
Are you ready to dive into the wonderful world of baking but feel intimidated by complicated recipes? Look no further! Our 4 3 2 1 Cake Recipe is the ultimate gateway to becoming a confident baker. This classic cake, often called a “pound cake” or “basic butter cake” by different names, is famously simple, relying on an easy-to-remember ratio that makes it perfect for beginners.
Forget the stress and embrace the joy of creating a delicious, moist, and tender cake from scratch. We’ll walk you through every step, providing easy baking recipes tips and essential baking tips for beginners to ensure your first (or hundredth!) cake is a resounding success. Get ready to impress yourself and everyone around you with this delightful treat!
Ingredients for Your 4 3 2 1 Cake
The beauty of the 4 3 2 1 Cake lies in its simplicity. Here’s what you’ll need, with quantities perfect for a standard 9-inch round cake, yielding about 12 servings. Always aim for room temperature ingredients for the best results!
| Ingredient | Quantity | Unit |
|---|---|---|
| All-Purpose Flour | 4 | cups |
| Granulated Sugar | 3 | cups |
| Large Eggs | 2 | |
| Unsalted Butter (softened) | 1 | cup (2 sticks) |
| Whole Milk (room temperature) | 1 | cup |
| Baking Powder | 1 | tablespoon |
| Salt | 1/2 | teaspoon |
| Vanilla Extract | 2 | teaspoons |
Step-by-Step Baking Instructions: Your Path to Cake Perfection
Follow these detailed steps carefully, and you’ll have a gorgeous cake ready to enjoy. Remember, baking is a science, but it’s also a lot of fun!
Step 1: Prepare Your Workspace and Pan
- Preheat Oven: Start by preheating your oven to 350°F (175°C). This is crucial for even baking. Don’t rush this step; give your oven at least 15-20 minutes to reach and stabilize at the correct temperature. A properly preheated oven ensures your cake begins to rise immediately and bakes evenly.
- Prepare Baking Pan: Grease and flour a 9-inch round baking pan. You can do this by rubbing a thin layer of butter or cooking spray all over the inside of the pan, then dusting it with a tablespoon or two of flour. Tap out any excess flour by inverting the pan and gently tapping it. For an extra non-stick measure, you can also line the bottom with a circle of parchment paper after greasing. This prevents sticking and ensures your cake comes out beautifully without tearing.
Step 2: Combine Dry Ingredients
- In a medium bowl, whisk together the 4 cups of all-purpose flour, 1 tablespoon of baking powder, and 1/2 teaspoon of salt. Whisking vigorously ensures these ingredients are evenly distributed throughout the mixture, which is important for the cake’s consistent rise and texture. Set this bowl aside for later.
- Beginner Tip: Sifting your flour is an extra step many pros take to aerate it and prevent lumps, resulting in an even lighter cake. While not strictly necessary for this recipe, if you have a sieve, it’s a great habit to adopt!
Step 3: Cream Butter and Sugar
- In a large mixing bowl (using either a stand mixer with a paddle attachment or a hand mixer on medium speed), cream together the 1 cup of softened unsalted butter and 3 cups of granulated sugar.
- Beat on medium-high speed for about 3-5 minutes, until the mixture is light, fluffy, and noticeably pale yellow. This process, known as creaming, incorporates essential air into the butter and sugar, which is vital for a tender, airy cake texture.
- Common Mistake & Tip: The butter’s temperature is key here. If your butter isn’t soft enough, it won’t cream properly, leading to a dense cake. It should be soft enough to easily indent with your finger. If it’s too soft (melted or oily), it will make an oily cake and won’t hold enough air.
Step 4: Add Eggs and Vanilla
- Add the 2 large eggs to the creamed butter and sugar mixture, one at a time. Beat well after each addition, ensuring each egg is fully incorporated before adding the next. Use a rubber spatula to scrape down the sides of the bowl frequently to ensure everything is thoroughly combined.
- Once the eggs are incorporated and the mixture is smooth, stir in the 2 teaspoons of vanilla extract. Vanilla adds a wonderful depth of flavor that complements the richness of the butter cake.
Step 5: Alternate Dry and Wet Ingredients
- Now, it’s time to gently combine your dry and wet ingredients. You’ll do this in stages to ensure proper mixing without overworking the batter.
- First Addition: Add about one-third of the dry ingredient mixture to the wet mixture in the bowl. Mix on low speed, just until the flour streaks mostly disappear.
- Second Addition: Pour in half of the 1 cup of room temperature whole milk. Mix on low speed until just combined.
- Third Addition: Add another one-third of the dry ingredients. Mix on low speed.
- Fourth Addition: Add the remaining half of the milk. Mix on low speed.
- Final Addition: Add the last one-third of the dry ingredients. Mix on low speed just until no streaks of flour remain.
- Crucial Beginner Tip: Do NOT overmix! Overmixing develops the gluten in the flour too much, resulting in a tough, chewy, and dry cake. As soon as the flour disappears, stop mixing. A few small lumps are perfectly fine and will bake out. Overmixing is one of the most common cake-baking mistakes.
Step 6: Bake Your Cake
- Pour the cake batter evenly into your prepared 9-inch baking pan. Gently tap the pan on your counter a few times to release any large air bubbles trapped in the batter.
- Place the pan in the center rack of your preheated oven.
- Bake for 30-35 minutes, or until a wooden skewer or toothpick inserted into the very center of the cake comes out clean (no wet batter).
- Important Note for Beginners: Avoid opening the oven door during the first 20-25 minutes of baking, as the sudden drop in temperature can cause the cake to sink dramatically in the middle. Trust your oven!
- Alternative Pan Sizes: If using two 8-inch round pans, bake for 25-30 minutes. For a 9×13 inch rectangular pan, bake for 35-40 minutes. Always test for doneness, as baking times can vary slightly depending on your oven and pan material.
Step 7: Cool and Enjoy
- Once baked, carefully remove the cake from the oven. Let it cool in the pan on a wire rack for about 10-15 minutes. This crucial step allows the cake to set and firm up, preventing it from breaking or crumbling when you try to remove it.
- After 10-15 minutes, carefully invert the cake onto the wire rack to cool completely. Cooling on a rack ensures air circulation all around the cake, preventing condensation and sogginess on the bottom.
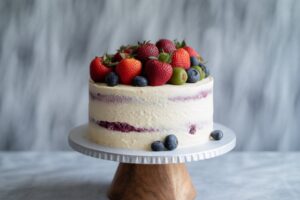
- Frosting (Optional): Once the cake is completely cool to the touch (this can take 1-2 hours), you can frost it with your favorite buttercream, a simple powdered sugar glaze, or just dust it with powdered sugar for a simple elegance. This cake is incredibly delicious on its own or served with fresh berries and a scoop of ice cream!
Pro-Level Baking Tips & Tricks for Beginners
Elevate your baking game with these essential tips, ensuring your 4 3 2 1 Cake (and future bakes!) are always perfect:
- Accuracy is Key: Baking is a science. Use proper measuring cups and spoons. For flour, spoon it into the measuring cup and level it off with a straight edge (like the back of a knife) – don’t scoop directly from the bag, as this compacts the flour and you’ll end up with too much, leading to a dry cake.
- Room Temperature Ingredients: This is a game-changer! Room temperature butter creams better, incorporating more air. Room temperature eggs emulsify more easily into the batter, creating a smoother, more uniform texture. Plan ahead and take them out of the fridge at least an hour before baking.
- Don’t Overmix: We can’t stress this enough! Overmixing develops gluten, leading to a tough, dry cake. Mix only until ingredients are just combined.
- Preheat Properly: A fully preheated oven ensures your cake starts baking immediately at the correct temperature, which helps with proper rise and prevents a dense texture.
- Know Your Oven: Ovens can vary. If your cake is browning too quickly or not baking evenly, consider investing in an oven thermometer to check its accuracy. Rotate your pan halfway through baking if one side browns faster.
- Cool Completely: Resist the urge to frost or cut into a warm cake! A warm cake is delicate and can crumble. Also, frosting on a warm cake will melt into a messy puddle. Patience is a virtue in baking!
- Storage: Store your unfrosted cake at room temperature, tightly wrapped in plastic wrap, for up to 3 days. If frosted with a stable buttercream, it can also be stored at room temperature for 2-3 days, or refrigerated for up to a week (bring to room temp before serving for the best texture).
Essential Baking Tools for Your Kitchen
Having the right tools makes all the difference in your baking journey. Here are some essentials to get you started:
- Mixing Bowls (various sizes)
- Whisk
- 9-inch Round Baking Pan
- Measuring Cups and Spoons Set
- Rubber Spatula
- Electric Hand Mixer or Stand Mixer (optional, but highly recommended for creaming butter and sugar)
- Wire Cooling Rack
- Parchment Paper
Nutrition Information (per serving)
(Estimates based on 12 servings for the plain cake, without frosting)
| Nutrient | Amount |
|---|---|
| Calories | 380 kcal |
| Carbohydrates | 60 g |
| Protein | 4 g |
| Fat | 14 g |
| Fiber | 1 g |
| Sugar | 40 g |
Frequently Asked Questions (FAQs)
Q: What does “4 3 2 1” in the recipe name refer to?
A: The “4 3 2 1” is a classic baking ratio, often indicating 4 parts flour, 3 parts sugar, 2 parts eggs, and 1 part butter (by weight or sometimes by volume, as in our recipe). It’s a simple, memorable way to create a balanced, delicious cake, making it perfect for beginners!
Q: Can I use cold butter or eggs?
A: While you technically *can*, it’s highly recommended to use room temperature butter and eggs. Room temperature butter creams much more easily with sugar, incorporating more air for a lighter, fluffier cake. Cold eggs don’t emulsify as well into the batter, which can lead to a less uniform texture. Plan ahead and take them out of the fridge an hour or two before you plan to bake!
Q: Why is my cake dense or dry?
A: A dense cake is often caused by overmixing the batter, which develops the gluten in the flour too much. Not enough leavening agent (baking powder) or using cold ingredients can also contribute. A dry cake can be due to overbaking or, again, overmixing. Always mix just until the ingredients are combined, and keep an eye on your baking time!
Q: How do I know when my cake is perfectly baked?
A: The best way to check for doneness is to insert a wooden skewer, toothpick, or thin knife into the center of the cake. If it comes out clean (without wet batter attached), your cake is done! The edges should also be golden brown and pulling slightly away from the sides of the pan.
Q: Can I add other flavors or mix-ins to this cake?
A: Absolutely! This basic recipe is a fantastic canvas. You can add citrus zest (lemon, orange), a different extract (almond, peppermint), or even chocolate chips, berries (tossed in a bit of flour first to prevent sinking), or nuts. Experiment and make it your own!
Q: How should I store leftover cake?
A: For optimal freshness, store unfrosted cake tightly wrapped in plastic wrap at room temperature for up to 3 days. If frosted with a stable buttercream, it can also be kept at room temperature for 2-3 days, or refrigerated for up to a week. Always allow refrigerated cake to come to room temperature before serving for the best texture and flavor.
Your Delicious Baking Journey Starts Now!
Congratulations, budding baker! You’ve just mastered the art of making a delicious, perfectly balanced 4 3 2 1 Cake. This recipe isn’t just about baking a cake; it’s about building confidence in the kitchen and discovering the simple joy of creating something wonderful from scratch. Whether you’re sharing it with loved ones, bringing it to a potluck, or simply enjoying a slice with your afternoon tea, this cake is sure to bring smiles.
Don’t be afraid to experiment with flavors or decorations as you grow in your baking skills. The kitchen is a place for creativity and fun. We hope this detailed guide has empowered you to bake more and fear less. Happy baking!
Did you try this recipe? We’d love to hear about your experience! Share your photos and comments below!