Discover the Easiest 4 Ingredient Gluten Free Bread Recipe You’ll Ever Make!
Are you new to the wonderful world of gluten-free baking? Or perhaps you’re simply on the hunt for incredibly easy baking recipes that deliver fantastic results without a fuss? Then you’ve landed in the perfect place! This revolutionary 4 Ingredient Gluten Free Bread Recipe is tailor-made for beginners. Forget complicated steps, a pantry full of obscure ingredients, or daunting techniques. We’re about to demystify gluten-free bread making and show you how to bake a surprisingly delicious, soft, and satisfying loaf with minimal effort. Get ready to impress yourself and your family with homemade bread, even if you consider yourself a total novice in the kitchen. We’ll provide all the essential baking tips for beginners you need to succeed!
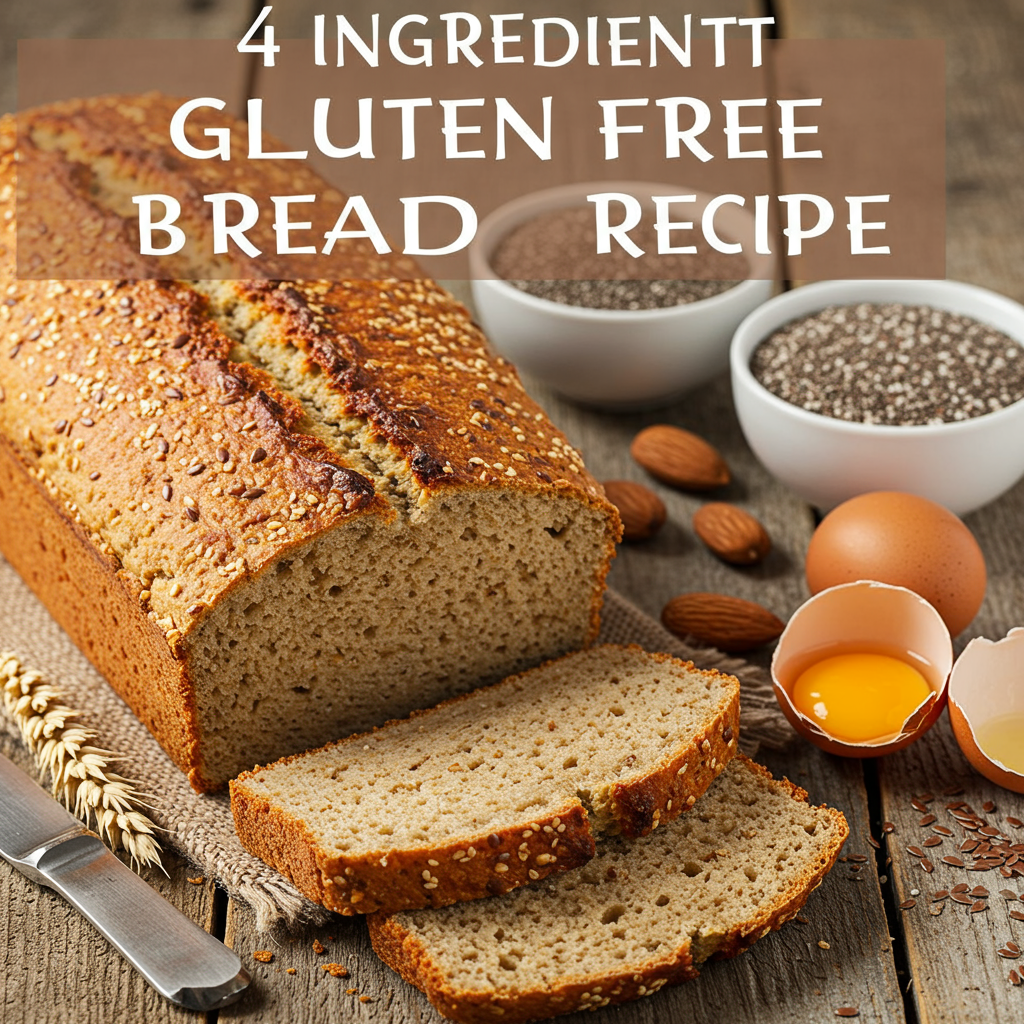
Ingredients List
Simplicity is key to this recipe! Here are the only four ingredients you’ll need for this fantastic gluten-free bread. It’s crucial that your chosen gluten-free all-purpose flour blend already contains xanthan gum, as it’s vital for the bread’s structure and texture.
| Ingredient | Quantity |
|---|---|
| Gluten-Free All-Purpose Flour Blend (with xanthan gum)* | 2 cups (240g) |
| Psyllium Husk Powder (fine powder, not whole husks) | 3 tablespoons |
| Warm Water (approx. 105-115°F / 40-46°C) | 1 ½ cups (360ml) |
| Baking Powder | 2 teaspoons |
Step-by-Step Instructions: Your Beginner’s Guide to Gluten-Free Bread
Follow these detailed steps carefully, and you’ll be enjoying warm, homemade gluten-free bread in no time. We’ve added extra tips at each stage to ensure your success, even if this is your very first loaf!
Step 1: Preheat Your Oven & Prep Your Pan
Before you even think about mixing, let’s get your oven ready. Preheat your oven to 375°F (190°C). This is important because a consistently hot oven from the moment your bread goes in helps it rise properly. While the oven is heating, take a standard 8.5 x 4.5 inch (or 9×5 inch) loaf pan and lightly grease it with a little oil or cooking spray. For extra easy removal and cleanup (a brilliant baking tip for beginners!), you can line the bottom and longer sides with parchment paper, leaving an overhang to use as “handles” later. This prevents sticking and makes transferring your finished loaf a breeze!
Step 2: Combine the Dry Ingredients
In a large mixing bowl, grab your whisk and thoroughly combine your dry ingredients: the gluten-free all-purpose flour blend, psyllium husk powder, and baking powder. It’s absolutely crucial to whisk them together very well for at least 1-2 minutes. Why so long? Psyllium husk powder can sometimes clump, and the baking powder needs to be evenly distributed throughout the flour for a consistent rise. A few good minutes of whisking ensures everything is perfectly combined and sets a strong foundation for your bread.
Step 3: Add the Warm Water
Now for the magic! Gradually pour the warm water into your dry ingredient mixture while continuously stirring with a sturdy spoon or spatula. The water temperature is important here – it should feel comfortably warm to the touch, like a baby’s bath (approx. 105-115°F / 40-46°C). Too cold, and it won’t activate the psyllium husk; too hot, and it could affect the flour. As you mix, you’ll notice the dough quickly thickening and becoming quite sticky. This is the psyllium husk doing its amazing job, absorbing the water and creating a gel-like binder that mimics the structure of gluten. Do not overmix at this stage; just mix until everything is combined and a thick, shaggy, uniform dough forms. It will be much stickier and denser than traditional wheat dough, and that’s perfectly normal for gluten-free bread.
Step 4: Form the Loaf
Once your dough is mixed, let it rest in the bowl for about 5 minutes. This brief rest allows the psyllium husk to fully hydrate and for the dough to firm up slightly, making it a bit easier to handle. After resting, lightly flour your hands with a tiny bit of gluten-free flour (just a tablespoon or two, don’t add too much to the dough itself). Gently scoop the sticky dough out of the bowl and shape it into a neat loaf that fits snugly into your prepared loaf pan. You’re not aiming for absolute perfection here, just a general oval shape. This dough doesn’t “proof” like yeast bread, but it will expand nicely in the oven. Smooth the top of the loaf with your floured hands or a wet spatula.
Beginner Tip: If the dough is still too sticky to work with, do NOT add more flour to the dough itself, as this can dry out your final bread. Instead, lightly wet your hands with water. This simple trick helps prevent sticking without altering the crucial hydration balance of the dough.
Step 5: Bake Your Bread
Carefully place your loaf pan into the preheated oven. Bake for approximately 50-60 minutes. Baking times can vary slightly depending on your specific oven, so it’s always a good idea to keep an eye on your bread, especially towards the end. How do you know it’s done? The top should be a beautiful golden brown, and when you carefully tap the bottom of the loaf (using oven mitts!), it should sound hollow. For ultimate certainty, you can use an instant-read thermometer – the internal temperature should reach around 200-210°F (93-99°C).
Common Mistake & Solution: If your bread isn’t browning enough, you can increase the oven temperature by 25°F for the last 10-15 minutes, but watch it very closely to prevent burning. If it’s browning too quickly, you can loosely tent it with aluminum foil to protect the crust.
Step 6: Cool Completely (This is Crucial!)
This might be the hardest step because the incredible aroma will be almost irresistible! Once baked, remove the loaf pan from the oven and let the bread cool in the pan for about 10-15 minutes. This allows it to firm up a bit and makes it much easier to handle. Then, using the parchment paper overhang (if you used it) or by carefully inverting the pan, transfer the loaf to a wire cooling rack to cool completely. And we mean *completely*! Resist the urge to slice into it while it’s still warm. Why is this so important for gluten-free bread? Gluten-free bread continues to cook and set as it cools. Slicing it too soon can result in a disappointingly gummy or sticky texture inside. Patience truly is a virtue here, and it will be rewarded with a much better texture.
Tips & Tricks for Gluten-Free Bread Baking Success
Even with an incredibly easy recipe like this one, a few extra pointers can make all the difference. These additional baking tips for beginners will help elevate your gluten-free bread game and ensure consistent success!
- Measure Accurately: Baking, especially gluten-free, is often more like science than art. Use proper measuring cups and spoons, and for the most consistent and best results, we highly recommend weighing your flour and psyllium husk with a kitchen scale.
- Check Your GF Flour Blend: Always double-check that your chosen gluten-free all-purpose flour blend explicitly states it contains xanthan gum. If it doesn’t, you MUST add 1 teaspoon of xanthan gum per cup of flour to the dry ingredients. This is absolutely critical for providing the necessary structure and preventing a crumbly texture.
- Warm Water is Key: The specified warm water temperature is not arbitrary. It helps the psyllium husk hydrate effectively and contributes to a better dough consistency. Water that’s too cold won’t activate the psyllium properly, while water that’s too hot can negatively affect the flour.
- Don’t Overmix (But Mix Thoroughly): While you don’t need to worry about developing gluten (because there isn’t any!), you do need to ensure the psyllium husk is evenly distributed and fully hydrated. Mix until just combined and you no longer see any dry streaks of flour. Overmixing won’t hurt, but isn’t necessary.
- Psyllium Husk Quality: For this recipe, always use fine psyllium husk powder, not whole psyllium husks. The powder absorbs liquid differently and provides a much more consistent and desirable texture in the final bread.
- Storage: Once your bread has cooled completely, store it in an airtight container at room temperature for up to 3 days. For longer storage, you can slice the cooled loaf and freeze the individual slices in a freezer-safe bag or container. Toasting slices directly from frozen is a fantastic way to enjoy fresh-ttasting bread anytime!
Essential Baking Tools
Having the right tools makes any baking project smoother and more enjoyable, especially when you’re just starting out. Here are a few essentials that will make this recipe (and many other baking adventures!) a breeze:
- Mixing Bowl: A good, sturdy mixing bowl is your primary workstation.
- Whisk: Essential for thoroughly combining your dry ingredients.
- Baking Pan: A standard loaf pan (8.5×4.5 or 9×5 inches) is perfect for this recipe.
- Measuring Cups: Accurate measurements are absolutely crucial in gluten-free baking.
- Spatula: Great for scraping down bowls, mixing, and gently shaping the dough.
- (Optional but Highly Recommended) Kitchen Scale: For ultimate accuracy, especially with flour and psyllium husk, a kitchen scale is a game-changer.
Nutrition Information (per slice, approx. 12 slices per loaf)
Please note that these values are estimates and can vary based on the exact brands of ingredients used and the size of your slices.
| Nutrient | Amount |
|---|---|
| Calories | 130 kcal |
| Carbohydrates | 25g |
| Protein | 2g |
| Fat | 1g |
| Fiber | 4g |
| Sugar | 0g |
Frequently Asked Questions (FAQs)
Q1: Can I use whole psyllium husks instead of powder?
A1: While both come from the same plant, psyllium husk powder is much finer and more concentrated than whole psyllium husks. For this specific recipe, we highly recommend using psyllium husk powder for the best texture and consistent results. Whole husks will absorb water differently and may result in a different, often less desirable, crumb structure in your bread.
Q2: My dough is too sticky to handle. What should I do?
A2: Don’t be alarmed – gluten-free doughs are naturally stickier and wetter than traditional wheat doughs! Instead of adding more flour (which can dry out your final bread), try lightly wetting your hands with water before shaping the loaf. A little moisture on your hands will prevent the dough from sticking without altering the crucial hydration balance of the bread itself. A spatula can also be very helpful for handling sticky doughs.
Q3: Why did my bread come out dense or gummy?
A3: There are a few common reasons for a dense or gummy texture in gluten-free bread. The most frequent culprit is slicing the bread before it has completely cooled. Gluten-free bread continues to set and firm up as it cools, so patience is absolutely key! Other reasons could include inaccurate measurements (especially too much water or not enough psyllium husk), or your gluten-free flour blend not containing xanthan gum (or not adding it if your blend required it).
Q4: Can I add seeds or herbs to this bread?
A4: Absolutely! This recipe provides a fantastic neutral base that is perfect for customization. Feel free to fold in about 1/4 to 1/2 cup of your favorite seeds (like sunflower, pumpkin, chia, or flax) or dried herbs (such as rosemary, thyme, or oregano) with your dry ingredients. This adds wonderful flavor, texture, and often extra nutrition. Just be mindful that additions can slightly alter the baking time, so keep an eye on your loaf.
Q5: How should I store this gluten-free bread to keep it fresh?
A5: Once your bread is completely cooled, store the whole loaf or individual slices in an airtight container at room temperature for up to 3 days. For longer storage, we recommend slicing the cooled loaf and freezing the slices in a freezer-safe bag or container. You can then toast individual slices directly from frozen, making for a quick and easy breakfast, sandwich, or snack anytime you need it!
Your Gluten-Free Baking Journey Starts Now!
Congratulations, future gluten-free baking pro! You’ve just discovered how incredibly simple and rewarding it can be to bake your own fresh, delicious bread with our 4 Ingredient Gluten Free Bread Recipe. No more expensive store-bought loaves or complicated, intimidating instructions. This recipe is your perfect gateway to confident gluten-free baking, proving that you don’t need a pantry full of obscure ingredients or years of experience to create something truly wonderful from scratch.
We truly hope these detailed instructions and helpful baking tips for beginners empower you to get into the kitchen and start creating. Don’t be afraid to experiment, have fun, and most importantly, enjoy the delicious process! We’d love to hear about your successes – share your experiences with us in the comments below. Happy baking!
“`