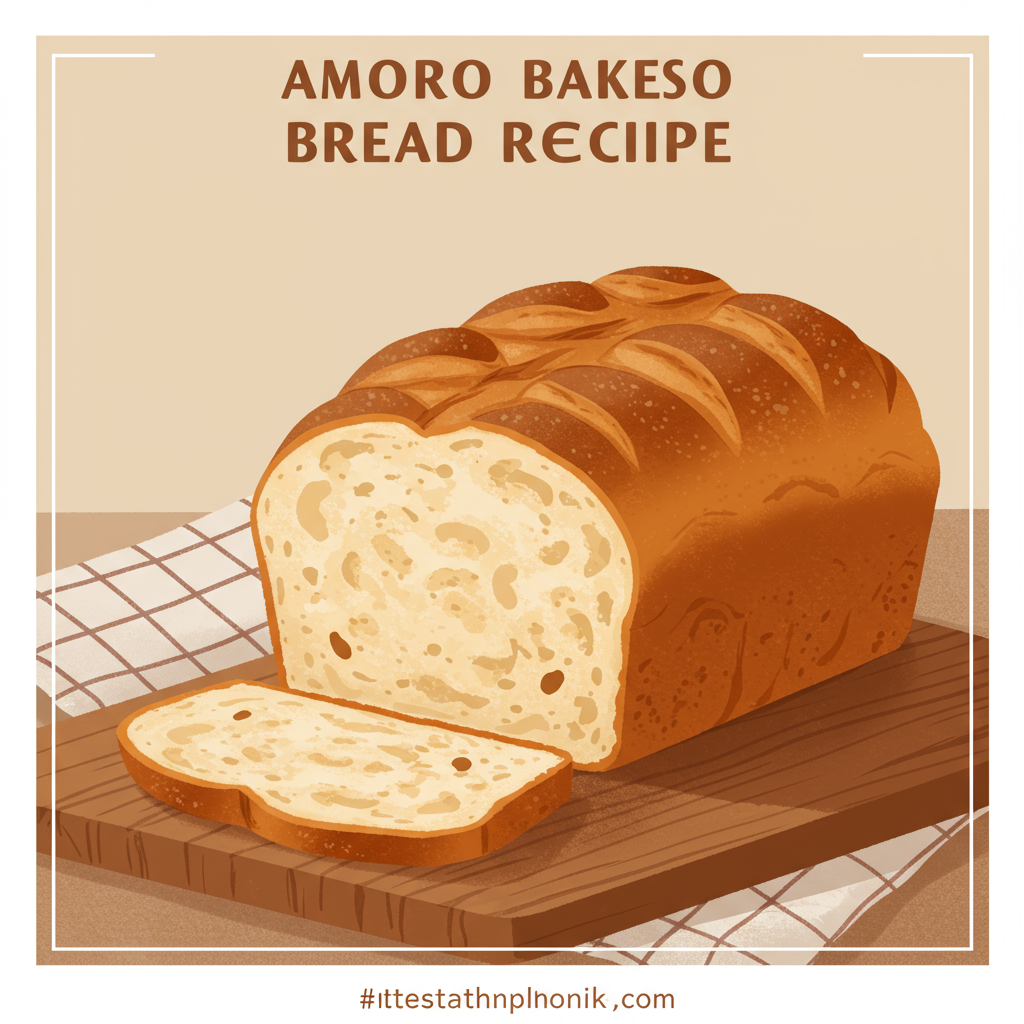
There’s nothing quite like the aroma of freshly baked bread wafting through your home. It’s comforting, it’s delicious, and with this Amoroso Bread Recipe, it’s surprisingly achievable even if you’re a complete novice! Often associated with classic Philly cheesesteaks and hoagies, Amoroso bread is known for its distinctive soft, chewy interior and subtly crisp crust.

Forget store-bought; today, we’re going to dive into one of the most satisfying and easy baking recipes you can master. I’ll walk you through every step, providing essential baking tips for beginners to ensure your success. Get ready to impress yourself and your loved ones with this incredible homemade loaf!
Amoroso Bread Recipe: Ingredients You’ll Need
Gathering your ingredients is the first step to baking success. Make sure everything is measured accurately before you start!
| Ingredient | Quantity | Unit |
|---|---|---|
| All-Purpose Flour (or Bread Flour) | 4 | cups |
| Warm Water (105-115°F / 40-46°C) | 1.5 | cups |
| Active Dry Yeast | 2.25 | teaspoons |
| Granulated Sugar | 1 | tablespoon |
| Salt | 1.5 | teaspoons |
| Olive Oil | 2 | tablespoons |
| Cornmeal (for dusting, optional) | 1 | tablespoon |
Step-by-Step Instructions: Your Journey to Perfect Amoroso Bread
Step 1: Activate the Yeast (The Magic Begins!)
In a large mixing bowl, pour the warm water. It’s crucial that the water is between 105-115°F (40-46°C). If it’s too cold, the yeast won’t activate; too hot, and it will kill the yeast. A kitchen thermometer is your best friend here! Sprinkle the granulated sugar and active dry yeast over the warm water. Give it a gentle stir and let it sit for 5-10 minutes. You’re looking for a foamy, bubbly layer to form on top – this means your yeast is active and ready to work its magic. If you don’t see foam, your yeast might be old or the water temperature was off, and it’s best to start over with fresh yeast.
Step 2: Mix the Dough (Bringing it All Together)
Once your yeast is bubbly, add the olive oil and salt to the bowl. Now, gradually add the flour, about a cup at a time, mixing with a sturdy spoon or a dough whisk. As you add the flour, the mixture will become thicker. Once it’s too thick to stir, turn it out onto a lightly floured surface (your kitchen counter works perfectly!).
Beginner Tip: Don’t add all the flour at once. Sometimes you might need slightly less or more depending on the humidity and your flour type. The dough should be soft but not overly sticky.
Step 3: Knead the Dough (Building Strength and Elasticity)
This is where you build the structure of your bread! Knead the dough for 8-10 minutes. If you’re kneading by hand, push the dough away from you with the heels of your hands, fold it back over, rotate, and repeat. It’s a great workout! The dough will transform from shaggy and sticky to smooth, elastic, and less sticky. To check if it’s done, perform the “windowpane test”: pinch off a small piece of dough and gently stretch it. If you can stretch it thin enough to see light through it without tearing, it’s ready.
Alternative: Stand Mixer Method: If you have a stand mixer with a dough hook, this step is a breeze! Mix on low speed for 2-3 minutes until combined, then increase to medium-low speed and knead for 6-8 minutes, until the dough is smooth and elastic. The dough should clean the sides of the bowl.
Common Mistake: Not kneading enough results in dense, crumbly bread. Over-kneading is rare by hand but can happen with a machine, leading to a tough texture.
Step 4: First Rise (Proofing for Flavor and Volume)
Lightly grease a clean large bowl with a little olive oil. Place your kneaded dough into the bowl, turning it once to coat the top with oil (this prevents a dry crust from forming). Cover the bowl tightly with plastic wrap or a clean kitchen towel. Find a warm, draft-free spot for your dough to rise. A warm kitchen counter, inside a slightly warm (but turned off!) oven with the light on, or near a sunny window are all great options.
Let the dough rise for 1 to 1.5 hours, or until it has **doubled in size**. This first rise (bulk fermentation) develops flavor and creates the airy texture we love.
Beginner Tip: Patience is key! Don’t rush this step. If your kitchen is cool, it might take a bit longer. Don’t worry if it’s not exactly 1.5 hours – go by sight!
Step 5: Shape the Loaves (Creating the Amoroso Form)
Once your dough has doubled, gently punch it down to release the air. Turn the dough out onto a lightly floured surface. Divide the dough into two equal pieces if you want two smaller loaves, or keep it as one for a larger loaf. For each piece, gently flatten it into a rectangle. Take one of the long sides and fold it over to the center, pressing down firmly. Repeat with the other long side, overlapping slightly. Then, starting from one end, roll the dough tightly into a log, pinching the seam closed at the bottom. Gently taper the ends to get that classic Amoroso shape.
Alternative: For a rounder loaf, simply shape the dough into a taut ball by pulling the edges under.
Step 6: Second Rise (The Final Proof)
Lightly grease a baking sheet or line it with parchment paper. Sprinkle a little **cornmeal** on the parchment paper if using (this adds a nice texture and prevents sticking, just like traditional Amoroso bread). Carefully place your shaped loaves on the prepared baking sheet, leaving ample space between them if you’re baking two. Cover the loaves loosely with a clean kitchen towel or plastic wrap.
Let them rise again in a warm, draft-free spot for another 45-60 minutes, or until they look noticeably puffy and almost doubled in size again. This is called proofing, and it’s essential for a light, airy crumb.
Step 7: Prepare for Baking (Preheat and Score)
About 20 minutes before the second rise is complete, preheat your oven to **400°F (200°C)**. If you have a baking stone or steel, place it in the oven during preheating for an even crispier crust.
Once the oven is preheated and the loaves are fully proofed, gently score the top of each loaf with 3-4 diagonal slashes using a very sharp knife or a bread lame. This not only looks professional but also allows the bread to expand without tearing haphazardly, creating a beautiful ‘oven spring’.
Pro Tip for Crust: For an extra crispy crust, you can create steam in your oven. Place a metal pan on the bottom rack during preheating. Just before you put the bread in, carefully pour about 1 cup of hot water into the hot pan (be cautious of the steam!). Quickly close the oven door.
Step 8: Bake to Golden Perfection
Carefully place your baking sheet with the loaves into the preheated oven. Bake for 25-35 minutes, or until the crust is golden brown and sounds hollow when tapped on the bottom. If you have a digital thermometer, the internal temperature should read 200-210°F (93-99°C).
If you used the steam method, remove the pan of water after the first 10-15 minutes of baking.
Step 9: Cool (The Hardest Part!)
This is arguably the hardest step for any baker: waiting! Once baked, immediately transfer the loaves to a wire cooling rack. Allow them to cool completely for at least 1 hour before slicing. Slicing too early traps steam inside, leading to a gummy texture. Cooling allows the internal structure to set and the flavors to fully develop.
Congratulations, you’ve just baked your very own Amoroso Bread!
Tips & Tricks for Beginner Bread Bakers
- Accurate Measuring: Especially for flour, use the “spoon and level” method. Spoon flour into your measuring cup until overflowing, then level off with a straight edge (like a knife). Don’t scoop directly from the bag, as this compacts the flour, leading to too much flour and a dry dough.
- Test Your Yeast: Always proof your yeast first, even if it’s new. This simple step saves you from wasting ingredients on inactive yeast.
- Humidity Matters: Baking is sensitive to environment. On humid days, you might need slightly more flour; on dry days, a little less. Trust the feel of your dough more than exact measurements sometimes.
- Create Steam for Crust: For a truly professional-looking and tasting crust, don’t skip the steam step. A pan of hot water in the oven works wonders.
- Don’t Rush the Rise: The rising times are estimates. Always go by how the dough looks (doubled in size, puffy) rather than strictly by the clock.
- Storage: Store your cooled Amoroso bread at room temperature in a paper bag for a crispier crust, or in an airtight container/plastic bag for a softer crust. It’s best enjoyed within 2-3 days. For longer storage, slice and freeze.
- Learn by Doing: Don’t be discouraged if your first loaf isn’t perfect. Every bake is a learning experience!
Essential Baking Tools for Your Kitchen
Having the right tools makes baking a joy. Here are a few essentials you’ll find yourself reaching for again and again:
- Mixing Bowl – A sturdy, large bowl is indispensable.
- Whisk – Great for incorporating dry ingredients or activating yeast.
- Baking Pan – A heavy-duty baking sheet is perfect for loaves.
- Measuring Cups & Measuring Spoons – Accuracy is key in baking!
- Spatula – For scraping down bowls and gentle folding.
- Optional but Recommended: Kitchen thermometer (for water), bench scraper (for dough handling), bread lame (for scoring).
Nutrition Information (Estimated Per Serving – 1 Slice)
This information is an estimate based on the ingredients and a typical yield of 12-16 slices per loaf. Actual values may vary.
| Nutrient | Per Serving (1 slice) |
|---|---|
| Calories | 170 kcal |
| Carbohydrates | 32 g |
| Protein | 5 g |
| Fat | 3 g |
| Fiber | 1 g |
| Sugar | 1 g |
Frequently Asked Questions (FAQs) for Beginner Bakers
Q1: My yeast didn’t foam. What went wrong?
A: Most likely, your water was either too cold (yeast stays dormant) or too hot (killed the yeast). Ensure the water temperature is between 105-115°F (40-46°C) using a thermometer. Also, check the expiration date on your yeast; old yeast loses its potency.
Q2: My dough isn’t rising. What should I do?
A: If your yeast was active (foamed), common reasons for no rise include: your kitchen is too cold (find a warmer spot), your flour is old, or you added too much salt, which can inhibit yeast activity. Give it more time in a warm place, or if it still doesn’t budge after a couple of hours, you might need to start over.
Q3: Can I substitute whole wheat flour for all-purpose flour?
A: Yes, but with adjustments. Whole wheat flour absorbs more liquid, so you might need to add an extra tablespoon or two of water. The texture will also be denser, and the rise might not be as high. It’s a great option for a healthier loaf, but for your first time, sticking to all-purpose or bread flour is recommended.
Q4: How do I get a really crispy crust?
A: The key to a crispy crust is steam and high heat. Preheat your oven with a baking stone or steel if you have one. Before baking, create steam by pouring hot water into a preheated metal pan on the bottom rack of your oven. Remove the water pan after the first 10-15 minutes of baking.
Q5: How long does homemade Amoroso bread stay fresh?
A: Homemade bread, without preservatives, is best enjoyed fresh within 2-3 days. Store it at room temperature. For longer storage, you can slice the cooled bread and freeze it in an airtight bag for up to a month. Thaw slices as needed for quick enjoyment!
Q6: Can I make this recipe in a stand mixer?
A: Absolutely! Follow the instructions for activating the yeast. Then, combine the wet and dry ingredients in your stand mixer bowl with the dough hook attachment. Mix on low speed until a shaggy dough forms, then increase to medium-low and knead for 6-8 minutes until the dough is smooth, elastic, and pulls away from the sides of the bowl.
Conclusion: Enjoy Your Homemade Masterpiece!
Baking bread at home is one of life’s most rewarding simple pleasures. You’ve just created a delicious, authentic Amoroso loaf from scratch, and that’s something to be incredibly proud of! Whether you’re using it for sandwiches, dipping in olive oil,

or just tearing off a piece to savor, this bread is sure to bring joy to your table. Don’t be afraid to experiment and make this recipe your own. Happy baking, and enjoy every single bite of your incredible, homemade Amoroso bread!