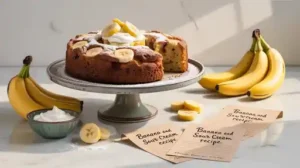
Welcome, budding bakers! Are you ready to dive into the wonderful world of baking with a recipe that’s as forgiving as it is delicious. Look no further than our incredible Banana And Sour Cream Cake Recipe. This cake isn’t just a treat for your taste buds; it’s also one of the most delightful and easy baking recipes you’ll ever try. Perfect for using up those overripe bananas on your counter, this cake boasts an unbelievably moist crumb and a rich, tender texture, thanks to the magic of sour cream.
We’ve packed this post with all the essential baking tips for beginners, ensuring your first (or fiftieth!) attempt is a resounding success. Get ready to bake a masterpiece!
Ingredients List
Gather your ingredients! For the best results, ensure your butter, eggs, and sour cream are at room temperature. This helps them combine more smoothly and creates a more uniform batter.
| Ingredient | Quantity | Unit |
|---|---|---|
| All-purpose flour | 2 | cups |
| Granulated sugar | 1 | cup |
| Baking soda | 1 | teaspoon |
| Salt | ½ | teaspoon |
| Unsalted butter (softened) | ½ | cup (1 stick) |
| Large eggs (room temperature) | 2 | |
| Sour cream (full-fat, room temperature) | ½ | cup |
| Vanilla extract | 1 | teaspoon |
| Very ripe bananas (mashed) | 3 | medium |
| Optional: Chopped walnuts or chocolate chips | ½ | cup |
Step-by-Step Instructions: Bake Your Perfect Banana And Sour Cream Cake
Follow these detailed steps carefully, and you’ll be enjoying a slice of homemade heaven in no time. Remember, baking is a science, but it’s also incredibly rewarding!
Step 1: Preheat and Prepare Your Pan
- Preheat your oven to 350°F (175°C). This is crucial for even baking! An oven that isn’t fully preheated can cause your cake to bake unevenly or even sink in the middle.
- Grease and flour a 9×13 inch baking pan (or a 9-inch round springform pan). To do this, use a little butter or non-stick cooking spray to coat the entire inside surface of the pan. Then, sprinkle a tablespoon or two of all-purpose flour into the pan and tap it around until the entire greased surface is lightly dusted. Dump out any excess flour. This creates a non-stick barrier, ensuring your cake releases easily after baking.
- Beginner Tip: Always preheat your oven at least 15-20 minutes before you plan to bake. Ovens can take longer than you think to reach and stabilize at the correct temperature. A properly preheated oven ensures your cake begins rising immediately and bakes consistently.
Step 2: Combine Dry Ingredients
- In a medium bowl, whisk together the 2 cups of all-purpose flour, 1 teaspoon of baking soda, and ½ teaspoon of salt. Whisking ensures these ingredients are thoroughly combined and evenly distributed throughout the dry mixture, so you don’t end up with pockets of just baking soda or salt in your finished cake. This also helps to aerate the flour slightly.
- Set this bowl aside for now.
- Beginner Tip: For accurate flour measurement, always use the “spoon and level” method. Spoon flour into your dry measuring cup until it overflows, then use the back of a knife or a straight edge to level it off. Never pack the flour down into the cup or scoop directly from the bag, as this can add too much flour (up to 25% more!), leading to a dry, dense cake.
Step 3: Cream Butter and Sugar
- In a large mixing bowl (the one you’ll use for all your wet ingredients!), using an electric mixer (either a handheld mixer or a stand mixer with the paddle attachment), cream together the ½ cup (1 stick) of softened unsalted butter and 1 cup of granulated sugar.
- Beat on medium speed for 2-3 minutes until the mixture is light, fluffy, and pale yellow. This process is called “creaming” and it’s essential because it incorporates tiny air pockets into the butter and sugar, which expand during baking and contribute significantly to the cake’s light and tender texture.
- Beginner Tip: Make sure your butter is truly softened – it should be pliable and leave an indentation when gently pressed with your finger, but it should not be melted or greasy. Cold butter won’t cream properly, and melted butter will result in a denser, greasier cake.
Step 4: Add Eggs and Vanilla
- Add the 2 large eggs to the butter-sugar mixture, one at a time. Beat well after each addition, scraping down the sides of the bowl with a rubber spatula to ensure everything is thoroughly incorporated.
- Once the eggs are fully mixed in and the mixture looks smooth, stir in the 1 teaspoon of vanilla extract.
- Beginner Tip: Adding eggs one at a time helps them emulsify properly with the butter and sugar mixture, preventing the batter from curdling. Scrape down the bowl frequently to ensure all ingredients are evenly mixed and no pockets of unmixed ingredients remain at the bottom.
Step 5: Incorporate Wet and Dry Ingredients (Alternating Method)
- In a separate small bowl, mash your 3 medium very ripe bananas with a fork until mostly smooth but with a few small lumps remaining for texture. Remember, the spottier and browner the bananas, the better the flavor!
- Now, it’s time to combine everything using the alternating method. Add about one-third of the dry ingredient mixture (from Step 2) to the wet ingredients in the large bowl. Mix on low speed just until combined – stop as soon as the flour streaks disappear.
- Next, add half of the ½ cup of sour cream and half of the mashed bananas. Mix on low speed until just combined.
- Repeat this process: add another third of the dry ingredients, then the remaining sour cream and bananas, and finally the last third of the dry ingredients.
- Mix just until no streaks of flour remain. It’s crucial not to overmix at this stage! Overmixing develops the gluten in the flour, which can lead to a tough, rubbery, and dry cake instead of a tender, moist one. A few small lumps in the batter are perfectly fine.
- If you’re adding optional chopped walnuts or chocolate chips, gently fold them in now with a spatula.
- Beginner Tip: The alternating method helps to create a smooth, emulsified batter and prevents overmixing of the flour. Always start and end with dry ingredients to ensure a consistent texture.
Step 6: Bake Your Cake
- Pour the batter into your prepared baking pan, spreading it evenly with a spatula to ensure consistent thickness.
- Bake for 35-45 minutes for a 9×13 inch pan, or 45-55 minutes for a 9-inch round pan. Baking times can vary significantly depending on your specific oven, so use the time range as a guide.
- The cake is done when a wooden skewer or toothpick inserted into the very center comes out clean or with only a few moist crumbs attached. The top should be golden brown and spring back lightly when gently touched in the center.
- Beginner Tip: Resist the urge to open the oven door frequently, especially during the first 25-30 minutes of baking. The sudden drop in temperature can cause the cake to sink dramatically in the middle. If your cake is browning too quickly on top before it’s fully cooked through, you can loosely tent it with aluminum foil for the last 10-15 minutes of baking to prevent over-browning.
Step 7: Cool and Enjoy!
- Once baked, remove the cake from the oven and let it cool in the pan on a wire rack for 15-20 minutes. This crucial step allows the cake’s delicate structure to set and prevents it from breaking or crumbling when you attempt to remove it from the pan.
- After 15-20 minutes, carefully invert the cake onto the wire rack to cool completely. If you used a round springform pan, simply release the latch and remove the sides.
- Beginner Tip: Cooling a cake completely on a wire rack is absolutely crucial! If you try to frost or slice a warm cake, it will be crumbly, difficult to handle, and any frosting will melt. Patience is a virtue in baking, and a fully cooled cake yields the best texture and presentation.
- Once fully cooled, you can slice it as is, or top it with a simple dusting of powdered sugar, a light glaze, or your favorite cream cheese frosting for an extra special treat.
Tips & Tricks for Beginner Bakers
Baking is an art and a science, and these little nuggets of wisdom will help you achieve perfect results every time with your Banana And Sour Cream Cake Recipe:
- Room Temperature is Key: This cannot be stressed enough! Room temperature butter, eggs, and sour cream emulsify better, creating a smoother, more uniform batter and a finer crumb. Plan ahead and take them out of the fridge an hour or two before you start baking. If you forget, a quick trick for eggs is to place them in a bowl of warm (not hot!) water for 5-10 minutes.
- Don’t Overmix: Once you add the flour, mix only until just combined. Overmixing develops the gluten, making your cake tough and chewy instead of tender and moist. A few small lumps in the batter are perfectly normal and preferred over overmixing.
- Ripe Bananas are a Must: The spottier and browner your bananas are, the sweeter and more flavorful they will be, adding natural moisture and intense banana taste to your cake. Green or yellow bananas won’t give you the same depth of flavor or sweetness.
- Accurate Measuring: Baking is precise! Use proper dry measuring cups for flour, sugar, baking soda, and salt, always leveling them off. Use liquid measuring cups (with a spout) for liquids like vanilla extract. Invest in a kitchen scale for even more accuracy, especially with flour.
- Know Your Oven: Ovens can vary widely in actual temperature compared to what they display. If you find your cakes consistently bake too fast, too slow, or unevenly, consider investing in an inexpensive oven thermometer to check its accuracy.
- Cool Completely: Patience, young padawan! Cooling the cake entirely on a wire rack prevents sogginess (condensation can build up if left in the pan) and ensures it holds its shape when sliced or frosted.
- Read the Entire Recipe First: Before you even gather your ingredients, read through the entire recipe from start to finish. This helps you understand the process, anticipate steps, and ensures you don’t miss anything crucial.
- Embrace Imperfection: Don’t be discouraged if your first cake isn’t absolutely perfect. Every bake is a learning experience. The most important thing is to have fun, enjoy the process, and, of course, enjoy the delicious results!
Essential Baking Tools
Having the right tools makes all the difference, especially when you’re starting out. Here are some essentials for your baking adventures:
- Mixing Bowl (a set of various sizes is very useful)
- Whisk (both a balloon whisk and a fork will come in handy)
- Baking Pan (a 9×13 inch rectangular pan or a 9-inch round springform pan are versatile)
- Measuring Cups (both dry and liquid sets)
- Spatula (rubber spatulas for scraping bowls and an offset spatula for spreading batter/frosting)
- Measuring Spoons
- An electric mixer (a handheld mixer is a great starting point)
- Wire cooling rack
- Parchment paper (optional, but great for preventing sticking)
Nutrition Information (Estimated per serving, based on 12 servings)
While this is an indulgent treat, here’s an estimated nutritional breakdown to help you keep track. Please note these are general estimates and can vary based on specific brands and exact ingredient amounts.
Sugar32g
| Nutrient | Amount |
|---|---|
| Calories | 320 kcal |
| Carbohydrates | 50g |
| Protein | 5g |
| Fat | 18g |
| Fiber | 2g |
Note: These values are approximate and can vary based on specific ingredients, brand choices, and exact serving size. This estimate does not include optional mix-ins or frosting.
Frequently Asked Questions (FAQs)
Q1: Why do my bananas need to be so ripe?
A: Very ripe bananas (the ones with plenty of brown spots and a soft texture) are significantly sweeter and have a much more intense banana flavor. They also break down easily when mashed, incorporating smoothly into the batter and adding essential moisture that contributes to the cake’s tender crumb. Using under-ripe bananas will result in a less flavorful and potentially drier cake.
Q2: Can I use low-fat sour cream or a substitute?
A: While you can technically use low-fat sour cream, full-fat sour cream is highly recommended for the best results in this Banana And Sour Cream Cake Recipe. The fat content contributes significantly to the cake’s moistness, rich flavor, and tender crumb. If you absolutely need a substitute, full-fat plain Greek yogurt or buttermilk can work, but the texture and flavor might be slightly different. For Greek yogurt, thin it slightly with a splash of milk to reach a similar consistency to sour cream.
Q3: How do I know when my cake is perfectly baked?
A: The most reliable way to check for doneness is the “toothpick test.” Insert a wooden skewer or toothpick into the very center of the cake. If it comes out completely clean (no wet batter attached), your cake is done. A few moist crumbs clinging to the toothpick are generally acceptable, but wet batter means it needs more time. Additionally, the cake’s top should be golden brown and spring back lightly when gently pressed with your finger.
Q4: My cake sank in the middle after baking. What went wrong?
A: This is a common beginner issue! Several factors can cause a cake to sink:
- Opening the oven door too early: A sudden drop in temperature before the cake’s structure is set can cause it to collapse. Resist opening the oven door for at least the first two-thirds of the baking time.
- Underbaked: If the cake isn’t fully cooked through, its center won’t have enough structure to hold up once removed from the oven.
- Too much leavening: Using too much baking soda can cause the cake to rise too quickly and then collapse. Ensure you measure accurately.
- Oven temperature issues: An oven that’s too hot on the outside and too cool on the inside can cause the edges to set before the center is cooked, leading to a collapse. An oven thermometer can help.
- Overmixing: As mentioned, overmixing develops gluten and can lead to a tough, less airy cake that might struggle to hold its rise.
Q5: Can I add different mix-ins to this cake?
A: Absolutely! This Banana And Sour Cream Cake Recipe is wonderfully versatile. Besides walnuts or chocolate chips, you could try pecans, shredded coconut, dried cranberries, or even a swirl of cinnamon sugar (mixed with a little brown sugar and butter). Just be mindful not to add too many mix-ins, as this can weigh down the batter and affect the cake’s texture. About ½ to ¾ cup of total mix-ins is a good general guideline.
Q6: How should I store leftover cake?
A: To keep your cake fresh and moist, store it in an airtight container at room temperature for up to 3-4 days. If your kitchen is very warm, or if you’ve added a perishable frosting (like cream cheese frosting), it’s best to store it in the refrigerator. Just remember to bring refrigerated cake to room temperature before serving for the best texture and flavor, as cold temperatures can make cakes taste dry.
Conclusion: Your Baking Journey Begins Here!
Congratulations, you’ve just unlocked the secret to a perfectly moist and flavorful Banana And Sour Cream Cake Recipe! We hope this detailed guide, packed with easy baking recipes insights and crucial baking tips for beginners, has empowered you to confidently create this delightful treat. Don’t be afraid to experiment with flavors, and most importantly, have fun in the kitchen. The smell of a freshly baked cake filling your home is one of life’s simple joys. So go ahead, bake this cake, share it with loved ones, and savor every tender, banana-filled bite. We can’t wait to hear about your baking success!