Aloha, baking enthusiasts! Are you ready to fill your kitchen with the irresistible aroma of warm, sweet, and perfectly moist banana bread? If you’ve been searching for an incredible Banana Bread Recipe Hawaii style that’s not only bursting with tropical flavor but also incredibly simple to master, you’ve come to the right place. This recipe is specifically designed to be one of those truly easy baking recipes,
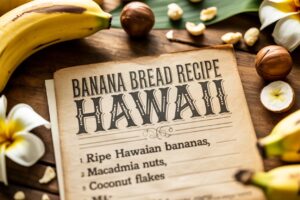
perfect for anyone just starting their baking journey or seasoned pros looking for a reliable, delicious classic. Forget complicated techniques; we’re all about straightforward steps and fantastic results. Get ready to impress yourself and your loved ones with a slice of pure comfort, complete with essential baking tips for beginners to ensure your success. Let’s get baking!
Gather Your Tropical Treasures: Ingredients List
Before we dive into the fun, let’s make sure you have all the necessary ingredients on hand. Using ripe bananas is key for the best flavor and moisture!
| Ingredient | Quantity | Unit |
|---|---|---|
| Very Ripe Bananas, mashed | 3-4 large | |
| All-Purpose Flour | 1 ½ | cups |
| Granulated Sugar | ¾ | cup |
| Large Egg | 1 | |
| Unsalted Butter, melted | ¼ | cup |
| Milk (any kind, e.g., whole, almond) | 2 | tablespoons |
| Baking Soda | 1 | teaspoon |
| Salt | ½ | teaspoon |
| Vanilla Extract | 1 | teaspoon |
| Chopped Macadamia Nuts (optional, but highly recommended for the Hawaiian touch!) | ½ | cup |
| Shredded Coconut (sweetened or unsweetened, optional) | ¼ | cup |
Your Journey to Deliciousness: Step-by-Step Instructions
Follow these simple steps, and you’ll have a perfect loaf of Hawaiian Banana Bread in no time!
Step 1: Prep Your Oven and Pan
- Preheat your oven to 350°F (175°C). This ensures the oven is at the correct temperature from the moment your bread goes in, leading to even baking.
- Lightly grease and flour a 9×5-inch loaf pan. Alternatively, for super easy removal, line the pan with parchment paper, leaving an overhang on the longer sides. This acts as a sling to lift the baked bread out effortlessly.
Step 2: Mash Those Bananas
- In a large mixing bowl, mash the very ripe bananas with a fork until mostly smooth. Don’t worry about getting every single lump out; a few small chunks of banana are perfectly fine and add a lovely texture to the finished bread.
- Beginner Tip: The riper your bananas, the sweeter and more moist your bread will be. Look for bananas with lots of brown spots or even entirely black peels! They’re not overripe for banana bread; they’re perfect!
Step 3: Combine Wet Ingredients
- To the mashed bananas, add the melted butter, granulated sugar, egg, milk, and vanilla extract.
- Whisk these ingredients together until they are well combined and smooth. At this stage, you don’t need to worry about overmixing, just make sure everything is evenly incorporated.
- Common Mistake & Fix: Ensure your butter is fully melted and cooled slightly (not hot) before adding to prevent cooking the egg. If it clumps, whisk vigorously or gently warm the mixture slightly if needed.
Step 4: Mix Dry Ingredients
- In a separate medium bowl, combine the all-purpose flour, baking soda, and salt.
- Whisk them together gently for about 15-30 seconds. This crucial step ensures that the leavening agent (baking soda) and salt are evenly distributed throughout the flour, preventing pockets of unmixed ingredients and ensuring a uniform rise.
Step 5: Combine Wet and Dry
- Gradually add the dry ingredients to the wet ingredients in the large bowl. It’s best to add about half, mix lightly, then add the rest.
- Using a spatula or wooden spoon, mix until just combined. It is absolutely okay if there are still a few streaks of flour visible; these will disappear during baking.
- Crucial Beginner Tip: DO NOT OVERMIX! Overmixing is one of the most common reasons for tough banana bread. It develops the gluten in the flour too much, leading to a dense, chewy, rather than soft and tender, loaf. Stop mixing as soon as the dry ingredients are barely incorporated.
Step 6: Fold in the Hawaiian Flair (Optional Add-ins)
- If you’re using them, gently fold in the chopped macadamia nuts and shredded coconut into the batter. This is where the “Hawaii” truly shines through, adding a delightful crunch and tropical sweetness.
- Alternative: Feel free to customize! Chocolate chips, walnuts, pecans, or even a handful of dried pineapple chunks make great additions if macadamia nuts aren’t available or to your taste. Just don’t add too many, or your bread might become heavy.
Step 7: Bake to Golden Perfection
- Pour the batter into your prepared loaf pan, spreading it evenly with your spatula.
- Bake for 50-65 minutes. The exact time can vary depending on your oven and pan material.
- To test for doneness, insert a wooden skewer or toothpick into the center of the loaf. It should come out clean or with only a few moist crumbs attached, but no wet batter.
- Beginner Tip for Doneness: If the top starts browning too quickly before the inside is cooked (this often happens around the 40-minute mark), you can loosely tent the pan with aluminum foil for the last 15-20 minutes of baking. This prevents over-browning while allowing the inside to finish cooking.
Step 8: Cool and Enjoy!
- Once baked, remove the pan from the oven and let the banana bread cool in the pan for 10-15 minutes. This initial cooling allows the bread to set and firm up, making it much easier to remove without breaking.
- After cooling slightly in the pan, carefully lift the bread out using the parchment paper overhang (if used) or invert it onto a wire rack.
- Let it cool completely on the wire rack before slicing. This is a vital step often overlooked by eager bakers! Cooling completely allows the internal structure of the bread to stabilize and prevents it from becoming gummy or falling apart when sliced.
- Slice, serve, and savor your homemade Hawaiian Banana Bread! It’s delicious on its own, with a smear of butter, or even a drizzle of honey.
Pro Tips & Tricks for the Best Banana Bread
Even though this is an easy recipe, these extra insights will help you achieve perfection every time and elevate your baking game!
- The Riper, The Better: Seriously, don’t underestimate the power of black, spotty bananas! They provide natural sweetness and moisture that under-ripe bananas just can’t. If your bananas aren’t ripe enough and you’re in a hurry, you can speed up the process by baking them unpeeled on a baking sheet at 300°F (150°C) for 15-30 minutes until their peels are black and the insides are soft.
- Measure Flour Correctly: For consistent results, use the “spoon and level” method. Spoon flour into your measuring cup until overflowing, then level it off with a straight edge (like the back of a knife). Scooping directly from the bag can compact the flour, leading to too much dry ingredient and a dry, crumbly bread.
- Don’t Peek Too Early: Resist the urge to open the oven door frequently, especially during the first 30 minutes of baking. Sudden temperature drops can cause your bread to sink in the middle. Use your oven light to check on its progress.
- Customize Your Loaf: This recipe is a fantastic base! Feel free to experiment with other add-ins like white chocolate chips, dried pineapple chunks, or a swirl of cream cheese frosting on top once completely cooled for an extra treat. For a touch more spice, add ½ teaspoon of cinnamon or nutmeg.
- Store It Right: Once completely cooled, store banana bread at room temperature in an airtight container for up to 3-4 days. To keep it fresh longer, wrap individual slices tightly in plastic wrap and then foil, and freeze for up to 3 months. Thaw frozen slices at room temperature or gently warm them in the microwave or oven.
Essential Baking Tools for Your Kitchen
Having the right tools makes baking a breeze! Here are a few essentials you might find helpful:
- Mixing Bowl
- Whisk
- Baking Pan (9×5 inch loaf pan)
- Measuring Cups
- Spatula
- Wire Rack (for cooling, essential for preventing a soggy bottom!)
Nutrition Information (Estimated)
Here’s an estimated nutritional breakdown per slice (assuming 12 slices per loaf). Please note these are approximate values and can vary based on specific ingredients, brand choices, and add-ins used. This information is for general guidance only.
| Nutrient | Per Slice (Estimate) |
|---|---|
| Calories | 280-320 kcal |
| Carbohydrates | 45-55 g |
| Protein | 3-5 g |
| Fat | 10-14 g |
| Fiber | 2-3 g |
| Sugar | 25-30 g |
Frequently Asked Questions (FAQs)
Q1: How ripe do my bananas really need to be for the best banana bread?
A: For the best flavor and moisture, your bananas should be very ripe – think brown spots all over or even mostly black. The starches convert to natural sugars as they ripen, making them sweeter and easier to mash, contributing significantly to the bread’s moist texture and rich taste. Green or yellow bananas won’t give you the same depth of flavor or moisture.
Q2: My banana bread turned out dry and crumbly, or dense and gummy. What went wrong?
A: A dry, crumbly bread is often due to too much flour (incorrectly measured, see “spoon and level” tip) or overbaking. A dense or gummy texture usually points to overmixing the batter, which develops the gluten too much, or not allowing the bread to cool completely before slicing. Always measure flour accurately, mix until just combined, and be patient with cooling!
Q3: Can I reduce the amount of sugar in this recipe?
A: Yes, you can! Very ripe bananas provide a lot of natural sweetness. You can often reduce the granulated sugar by ¼ cup without significantly impacting the texture, especially if your bananas are super ripe. Any more than that might affect the moisture content and the bread’s browning, so experiment cautiously.
Q4: How should I store leftover banana bread to keep it fresh?
A: Once completely cooled, store your banana bread in an airtight container at room temperature for up to 3-4 days. For longer storage, wrap individual slices tightly in plastic wrap, then aluminum foil, and freeze for up to 3 months. Thaw frozen slices at room temperature for a few hours, or gently warm them in the microwave or oven.
Q5: Can I make this recipe gluten-free?
A: Yes, you can! Substitute the all-purpose flour with an equal amount of a 1:1 gluten-free baking flour blend that contains xanthan gum. The rest of the ingredients and steps should remain the same. The texture might be slightly different, perhaps a bit denser, but it will still be delicious.
Q6: What if I don’t have a 9×5-inch loaf pan?
A: You can use an 8.5×4.5-inch loaf pan, but you might need to increase the baking time slightly (by 5-10 minutes) and keep a close eye on it. Alternatively, this recipe works wonderfully for muffins! Divide the batter into a 12-cup muffin tin (filling about two-thirds full) and bake for approximately 20-25 minutes, or until a toothpick inserted into the center comes out clean.
Mahalo for Baking!
And there you have it – your very own slice of paradise, baked right in your kitchen! This Banana Bread Recipe Hawaii style isn’t just a treat for your taste buds; it’s a simple, joyful baking experience perfect for anyone, especially beginners. We hope these detailed instructions and helpful tips have given you the confidence to whip up this delightful loaf again and again. Whether you’re enjoying it for breakfast, a snack, or a sweet dessert, you’re in for a truly comforting experience that brings a little bit of the islands to your home.
Don’t be shy – share your baking successes with us! We’d love to hear how your Hawaiian Banana Bread turned out in the comments below, or tag us in your photos. Happy baking, and enjoy every delicious bite!
“`