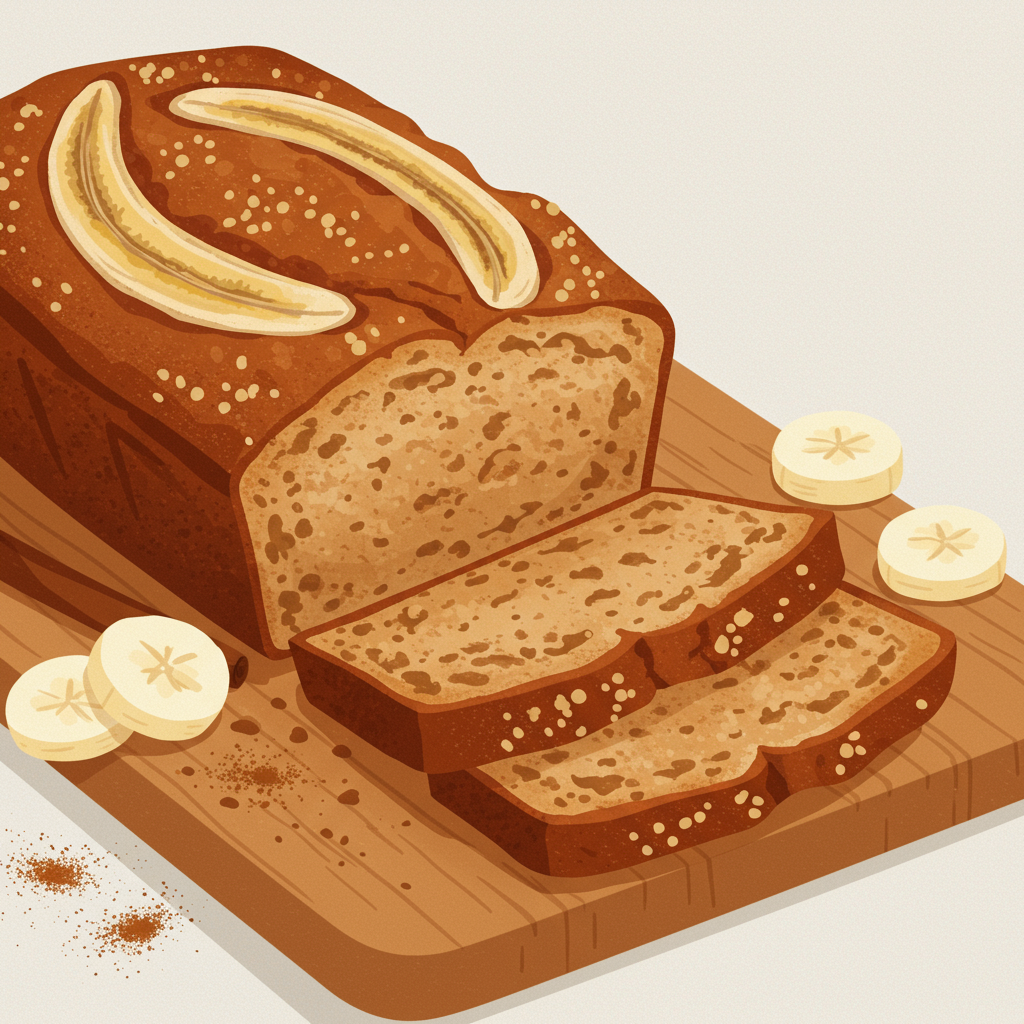
The Ultimate Beginner-Friendly Banana Bread Recipe with Brown Sugar
Welcome, aspiring bakers! Are you ready to fill your home with the most comforting, warm, and utterly irresistible aroma? Today, we’re diving into a classic that’s perfect for anyone just starting their baking journey: our incredible **banana bread recipe with brown sugar**. This isn’t just any banana bread; the brown sugar adds a deep, caramel-like sweetness and an unbeatable moistness that will have everyone asking for more. Forget complicated techniques – this is one of those truly **easy baking recipes** that promises delicious results every single time. We’ll walk through every step, sharing our best **baking tips for beginners** to ensure your first (or fiftieth!) loaf is a resounding success. Get ready to transform those overripe bananas into a golden-brown masterpiece!
Ingredients You’ll Need
Gathering your ingredients is the first step to baking success. Make sure everything is measured out before you begin – this is called “mise en place” and makes the baking process so much smoother!
| Ingredient | Quantity | Unit |
|---|---|---|
| Overripe Bananas (mashed) | 3 | medium |
| All-Purpose Flour | 1 ½ | cups |
| Light Brown Sugar (packed) | ¾ | cup |
| Large Egg | 1 | |
| Unsalted Butter (melted) | ⅓ | cup |
| Baking Soda | 1 | teaspoon |
| Salt | ½ | teaspoon |
| Vanilla Extract | 1 | teaspoon |
| Ground Cinnamon (optional) | ½ | teaspoon |
Step-by-Step Baking Instructions
Follow these detailed steps carefully, and you’ll be enjoying homemade banana bread in no time. Remember, baking is a science, but it’s also a lot of fun!
Step 1: Preheat and Prepare
- Preheat your oven: Set your oven to 350°F (175°C). This ensures your oven is at the correct temperature when your batter is ready, promoting even baking.
- Prepare your loaf pan: Grease a 9×5-inch loaf pan with butter or cooking spray. For an extra easy removal, you can line the pan with parchment paper, leaving an overhang on the sides to lift the bread out later. This is a fantastic trick for beginners to prevent sticking!
Step 2: Mash the Bananas
- In a large mixing bowl, thoroughly mash your overripe bananas with a fork until mostly smooth. A few small lumps are perfectly fine and add lovely texture!
- Beginner Tip: The riper the bananas (brown spots are great!), the sweeter and more flavorful your bread will be. They’re also much easier to mash. If your bananas aren’t quite ripe enough, you can bake them at 300°F (150°C) for 15-20 minutes until the peels turn black.
Step 3: Mix the Wet Ingredients
- To the mashed bananas, add the melted butter, light brown sugar, egg, and vanilla extract.
- Whisk it all together: Use a whisk or a spatula to mix these ingredients until they are well combined. Don’t worry about being perfectly smooth at this stage; just ensure everything is incorporated. The brown sugar might clump a little, but it will dissolve as you mix.
- Common Mistake & Fix: If your butter isn’t fully melted, it might not incorporate well. Ensure it’s liquid but not scalding hot, as hot butter can “cook” the egg prematurely.
Step 4: Combine the Dry Ingredients
- In a separate medium bowl, whisk together the all-purpose flour, baking soda, salt, and optional ground cinnamon. Whisking dry ingredients together ensures they are evenly distributed, so you don’t get pockets of baking soda in your finished bread.
Step 5: Combine Wet and Dry Mixtures
- Add the dry to the wet: Pour the dry ingredient mixture into the wet banana mixture.
- Mix gently: Using a spatula, fold the ingredients together until *just* combined. It’s okay if there are a few streaks of flour remaining.
- Crucial Beginner Tip: Do NOT overmix! Overmixing develops the gluten in the flour too much, which can lead to a tough, dense, and chewy banana bread instead of a soft, tender one. Stop mixing as soon as you no longer see large pockets of dry flour.
Step 6: Bake Your Bread
- Pour into the pan: Pour the batter evenly into your prepared loaf pan.
- Bake: Place the loaf pan in the preheated oven and bake for 50-65 minutes.
- Check for doneness: To check if your banana bread is done, insert a toothpick into the center of the loaf. If it comes out clean or with a few moist crumbs (but no wet batter), it’s ready! If it comes out wet, continue baking for another 5-10 minutes and test again.
- Alternative Check: You can also gently press the top of the bread; if it springs back, it’s likely done. If your bread is browning too quickly on top, you can loosely tent it with aluminum foil for the last 15-20 minutes of baking.
Step 7: Cool and Enjoy
- Cool in the pan: Once baked, remove the banana bread from the oven and let it cool in the loaf pan for about 10-15 minutes. This allows the bread to set and firm up, making it easier to remove without breaking.
- Transfer to a wire rack: After cooling slightly in the pan, carefully invert the bread onto a wire cooling rack. If you used parchment paper, simply lift it out.
- Cool completely: Let the banana bread cool completely on the wire rack before slicing. While it’s tempting to cut into it warm, cooling allows the internal structure to fully set, resulting in a cleaner slice and better texture.
- Slice and serve: Once cool, slice your delicious banana bread and enjoy! It’s fantastic on its own, with a smear of butter, or even a drizzle of honey.
Baking Tips & Tricks for Perfect Banana Bread
Elevate your banana bread game with these essential tips, especially helpful for beginner bakers:
- Embrace the Brown Spots: Seriously, the darker and spottier your bananas, the better! Overripe bananas are sweeter and more fragrant, contributing immensely to the flavor and moisture of your bread. Don’t be shy about using bananas that look “too far gone” for eating raw.
- Room Temperature Ingredients: For a smoother, more evenly mixed batter, try to have your egg and butter at room temperature. This helps them emulsify better, creating a more cohesive and tender crumb. If your egg is cold, place it in a bowl of warm water for a few minutes.
- Don’t Overmix the Batter: We can’t stress this enough! Overmixing develops gluten, which leads to a tough, rubbery texture. Mix just until the dry ingredients are incorporated, and stop as soon as you see no more dry flour streaks. A slightly lumpy batter is actually a good sign!
- The Toothpick Test is Your Best Friend: This is the most reliable way to check for doneness. Insert a toothpick into the very center of the loaf. If it comes out clean, your bread is done. If it has wet batter, put it back in for 5-10 minute increments.
- Cooling is Crucial: While it’s tempting to slice into warm banana bread, allowing it to cool completely on a wire rack is vital. This prevents it from becoming gummy or collapsing and ensures the texture is perfect.
- Storage Secrets: Store your banana bread at room temperature in an airtight container for up to 3-4 days. For longer storage, wrap individual slices tightly in plastic wrap and then foil, and freeze for up to 3 months. Thaw at room temperature or gently warm in the microwave.
- Customization Fun: Feel free to add 1/2 cup of your favorite mix-ins to the batter before baking. Chocolate chips (dark or milk!), chopped walnuts, pecans, or even a sprinkle of shredded coconut are all fantastic additions.
Essential Baking Tools
Having the right tools makes baking easier and more enjoyable. Here are a few must-haves for this recipe:
- Mixing Bowl (You’ll need at least two: one large, one medium)
- Whisk (For dry ingredients and initial wet ingredient mixing)
- Baking Pan (A 9×5 inch loaf pan is ideal)
- Measuring Cups & Measuring Spoons (Accuracy is key in baking!)
- Spatula (For folding ingredients and scraping bowls)
- Fork (For mashing bananas)
- Wire Cooling Rack (For proper cooling)
Nutrition Information (Estimated per slice, 1/12th of loaf)
Please note: These are approximate values and can vary based on exact ingredients and portion sizes.
| Nutrient | Amount |
|---|---|
| Calories | ~280-320 |
| Total Carbohydrates | ~45-55g |
| Protein | ~4-6g |
| Total Fat | ~10-14g |
| Fiber | ~1-2g |
| Total Sugar | ~25-35g |
Frequently Asked Questions for Beginner Bakers
Q1: What kind of bananas should I really use for banana bread?
A: The riper, the better! Look for bananas with plenty of brown spots, or even almost entirely black peels. These bananas are sweeter and softer, making them easier to mash and providing the best flavor and moisture for your bread.
Q2: Can I use white sugar instead of brown sugar?
A: Yes, you can, but it will slightly change the outcome. Brown sugar adds a deeper, more caramel-like flavor and contributes to a moister, chewier texture due to its molasses content. White sugar will result in a slightly lighter, less complex flavor and potentially a slightly drier bread. If substituting, use the same quantity.
Q3: My banana bread sank in the middle. What went wrong?
A: There are a few common culprits! It could be: 1) Underbaked: The center wasn’t fully cooked. 2) Overmixing the batter: This can create too much air initially, which then collapses. 3) Too much leavening (baking soda): An excessive amount can cause a rapid rise and then collapse. 4) Opening the oven door too early: A sudden temperature drop can cause the bread to sink before it’s set.
Q4: How do I know when my banana bread is perfectly done?
A: The best method is the “toothpick test.” Insert a wooden toothpick or thin skewer into the very center of the loaf. If it comes out clean (no wet batter), your bread is done. A few moist crumbs are okay, but any liquid batter means it needs more time.
Q5: How long does homemade banana bread typically last?
A: Stored at room temperature in an airtight container, your banana bread will stay fresh for about 3-4 days. If you want to keep it longer, you can wrap individual slices tightly and freeze them for up to 3 months. Thaw at room temperature or gently warm for a quick treat!
Q6: Can I add chocolate chips or nuts to this recipe?
A: Absolutely! Banana bread is wonderfully versatile. You can fold in about 1/2 to 1 cup of chocolate chips (milk, semi-sweet, or dark), chopped walnuts, pecans, or even shredded coconut along with the dry ingredients just before mixing them into the wet. This adds extra flavor and texture!
Time to Bake Your Best Banana Bread!
There you have it! A comprehensive, beginner-friendly guide to baking the most delicious, moist, and flavorful **banana bread recipe with brown sugar** you’ve ever tasted. Don’t be intimidated – baking is a journey, and every loaf is a step towards becoming a more confident cook. This recipe is designed to set you up for success, providing all the tips and tricks you need to avoid common pitfalls and achieve bakery-quality results right in your own kitchen.
So, grab those spotty bananas, preheat your oven, and get ready to experience the joy of homemade baking. We can’t wait to hear how your banana bread turns out. Share your creations in the comments below, or tell us about your favorite additions. Happy baking!
“`