Ingredients You’ll Need
Gathering your ingredients before you start is one of the best baking tips for beginners. It ensures a smooth process and prevents any mid-bake scrambles!
| Ingredient | Quantity | Unit |
|---|---|---|
| All-Purpose Flour | 1 ½ | cups |
| Granulated Sugar | ½ | cup |
| Baking Soda | 1 | teaspoon |
| Salt | ½ | teaspoon |
| Very Ripe Bananas (mashed) | 3 | medium |
| Large Eggs | 2 | |
| Vegetable Oil (or other neutral oil like canola) | ⅓ | cup |
| Vanilla Extract | 1 | teaspoon |
| Optional: Chocolate Chips or Chopped Nuts | ½ | cup |
Step-by-Step Instructions: Bake Your Best Banana Bread
Follow these detailed steps, and you’ll have a moist, delicious banana bread ready to enjoy in no time. Don’t rush, and remember, baking is a joyful process!
-
Prep Your Baking Essentials:
Preheat your oven to 350°F (175°C). This is crucial for even baking! Grease and flour a 9×5-inch loaf pan, or line it with parchment paper for easy removal. Greasing and flouring means lightly coating the inside of the pan with oil or baking spray, then dusting with a spoonful of flour, tapping out the excess. This prevents your bread from sticking.
-
Combine the Dry Ingredients:
In a large mixing bowl, whisk together the all-purpose flour, granulated sugar, baking soda, and salt. Whisking ensures that the leavening agent (baking soda) and salt are evenly distributed throughout the flour, which is key for your bread to rise properly and taste balanced. Set this bowl aside.
-
Mash Your Bananas:
In a separate medium bowl, place your very ripe bananas. These are the bananas that are mostly brown or black – don’t throw them away! They are perfectly sweet and moist for baking. Using a fork or a potato masher, mash the bananas until mostly smooth with a few small lumps remaining. A little texture is good! This step is where most of the moisture and sweetness for your bread comes from, replacing the need for butter.
-
Add Wet Ingredients to Bananas:
To your mashed bananas, add the eggs, vegetable oil, and vanilla extract. Whisk these ingredients together until just combined. The oil replaces the butter, providing moisture without the dairy. Make sure to crack your eggs into a separate small bowl first, just in case one is bad or you get a shell in it!
-
Combine Wet and Dry Mixtures:
Pour the wet banana mixture into the bowl with the dry ingredients. Using a spatula or a wooden spoon, gently fold the ingredients together until just combined. Important tip for beginners: Do NOT overmix! Overmixing develops the gluten in the flour too much, which can lead to a tough, dense, and dry banana bread. A few streaks of flour are perfectly fine – they will disappear during baking.
-
Add Optional Mix-ins (if using):
If you’re adding chocolate chips, chopped nuts (like walnuts or pecans), or even a sprinkle of cinnamon, gently fold them into the batter now. This is a great way to customize your banana bread!
-
Pour into Loaf Pan:
Pour the batter evenly into your prepared 9×5-inch loaf pan. You can gently tap the pan on the counter a couple of times to release any large air bubbles and level the top.
-
Bake to Golden Perfection:
Bake in the preheated oven for 50-65 minutes. Baking times can vary depending on your oven, so start checking around the 50-minute mark. To check for doneness, insert a wooden skewer or toothpick into the center of the loaf. If it comes out clean or with a few moist crumbs attached (but no wet batter), your banana bread is done. If it comes out with wet batter, continue baking for another 5-10 minutes and test again.
-
Cooling Process:
Once baked, remove the loaf pan from the oven and let it cool in the pan for about 10-15 minutes on a wire rack. This allows the bread to set and prevents it from crumbling when you remove it. After 10-15 minutes, carefully invert the loaf onto the wire rack to cool completely. Slicing into hot banana bread can make it gummy, so patience is key here!
-
Slice and Enjoy!
Once fully cooled, slice your delicious homemade banana bread and enjoy! It’s perfect for breakfast, a snack, or even a simple dessert.
Pro Tips & Tricks for the Best Banana Bread

Even though this is an easy baking recipe, these extra baking tips for beginners will ensure your banana bread is consistently amazing:
- Use Very Ripe Bananas: This is non-negotiable! The browner (or blacker) your bananas, the sweeter and more flavorful your bread will be. They also mash more easily and provide essential moisture, reducing the need for butter.
- Don’t Overmix the Batter: As mentioned in the instructions, overmixing develops gluten, leading to a tough, dense texture. Mix just until the flour streaks disappear. A lumpy batter is a happy batter!
- Measure Flour Correctly: For accurate measuring, spoon the flour into your measuring cup, then level it off with the back of a knife. Scooping directly from the bag can compact the flour, leading to too much flour and a dry loaf.
- Check Your Oven Temperature: Ovens can vary. If you find your baked goods are consistently under or overcooked, an inexpensive oven thermometer can be a great investment to ensure accurate temperatures.
- Cool Completely: Resist the urge to slice hot banana bread. Cooling completely allows the internal structure to set, resulting in a cleaner slice and better texture.
- Storage: Store your banana bread tightly wrapped in plastic wrap or in an airtight container at room temperature for up to 3-4 days. For longer storage, it freezes beautifully!
Essential Baking Tools for Your Kitchen
Having the right tools makes baking much easier and more enjoyable. Here are a few essentials:
- Mixing Bowl
- Whisk
- Baking Pan (9×5 inch loaf pan)
- Measuring Cups & Spoons
- Rubber Spatula
- Wire Rack (for cooling)
- Toothpicks or Wooden Skewers (for testing doneness)
Estimated Nutrition Information (Per Slice)
Please note: This is an approximate nutritional estimate for one slice (assuming 12 slices per loaf) and can vary based on specific ingredient brands and exact measurements.
| Nutrient | Per Serving (Approx.) |
|---|---|
| Calories | 210 kcal |
| Carbohydrates | 38 g |
| Protein | 3 g |
| Fat | 6 g |
| Fiber | 1 g |
| Sugar | 20 g |
Frequently Asked Questions for Beginners
- Q: My bananas aren’t ripe enough! What can I do?
- A: If you’re in a pinch, you can ripen bananas faster. Place them on a baking sheet and bake at 300°F (150°C) for 15-30 minutes, or until the peels are shiny black. Let them cool completely before mashing. Alternatively, you can put them in a paper bag with an apple overnight to speed up ripening.
- Q: Can I use whole wheat flour instead of all-purpose?
- A: Yes, you can! However, whole wheat flour absorbs more liquid and can result in a denser loaf. For beginners, I recommend starting with all-purpose. If you do use whole wheat, try a 50/50 mix with all-purpose flour for a good balance of texture and nutrition.
- Q: My banana bread came out dry/dense. What went wrong?
- A: The most common culprits are overmixing the batter (which develops too much gluten) or using too much flour (often from scooping directly from the bag instead of spooning and leveling). Under-ripe bananas can also contribute to a less moist loaf. Make sure to follow the ‘do not overmix’ rule and measure your flour accurately!
- Q: How should I store leftover banana bread?
- A: Once completely cooled, wrap your banana bread tightly in plastic wrap or aluminum foil, or place it in an airtight container. It will stay fresh at room temperature for 3-4 days. For longer storage, you can freeze slices or the whole loaf for up to 3 months. Thaw at room temperature before serving.
- Q: Can I add other mix-ins?
- A: Absolutely! Get creative! Besides chocolate chips and nuts, you can add shredded coconut, dried cranberries or raisins, a pinch of cinnamon or nutmeg, or even a swirl of cream cheese (add a thin layer of cream cheese batter over half the banana bread batter, then top with remaining banana bread batter before baking).
Bake, Enjoy, and Share Your Success!
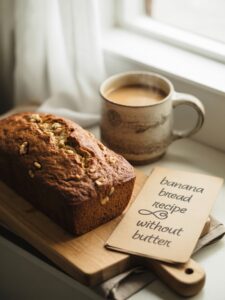
Congratulations, you’ve just mastered a fantastic **Banana Bread Recipe Without Butter**! This delightful loaf proves that you don’t need butter to achieve incredible flavor and moisture. We hope these detailed instructions and **baking tips for beginners** have made your baking journey a joyous and successful one.
Now, go ahead and slice into that warm, fragrant bread. Enjoy it with your morning coffee, as an afternoon snack, or share it with loved ones. Don’t forget to experiment with different mix-ins next time! Happy baking!
“`
2 thoughts on “Banana Bread Recipe Without Butter – Easy Chocolate Delight”