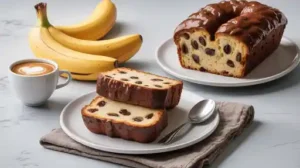
Are you ready to bake something truly special and incredibly delicious, even if you’re a complete beginner in the kitchen? Get excited because today we’re diving into one of the most comforting and satisfying treats: our ultimate Banana Bread Recipes With Crumb Topping. This isn’t just any banana bread; it’s a moist, flavorful loaf crowned with a sweet, buttery, and perfectly spiced crumb topping that adds an irresistible texture to every bite.
Forget complicated techniques this recipe is designed to be one of the most easy baking recipes you’ll ever try, packed with helpful baking tips for beginners to guide you every step of the way. You’ll be amazed at how simple it is to transform those forgotten, overripe bananas into a masterpiece that will fill your home with the most wonderful aroma. Let’s get baking!
Ingredients You’ll Need
Gather your ingredients! We’ve broken them down into two simple sections: one for the incredibly moist banana bread and another for that delightful crumb topping.
For the Crumb Topping:
| Quantity | Unit | Ingredient |
|---|---|---|
| 1/2 | cup | All-purpose flour |
| 1/4 | cup | Granulated sugar |
| 1/4 | cup | Packed light brown sugar |
| 1/2 | teaspoon | Ground cinnamon |
| 1/4 | cup | Unsalted butter, melted |
For the Banana Bread:
| Quantity | Unit | Ingredient |
|---|---|---|
| 1 3/4 | cups | All-purpose flour |
| 1 | teaspoon | Baking soda |
| 1/2 | teaspoon | Salt |
| 1/2 | cup | Unsalted butter, softened to room temperature |
| 1/2 | cup | Granulated sugar |
| 1/2 | cup | Packed light brown sugar |
| 2 | large | Eggs, at room temperature |
| 1 | teaspoon | Vanilla extract |
| 1/2 | cup | Sour cream or plain Greek yogurt, at room temperature |
| 3-4 | medium | Very ripe bananas, mashed (about 1.5 cups) |
Step-by-Step Baking Instructions
Follow these detailed steps carefully, and you’ll have a perfect loaf of banana bread with crumb topping in no time. Don’t rush, and remember, baking should be fun!
Step 1: Prepare Your Crumb Topping First
In a medium bowl, combine the 1/2 cup all-purpose flour, 1/4 cup granulated sugar, 1/4 cup packed light brown sugar, and 1/2 teaspoon ground cinnamon. Use a fork or a whisk to mix these dry ingredients together until they are well combined. Pour in the 1/4 cup of melted unsalted butter. Now, use your fingers or a fork to mix the butter into the dry ingredients until coarse crumbs form. The mixture should resemble wet sand with some larger clumps. Beginner Tip: Don’t overmix! Just combine until you see those lovely crumbs. Set this bowl aside for later.
Step 2: Preheat Oven & Prepare Baking Pan
Preheat your oven to 350°F (175°C). This allows the oven to reach and maintain the correct temperature, which is crucial for even baking. Lightly grease and flour a 9×5 inch loaf pan. You can also line it with parchment paper, leaving an overhang on the longer sides to easily lift the bread out later. This prevents sticking and makes cleanup a breeze.
Step 3: Whisk Dry Ingredients for Banana Bread
In a large bowl, whisk together the 1 3/4 cups all-purpose flour, 1 teaspoon baking soda, and 1/2 teaspoon salt. Whisking ensures that the leavening agent (baking soda) and salt are evenly distributed throughout the flour, preventing pockets of unmixed ingredients. Beginner Tip: Sifting your flour can make your bread even lighter, but whisking thoroughly is usually sufficient.
Step 4: Cream Butter and Sugars
In a separate, even larger bowl (or the bowl of a stand mixer fitted with a paddle attachment), cream together the 1/2 cup softened unsalted butter, 1/2 cup granulated sugar, and 1/2 cup packed light brown sugar. Beat on medium speed for 2-3 minutes until the mixture is light, fluffy, and pale in color. This process incorporates air, which contributes to the bread’s tender texture. Beginner Tip: Make sure your butter is truly at room temperature. It should be soft enough to indent with your finger but not melted. Cold butter won’t cream properly, and melted butter will lead to a dense bread.
Step 5: Add Eggs and Vanilla
Add the 2 large eggs, one at a time, beating well after each addition until fully incorporated. Scrape down the sides of the bowl with a spatula as needed to ensure everything is mixed. Stir in the 1 teaspoon vanilla extract. Beginner Tip: Adding eggs one at a time helps them emulsify properly with the butter mixture, preventing a curdled appearance and ensuring a smoother batter.
Step 6: Incorporate Wet Ingredients
Stir in the 1/2 cup sour cream (or plain Greek yogurt) and the 3-4 mashed very ripe bananas. Mix until just combined. Don’t worry if there are a few small lumps of banana; they add to the bread’s rustic charm. Beginner Tip: The riper your bananas, the sweeter and more flavorful your banana bread will be! Look for bananas with lots of brown spots or even entirely brown peels.
Step 7: Combine Wet and Dry Mixtures
Gradually add the dry ingredient mixture (from Step 3) to the wet ingredient mixture (from Step 6). Mix on low speed, or by hand with a spatula, until just combined. Do not overmix! Overmixing develops the gluten in the flour too much, which can result in a tough, dense banana bread. A few streaks of flour are perfectly fine. Common Mistake: This is where many beginners go wrong. Stop mixing as soon as you don’t see any dry flour anymore.
Step 8: Pour into Pan and Add Crumb Topping
Pour the banana bread batter evenly into your prepared loaf pan. Take your reserved crumb topping and sprinkle it generously over the top of the batter. Try to distribute it as evenly as possible for a beautiful crust on every slice.
Step 9: Bake to Perfection
Bake for 55-70 minutes, or until a wooden skewer or toothpick inserted into the center of the bread comes out clean or with moist crumbs attached (no wet batter). Beginner Tip: Baking times can vary greatly depending on your oven. Start checking around 50 minutes. If the crumb topping starts to brown too quickly, you can loosely tent the top of the loaf with aluminum foil for the remaining baking time.
Step 10: Cool and Serve
Once baked, remove the loaf pan from the oven and let the banana bread cool in the pan on a wire rack for about 15-20 minutes. This allows the bread to set and prevents it from crumbling when you remove it. After 15-20 minutes, carefully invert the bread onto the wire rack to cool completely. Slicing warm banana bread is tempting, but letting it cool fully makes for cleaner slices and a better texture. Enjoy!
Tips & Tricks for Beginner Bakers
Baking can seem daunting, but these simple tips will help you master this banana bread and build confidence in the kitchen:
- Room Temperature Ingredients: Ensure your butter, eggs, and sour cream are at room temperature. This helps them emulsify better, creating a smoother, more uniform batter and a lighter final product.
- Don’t Overmix: This is the golden rule for most quick breads! Overmixing develops gluten, leading to a tough, dry banana bread. Mix just until ingredients are combined.
- Perfectly Ripe Bananas: The darker the spots on your bananas, the sweeter and more flavorful your bread will be. If your bananas aren’t ripe enough, you can bake them unpeeled on a baking sheet at 300°F (150°C) for 15-20 minutes until they turn black and soft.
- Measure Accurately: Especially with flour, use the “spoon and level” method. Spoon flour into your measuring cup and then level it off with a straight edge (like a knife). Don’t scoop directly from the bag, as this can compact the flour and lead to too much flour.
- Test for Doneness: A toothpick inserted into the center should come out clean or with a few moist crumbs. If it comes out with wet batter, continue baking in 5-minute increments.
- Storage: Store leftover banana bread in an airtight container at room temperature for up to 3 days, or in the refrigerator for up to a week. It also freezes beautifully for up to 3 months!
- Add-ins: Feel free to customize! Fold in 1/2 to 1 cup of chocolate chips, chopped walnuts, or pecans with the dry ingredients.
Essential Baking Tools
Having the right tools makes all the difference, especially when you’re starting out. Here are a few essentials you’ll want:
- Mixing Bowl
- Whisk
- Baking Pan (specifically a 9×5 inch loaf pan)
- Measuring Cups & Measuring Spoons
- Spatula (rubber spatula for scraping bowls)
- Wire Cooling Rack
Nutrition Information (Estimated per slice)
This is an estimated nutritional breakdown for one slice of banana bread with crumb topping, assuming the recipe yields 12 slices. Actual values may vary based on specific ingredients and portion sizes.
| Nutrient | Amount |
|---|---|
| Calories | 380 kcal |
| Carbohydrates | 58 g |
| Protein | 5 g |
| Fat | 16 g |
| Fiber | 2 g |
| Sugar | 35 g |
Frequently Asked Questions (FAQs)
Q1: My bananas aren’t very ripe. Can I still use them?
A: While very ripe bananas (with brown spots) give the best flavor and sweetness, if yours are only slightly ripe, you can quick-ripen them! Bake unpeeled bananas on a baking sheet at 300°F (150°C) for 15-20 minutes, or until the peels turn black and shiny. Let them cool before mashing. This concentrates their sugars and softens them perfectly.
Q2: How do I know when my banana bread is fully baked?
A: The best way to check is with the “toothpick test.” Insert a wooden skewer or toothpick into the very center of the loaf. If it comes out clean or with only a few moist crumbs attached (no wet batter), your bread is done. If it comes out wet, bake for another 5-10 minutes and test again.
Q3: Can I add chocolate chips or nuts to this recipe?
A: Absolutely! This recipe is fantastic with add-ins. You can fold in 1/2 cup to 1 cup of chocolate chips (milk, dark, or white), chopped walnuts, or pecans into the batter along with the dry ingredients in Step 7. Just be careful not to overmix!
Q4: My crumb topping browned too quickly. What went wrong?
A: Oven temperatures can vary! If your crumb topping is browning too fast before the bread is cooked through, simply take a piece of aluminum foil and loosely tent it over the top of the loaf pan for the remainder of the baking time. This will protect the topping from burning while the inside finishes baking.
Q5: Why is my banana bread dry or dense?
A: The most common culprits for dry or dense banana bread are overmixing the batter and using too much flour. Overmixing develops the gluten, making it tough. Too much flour (often from scooping directly with the measuring cup) makes the batter dry. Always use the “spoon and level” method for measuring flour and mix just until combined.
Q6: Can I make this recipe into muffins instead of a loaf?
A: Yes, you can! This recipe works wonderfully as muffins. Line a 12-cup muffin tin with paper liners. Fill each liner about two-thirds full, then sprinkle with the crumb topping. Bake at 375°F (190°C) for 20-25 minutes, or until a toothpick inserted into the center of a muffin comes out clean. Keep an eye on them, as muffin baking times are shorter.
Time to Enjoy Your Homemade Masterpiece!
Congratulations, baker! You’ve just created a truly irresistible loaf of banana bread with a delightful crumb topping. This recipe is a testament to how simple and rewarding baking can be, even for those just starting out. The aroma filling your kitchen is just the beginning of the joy this bread will bring. Whether you’re sharing it with loved ones, enjoying it with your morning coffee, or simply treating yourself, every bite is a little slice of heaven.
Don’t be afraid to experiment with other spices or add-ins in the future. Baking is a journey of discovery, and every loaf you bake helps you learn and grow. We hope this detailed guide has given you the confidence to tackle more easy baking recipes and develop your own baking tips for beginners. Happy baking, and enjoy your delicious homemade banana bread!