Are you ready to bake something truly special that will fill your home with an irresistible aroma and delight everyone who takes a bite? You’ve come to the right place! This Banana Cake Recipe With Nuts is specifically designed for home bakers of all skill levels, especially those just starting their baking journey. Forget complicated techniques and intimidating jargon; we’re going to break down every step to ensure your success.
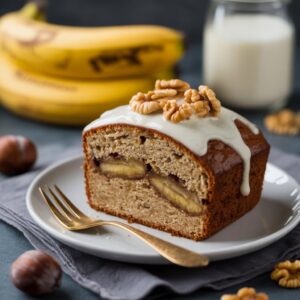
This is one of those easy baking recipes that delivers big on flavor and comfort, making it perfect for a cozy afternoon treat or a potluck showstopper. We’ll cover all the essential baking tips for beginners so you can confidently create a moist, flavorful banana cake studded with crunchy nuts, all from scratch. Let’s get baking!
Ingredients You’ll Need
Before we dive into the fun part, let’s gather all our ingredients. Accuracy in measuring is key, so make sure you have your measuring cups and spoons ready!
| Ingredient | Quantity |
|---|---|
| All-Purpose Flour | 1 ¾ cups (210g) |
| Baking Soda | 1 teaspoon |
| Ground Cinnamon | ½ teaspoon |
| Salt | ½ teaspoon |
| Unsalted Butter, softened | ½ cup (113g), 1 stick |
| Granulated Sugar | ¾ cup (150g) |
| Large Eggs, room temperature | 2 |
| Vanilla Extract | 1 teaspoon |
| Very Ripe Bananas, mashed | 1 ½ cups (about 3-4 large bananas) |
| Buttermilk, room temperature | ¼ cup (60ml) |
| Chopped Walnuts or Pecans | ½ cup (60g), plus extra for garnish (optional) |
Step-by-Step Baking Instructions
Follow these detailed steps closely, and you’ll be on your way to a perfect banana cake!
Step 1: Prepare Your Baking Pan and Preheat Oven
- Preheat your oven: Set your oven to 350°F (175°C). It’s crucial to preheat your oven fully before putting the cake in, as this ensures even baking and proper rising.
- Prepare your pan: Take a 9×13 inch baking pan (or a 9-inch round pan for a thicker cake, though baking time may vary). Grease it thoroughly with butter or non-stick spray. For extra assurance against sticking, you can also lightly flour the greased pan, tapping out any excess. This creates a non-stick barrier.
Step 2: Whisk Dry Ingredients
- Combine dry ingredients: In a medium-sized bowl, whisk together the all-purpose flour, baking soda, ground cinnamon, and salt. Whisking ensures that the leavening agents (baking soda) are evenly distributed, which is essential for a cake that rises beautifully and consistently. Beginner Tip: Don’t skip this step! It prevents lumps and ensures every bite of your cake has the right texture and flavor. Set this bowl aside.
Step 3: Cream Wet Ingredients (Butter and Sugar)
- Cream butter and sugar: In a large mixing bowl, using an electric mixer (handheld or stand mixer with paddle attachment), beat the softened unsalted butter and granulated sugar together on medium speed. Beat until the mixture is light in color and fluffy, about 2-3 minutes. This process, called “creaming,” incorporates air into the butter, which helps the cake rise and gives it a tender crumb. Beginner Tip: Ensure your butter is truly softened (room temperature). If it’s too cold, it won’t cream properly; if it’s melted, it will make your cake dense.
Step 4: Add Eggs and Vanilla
- Incorporate eggs: Add the large eggs one at a time, beating well after each addition. Scrape down the sides of the bowl with a spatula after adding each egg to ensure everything is fully combined. The eggs add structure and richness to the cake. Beginner Tip: Room temperature eggs incorporate better into the batter and create a smoother emulsion, leading to a lighter cake.
- Stir in vanilla: Mix in the vanilla extract until just combined.
Step 5: Add Bananas and Buttermilk
- Mash bananas: In a separate bowl, mash your very ripe bananas with a fork until mostly smooth but with a few small lumps remaining for texture. Beginner Tip: The riper the bananas (brown spots are good!), the sweeter and more flavorful your cake will be. They also mash more easily.
- Add to wet mixture: Gently fold the mashed bananas into the creamed butter and sugar mixture until just combined.
- Add buttermilk: Stir in the buttermilk until just incorporated. Beginner Tip: Buttermilk adds moisture and a slight tang, reacting with the baking soda to create a tender crumb. If you don’t have buttermilk, you can make a substitute: add 1 tablespoon of lemon juice or white vinegar to a liquid measuring cup, then fill the rest with regular milk until it reaches ¼ cup. Let it sit for 5 minutes before using.
Step 6: Combine Wet and Dry Ingredients
- Gradually add dry to wet: With the mixer on low speed, gradually add the dry ingredients mixture to the wet ingredients, mixing until just combined. Be careful not to overmix! Overmixing develops the gluten in the flour too much, which can result in a tough, chewy cake instead of a tender one. Stop mixing as soon as you no longer see streaks of dry flour.
Step 7: Fold in Nuts
- Fold in nuts: Gently fold in the chopped walnuts or pecans using a spatula. Distribute them evenly throughout the batter. Alternative: If you’re not a fan of nuts, you can omit them, or substitute them with chocolate chips for a different twist!
Step 8: Bake the Cake
- Pour into pan: Pour the batter into your prepared baking pan and spread it evenly with a spatula.
- Bake: Place the pan in the preheated oven and bake for 30-35 minutes for a 9×13 inch pan, or 40-50 minutes for a 9-inch round pan.
- Check for doneness: To check if the cake is done, insert a wooden skewer or toothpick into the center of the cake. If it comes out clean or with a few moist crumbs attached (no wet batter), the cake is ready. If it comes out with wet batter, continue baking for another 5 minutes and test again.
Step 9: Cool and Serve
- Cool in pan: Once baked, remove the cake from the oven and let it cool in the pan on a wire rack for about 10-15 minutes. This allows the cake to set and prevents it from breaking when you remove it.
- Transfer to rack: After 10-15 minutes, carefully invert the cake onto the wire rack to cool completely. Cooling completely is important before slicing, as it allows the cake’s structure to fully set and prevents it from crumbling.
- Serve: Slice and enjoy your delicious homemade Banana Cake With Nuts! It’s wonderful plain, or with a dusting of powdered sugar, or even a simple cream cheese frosting if you’re feeling fancy.
Baking Tips & Tricks for Beginners
Mastering a few fundamental techniques will elevate your baking from good to great. Here are some essential tips for making this banana cake a success every time:
- Room Temperature is Key: Ensure your butter, eggs, and buttermilk are all at room temperature. This allows them to emulsify properly, creating a smoother, more uniform batter and a tenderer cake. Cold ingredients can cause the batter to curdle and result in a dense cake.
- Don’t Overmix the Batter: Once you add the dry ingredients to the wet, mix only until just combined. Overmixing develops the gluten in the flour, leading to a tough, dry, and chewy cake. A few lumps are perfectly fine!
- Measure Accurately: Baking is a science! Use proper measuring cups and spoons. For flour, spoon it into the measuring cup and then level it off with a straight edge (like a knife) rather than scooping directly from the bag, which can compact the flour and lead to using too much.
- Use Very Ripe Bananas: The riper your bananas are (think brown spots and soft to the touch), the sweeter and more flavorful your cake will be. They also mash more easily and incorporate better into the batter.
- Preheat Your Oven Fully: Always preheat your oven for at least 15-20 minutes before baking. A properly preheated oven ensures your cake starts baking at the correct temperature, leading to an even rise and proper texture.
- Test for Doneness: Use the toothpick test! Insert a wooden skewer into the center of the cake. If it comes out clean, your cake is done. If it comes out with wet batter, continue baking in 5-minute increments.
- Cool Completely: Resist the urge to slice into your cake immediately after it comes out of the oven. Letting it cool completely on a wire rack allows the cake to finish setting, preventing it from crumbling and improving its texture.
Essential Baking Tools
Having the right tools makes all the difference, especially for beginners. Here are some basics you’ll want to have on hand:
- Mixing Bowl (various sizes)
- Whisk (for dry ingredients)
- Baking Pan (9×13 inch or 9-inch round)
- Measuring Cups (for dry and wet ingredients)
- Measuring Spoons
- Spatula (rubber spatula for scraping and folding)
- Electric Mixer (handheld or stand mixer)
- Wire Rack (for cooling)
Nutrition Information (Approximate per serving)
Please note: This is an approximate nutritional breakdown for one serving (1/12th of a 9×13 inch cake) and can vary based on exact ingredient brands and quantities.
| Nutrient | Per Serving (approx.) |
|---|---|
| Calories | 350 kcal |
| Carbohydrates | 48g |
| Protein | 5g |
| Fat | 16g |
| Fiber | 2g |
| Sugar | 28g |
Frequently Asked Questions for Beginners
Q: What kind of bananas are best for banana cake?
A: The best bananas are those that are very ripe, with lots of brown spots or even entirely brown. They’ll be soft to the touch and easy to mash. These bananas have developed more sugar and a stronger banana flavor, which translates into a more delicious and moist cake.
Q: Can I use frozen bananas?
A: Yes, you can! If you have frozen ripe bananas, thaw them completely at room temperature or in the microwave. They will release some liquid, so drain off any excess before mashing and using them in the recipe.
Q: How do I store leftover banana cake?
A: Store your banana cake in an airtight container at room temperature for up to 3 days. For longer storage, you can refrigerate it for up to a week. You can also freeze individual slices, wrapped tightly in plastic wrap and then foil, for up to 2-3 months. Thaw at room temperature before serving.
Q: Can I make this recipe without nuts?
A: Absolutely! If you prefer a nut-free cake, simply omit the chopped walnuts or pecans from the recipe. The cake will still be wonderfully moist and flavorful. You can also substitute them with chocolate chips or shredded coconut if you like.
Q: Why is my banana cake dry or dense?
A: A dry cake is often due to overbaking or using too much flour. A dense cake can result from overmixing the batter (which develops gluten, making it tough), using cold ingredients, or not enough leavening. Make sure to measure flour correctly, avoid overmixing, and follow the baking times closely.
Q: Can I turn this into banana muffins?
A: Yes, you can! This batter works well for muffins. Line a muffin tin with paper liners and fill each about two-thirds full. Bake at 375°F (190°C) for about 18-22 minutes, or until a toothpick inserted into the center comes out clean. This recipe should yield about 18-24 muffins.
Happy Baking!
And there you have it your very own delicious, homemade Banana Cake Recipe With Nuts! We hope this detailed guide, packed with baking tips for beginners, has given you the confidence and knowledge to create a truly wonderful dessert. There’s nothing quite like the satisfaction of pulling a warm, fragrant cake from your own oven. Don’t be afraid to experiment, and remember that every baking attempt, successful or not, is a learning experience.
We’d love to see your creations! Share your photos and comments below. Happy baking, and enjoy every delightful slice!