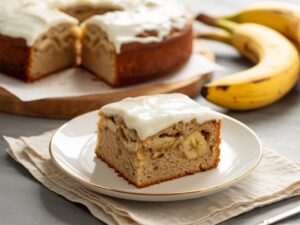
Welcome, fellow baking enthusiasts and kitchen novices! Are you ready to transform those ripe bananas sitting on your counter into something truly extraordinary? If you’ve been searching for a dessert that’s both comforting and impressive, look no further than our delightful Banana Crumb Cake Recipe. This isn’t just any banana cake; it’s a moist, tender cake crowned with a generous, buttery, cinnamon-spiced crumb topping that will make your taste buds sing!
Baking can sometimes feel intimidating, but we promise this recipe is one of the most easy baking recipes you’ll find. We’ve broken down every step with clear, simple instructions, making it perfect for anyone, especially those just starting their baking journey. Throughout this post, we’ll share essential baking tips for beginners to ensure your success. Get ready to fill your home with the irresistible aroma of freshly baked banana crumb cake!
Ingredients You’ll Need
Accuracy is your best friend in baking! Make sure to measure all ingredients carefully before you start.
For the Crumb Topping:
| Quantity | Unit | Ingredient |
|---|---|---|
| 1 | cup | All-purpose flour |
| ½ | cup | Granulated sugar |
| ¼ | cup | Packed light brown sugar |
| 1 | teaspoon | Ground cinnamon |
| 6 | tablespoons | Unsalted butter, very cold and cubed |
For the Banana Cake:
| Quantity | Unit | Ingredient |
|---|---|---|
| 1 ½ | cups | All-purpose flour |
| 1 | teaspoon | Baking soda |
| ½ | teaspoon | Salt |
| ½ | cup (1 stick) | Unsalted butter, softened to room temperature |
| ¾ | cup | Granulated sugar |
| 2 | large | Eggs, at room temperature |
| 1 | teaspoon | Vanilla extract |
| 1 ½ | cups | Mashed very ripe bananas (about 3-4 medium bananas) |
| ¼ | cup | Sour cream or plain Greek yogurt, at room temperature |
Step-by-Step Instructions for Your Banana Crumb Cake
Follow these detailed steps carefully, and you’ll be enjoying a delicious homemade banana crumb cake in no time!
Step 1: Prepare Your Pan and Oven
- Preheat Your Oven: Set your oven to 350°F (175°C). This allows the oven to reach and maintain a consistent temperature, which is crucial for even baking.
- Prepare Your Baking Pan: Lightly grease and flour a 9×9-inch square baking pan. You can also use a 9-inch round pan. To do this, rub a thin layer of butter or cooking spray all over the inside of the pan, then sprinkle a tablespoon of flour into the pan and tilt it until the flour coats all surfaces. Tap out any excess flour. This prevents the cake from sticking.
Step 2: Make the Crumb Topping
- Combine Dry Ingredients: In a medium bowl, whisk together 1 cup of all-purpose flour, ½ cup granulated sugar, ¼ cup packed light brown sugar, and 1 teaspoon of ground cinnamon. Whisking ensures all dry ingredients are evenly distributed.
- Add Cold Butter: Add the 6 tablespoons of very cold, cubed unsalted butter to the dry mixture. Beginner Tip: Using cold butter is key for a good crumb topping! It prevents the butter from melting too quickly and creates those desirable distinct crumbs.
- Form the Crumbs: Use your fingertips, a pastry blender, or a fork to cut the butter into the flour mixture. Work quickly to prevent the butter from getting too warm. Continue until the mixture resembles coarse crumbs with some pea-sized pieces. Set aside.
Step 3: Prepare the Banana Cake Batter
- Whisk Dry Ingredients: In a separate medium bowl, whisk together 1 ½ cups all-purpose flour, 1 teaspoon baking soda, and ½ teaspoon salt. Set aside. This ensures the leavening agents and salt are evenly distributed throughout the flour.
- Cream Butter and Sugar: In a large bowl (or the bowl of a stand mixer fitted with the paddle attachment), beat ½ cup (1 stick) softened unsalted butter and ¾ cup granulated sugar on medium speed until light and fluffy. This typically takes 2-3 minutes. Beginner Tip: Softened butter should be pliable but not melted. This step incorporates air, making your cake tender.
- Add Eggs and Vanilla: Add the 2 large eggs, one at a time, beating well after each addition until fully incorporated. Scrape down the sides of the bowl as needed. Stir in 1 teaspoon vanilla extract.
- Mash Bananas: In a small bowl, mash the 1 ½ cups of very ripe bananas with a fork. There should be no large chunks. Beginner Tip: The riper your bananas (think brown spots!), the sweeter and more flavorful your cake will be.
- Combine Wet and Dry: With the mixer on low speed, gradually add the dry ingredients to the wet ingredients, alternating with the mashed bananas and ¼ cup sour cream (or Greek yogurt). Start and end with the dry ingredients. For example: Add ⅓ of the flour mixture, mix until just combined, then add ½ of the mashed banana and sour cream, mix, then another ⅓ flour, then the remaining banana/sour cream, and finally the last ⅓ flour.
- Do Not Overmix: Mix only until just combined and no streaks of flour remain. Beginner Tip: Overmixing develops gluten, which can lead to a tough, dry cake. A few small lumps are okay!
Step 4: Assemble and Bake
- Pour Batter: Pour the banana cake batter evenly into your prepared 9×9-inch baking pan.
- Add Crumb Topping: Evenly sprinkle the prepared crumb topping over the cake batter.
- Bake: Place the pan in the preheated oven and bake for 40-50 minutes.
- Check for Doneness: The cake is done when a wooden skewer or toothpick inserted into the center comes out clean or with a few moist crumbs attached. If it comes out wet, continue baking for another 5-10 minutes.
- Cool the Cake: Once baked, remove the cake from the oven and let it cool in the pan on a wire rack for at least 20-30 minutes before slicing. This allows the cake to set and prevents it from crumbling when you cut it.
Step 5: Serve and Enjoy!
- Slice and Serve: Once cooled, slice your delicious Banana Crumb Cake and serve. It’s wonderful on its own, with a dusting of powdered sugar, or even a scoop of vanilla ice cream!
- Storage: Store leftover cake in an airtight container at room temperature for up to 3 days, or in the refrigerator for up to 5 days.
Tips & Tricks for a Perfect Banana Crumb Cake
Even with an easy recipe, these extra insights can elevate your baking game and ensure consistent success every time.
- Embrace the Brown Bananas: Don’t throw away those spotty, almost black bananas! They are the secret to the best banana cake. As bananas ripen, their starches convert to sugars, intensifying their flavor and sweetness.
- Room Temperature is Key: For the cake batter, ensure your butter, eggs, and sour cream are at room temperature. This allows them to emulsify better, creating a smoother, more uniform batter and a finer-crumbed cake. If you forget to take them out, place eggs in warm water for 5-10 minutes, and microwave butter for 10-15 seconds.
- Measure Flour Correctly: Don’t scoop flour directly from the bag with your measuring cup. This compacts the flour, leading to too much being used and a dry cake. Instead, use the “spoon and level” method: spoon flour into your measuring cup, then level it off with the back of a knife.
- Don’t Overmix the Batter: Once you add the dry ingredients, mix only until just combined. Overmixing develops gluten, which can make your cake tough and dense. A few small lumps of flour are better than an overmixed batter.
- Cold Butter for Crumb Topping: Just as important as room temperature ingredients for the cake, cold butter is essential for the crumb topping. It helps create those distinct, crisp, and buttery crumbs that make this cake so special.
- Patience with Cooling: Resist the urge to cut into the cake immediately after it comes out of the oven. Allowing it to cool in the pan helps it set properly, preventing it from falling apart and making for cleaner slices.
Essential Baking Tools
Having the right tools makes baking much easier and more enjoyable. Here are a few essentials you’ll want:
- Mixing Bowl
- Whisk
- Baking Pan (9×9 inch square or 9 inch round)
- Measuring Cups
- Spatula
- Electric Mixer (handheld or stand mixer)
Nutrition Information (Estimated per serving)
Please note that these values are estimates and can vary based on specific ingredients and serving sizes.
| Nutrient | Amount |
|---|---|
| Calories | ~380 kcal |
| Carbohydrates | ~55g |
| Protein | ~5g |
| Fat | ~18g |
| Fiber | ~1.5g |
| Sugar | ~35g |
Frequently Asked Questions (FAQs)
1. What if my bananas aren’t ripe enough?
If your bananas aren’t quite ripe but you’re craving this cake NOW, you have a couple of options! You can bake them: place unpeeled bananas on a baking sheet and bake at 300°F (150°C) for 15-30 minutes until their skins are black and shiny. Let them cool before mashing. This quickens the ripening process and sweetens them up!
2. Can I make this cake ahead of time?
Absolutely! This banana crumb cake is wonderful made a day in advance. Store it in an airtight container at room temperature. The flavors often deepen overnight, making it even more delicious.
3. Can I substitute sour cream with anything else?
Yes! If you don’t have sour cream, plain Greek yogurt is an excellent substitute. It adds similar moisture and a slight tang that complements the banana flavor beautifully. Buttermilk can also work in a pinch, though the texture might be slightly different.
4. How do I know when the cake is truly done?
The best way to check for doneness is the toothpick test. Insert a wooden skewer or toothpick into the very center of the cake. If it comes out clean or with a few moist crumbs attached, your cake is ready. If it’s wet with batter, bake for a few more minutes and retest.
5. My cake came out dry. What went wrong?
A dry cake is often a result of overbaking or overmixing the batter. Make sure to use the toothpick test to avoid overbaking. Also, remember to mix the wet and dry ingredients only until just combined to prevent gluten development, which can lead to a tough, dry texture.
6. Can I freeze this Banana Crumb Cake?
Yes, this cake freezes beautifully! Once completely cooled, wrap the cake (either whole or in individual slices) tightly in plastic wrap, then an additional layer of aluminum foil. Freeze for up to 2-3 months. Thaw at room temperature before serving.
Time to Bake Your Own Banana Crumb Cake!
You now have all the knowledge, tips, and step-by-step instructions needed to bake a truly spectacular Banana Crumb Cake. This recipe is a fantastic way to use up those ripe bananas and create a dessert that’s perfect for breakfast, brunch, or an afternoon treat. Don’t be afraid to get your hands a little messy and enjoy the process!
Baking is a journey, and every cake you make adds to your experience. We hope this recipe brings a little warmth and sweetness to your kitchen. Happy baking, and we can’t wait to hear about your delicious results!
“`