
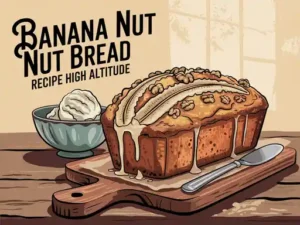
Are you living in a higher elevation and finding your baked goods falling flat, dry, or sinking in the middle? You’re not alone! Baking at altitude presents unique challenges, but it doesn’t mean you have to give up on your favorite treats. Today, we’re tackling a beloved classic with a special twist our Banana Nut Bread Recipe High Altitude. This isn’t just any recipe; it’s specifically formulated to help you achieve perfect, moist, and delicious banana bread every single time, no matter how high you are.
This guide is packed with easy baking recipes and practical baking tips for beginners, designed to demystify the science behind high-altitude adjustments. We’ll walk you through each step, ensuring you understand not just what to do, but why you’re doing it. Get ready to impress yourself and your loved ones with a loaf of homemade banana nut bread that’s golden brown, perfectly risen, and bursting with flavor. Let’s get baking!
Gather Your Ingredients: High-Altitude Friendly List
Precision is key in baking, especially at higher altitudes. Make sure to measure all your ingredients carefully. We’ve adjusted the leavening and moisture slightly for optimal results above 3,500 feet.
Dry Ingredients:
| Ingredient | Quantity |
|---|---|
| All-Purpose Flour | 1 ¾ cups (210g) |
| Granulated Sugar | ¾ cup (150g) |
| Baking Soda | ¾ teaspoon |
| Salt | ½ teaspoon |
| Ground Cinnamon (optional, but recommended!) | ½ teaspoon |
Wet Ingredients & Add-ins:
| Ingredient | Quantity |
|---|---|
| Ripe Bananas, mashed | 3 medium (about 1 ¼ cups) |
| Large Egg, lightly beaten | 1 |
| Unsalted Butter, melted and cooled | ½ cup (1 stick or 113g) |
| Buttermilk or Milk + 1 tsp Lemon Juice/Vinegar | ¼ cup |
| Vanilla Extract | 1 teaspoon |
| Chopped Walnuts or Pecans | ½ cup (plus extra for topping, optional) |
Step-by-Step Instructions: Your Path to Perfect Banana Bread
Follow these detailed steps carefully for high-altitude baking success. Remember, **patience and precise measurements** are your best friends!
Step 1: Prep Your Oven and Pan
- Preheat your oven to **375°F (190°C)**. This slightly higher temperature helps set the structure of the bread faster at altitude, preventing it from collapsing.
- Grease a 9×5-inch loaf pan with butter or non-stick cooking spray. For extra easy removal, you can also line the bottom with a strip of parchment paper, letting the ends hang over the sides like handles. This is a great **baking tip for beginners**!
Step 2: Combine the Dry Ingredients
- In a large mixing bowl, whisk together the **flour, granulated sugar, baking soda, salt, and cinnamon** (if using).
- **Beginner Tip:** When measuring flour, use the “spoon and level” method. Spoon the flour into your measuring cup until it overflows, then level it off with a straight edge (like the back of a knife). **Do not scoop the flour directly with the measuring cup** or pack it down, as this can add too much flour and result in dry bread, especially at high altitude where moisture evaporates faster.
Step 3: Prepare the Wet Ingredients
- In a separate medium bowl, mash the **ripe bananas** with a fork until mostly smooth but with a few small lumps remaining (this adds texture!).
- To the mashed bananas, add the **lightly beaten egg, melted and cooled butter, buttermilk (or milk/lemon juice mixture), and vanilla extract**.
- Whisk these wet ingredients together until well combined.
- **Alternative:** If you don’t have buttermilk, simply add 1 teaspoon of lemon juice or white vinegar to ¼ cup of regular milk and let it sit for 5 minutes before adding to the bananas. It will curdle slightly, which is exactly what you want!
Step 4: Gently Combine Wet and Dry
- Pour the wet ingredients into the bowl with the dry ingredients.
- Using a spatula, **gently fold** the ingredients together until just combined. A few streaks of flour are perfectly fine.
- **CRITICAL Beginner Tip: Do NOT overmix!** Overmixing develops the gluten in the flour, leading to a tough, chewy, and dense banana bread. For quick breads, a light hand is always best. This is even more important at high altitude as the structure needs to be tender.
Step 5: Fold in the Nuts
- Gently fold in the **chopped walnuts or pecans** until evenly distributed.
- **Alternative:** Not a fan of nuts? Simply omit them! You can also substitute with chocolate chips (½ cup) for a delicious twist.
Step 6: Bake to Golden Perfection
- Pour the batter into your prepared loaf pan. If desired, sprinkle a few extra chopped nuts on top for a nice presentation.
- Bake for **45-55 minutes**, or until a wooden skewer or toothpick inserted into the center comes out clean or with moist crumbs attached (no wet batter).
- **High-Altitude Specifics:** Because of the increased oven temperature, your bread might bake a little faster. Start checking for doneness around the 40-minute mark. If the top is browning too quickly, you can loosely tent it with aluminum foil for the remaining baking time.
- **Common Mistake Alert:** If your bread sinks in the middle, it’s often a sign of being underbaked (or sometimes over-leavened for high altitude). Ensure your toothpick test is truly clean from the center.
Step 7: Cool and Enjoy!
- Once baked, remove the loaf pan from the oven and let it cool in the pan on a wire rack for **10-15 minutes**. This crucial step allows the bread to set and prevents it from crumbling when you remove it.
- After 10-15 minutes, carefully invert the loaf onto the wire rack to cool completely.
- **Serving Suggestion:** While delicious warm, banana bread is often easier to slice and has a better texture once fully cooled. Serve plain, with a smear of butter, or even a dollop of cream cheese!
Essential Baking Tools for Success
Having the right tools makes all the difference, especially when you’re just starting out. Here are a few essentials that will make baking this Banana Nut Bread Recipe High Altitude a breeze:
- Mixing Bowl (a set with various sizes is very useful!)
- Whisk (for combining dry ingredients and wet ingredients)
- Baking Pan (a standard 9×5-inch loaf pan is perfect)
- Measuring Cups and Measuring Spoons (accuracy is paramount!)
- Spatula (for folding and scraping the bowl)
- Wire Cooling Rack (essential for even cooling)
Tips & Tricks for High-Altitude Banana Bread Perfection
Beyond the recipe, these general **baking tips for beginners** will elevate your high-altitude baking game:
- **The Bananas are Key:** For the best flavor, use **very ripe bananas**—those with lots of brown spots or even entirely black peels. They are sweeter and easier to mash. If yours aren’t ripe enough, you can bake them on a baking sheet at 300°F (150°C) for 15-30 minutes until their skins turn black.
- **Don’t Overmix (Seriously!):** We can’t stress this enough. Overmixing develops gluten, leading to a tough texture. Mix only until the ingredients are just combined.
- **Measure Flour Correctly:** As mentioned, spoon and level your flour. Compacted flour is a common culprit for dry, dense bread. For high altitude, less moisture is lost, so accurately measured flour helps maintain the right balance.
- **Understand High-Altitude Adjustments:** At higher elevations, atmospheric pressure is lower. This causes leavening agents (like baking soda) to work more efficiently, making baked goods rise faster and higher. However, without proper adjustments (like slightly less leavening, increased liquid, and a higher oven temp), this can lead to a collapsed structure, dry bread, or a gummy texture. This recipe incorporates those adjustments for you!
- **Storage:** Store your banana bread at room temperature in an airtight container for up to 3-4 days. For longer storage, wrap it tightly in plastic wrap and then foil, and freeze for up to 3 months. Thaw at room temperature.
- **Add-in Variations:** Feel free to get creative! Besides walnuts or pecans, try chocolate chips, dried cranberries, shredded coconut, or a mix of spices like nutmeg or allspice.
- **Testing for Doneness:** A toothpick test is reliable. If it comes out clean, the bread is done. If it comes out with wet batter, it needs more time. Small, moist crumbs are okay, but no liquid batter.
Nutrition Information (Estimated per serving)
This is an estimated nutritional breakdown for one slice of banana nut bread (assuming 12 servings per loaf). Actual values may vary based on exact ingredients and portion size.
| Nutrient | Amount |
|---|---|
| Calories | 280 kcal |
| Carbohydrates | 40g |
| Protein | 4g |
| Fat | 13g |
| Fiber | 2g |
| Sugar | 22g |
Frequently Asked Questions (FAQs) for Beginner Bakers
Q1: What if my bananas aren’t ripe enough?
**A:** Super ripe bananas are crucial for sweetness and moisture. If yours are still green or yellow, you can ripen them quickly! Place them on a baking sheet and bake at 300°F (150°C) for 15-30 minutes until the skins are completely black and shiny. Let them cool before mashing.
Q2: Can I make this banana bread without nuts?
**A:** Absolutely! If you’re not a fan of nuts or have allergies, simply omit them from the recipe. The bread will still be wonderfully delicious. You can also substitute with an equal amount of chocolate chips or dried fruit if you like.
Q3: How do I know if my banana bread is baked through?
**A:** The best way is to insert a wooden skewer or toothpick into the very center of the loaf. If it comes out clean or with only a few moist crumbs attached, it’s done. If there’s wet batter, continue baking for another 5-10 minutes and test again. The internal temperature should be around 200-210°F (93-99°C) if you have a thermometer.
Q4: Why did my banana bread sink in the middle?
**A:** There are a few common reasons, especially at high altitude. It’s often due to being **underbaked** (the center wasn’t fully set). It can also happen from **overmixing** the batter (which weakens the structure), or if the **leavening agents** were too much for the altitude (our recipe accounts for this, but if you used a sea-level recipe, this is a likely culprit).
Q5: How should I store leftover banana bread?
**A:** Store your banana bread in an airtight container at room temperature for up to 3-4 days. If you want to keep it longer, it freezes beautifully! Wrap individual slices or the whole loaf tightly in plastic wrap, then a layer of aluminum foil, and freeze for up to 3 months. Thaw at room temperature or warm gently in the microwave.
Happy High-Altitude Baking!
There you have it! A comprehensive, beginner-friendly guide to making the most delicious, perfectly risen, and moist Banana Nut Bread Recipe High Altitude. We hope this detailed recipe and all the accompanying tips empower you to bake with confidence, no matter your elevation.
Baking is a wonderful journey, and every loaf you bake is a step towards mastering your craft. Don’t be afraid to experiment, and most importantly, enjoy the process and the incredible aroma filling your kitchen. We’d love to hear how your banana bread turns out – share your creations and comments below!