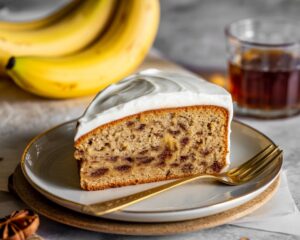
Welcome, aspiring bakers! Are you ready to whip up a dessert that tastes like a tropical vacation in every bite? This Banana Rum Cake Recipe is not just incredibly moist and flavorful, it’s also designed with you, the beginner, in mind.
Forget complicated steps and intimidating techniques; we’re breaking down everything you need to know to create a show-stopping cake with ease. If you’re looking for easy baking recipes that deliver impressive results, you’ve come to the right place. We’ll walk you through each step, share essential baking tips for beginners, and ensure your journey to baking this delightful cake is smooth, enjoyable, and ultimately, delicious!
What Makes This Banana Rum Cake So Special?
This isn’t just any banana cake; the addition of rum infuses it with a warm, complex aroma and a subtle, boozy kick that perfectly complements the sweetness of the bananas. It’s the ideal dessert for a cozy evening, a family gathering, or simply when you crave something truly comforting and extraordinary. Get ready to impress yourself and your loved ones!
Ingredients You’ll Need
Gathering your ingredients is the first step to baking success. Make sure everything is measured accurately and, for best results, at room temperature unless otherwise specified.
| Ingredient | Quantity | Unit |
|---|---|---|
| For the Cake: | ||
| All-Purpose Flour | 2 | cups |
| Granulated Sugar | 1 | cup |
| Baking Soda | 1 | teaspoon |
| Salt | ½ | teaspoon |
| Unsalted Butter, softened | ½ | cup (1 stick) |
| Large Eggs | 2 | |
| Vanilla Extract | 1 | teaspoon |
| Overripe Bananas, mashed | 3-4 (about 1 ½ cups) | medium |
| Dark Rum | ¼ | cup |
| Sour Cream or Plain Greek Yogurt | ½ | cup |
| For the Rum Glaze (Optional but Highly Recommended!): | ||
| Powdered Sugar | 1 | cup |
| Dark Rum | 2-3 | tablespoons |
| Milk (any kind) | 1-2 | tablespoons (if needed) |
Step-by-Step Instructions for Your Banana Rum Cake
Follow these detailed steps carefully, and you’ll have a perfect cake every time. Don’t rush, and enjoy the process!
Step 1: Preheat and Prep Your Pan
- Preheat your oven: Set your oven to 350°F (175°C). Getting the oven to the correct temperature before you put your cake in is crucial for even baking.
- Prepare your baking pan: Grease and flour a 9×13 inch baking pan or a 10-inch Bundt pan. To do this, rub a little butter or non-stick cooking spray all over the inside of the pan. Then, add a spoonful of flour and tilt the pan, tapping it gently, to coat the entire greased surface. Tap out any excess flour. This creates a non-stick barrier, ensuring your cake comes out easily. If you’re using a Bundt pan, pay extra attention to all the nooks and crannies!
Step 2: Combine Dry Ingredients
- In a medium-sized bowl, whisk together the all-purpose flour, granulated sugar, baking soda, and salt. Using a whisk helps distribute the baking soda and salt evenly throughout the flour, preventing pockets of unmixed ingredients. Set this bowl aside.
Step 3: Cream Butter and Sugar
- In a large mixing bowl (or the bowl of a stand mixer), add the softened unsalted butter. Use an electric mixer (handheld or stand mixer with paddle attachment) to beat the butter on medium speed for about 1 minute until it’s light and creamy.
- Gradually add the remaining granulated sugar to the butter, beating until the mixture is light and fluffy. This process, called “creaming,” incorporates air into the butter and sugar, which gives the cake a tender texture. This usually takes 2-3 minutes. Scrape down the sides of the bowl occasionally to ensure everything is well combined.
Step 4: Add Eggs and Vanilla
- Crack in one large egg at a time, beating well after each addition. Don’t add the next egg until the previous one is fully incorporated. This helps emulsify the mixture, preventing it from separating.
- Stir in the vanilla extract. Vanilla adds a beautiful depth of flavor that complements the banana and rum.
Step 5: Incorporate Bananas, Rum, and Sour Cream
- Add the mashed overripe bananas, dark rum, and sour cream (or Greek yogurt) to the wet ingredients. Mix on low speed until just combined. The mixture might look a little lumpy from the bananas – that’s perfectly normal!
Step 6: Combine Wet and Dry Ingredients
- Gradually add the dry ingredient mixture from Step 2 to the wet ingredient mixture in the large bowl. Mix on low speed, or by hand with a spatula, until just combined.
- Beginner Tip: This is where many beginners make a common mistake – do not overmix! Overmixing develops the gluten in the flour too much, resulting in a tough, dry cake. Mix only until no streaks of flour are visible. A few small lumps are better than a tough cake.
Step 7: Bake Your Cake
- Pour the cake batter evenly into your prepared baking pan. Smooth the top with a spatula.
- Bake in the preheated oven for 35-45 minutes for a 9×13 inch pan, or 50-60 minutes for a Bundt pan.
- How to check for doneness: Insert a wooden skewer or toothpick into the center of the cake. If it comes out clean or with a few moist crumbs attached, your cake is done! If it comes out wet with batter, continue baking for a few more minutes and check again.
Step 8: Cool the Cake
- Once baked, remove the cake from the oven and let it cool in the pan for about 10-15 minutes. This allows the cake to set and firm up, making it easier to remove without breaking.
- After 10-15 minutes, carefully invert the cake onto a wire rack to cool completely. Cooling on a wire rack ensures air circulates around the entire cake, preventing sogginess.
Step 9: Prepare the Rum Glaze (Optional)
- While the cake cools, prepare the glaze. In a small bowl, whisk together the powdered sugar and dark rum until smooth.
- If the glaze is too thick, add milk a teaspoon at a time until you reach your desired drizzling consistency. If it’s too thin, add a little more powdered sugar.
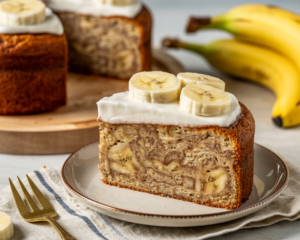
Step 10: Glaze and Serve!
- Once the cake is completely cool, drizzle the rum glaze generously over the top. The glaze will set slightly as it cools.
- Slice and serve your magnificent **Banana Rum Cake**! Enjoy the fruits (and rum!) of your labor.
Tips & Tricks for Beginner Bakers
Baking is a science, but with these simple tips, you’ll feel like a pro in no time!
- Room Temperature Ingredients are Key: Ensure your butter, eggs, and sour cream are at room temperature. This allows them to emulsify better, creating a smoother, more uniform batter and a lighter, fluffier cake. Take them out of the fridge at least 30-60 minutes before you start baking.
- Measure Accurately: Baking requires precision. Use proper measuring cups and spoons. For flour, spoon it into your measuring cup and level it off with a straight edge (like the back of a knife) rather than scooping directly from the bag, which can compact the flour and lead to too much.
- Don’t Overmix: We can’t stress this enough! Once you add the dry ingredients to the wet, mix only until just combined. Overmixing develops gluten, making your cake tough and dense.
- Ripen Bananas Faster: If your bananas aren’t quite ripe enough (you want them deeply speckled brown), you can bake them on a baking sheet at 300°F (150°C) for 15-30 minutes until their skins are black and shiny. Let them cool before mashing.
- Know Your Oven: Ovens can vary. It’s helpful to get an oven thermometer to ensure your oven is truly at the temperature you set it to. This helps prevent under or over-baking.
- Cool Completely Before Glazing: If you glaze a warm cake, the glaze will melt and soak into the cake, rather than forming a nice, even coating on top. Patience is a virtue here!
- Storage: Store your cooled and glazed cake at room temperature, covered tightly, for up to 3 days. For longer storage, you can refrigerate it for up to a week.
Essential Baking Tools
Having the right tools makes all the difference! Here are some basics you’ll want in your kitchen:
- Mixing Bowls (various sizes)
- Whisk
- 9×13 inch Baking Pan or Bundt Pan
- Measuring Cups and Spoons
- Rubber Spatula
- Electric Hand Mixer or Stand Mixer (highly recommended for creaming butter)
- Wire Rack for cooling
Nutrition Information (Estimated per Serving)
Please note: This is an estimated nutritional breakdown for one slice (assuming 12 servings from a 9×13 inch cake) and can vary based on specific ingredient brands and exact measurements.
| Nutrient | Amount |
|---|---|
| Calories | 380 kcal |
| Carbohydrates | 58 g |
| Protein | 4 g |
| Fat | 16 g |
| Fiber | 1 g |
| Sugar | 37 g |
Frequently Asked Questions (FAQs)
Q1: Can I use less rum, or omit it completely?
A: Yes, absolutely! For the cake, you can reduce the rum to 2 tablespoons for a milder flavor, or substitute it with an equal amount of milk, orange juice, or even strong brewed coffee for a different flavor profile. If omitting completely, you might add an extra teaspoon of vanilla extract or a pinch of cinnamon for more flavor. For the glaze, you can substitute rum with milk or water mixed with a dash of vanilla extract.
Q2: My bananas aren’t very ripe. Can I still use them?
A: While very ripe, spotty bananas (almost black) provide the best sweetness and moisture, you can still use slightly less ripe ones. The flavor won’t be as intense, but the cake will still be delicious. As mentioned in the tips, you can bake them in their skins at 300°F (150°C) for 15-30 minutes until they blacken, which helps ripen them faster.
Q3: How do I know if my cake is fully baked?
A: The best way is the toothpick test! Insert a wooden skewer or toothpick into the very center of the cake. If it comes out clean or with a few moist crumbs attached (not wet batter), your cake is done. If it comes out wet, continue baking in 5-minute increments and test again.
Q4: Can I make this cake ahead of time?
A: Yes, this cake is actually fantastic the next day as the flavors have more time to meld. You can bake the cake a day in advance, let it cool completely, and then glaze it just before serving, or glaze it and store it covered at room temperature.
Q5: What’s the best way to store leftover Banana Rum Cake?
A: Store leftover cake tightly covered at room temperature for up to 3 days. If you want to keep it longer, you can refrigerate it for up to a week. For maximum freshness, individual slices can also be wrapped well and frozen for up to 2-3 months. Thaw at room temperature before enjoying.
Ready to Bake Your Own Banana Rum Cake?
Congratulations, you’ve got all the tools and knowledge you need to bake a truly spectacular Banana Rum Cake! This recipe is a fantastic starting point for any beginner baker, teaching you essential techniques while delivering an incredibly satisfying dessert. Don’t be afraid to get your hands a little messy, enjoy the process, and most importantly, savor every single bite of your homemade creation.
We’d love to hear how your cake turns out! Share your experiences, ask more questions, or just tell us how much you loved it in the comments below. Happy baking!