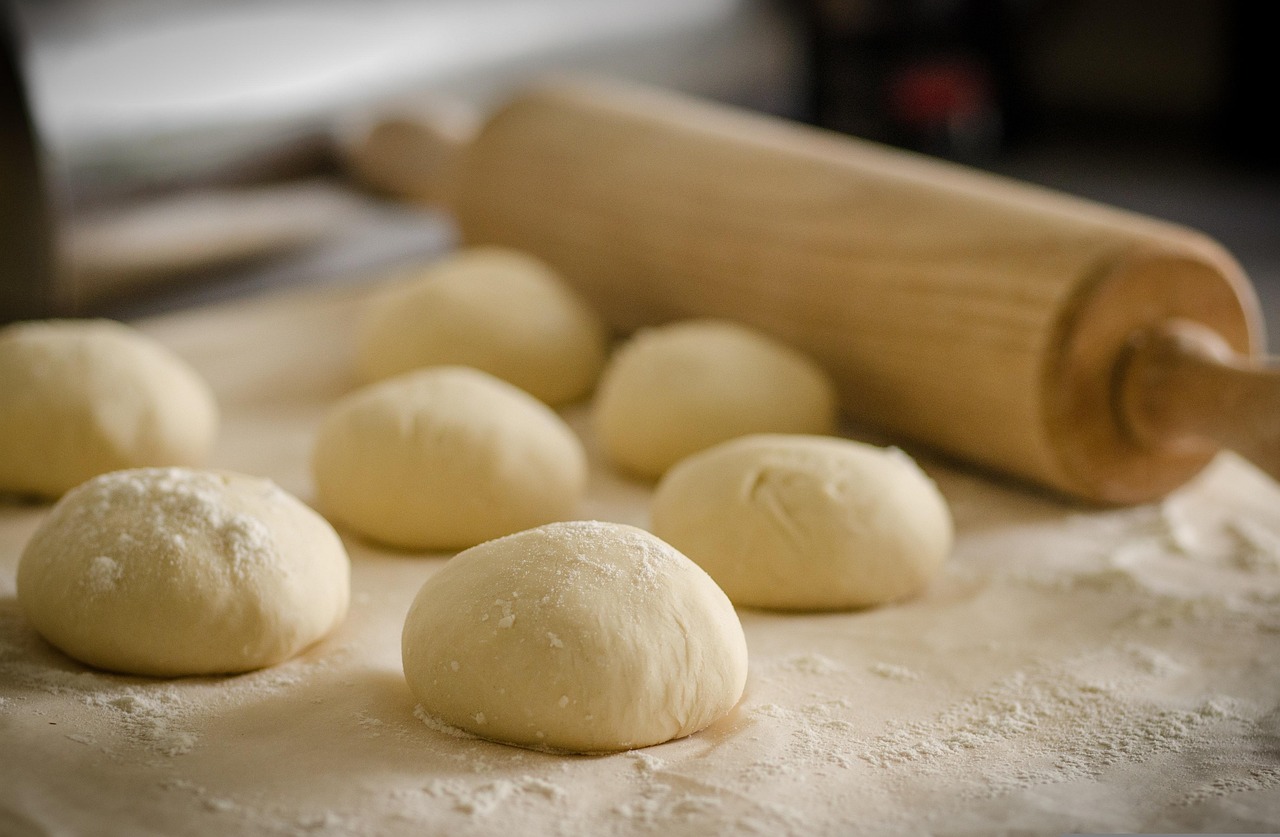
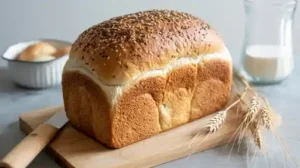
Are you new to the wonderful world of baking and looking for a recipe that’s almost impossible to mess up? Or perhaps you’re a seasoned pro searching for a surprisingly simple yet incredibly delicious treat that requires minimal effort? Look no further! This Beer Bread Recipe 4 Ingredients is about to become your new go-to. It’s hands down one of the most easy baking recipes you’ll ever encounter, requiring minimal effort but delivering maximum flavor and a delightful, rustic texture.
Perfect for absolute beginners, we’ll walk you through every single step, providing essential baking tips for beginners to ensure your first loaf (or your tenth!) turns out perfectly golden, crusty, and delightfully aromatic. Forget complicated techniques and long ingredient lists; get ready to impress yourself and your loved ones with this rustic, flavorful bread that comes together in a flash!
Ingredients List
You truly only need these four simple items to create a magical loaf of beer bread. Make sure to have them measured out and ready to go!
| Ingredient | Quantity |
|---|---|
| Self-Rising Flour | 3 cups |
| Granulated Sugar | 1/4 cup |
| Beer (any kind, not flat) | 1 (12-ounce) bottle or can |
| Unsalted Butter, melted | 1/2 cup (1 stick) |
Step-by-Step Instructions: Your Beginner-Friendly Guide
Follow these detailed steps carefully, and you’ll have a warm, crusty loaf of beer bread ready to enjoy in no time. We’ve added extra tips along the way to help you avoid common beginner mistakes!
Step 1: Preheat Your Oven and Prepare Your Pan
- Preheat your oven to 375°F (190°C). Getting your oven to the correct temperature before the bread goes in is crucial for even baking and a good rise.
- Grease a 9×5-inch loaf pan thoroughly with butter, cooking spray, or shortening. Make sure to get into all the corners and up the sides. This prevents your delicious bread from sticking!
Step 2: Combine the Dry Ingredients
- In a large mixing bowl, whisk together the 3 cups of self-rising flour and 1/4 cup of granulated sugar. Whisking ensures they are evenly distributed.
- Beginner Tip: No self-rising flour? No problem! You can easily make your own. For this recipe, in a separate bowl, whisk together 3 cups of all-purpose flour, 4 ½ teaspoons of baking powder, and 1 ½ teaspoons of salt. Then proceed with the recipe.
Step 3: Add the Beer
- Pour the entire 12-ounce bottle or can of beer into the bowl with your dry ingredients.
- Beginner Tip: Choosing your beer! The type of beer you use will subtly influence the flavor of your bread. Lighter lagers or pilsners will result in a milder, slightly sweet flavor. Amber ales add a bit more malty depth. Dark stouts or porters will yield a very robust, almost savory bread with deeper caramel notes. For your first time, a basic lager or amber ale is a great choice! Ensure the beer is not flat; fresh carbonation helps with the bread’s rise.
Step 4: Mix Gently – Do NOT Overmix!
- Using a spatula or a wooden spoon, gently mix the ingredients together just until they are combined. The batter will be thick and shaggy.
- Critical Beginner Tip: This is the most important step for tender bread! Do NOT overmix! Overmixing develops gluten in the flour, which will make your beer bread tough and chewy instead of light and fluffy. A few lumps are perfectly normal and desired, so resist the urge to keep stirring until it’s perfectly smooth. Stop mixing as soon as you no longer see streaks of dry flour.
Step 5: Transfer to the Pan and Add the Butter
- Pour or spoon the bread batter into your prepared 9×5-inch loaf pan, spreading it out evenly with your spatula.
- Evenly drizzle the 1/2 cup of melted unsalted butter over the top of the batter in the pan. Don’t skip this step! The butter seeps into the top layer of the bread as it bakes, creating an incredibly rich, golden-brown, crispy crust that is absolutely irresistible.
Step 6: Bake to Golden Perfection
- Place the loaf pan into your preheated oven.
- Bake for 45-55 minutes. Baking times can vary slightly depending on your oven, so keep an eye on it.
- Beginner Tip: How to tell if it’s done! The bread should be beautifully golden brown on top, and the crust should look well-formed. To be sure, insert a toothpick into the center of the loaf. If it comes out clean (no wet batter attached), your bread is done! If it’s still gooey, bake for another 5-10 minutes and test again.
Step 7: Cool and Serve
- Once baked, carefully remove the loaf pan from the oven.
- Let the bread cool in the pan on a wire rack for about 10-15 minutes. This allows the bread to set and makes it easier to remove without breaking.
- After 10-15 minutes, carefully invert the pan to remove the loaf and place it directly onto the wire rack to cool completely.
- Beginner Tip: Patience is key! While it’s tempting to slice into a warm loaf immediately, allowing it to cool completely (or at least mostly) results in a much better texture and easier slicing.
- Once cooled to your liking, slice and enjoy your homemade beer bread! It’s fantastic warm with a pat of butter, alongside a hearty soup, or as a side for any meal.
Tips & Tricks for Your Best Beer Bread
Elevate your beer bread game with these actionable tips and advice, perfect for anyone looking to master this simple recipe!
- Experiment with Beer Types: Don’t be afraid to try different beers! As mentioned, lighter beers like lagers or pilsners create a milder bread, while darker beers like stouts or porters will give you a richer, more malty, and sometimes slightly bitter flavor. Amber ales offer a nice middle ground. Each beer tells a different story in your bread!
- Never Overmix: We can’t stress this enough! Overmixing is the number one culprit for tough, dense bread. Mix only until the dry ingredients are just incorporated. A few lumps are perfectly fine and indicate a tender crumb to come.
- Get Creative with Add-Ins: This 4-ingredient recipe is a perfect base for customization. Stir in 1/2 cup of shredded sharp cheddar cheese, a sprinkle of dried herbs like rosemary or thyme (about 1-2 teaspoons), a teaspoon of garlic powder, or even some chopped jalapeños for a spicy kick. Add these with your dry ingredients before the beer.
- Make Your Own Self-Rising Flour: If self-rising flour isn’t a pantry staple for you, it’s incredibly easy to make. For every cup of all-purpose flour, whisk in 1 ½ teaspoons of baking powder and ½ teaspoon of salt. For this recipe, that would be 4 ½ teaspoons of baking powder and 1 ½ teaspoons of salt added to 3 cups of all-purpose flour.
- Storage is Simple: Store leftover beer bread tightly wrapped in plastic wrap or in an airtight container at room temperature for up to 3-4 days. For longer enjoyment, slices can be individually wrapped and frozen for up to 3 months. Thaw at room temperature or gently warm in the oven.
- Serving Suggestions Galore: This bread is incredibly versatile. Serve it warm with butter, alongside a hearty bowl of chili, stew, or soup. It’s also fantastic with grilled meats, as a base for open-faced sandwiches, or simply toasted for breakfast.
Essential Baking Tools
You don’t need much to make this recipe, but having these basic tools will make your baking experience smooth and enjoyable:
- Mixing Bowl (large enough for all ingredients)
- Whisk (for dry ingredients)
- Baking Pan (9×5 inch loaf pan is ideal)
- Measuring Cups (for flour and sugar)
- Spatula (for mixing and spreading batter)
Nutrition Information (Estimated per slice)
Please note: These values are approximate and can vary based on specific ingredients (e.g., type of beer, brand of flour) and the number of slices you cut from your loaf (typically 12-16 slices).
| Nutrient | Amount |
|---|---|
| Calories | ~220-250 kcal |
| Carbohydrates | ~35-40 g |
| Protein | ~4-5 g |
| Fat | ~8-12 g |
| Fiber | ~1-2 g |
| Sugar | ~5-8 g |
Frequently Asked Questions (FAQs)
Q1: Can I use non-alcoholic beer for this recipe?
A: Yes, absolutely! The alcohol content in beer bakes out during the cooking process. Non-alcoholic beer will still provide the necessary liquid, flavor notes, and carbonation (which aids in leavening) to make a delicious loaf of beer bread.
Q2: What if I don’t have self-rising flour?
A: No problem at all! You can easily make your own self-rising flour. For this recipe (using 3 cups of flour), simply whisk together 3 cups of all-purpose flour with 4 ½ teaspoons of baking powder and 1 ½ teaspoons of salt. Then proceed with the recipe as written.
Q3: Can I add other ingredients to my beer bread?
A: Definitely! This recipe is a fantastic base for customization. Common and delicious additions include 1/2 cup of shredded cheddar cheese, 1-2 teaspoons of dried herbs (like rosemary or thyme), a teaspoon of garlic powder, or even some chopped jalapeños for a spicy kick. Stir these into the dry ingredients before adding the beer.
Q4: How do I know when my beer bread is done baking?
A: Your beer bread is done when it’s beautifully golden brown on top and a toothpick inserted into the center comes out clean, without any wet batter attached. The internal temperature should register between 200-210°F (93-99°C).
Q5: Why is my beer bread dense or tough?
A: The most common reason for dense or tough beer bread is overmixing the batter. When you overmix, you develop the gluten in the flour too much, leading to a chewy, heavy texture. Remember to mix just until the flour is incorporated, and a few lumps are perfectly normal.
Q6: How should I store leftover beer bread?
A: Store leftover beer bread tightly wrapped in plastic wrap or in an airtight container at room temperature for up to 3-4 days to maintain its freshness. For longer storage, you can freeze individual slices or the whole loaf for up to 3 months. Just thaw at room temperature or gently warm in the oven when you’re ready to enjoy it again!
Conclusion
And there you have it – a truly remarkable and incredibly simple Beer Bread Recipe 4 Ingredients! This recipe proves that you don’t need a pantry full of exotic ingredients or hours of experience to create something truly delicious and satisfying. Whether you’re just starting your baking journey or looking for a quick win, this beer bread is a guaranteed success. It fills your home with an amazing aroma and your belly with comforting goodness.
So go ahead, grab your ingredients, and bake up a loaf of pure comfort. Don’t forget to share your creations and tell us what you think in the comments below! Happy baking!