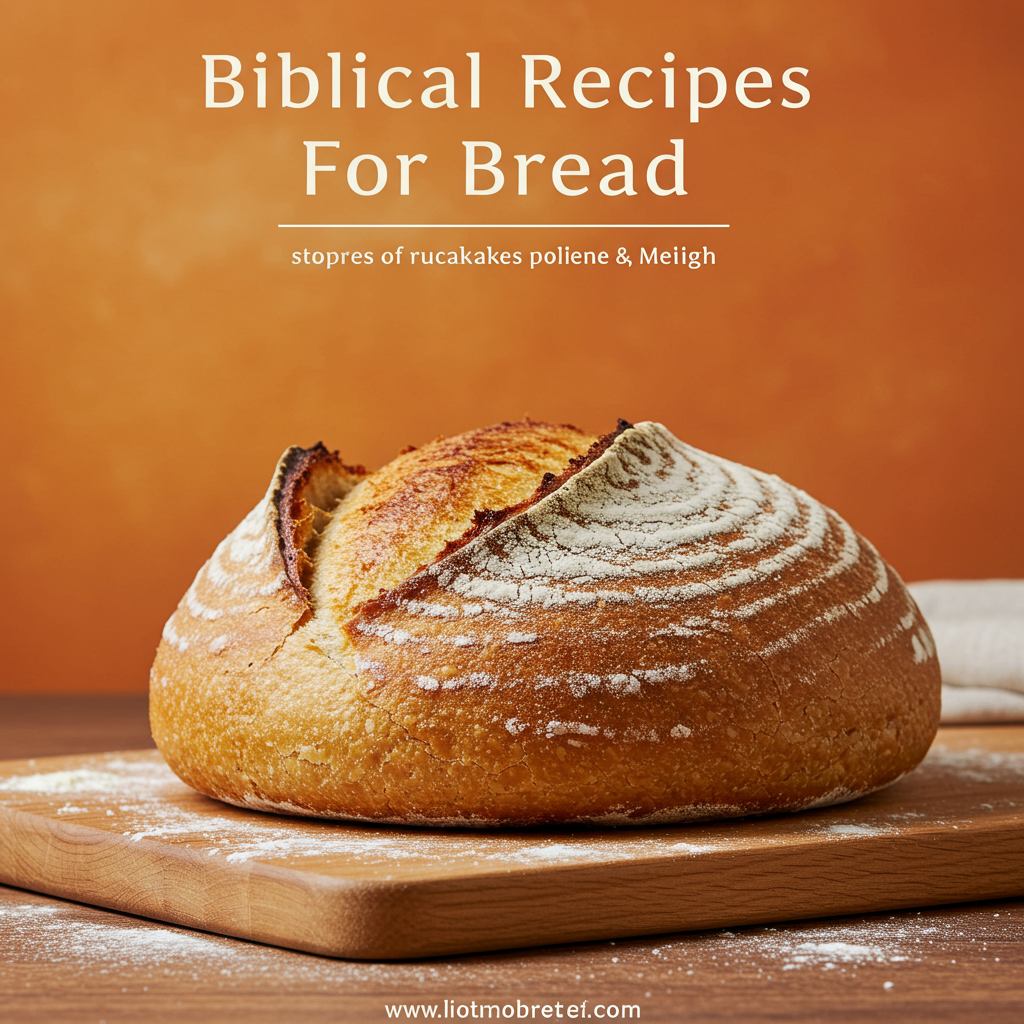
Biblical Recipes For Bread: Simple Whole Wheat Peasant Loaf
Ever wondered what it was like to bake bread in ancient times? Imagine a time when bread was the staff of life, made with simple ingredients and a deep reverence for the process. Today, we’re going to journey back in time with one of our favorite **Biblical Recipes For Bread**: a wonderfully rustic and incredibly satisfying Simple Whole Wheat Peasant Loaf. This isn’t just about making bread; it’s about connecting with a timeless tradition, a practice that sustained communities for millennia. Don’t worry if you’re new to the kitchen; this is one of those truly **easy baking recipes** designed specifically with **baking tips for beginners** in mind. We’ll walk you through every step, ensuring your first homemade loaf is a resounding success. Get ready to fill your home with the incredible aroma of freshly baked bread!
Ingredients for Your Ancient Loaf
Keeping true to the spirit of simple, wholesome ingredients, here’s what you’ll need for this rustic bread. We recommend using a kitchen scale for the most accurate results, but cup measurements are also provided.
| Ingredient | Quantity | Unit |
|---|---|---|
| Warm Water | 1 | cup (240ml) |
| Active Dry Yeast | 1 | teaspoon |
| Whole Wheat Flour | 3 | cups (approx. 360g) |
| Fine Sea Salt | 1 | teaspoon |
| Olive Oil (optional) | 1 | tablespoon (for greasing bowl) |
Step-by-Step Instructions: Baking Your Biblical Bread
Follow these detailed steps, and you’ll be pulling a beautiful, fragrant loaf from your oven in no time. Take your time, enjoy the process, and don’t be afraid to get a little flour on your hands!
1. Activate the Yeast
In a large mixing bowl, combine the **warm water** (it should feel like a warm bath, around 105-115°F or 40-46°C – too hot will kill the yeast, too cold won’t activate it) with the **active dry yeast**. Stir gently and let it sit for 5-10 minutes. You should see a foamy layer form on top, which indicates your yeast is alive and ready to work! If it doesn’t foam, your water might have been too hot or too cold, or your yeast might be old. In this case, it’s best to start again with fresh yeast and check your water temperature.
2. Mix the Dough
To the foamy yeast mixture, add the **whole wheat flour** and **fine sea salt**. Using a sturdy spoon or a dough whisk, mix everything together until a shaggy, somewhat sticky dough forms. Don’t worry if it looks a bit rough; we’re aiming for rustic! If the dough seems too dry, add a tiny bit more water (a teaspoon at a time). If it’s too wet, add a sprinkle of flour. The goal is a dough that comes together but is still soft and pliable.
Beginner Tip: Resist the urge to add too much flour! A slightly stickier dough often results in a more tender crumb. Whole wheat flour absorbs water differently than white flour, so its texture can be a bit denser.
3. Knead (Lightly) the Dough
Turn the dough out onto a lightly floured surface. Knead for about 5-7 minutes. For this peasant bread, you don’t need a vigorous, long knead. Simply fold the dough over itself, press down with the heel of your hand, rotate, and repeat. You’re looking for the dough to become smoother and more elastic. It should spring back slowly when poked. If you prefer a no-knead method, you can skip this step and just ensure the ingredients are well combined, then proceed to the first rise (though the texture might be slightly different).
Common Mistake: Over-kneading whole wheat dough can make it tough. A gentle, short knead is perfect here.
4. The First Rise (Bulk Fermentation)
Lightly grease a large bowl with a little **olive oil**. Place your dough in the bowl, turning it once to coat the top. Cover the bowl with plastic wrap or a clean kitchen towel. Place it in a warm, draft-free spot for 1 to 1.5 hours, or until the dough has roughly doubled in size. A warm oven (turned off, with just the light on) or a sunny spot on your counter works well.
Beginner Tip: Patience is key! Don’t rush this step. The yeast needs time to work its magic, creating air bubbles that give your bread its structure. If your kitchen is cool, it might take a bit longer.
5. Shape Your Loaf
Once doubled, gently punch down the dough to release the air. Turn it out onto a lightly floured surface. For a rustic peasant loaf, a simple round or oval shape works beautifully. Gently shape it into your desired form. Avoid pressing out all the air; you want to maintain some of those lovely bubbles.
Alternative: You can place the shaped dough into a proofing basket (banneton) if you have one, or directly onto a baking sheet lined with parchment paper.
6. The Second Rise (Proofing)
Place your shaped loaf onto a baking sheet lined with parchment paper (or into your proofing basket). Cover it loosely again with plastic wrap or a kitchen towel. Let it rise in a warm place for another 30-45 minutes, or until it looks visibly puffier. This is the final rise, often called “proofing.”
7. Preheat and Bake
About 20 minutes before the second rise is complete, preheat your oven to 425°F (220°C). If you want a crispier crust, you can place a shallow pan of water on the bottom rack of your oven while it preheats to create steam. Once your oven is preheated and your dough has proofed, you can optionally score the top of your loaf with a sharp knife or razor blade (just a few shallow cuts) – this helps control where the bread expands.
Bake for 25-35 minutes, or until the crust is golden brown and the internal temperature reaches 200-210°F (93-99°C). If it’s browning too quickly, you can loosely tent it with aluminum foil.
Common Mistake: Opening the oven door too often during the first 15-20 minutes can cause the bread to deflate. Let it bake undisturbed!
8. Cooling is Crucial!
Once baked, immediately transfer the bread to a wire rack. This allows air to circulate around the entire loaf, preventing the bottom from becoming soggy. **Resist the urge to cut into it right away!** Let it cool completely for at least 1-2 hours. Slicing hot bread can result in a gummy texture inside because the starches are still setting.
Congratulations! You’ve just baked your own delicious, simple, and wholesome bread. Enjoy the fruit of your labor!
Tips & Tricks for Beginner Bakers
Embarking on your bread-making journey is exciting, and these extra tips will help ensure your success and make the process even more enjoyable:
- Use a Kitchen Scale: While cup measurements are provided, a kitchen scale offers far more accuracy, especially with flour. Consistent measurements lead to consistent results.
- Temperature Matters: Always check your water temperature for yeast activation. Too hot kills it, too cold slows it down. A thermometer is a small investment that makes a big difference.
- Warm Rising Environment: Yeast loves warmth! A slightly warm, draft-free spot is ideal for rising. If your kitchen is cold, try turning your oven on for a few minutes, then turning it off and placing the dough inside with the door ajar.
- Don’t Be Afraid of Stickiness: Whole wheat dough can be a bit stickier than white flour dough. Resist the urge to add too much extra flour during kneading or shaping, as this can lead to a dry, dense loaf. A light dusting is usually enough.
- Listen to Your Dough: Dough doesn’t always follow exact timings. Instead of rigidly sticking to the clock, observe your dough. Has it doubled in size? Does it feel light and airy? These visual and tactile cues are often more reliable than a timer.
- Cool Completely: We know it’s hard, but letting your bread cool fully on a wire rack is vital. This allows the internal structure to set, preventing a gummy texture and ensuring the best flavor.
- Embrace Imperfection: Your first loaf might not be picture-perfect, and that’s perfectly okay! Every loaf is a learning experience. The beauty of homemade bread lies in its unique, rustic character.
Essential Baking Tools for Success
Having the right tools can make your baking experience smoother and more enjoyable. Here are some essentials:
- Mixing Bowl
- Whisk (or sturdy spoon)
- Baking Pan (or baking sheet)
- Measuring Cups & Measuring Spoons
- Spatula (or dough scraper)
- Kitchen Scale (highly recommended for accuracy)
- Instant-Read Thermometer (for water and internal bread temp)
Nutrition Information (per 1/12th of loaf, estimated)
Please note: These are estimated values and can vary based on exact ingredient brands and preparation.
| Nutrient | Amount |
|---|---|
| Calories | 160 kcal |
| Carbohydrates | 32 g |
| Protein | 6 g |
| Fat | 2 g |
| Fiber | 4 g |
| Sugar | 1 g |
Frequently Asked Questions for Beginner Bakers
Q: My yeast didn’t get foamy. What went wrong?
A: The most common reasons are that your water was either too hot (which kills the yeast) or too cold (which keeps it dormant). Ensure your water is between 105-115°F (40-46°C). Also, check the expiration date on your yeast; old yeast loses its potency. It’s always best to start with fresh, properly activated yeast.
Q: My dough isn’t rising. What should I do?
A: This usually points back to inactive yeast or a too-cold environment. First, ensure your yeast was active (foamy). If it was, try moving your dough to a warmer spot. A warm oven (turned off, with just the light on) or placing the bowl in a larger bowl of warm water can help. Be patient; cooler temperatures just mean a slower rise.
Q: Can I use all-purpose flour instead of whole wheat?
A: Yes, you can! The texture will be lighter and less dense. You might need to adjust the water slightly, as all-purpose flour absorbs liquid differently. Start with the same amount of water and add more a teaspoon at a time if the dough is too dry, or a tablespoon more flour if it’s too wet.
Q: How should I store my homemade bread?
A: Once completely cooled, store your bread at room temperature in an airtight container, a bread box, or a paper bag inside a plastic bag to maintain a good crust while keeping the interior soft. It’s best enjoyed within 2-3 days. For longer storage, slice the loaf and freeze it in an airtight freezer bag for up to 3 months. You can then toast slices directly from frozen.
Q: Why is my bread dense and heavy?
A: Several factors can contribute to dense bread: inactive yeast, not enough rising time (especially the first rise), too much flour added during mixing or kneading, or over-kneading whole wheat flour. Review the steps, particularly yeast activation and rise times, and try to handle the dough gently.
Q: Was “Biblical” bread always leavened with yeast?
A: Not always! While yeast (sourdough starter was common) was known and used, unleavened bread (matzah) was also very common, especially during festivals like Passover. This recipe uses yeast for a softer, more familiar texture, but you can explore unleavened flatbreads if you want to experience that simpler, more ancient form of bread.
Embrace Your Inner Baker!
There’s a profound satisfaction that comes from baking your own bread, especially when it connects you to such ancient traditions. This **Biblical Recipes For Bread** is more than just a recipe; it’s an invitation to slow down, create something nourishing with your own hands, and fill your home with an aroma that has comforted humanity for millennia. Don’t be discouraged by minor setbacks; every baker, no matter how experienced, has had an “off” loaf. The journey of baking is one of continuous learning and delicious discovery.
We hope this detailed, beginner-friendly guide has given you the confidence to dive into the wonderful world of bread making. Share your creations, experiment with different flours or seeds, and most importantly, enjoy every single bite of your homemade Simple Whole Wheat Peasant Loaf. Happy baking!
“`