Welcome, aspiring bird bakers! Are you looking for a fun, rewarding project that brings nature right to your backyard? Our Bird Seed Cake Recipe is the perfect place to start! This isn’t just any recipe; it’s one of the most easy baking recipes you can tackle, even if you’ve never baked a day in your life. Forget complicated steps and tricky techniques we’re going to guide you through creating a delicious and nutritious treat that your local feathered friends will absolutely adore.
This beginner-friendly guide is packed with all the baking tips for beginners you’ll need to succeed. We’ll cover everything from simple ingredients to common mistakes to avoid, ensuring your first bird seed cake is a resounding success. Get ready to mix, mold, and marvel as you provide a vital food source, especially during colder months or breeding season. Let’s make some happy birds!
Ingredients You’ll Need
Gathering your ingredients is the first exciting step! For this recipe, we’re focusing on bird-safe and readily available items. Remember, always use unsalted and unroasted ingredients when preparing food for birds.
| Ingredient | Quantity | Unit |
|---|---|---|
| Unsalted Peanut Butter (smooth or crunchy) | 1 | cup |
| Rendered Suet or Lard (melted, cooled slightly) | 1 | cup |
| Mixed Bird Seed (high quality, no fillers) | 3 | cups |
| Cornmeal | 1/2 | cup |
| All-Purpose Flour (optional, for extra binding) | 1/4 | cup |
| Oats (rolled or quick-cooking) | 1/2 | cup |
| Warm Water or Low-Sodium Chicken Broth (optional, for consistency) | 1/4 – 1/2 | cup |
Step-by-Step Instructions: Creating Your Bird Seed Cake
Ready to get your hands a little messy (in a fun way)? Follow these detailed steps to create your perfect bird seed cake. Don’t worry, we’ll walk you through every part!
-
Prepare Your Binding Agents:
First, we need to get our sticky ingredients ready. In a large, microwave-safe mixing bowl, combine the **unsalted peanut butter** and the **rendered suet or lard**. If you don’t have rendered suet, solid vegetable shortening can be a substitute, but suet is more nutritious for birds. Microwave the mixture for 30-60 seconds on medium heat, or gently melt it in a saucepan over low heat on the stove. You want it warm enough to be liquid and easily mixable, but not boiling hot. Stir well until completely combined and smooth. Let it cool for a few minutes so it’s warm but not scalding – this helps prevent cooking the birdseed.
Beginner Tip: Always use unsalted peanut butter! Salt is harmful to birds. If you’re unsure about suet, many grocery stores sell it pre-packaged for birds, or you can ask a butcher for beef fat to render yourself.
-
Combine Dry Ingredients:
While your binding agents are cooling slightly, measure out your dry ingredients. In a separate large bowl, thoroughly mix the **mixed bird seed**, **cornmeal**, **all-purpose flour** (if using), and **oats**. The flour helps absorb excess moisture and adds to the binding. Cornmeal and oats are great sources of energy for birds.
Beginner Tip: Using a high-quality bird seed mix will attract a wider variety of birds. Avoid mixes with too many ‘filler’ seeds like red milo, which many backyard birds don’t prefer.
-
Mix Wet and Dry:
Now for the fun part! Pour the slightly cooled peanut butter and suet mixture into the bowl with your dry ingredients. Using a sturdy spoon, spatula, or even your clean hands (which is often the most effective way!), mix everything together until the dry ingredients are completely coated and moistened by the sticky fats. This might take a few minutes of good stirring and mashing.
Common Mistake & Fix: If the mixture seems too dry and crumbly to hold together, add the **warm water or low-sodium chicken broth** a tablespoon at a time. Mix thoroughly after each addition until the mixture just comes together and can be pressed into a cohesive ball. Don’t add too much, or it will be too soft and won’t hold its shape when it cools.
-
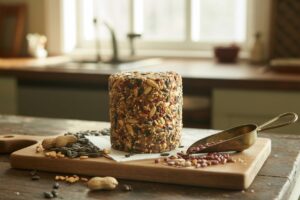
Shape Your Bird Seed Cakes:
Once your mixture is well combined and sticky, it’s time to shape it! You have a few options:
- Muffin Tins: Line muffin tins with paper liners or lightly grease them. Press the mixture firmly into each cup.
- Cookie Cutters: Press the mixture into large cookie cutters placed on a parchment-lined baking sheet.
- Small Baking Pan: Press the mixture firmly into a small baking pan (like an 8×8 inch pan) lined with parchment paper.
- Natural Shapes: Simply form the mixture into balls or logs with your hands.
The key is to **press the mixture down as firmly as possible** to ensure it holds its shape once cooled. If you want to hang your cakes, you can insert a loop of twine or a pipe cleaner into the center of each cake while it’s still soft.
Beginner Tip: If using a baking pan, lining it with parchment paper will make removal much easier once the cake is firm. For smaller cakes, muffin tins are incredibly convenient!
-
Chill and Set:
Place your shaped bird seed cakes into the refrigerator for at least **2-4 hours**, or ideally overnight. The cold will solidify the peanut butter and suet, making your cakes firm and sturdy enough to handle and hang. Don’t rush this step – proper chilling is crucial for the cake to hold its shape when exposed to outdoor temperatures.
-
Serve and Enjoy the Show!:
Once firm, carefully remove your bird seed cakes from their molds or pan. If you made a large cake in a pan, you can cut it into smaller squares or bars. Hang them from sturdy branches, place them on platform feeders, or secure them in suet cages. Then, step back and watch as your feathered friends discover their delicious new treat! You’ll be amazed at how quickly they find it.
Beginner Tip: Place feeders in a location visible from a window so you can enjoy watching the birds without disturbing them. Also, keep feeders clean and replenish as needed.
Pro Tips & Tricks for the Best Bird Seed Cake
Making bird seed cakes is wonderfully simple, but a few extra tips can elevate your creations and make them even more appealing to your backyard visitors.
Firstly, consistency is key. The mixture should be firm enough to hold its shape when pressed, but not so dry that it crumbles apart. If it’s too sticky, add a little more cornmeal or flour. If it’s too dry, a tiny splash of warm water or broth can help. Don’t be afraid to adjust as you go! Secondly, storage matters. These cakes are best stored in an airtight container in the refrigerator or freezer until ready for use. This prevents them from spoiling and keeps them firm, especially in warmer weather. They can last for several weeks in the fridge and a few months in the freezer.
Consider variations to attract different birds. Adding dried fruits (like chopped raisins or cranberries, ensuring they are unsweetened and sulfur-dioxide-free) can attract fruit-eating birds. Chopped nuts (unsalted, raw) are a favorite for woodpeckers and jays. You can also mix in different types of seeds, such as black oil sunflower seeds, nyjer seeds, or safflower for specific bird preferences. Always ensure any additions are safe for birds.
Finally, placement of your feeders can make a big difference. Hang cakes near protective cover like trees or shrubs, but far enough away that predators can’t easily ambush birds. Ensure feeders are accessible for refilling and cleaning, and try to place them where you can easily observe the birds from a window. Enjoy the process of connecting with nature!
Essential Tools for Your Bird Seed Cake Adventure
You don’t need a fancy kitchen to make these delightful cakes. Here are a few basic tools that will make the process even easier:
- Mixing Bowl
- Whisk (or sturdy spoon/spatula)
- Baking Pan (or muffin tins/cookie cutters)
- Measuring Cups
- Spatula
Nutritional Information (Approximate Per Serving for Birds)
While exact nutritional content can vary based on your specific ingredients and ratios, here’s an approximate breakdown to give you an idea of the goodness your birds are getting. This is designed for bird consumption, not human.
| Nutrient | Amount |
|---|---|
| Calories | High (energy-dense) |
| Carbohydrates | Moderate-High |
| Protein | Moderate |
| Fat | High (essential for energy) |
| Fiber | Moderate |
| Sugar | Low (naturally occurring) |
Frequently Asked Questions (FAQs)
Q: How long do bird seed cakes last?
A: When stored properly in an airtight container, these cakes can last for 2-3 weeks in the refrigerator and up to 3-4 months in the freezer. Once placed outdoors, their longevity depends on the weather. In cooler temperatures, they can last for several days or even a week. In hot, humid weather, they might only last a day or two before potentially spoiling or becoming too soft. Always check for mold or rancidity before refilling.
Q: Can I use different types of fat or binder?
A: Yes, you can! Besides suet, lard, or unsalted peanut butter, you can use solid vegetable shortening (like Crisco), unsalted almond butter, or even bacon grease (ensure it’s cooled and solidified, and use sparingly as it can be very salty, though rendered fat often has less salt). The key is to use a fat that solidifies at cooler temperatures to hold the cake together.
Q: What if my bird seed cake crumbles easily?
A: This usually means there wasn’t enough binding agent or it wasn’t pressed firmly enough. Next time, try adding a little more melted peanut butter or suet, or a touch more flour/cornmeal to help absorb excess moisture. Ensure you’re really packing the mixture tightly into your molds or pan before chilling. And don’t skimp on the chilling time – it’s crucial for firmness!
Q: Are all bird seeds safe for birds?
A: Most commercial bird seed mixes are safe, but it’s important to choose high-quality mixes without fillers like red milo, which many birds ignore. Avoid any seeds that are salted, roasted, or contain artificial colors or flavors. Never use avocado, chocolate, coffee grounds, or fruit pits, as these are toxic to birds.
Q: Can kids help make this recipe?
A: Absolutely! This is a fantastic, kid-friendly project. Children can help measure ingredients, mix (especially with their hands!), and press the mixture into molds. Just be sure to supervise them with any melting steps and explain why certain ingredients (like unsalted peanut butter) are important for bird safety.
Happy Baking (for Your Birds)!
And there you have it! Your very own homemade Bird Seed Cake, ready to bring joy to your backyard and provide much-needed nourishment for your local birds. This Bird Seed Cake Recipe is more than just a treat; it’s a small act of kindness that connects you with nature. Don’t be afraid to experiment with different bird-safe additions or shapes in future batches.
We hope you found these baking tips for beginners helpful and feel confident in your bird-baking abilities. Get ready to enjoy the delightful sights and sounds of happy birds flocking to your feeder. Happy bird-watching, and don’t forget to share your bird seed cake creations with us!