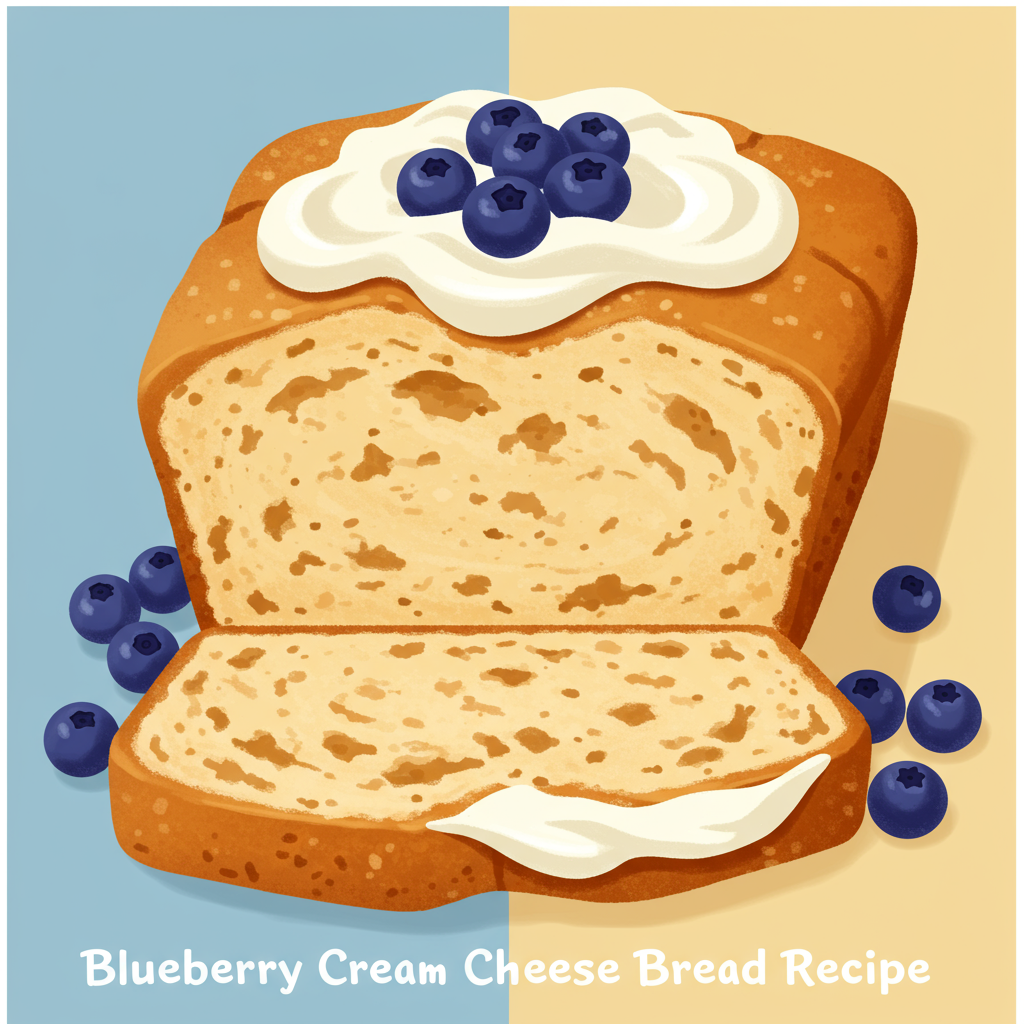
Welcome, aspiring bakers and seasoned pros alike! If you’re looking for a delightful treat that perfectly balances sweet, tangy, and utterly comforting, you’ve landed on the right page. This Blueberry Cream Cheese Bread Recipe is not just incredibly delicious; it’s also one of the most easy baking recipes you’ll encounter, making it absolutely perfect for anyone diving into the wonderful world of baking. We’ve packed this post with detailed instructions and essential baking tips for beginners to ensure your first (or fiftieth!) loaf comes out perfectly golden, moist, and bursting with flavor. Get ready to impress yourself and your loved ones with this irresistible creation!
Imagine a tender, vanilla-scented bread studded with juicy blueberries, swirled with a creamy, tangy cream cheese filling, and topped with a delicate, sweet glaze. Sounds amazing, right? This recipe breaks down every step into simple, manageable tasks, so even if you’ve never baked before, you’ll feel confident and capable. Let’s gather our ingredients and get ready to create some kitchen magic!
Gather Your Ingredients: What You’ll Need
Having all your ingredients measured and ready before you start (this is called “mise en place”!) will make the baking process much smoother and more enjoyable. Here’s what you’ll need for your delicious Blueberry Cream Cheese Bread:
| Quantity | Unit | Ingredient |
|---|---|---|
| 2 | cups | All-Purpose Flour |
| 1 | tablespoon | Baking Powder |
| ½ | teaspoon | Salt |
| ¾ | cup | Granulated Sugar |
| ½ | cup | Unsalted Butter, melted and cooled slightly |
| 2 | large | Eggs, room temperature |
| 1 | teaspoon | Vanilla Extract |
| ½ | cup | Milk (whole or 2%), room temperature |
| 1 ½ | cups | Fresh or Frozen Blueberries (do not thaw if frozen) |
| 1 | tablespoon | All-Purpose Flour (for tossing with blueberries) |
| 8 | ounces | Cream Cheese, softened |
| ¼ | cup | Granulated Sugar |
| 1 | large | Egg Yolk |
| ½ | teaspoon | Vanilla Extract |
| 1 | cup | Powdered Sugar (Confectioners’ Sugar) |
| 2-3 | tablespoons | Milk or Lemon Juice |
| ¼ | teaspoon | Vanilla Extract |
Step-by-Step Instructions: Baking Your Blueberry Cream Cheese Bread
Follow these detailed steps carefully, and you’ll be enjoying a slice of homemade heaven in no time. Remember, baking is a science, so precise measurements and following the order of operations are key for beginners!

Step 1: Prepare Your Pan and Oven
- Preheat Your Oven: Adjust your oven rack to the middle position and preheat your oven to 350°F (175°C). An oven thermometer is a great tool for beginners to ensure your oven is truly at the correct temperature.
- Prepare Your Loaf Pan: Grease a 9×5-inch loaf pan generously with butter or non-stick cooking spray. For easy removal, you can also line the pan with parchment paper, leaving an overhang on the longer sides. This creates “handles” to lift the baked bread out.
Step 2: Prepare the Blueberries
- Toss Blueberries with Flour: In a small bowl, gently toss the blueberries (fresh or frozen) with 1 tablespoon of flour. This simple trick helps prevent the blueberries from sinking to the bottom of your bread during baking, ensuring they are evenly distributed throughout.
Step 3: Make the Cream Cheese Filling
- Combine Filling Ingredients: In a medium bowl, combine the softened cream cheese, ¼ cup granulated sugar, egg yolk, and ½ teaspoon vanilla extract.
- Mix Until Smooth: Use a whisk or an electric mixer on low speed to beat the ingredients together until the mixture is completely smooth and creamy, with no lumps of cream cheese remaining. Set this aside.
Step 4: Mix the Dry Ingredients
- Whisk Dry Ingredients: In a large mixing bowl, whisk together the 2 cups all-purpose flour, baking powder, and salt. Make sure these are well combined. This distributes the leavening agent (baking powder) evenly, which is crucial for a light and airy bread.
Step 5: Mix the Wet Ingredients
- Combine Wet Ingredients: In a separate medium bowl, whisk together the melted and slightly cooled butter, ¾ cup granulated sugar, 2 large eggs (at room temperature are best for emulsifying), and 1 teaspoon vanilla extract. Whisk until well combined.
- Add Milk: Pour in the ½ cup room temperature milk and whisk again until everything is fully incorporated. Beginner Tip: Using room temperature wet ingredients (eggs, milk) helps them combine more smoothly with the other ingredients, leading to a better texture in your final bread.
Step 6: Combine Wet and Dry Ingredients (The Batter)
- Gently Combine: Pour the wet ingredients mixture into the bowl with the dry ingredients.
- Mix Until Just Combined: Using a spatula, gently fold the ingredients together until just combined. It’s okay if there are a few small lumps of flour – do not overmix! Common Mistake: Overmixing develops the gluten in the flour too much, which can result in a tough, dense bread. For quick breads like this, a tender crumb is desired.
- Fold in Blueberries: Gently fold in the floured blueberries. Again, mix minimally to avoid crushing the blueberries and to prevent overmixing the batter.
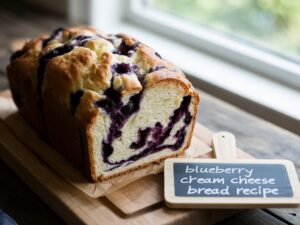
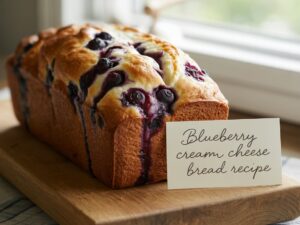
Step 7: Assemble and Bake Your Bread
- Layer the Batter: Pour about half of the bread batter into your prepared loaf pan, spreading it evenly.
- Add Cream Cheese Layer: Carefully spoon dollops of the cream cheese filling over the batter in the pan. You don’t need to spread it perfectly; it will create beautiful swirls as it bakes.
- Top with Remaining Batter: Gently spoon the remaining bread batter over the cream cheese filling, spreading it out as best you can to cover the cream cheese layer.
- Create Swirls (Optional): For a pretty marbled effect, take a butter knife or a skewer and gently swirl it through the layers a few times. Don’t overdo it!
- Bake: Place the loaf pan in the preheated oven. Bake for 55-65 minutes, or until a wooden skewer or toothpick inserted into the center (avoiding a cream cheese pocket) comes out clean or with moist crumbs, but no wet batter. Beginner Tip: If the top starts browning too quickly, you can loosely tent the loaf with aluminum foil for the last 15-20 minutes of baking.
- Cool: Once baked, remove the bread from the oven and let it cool in the pan for about 10-15 minutes. This allows the bread to set and makes it easier to remove.
- Transfer to Wire Rack: After 10-15 minutes, carefully lift the bread out of the pan (using those parchment paper handles if you used them) and transfer it to a wire cooling rack to cool completely. Cooling completely is crucial before slicing, especially if adding a glaze.
Step 8: Make the Optional Glaze (While Bread Cools)
- Whisk Glaze Ingredients: In a small bowl, whisk together the powdered sugar, 2 tablespoons of milk (or lemon juice), and ¼ teaspoon vanilla extract until smooth. If the glaze is too thick, add more milk a teaspoon at a time until it reaches a drizzling consistency. If it’s too thin, add a little more powdered sugar.
- Glaze the Cooled Bread: Once the bread has cooled completely, drizzle the glaze generously over the top. Let the glaze set for a few minutes before slicing and serving.
Baking Tips & Tricks for Beginners
Baking can seem daunting, but with a few simple tips, you’ll be baking like a pro in no time! Here’s some actionable advice:
- Measure Accurately: Baking is a science. Use proper measuring cups and spoons. For flour, spoon it into your measuring cup and then level it off with a straight edge (like a knife). Don’t scoop directly from the bag, as this compacts the flour and you’ll end up with too much.
- Room Temperature Ingredients: Always aim for room temperature eggs, milk, and softened cream cheese unless the recipe specifies otherwise. They emulsify (mix) better, creating a smoother batter and a more consistent final product.
- Don’t Overmix: For quick breads like this, mixing until “just combined” is key. Overmixing develops gluten, leading to a tough, chewy texture instead of a tender, moist one.
- Use an Oven Thermometer: Oven temperatures can vary greatly from what the dial says. An inexpensive oven thermometer can help you ensure your oven is consistently at the correct temperature, preventing burnt edges or underbaked centers.
- Cool Completely: Resist the urge to slice into your bread while it’s still warm! Cooling on a wire rack allows the internal structure to set, preventing a gummy texture and making it easier to slice cleanly.
- Parchment Paper is Your Friend: Lining your loaf pan with parchment paper is a fantastic trick for easy removal and cleanup, especially for sticky breads or those with a delicate crumb.
- Know Your Oven: Every oven is different. Your bread might bake faster or slower than the suggested time. Keep an eye on it, and use the toothpick test for doneness.
Essential Baking Tools for Your Kitchen
Having the right tools makes all the difference! Here are some basic baking essentials that will serve you well for this recipe and many others:
- Mixing Bowl (a set with different sizes is very useful)
- Whisk (both balloon and flat whisks are great)
- Baking Pan (specifically a 9×5-inch loaf pan for this recipe)
- Measuring Cups (for dry ingredients)
- Measuring Spoons (for smaller quantities)
- Spatula (silicone spatulas are great for mixing and scraping bowls)
- Wire Cooling Rack
- Parchment Paper
- Oven Thermometer (highly recommended for beginners!)
Estimated Nutrition Information (Per Slice)
Please note: This is an estimated nutritional breakdown based on standard ingredient values for approximately 12 slices per loaf and may vary depending on specific brands and exact measurements.
| Nutrient | Amount |
|---|---|
| Calories | 300-350 kcal |
| Total Carbohydrates | 40-45g |
| Protein | 5-7g |
| Total Fat | 15-20g |
| Dietary Fiber | 1-2g |
| Total Sugar | 25-30g |
Frequently Asked Questions (FAQs) for Beginner Bakers
Here are some common questions beginners often have when making quick breads like this one:
Q1: Can I use frozen blueberries instead of fresh ones?
A: Absolutely! Frozen blueberries work perfectly in this recipe. Just make sure you do not thaw them before tossing them with flour and adding them to the batter. Adding them frozen helps prevent them from bleeding too much color into the batter and keeps their shape better.
Q2: How do I know when my Blueberry Cream Cheese Bread is fully baked?
A: The best way is the “toothpick test.” Insert a wooden skewer or toothpick into the center of the loaf (try to avoid a cream cheese pocket, as that will always be moist). If it comes out clean or with only a few moist crumbs attached, it’s done. If it has wet batter, continue baking for another 5-10 minutes and test again.
Q3: How should I store the leftover bread?
A: Once completely cooled, store the bread in an airtight container at room temperature for up to 2-3 days. If you live in a warm or humid climate, or if you want to extend its shelf life, you can store it in the refrigerator for up to a week. If refrigerated, bring it to room temperature or warm slightly before serving for the best texture.
Q4: Can I make this bread ahead of time?
A: Yes! This bread actually tastes wonderful the next day as the flavors have a chance to meld. You can bake it, let it cool completely, glaze it (or not), and store it as described above. It’s a great option for breakfast, brunch, or a snack prep!
Q5: What if I don’t have cream cheese? Can I omit the filling?
A: While the cream cheese swirl adds a delicious tang and moisture, you can certainly make a simpler blueberry bread without it. Just omit the cream cheese filling ingredients and steps, and pour all the blueberry batter directly into the pan. It will still be a lovely blueberry quick bread!
Q6: My bread top is browning too fast, but the inside isn’t cooked. What should I do?
A: This is a common issue! Loosely tent the loaf pan with aluminum foil for the remainder of the baking time. This will protect the top from further browning while allowing the inside to continue cooking through. Make sure it’s loose so it doesn’t stick to the bread.
Enjoy Your Homemade Blueberry Cream Cheese Bread!
And there you have it! A comprehensive, beginner-friendly guide to baking your very own Blueberry Cream Cheese Bread. We hope you found these instructions and tips valuable and feel empowered to create something truly delicious in your kitchen. There’s immense satisfaction in pulling a warm, fragrant loaf from the oven, and this recipe is designed to give you that success.
Don’t be afraid to experiment a little once you’ve mastered the basic recipe – maybe try adding a hint of lemon zest to the batter or a sprinkle of streusel topping. The possibilities are endless! We’d love to hear how your bread turned out, so feel free to leave a comment below with your experience or any questions you might have. Happy baking, and enjoy every delightful bite!
1 thought on “Blueberry Cream Cheese Bread Recipe – For Baking Lovers”