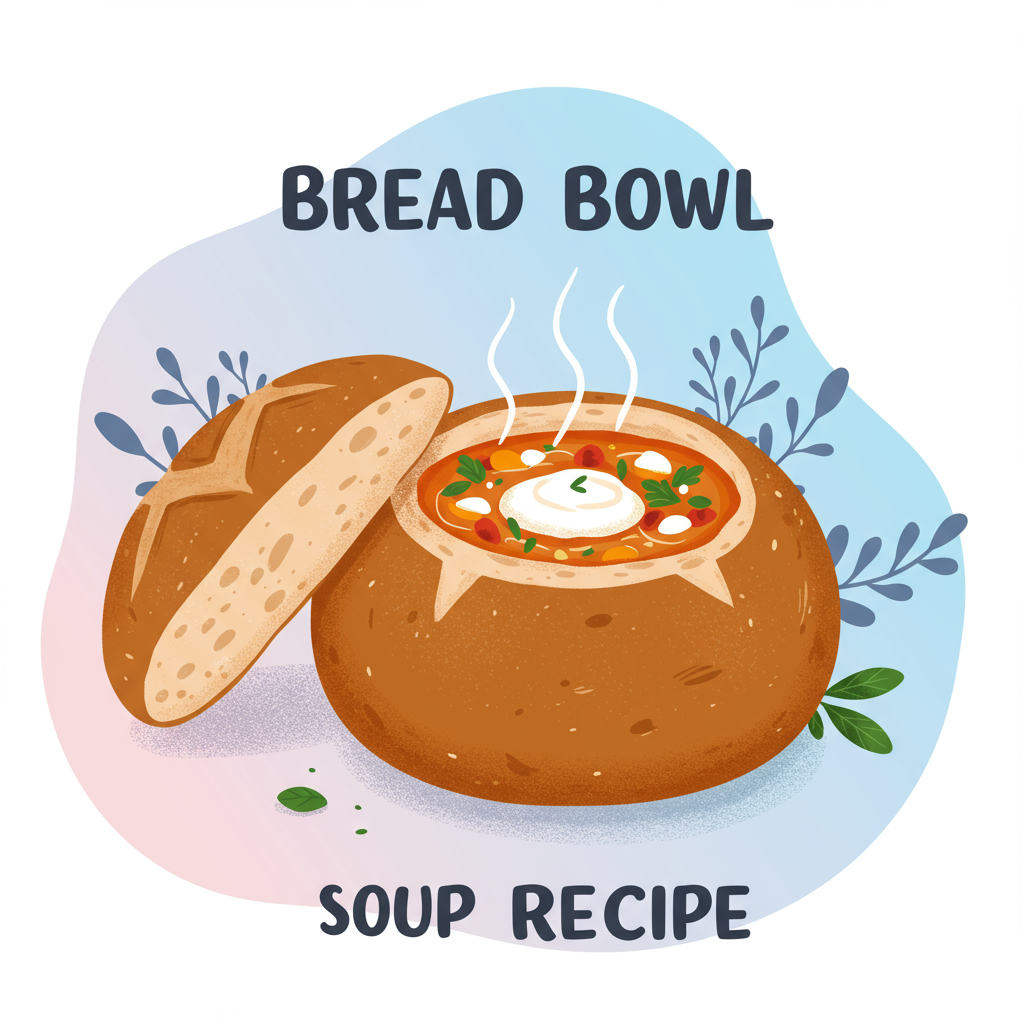
There’s nothing quite like a warm, comforting bowl of soup on a chilly day, especially when that bowl is edible! Our Bread Bowl Soup Recipe isn’t just a meal; it’s an experience. Imagine tearing off a piece of freshly baked, crusty bread, still warm from the oven, and dipping it into a rich, creamy soup. Sounds divine, right? You might think baking your own bread bowls is a daunting task, but I’m here to tell you it’s one of the most rewarding and surprisingly easy baking recipes you can tackle. This comprehensive guide is packed with baking tips for beginners, designed to help you create perfect, fluffy bread bowls and a delicious, creamy tomato basil soup from scratch. Get ready to impress yourself and your loved ones with this show-stopping, comforting dish!
Ingredients List
This recipe is divided into two main parts: the homemade bread bowls and a simple, delicious creamy tomato basil soup. Feel free to substitute your favorite soup recipe if you prefer!
For the Homemade Bread Bowls (Yields 4-6 bowls)
| Ingredient | Quantity | Unit |
|---|---|---|
| Active Dry Yeast | 2 ¼ | teaspoons (or 1 packet) |
| Warm Water (105-115°F / 40-46°C) | 1 ½ | cups |
| Granulated Sugar | 1 | tablespoon |
| Salt | 1 ½ | teaspoons |
| All-Purpose Flour | 4 – 4 ½ | cups (divided) |
| Olive Oil (for greasing) | 1 | tablespoon |
| Egg Wash (1 egg + 1 tbsp water) | Optional |
For the Creamy Tomato Basil Soup (Yields 4-6 servings)
| Ingredient | Quantity | Unit |
|---|---|---|
| Olive Oil | 2 | tablespoons |
| Yellow Onion, chopped | 1 | medium |
| Garlic, minced | 3 | cloves |
| Crushed Tomatoes (canned) | 28 | ounces |
| Vegetable Broth | 3 | cups |
| Heavy Cream | ½ | cup |
| Fresh Basil, chopped | ¼ | cup |
| Sugar | 1 | teaspoon (optional, to balance acidity) |
| Salt | to taste | |
| Black Pepper | to taste |
Step-by-Step Instructions: Your Path to Perfect Bread Bowls!
Let’s break down this recipe into easy, manageable steps. Don’t be afraid – baking is a science, but it’s also a lot of fun!
Part 1: Crafting Your Homemade Bread Bowls
- Activate the Yeast (The Wake-Up Call): In a large mixing bowl, combine the warm water (ensure it’s between 105-115°F / 40-46°C – a thermometer is your best friend here! Too hot will kill the yeast, too cold won’t activate it) and the granulated sugar. Sprinkle the active dry yeast over the top. Stir gently once, then let it sit for 5-10 minutes. You’re looking for a foamy, bubbly mixture on the surface. This is how you know your yeast is alive and ready to work its magic! If it doesn’t foam, your yeast might be old, or your water temperature was off, and you’ll need to start again.
- Mix the Dough (The Sticky Start): Once your yeast is active, add the salt and 2 cups of the all-purpose flour to the yeast mixture. Stir with a wooden spoon or a spatula until just combined. The mixture will be wet and sticky. Now, gradually add the remaining flour, about ½ cup at a time, mixing after each addition, until a shaggy, somewhat sticky dough forms. You might not need all 4 ½ cups of flour – stop when the dough starts to pull away from the sides of the bowl.
- Knead the Dough (The Muscle Work): Turn the dough out onto a lightly floured surface. This is where the kneading begins! Kneading develops the gluten in the flour, which gives bread its structure and chewiness.
- For Beginners: Push the dough away from you with the heels of your hands, then fold it back towards you. Give it a quarter turn and repeat. Keep going for 8-10 minutes. The dough will be sticky at first, but resist adding too much extra flour, as this can make your bread tough. Just use enough to prevent sticking. As you knead, the dough will become smoother, more elastic, and less sticky. It should spring back slowly when poked with a finger.
- Stand Mixer Option: If you have a stand mixer with a dough hook, you can use that! Knead on medium-low speed for about 6-8 minutes, or until the dough is smooth and elastic.
- First Rise (The Beauty Sleep): Lightly grease a large clean bowl with olive oil. Place the kneaded dough in the bowl, turning it once to coat the top with oil. Cover the bowl tightly with plastic wrap or a clean kitchen towel. Place it in a warm, draft-free spot (like a slightly warm oven that’s been turned off, or near a sunny window). Let the dough rise for 1 to 1 ½ hours, or until it has doubled in size. This is called “proofing.” Patience is key here; don’t rush it!
- Punch Down and Divide (The Gentle Awakening): Once the dough has doubled, gently punch it down to release the air. This redistributes the yeast and helps with the final texture. Turn the dough out onto a lightly floured surface and divide it into 4-6 equal pieces, depending on how large you want your bread bowls. For beginner-friendly evenness, you can use a kitchen scale to weigh the dough and divide accordingly.
- Shape the Bowls (The Art of Roundness): Take each piece of dough and gently shape it into a tight, smooth ball. To do this, cup your hand around the dough on the counter and gently rotate it, applying light pressure to create surface tension. This creates a round shape that will hold its form. Place the shaped dough balls onto a baking sheet lined with parchment paper, leaving plenty of space between them as they will expand.
- Second Rise (The Final Stretch): Loosely cover the shaped dough balls with plastic wrap or a clean kitchen towel. Let them rise again in a warm, draft-free spot for another 30-45 minutes, or until visibly puffed up and almost doubled in size.
- Preheat and Prepare for Baking: While your dough is on its second rise, preheat your oven to 375°F (190°C). If desired, prepare an egg wash by whisking one egg with one tablespoon of water. This will give your bread bowls a beautiful golden-brown, shiny crust.
- Bake the Bread Bowls: Once the oven is preheated and the dough has risen, brush the tops of the bread bowls with the egg wash (if using). Bake for 25-30 minutes, or until the crust is deeply golden brown and the internal temperature reaches 200-210°F (93-99°C) when checked with an instant-read thermometer. For a crispier bottom, you can remove them from the parchment paper for the last 5 minutes directly on the oven rack, but be careful!
- Cool and Hollow Out: Transfer the baked bread bowls to a wire rack to cool completely. This is crucial for them to firm up and for easy hollowing. Once cooled, use a serrated knife to carefully cut a circle from the top of each bread bowl (don’t cut all the way through!). Gently pull out the soft bread from the inside, leaving a sturdy ½-inch thick wall. Save the removed bread – it’s perfect for dipping!
Part 2: Whisking Up Your Creamy Tomato Basil Soup
- Sauté Aromatics: In a large pot or Dutch oven, heat the olive oil over medium heat. Add the chopped onion and cook until softened and translucent, about 5-7 minutes. Add the minced garlic and cook for another minute until fragrant, being careful not to burn it.
- Simmer the Soup Base: Pour in the crushed tomatoes and vegetable broth. Stir in the optional teaspoon of sugar (this helps cut the acidity of the tomatoes). Bring the mixture to a simmer, then reduce the heat to low, cover, and let it cook for 15-20 minutes, allowing the flavors to meld.
- Blend (Optional, for Creaminess): For a smoother soup, carefully use an immersion blender directly in the pot, or transfer batches to a regular blender (be very careful with hot liquids in a blender – vent the lid and cover with a towel). Blend until your desired consistency is reached. If you prefer a chunkier soup, you can skip this step or just blend part of it.
- Finish with Cream and Basil: Stir in the heavy cream and fresh chopped basil. Heat through gently for a few minutes, but do not bring to a rolling boil after adding the cream, as it can curdle. Season with salt and black pepper to taste. You might need more salt than you think!
Part 3: Assemble and Enjoy!
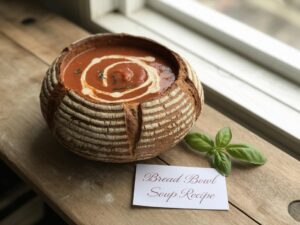
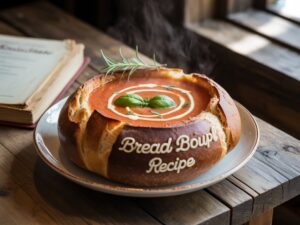
- Fill Your Bowls: Ladle the hot creamy tomato basil soup into your hollowed-out bread bowls. Don’t overfill them, especially for the first serving!
- Serve Immediately: Serve your delicious Bread Bowl Soup immediately. Garnish with a fresh basil leaf or a drizzle of olive oil if you like. Don’t forget those bread pieces you pulled out – they’re perfect for dipping!
Tips & Tricks for Bread Bowl Baking Success
Baking can seem intimidating, but with a few pointers, you’ll be a pro in no time!
- Measure Accurately: Especially with baking, precision matters. Use proper measuring cups and spoons, and for flour, spoon it into your measuring cup and then level it off with a straight edge. Don’t scoop directly from the bag, as this can compact the flour and lead to too much in your recipe.
- Yeast Temperature is Key: As mentioned, water temperature for yeast activation is critical. Too hot kills it; too cold slows it down. Invest in an inexpensive kitchen thermometer for consistent results.
- Don’t Rush the Rise: Proofing (rising) takes time. Don’t try to speed it up by putting it in an overly hot place, as this can affect flavor and texture. A warm, draft-free spot is ideal. If your kitchen is cold, a slightly warmed (then turned off) oven or microwave can work wonders.
- Listen to Your Dough: The amount of flour can vary slightly due to humidity and how packed your flour is. Add flour gradually until the dough feels right – elastic, smooth, and only slightly sticky. Don’t be afraid to adjust slightly.
- Check for Doneness: The best way to know if your bread is fully baked is with an instant-read thermometer. For most bread, 200-210°F (93-99°C) indicates it’s done. Tapping the bottom for a hollow sound is a good indicator, but the thermometer is more reliable.
- Cool Completely: Resist the urge to cut into your bread bowls while they’re hot. They continue to cook internally as they cool, and cooling completely ensures a sturdy structure perfect for holding soup.
Essential Baking Tools
Having the right tools makes all the difference for a smooth baking experience:
- Mixing Bowl
- Whisk
- Baking Pan (or baking sheet)
- Measuring Cups and Spoons
- Spatula
- Kitchen Thermometer (especially for water temp and bread internal temp)
- Parchment Paper
- Serrated Knife (for hollowing out the bowls)
Nutrition Info (Estimated per serving: 1 bread bowl + soup)
These values are estimates and can vary based on specific ingredients and portion sizes.
| Nutrient | Amount |
|---|---|
| Calories | ~550-650 kcal |
| Carbohydrates | ~80-95 g |
| Protein | ~15-20 g |
| Fat | ~18-25 g |
| Fiber | ~6-8 g |
| Sugar | ~10-15 g |
Frequently Asked Questions (FAQs)
- Q: Can I make the bread dough ahead of time?
- A: Absolutely! After the first rise, punch down the dough, shape it into balls, and place them on a parchment-lined baking sheet. Cover tightly with plastic wrap and refrigerate overnight (up to 24 hours). The next day, let them come to room temperature and proof for about an hour before baking as directed.
- Q: How do I know if my yeast is active?
- A: After combining the warm water, sugar, and yeast, let it sit for 5-10 minutes. If it’s active, a foamy, bubbly layer will form on the surface. If there’s no foam, your yeast might be old or the water temperature was incorrect, and it’s best to start with fresh yeast.
- Q: What if my dough isn’t rising?
- A: Several factors can cause this: inactive yeast, water that was too hot or too cold, or a cold environment. Ensure your yeast is fresh, your water temperature is accurate (105-115°F), and your dough is in a warm, draft-free spot. Patience is also key – sometimes it just needs more time.
- Q: Can I use store-bought bread bowls?
- A: Yes, you certainly can! While homemade adds an extra layer of satisfaction and freshness, store-bought bread bowls are a convenient shortcut. Just make sure they’re sturdy enough to hold your soup without leaking.
- Q: How do I store leftover bread bowls and soup?
- A: It’s best to store the soup and bread bowls separately. Store leftover soup in an airtight container in the refrigerator for up to 3-4 days. Leftover bread bowls can be stored at room temperature in an airtight container or bread bag for 1-2 days, or frozen for longer. Reheat the soup, and if desired, gently warm the bread bowls in the oven before serving.
- Q: What other kinds of soup work well in bread bowls?
- A: The possibilities are endless! Classic choices include Broccoli Cheddar, Clam Chowder, French Onion (without the excessive liquid), or even a hearty Beef Stew. Any thick, creamy, or chunky soup that isn’t too watery will be fantastic.
Enjoy Your Delicious Homemade Bread Bowl Soup!
Congratulations, baker! You’ve just created a truly memorable meal from scratch. There’s a special kind of pride that comes with serving something you’ve baked yourself, and this Bread Bowl Soup Recipe is no exception. Whether you’re making it for a cozy family dinner or a gathering with friends, these homemade bread bowls filled with warm, flavorful soup are sure to bring smiles all around. Don’t be afraid to experiment with different soups or add your own twist to the bread dough (perhaps some herbs or cheese!). We hope these beginner-friendly tips have given you the confidence to dive into the wonderful world of baking. Share your creations with us in the comments below – we’d love to hear how your bread bowls turned out!
1 thought on “Bread Bowl Soup Recipe – Baking Perfection”