Bake Your First Loaf: Easy Bread Machine Honey Wheat Bread Recipe for Beginners!
Introduction
Welcome, aspiring bakers! Are you ready to fill your home with the irresistible aroma of freshly baked bread? If the thought of baking bread from scratch seems daunting, fear not! This Bread Machine Honey Wheat Bread Recipe is designed specifically for you, making homemade bread incredibly simple and virtually foolproof. Using a bread machine transforms what could be a complex process into one of the most easy baking recipes you’ll ever try. Forget endless kneading and proofing; your machine handles all the hard work. We’ll walk you through every step, providing essential baking tips for beginners to ensure your first loaf (and every loaf after!) is a resounding success. Get ready to enjoy a warm, wholesome, and slightly sweet honey wheat bread that will become a staple in your kitchen!
Ingredients List
Gathering your ingredients accurately is the first step to a perfect loaf. Here’s what you’ll need for a delicious 1.5-pound loaf of honey wheat bread:
| Ingredient | Quantity | Unit |
|---|---|---|
| Warm Water (105-115°F / 40-46°C) | 1 | cup |
| Honey | 1/4 | cup |
| Olive Oil (or vegetable oil) | 2 | tablespoons |
| Salt | 1 | teaspoon |
| Whole Wheat Flour | 2 | cups |
| Bread Flour | 1 | cup |
| Active Dry Yeast | 2 | teaspoons |
Beginner Tip: Ensure your water is the correct temperature. Too hot, and it will kill the yeast; too cold, and the yeast won’t activate properly. A kitchen thermometer is your best friend here!
Step-by-Step Instructions for Your Perfect Loaf
Follow these detailed steps carefully, and you’ll be enjoying warm, homemade bread in no time!
Step 1: Prepare Your Bread Machine Pan
First things first, make sure your bread machine pan is clean and the kneading paddle is securely in place. Some people like to lightly grease the paddle or the bottom of the pan to prevent sticking, though it’s often not strictly necessary with non-stick pans.
Step 2: Add the Liquids
This is crucial for bread machines: liquids go in first! Pour the warm water (remember that 105-115°F range!), honey, and olive oil directly into the bread machine pan. The honey adds sweetness and helps with browning, while the oil contributes to a softer crumb and crust.
Why this order? Placing liquids first helps to hydrate the dry ingredients evenly and prevents the yeast from activating too early or coming into direct contact with salt, which can inhibit its growth.
Step 3: Add the Dry Ingredients (Except Yeast)
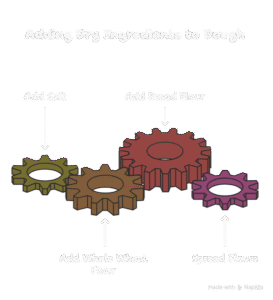
Next, carefully add the dry ingredients. Sprinkle the salt into one corner of the pan, making sure it doesn’t directly touch where the yeast will go. Then, add the whole wheat flour, followed by the bread flour. Gently spread the flours to cover the liquids.
Measuring Flour Like a Pro: For accurate measurement, use the “spoon and level” method. Spoon flour lightly into your measuring cup until it’s overflowing, then use a straight edge (like a knife or the back of a ruler) to level it off. Don’t pack the flour down or scoop directly from the bag, as this can add too much flour and result in dense bread.
Understanding Flour Types: Whole wheat flour provides the nutritional benefits and characteristic hearty flavor, while bread flour has a higher protein content than all-purpose flour. This higher protein develops more gluten, which gives your bread a better structure and chewiness, preventing it from being too crumbly. If you only have all-purpose flour, you can use it, but your bread might be a bit softer and less chewy.
Step 4: Add the Yeast
Create a small well or mound in the center of the flour, and carefully sprinkle the active dry yeast into it. Ensure the yeast sits on top of the flour and is not touching the liquids or the salt. This separation is key to proper yeast activation at the right time.
Yeast Check: If you’re unsure about your yeast’s freshness, you can “proof” it separately. Mix 1/2 tsp of sugar with 1/2 cup of your warm water and sprinkle 1 tsp of yeast over it. Let it sit for 5-10 minutes. If it becomes foamy, your yeast is active. If not, it’s time for new yeast!
Step 5: Set Your Bread Machine
Place the bread pan back into your bread machine. Close the lid securely. Select the “Whole Wheat” or “Basic” cycle, depending on your machine’s options. For a 1.5-pound loaf, choose the 1.5 lb setting. Select your desired crust color – “Light,” “Medium,” or “Dark.” For your first time, “Medium” is usually a great starting point.
Common Mistake Prevention: Double-check that you’ve selected the correct loaf size and cycle. An incorrect setting can lead to over or under-proofing and baking.
Step 6: Let the Machine Do Its Magic!
Press “Start.” Your bread machine will now begin its cycle, which typically involves several stages: kneading, rising (proofing), and baking. This process usually takes 3 to 4 hours, depending on your machine and chosen cycle.
During the Kneading Cycle: After about 5-10 minutes of kneading, open the lid briefly to check the dough. It should form a smooth, elastic ball.
- If the dough looks too dry and crumbly: Add 1 teaspoon of warm water at a time until it comes together.
- If the dough looks too wet and sticky: Add 1 teaspoon of bread flour at a time until it forms a cohesive ball.
Adjustments are common and ensure a perfect texture! Avoid opening the lid during the rising and baking cycles, as this can cause the bread to collapse or affect its texture.
Step 7: The Grand Finale – Baking!
Once the baking cycle is complete, your bread machine will likely beep. Carefully open the lid (watch out for steam!) and remove the bread pan using oven mitts. The crust should be a beautiful golden brown.
Step 8: Cool Your Loaf
Immediately remove the bread from the pan. If the kneading paddle is stuck in the loaf, gently twist it out using a utensil (be careful not to burn yourself). Place the hot loaf on a wire cooling rack and allow it to cool completely for at least 1-2 hours before slicing. This is a critical step!
Why cooling is essential: Slicing hot bread can result in a gummy texture inside because the internal steaming process is still happening. Cooling allows the starches to set, resulting in the perfect texture and easier slicing.
Step 9: Slice and Enjoy!
Once cooled, use a serrated bread knife to slice your masterpiece. Enjoy your warm, homemade Bread Machine Honey Wheat Bread with butter, jam, or as part of your favorite sandwich. Congratulations, you’ve baked your first loaf!
Tips & Tricks for Bread Machine Success
Even with an easy recipe, a few extra pointers can make all the difference for beginners.
- Always Use Fresh Ingredients: Especially yeast! Old yeast is the number one cause of bread that doesn’t rise. Store yeast in an airtight container in the refrigerator or freezer. Flours can also go stale, so try to use them within a few months of opening.
- Accurate Measuring is Key: Baking is a science! Use proper measuring cups and spoons, and always level off dry ingredients like flour and salt. Too much or too little of any ingredient can throw off the delicate balance.
- Water Temperature Matters: As mentioned, warm (not hot, not cold) water is crucial for activating the yeast. Invest in a simple kitchen thermometer.
- Don’t Peek During Rising/Baking: Resist the urge to open the lid during the crucial rising and baking phases. The sudden change in temperature can cause the dough to collapse, resulting in a dense loaf.
- Cool Completely: This cannot be stressed enough! Patience is a virtue here. Cooling on a wire rack allows steam to escape, preventing a soggy interior and ensuring a perfect texture.
- Storage: Store cooled bread in an airtight container or bread bag at room temperature for up to 3-4 days. For longer storage, slice the cooled bread and freeze it in a freezer-safe bag for up to 3 months.
- Experiment with Add-ins: Once you’re comfortable with the basic recipe, try adding a handful of sunflower seeds, flax seeds, or dried cranberries during the “add-in” cycle (if your machine has one) for extra flavor and texture.
Essential Baking Tools
While your bread machine does most of the heavy lifting, having these basic tools will make your baking experience even smoother:
- Bread Machine (The star of our show!)
- Measuring Cups (For liquids and dry ingredients)
- Measuring Spoons (For salt, yeast, etc.)
- Kitchen Scale (Optional, but highly recommended for precise flour measurements)
- Kitchen Thermometer (For checking water temperature)
- Wire Cooling Rack (Essential for cooling your loaf)
- Serrated Bread Knife (For clean, even slices)
- Oven Mitts (For safely handling the hot bread pan)
Nutrition Info (Estimated per slice, 1/12 of a 1.5 lb loaf)
Here’s an approximate nutritional breakdown for a single slice of your delicious homemade honey wheat bread. Please note, these values can vary based on exact ingredient brands and measurements.
| Nutrition Fact | Amount (approx.) |
|---|---|
| Calories | 130 kcal |
| Carbohydrates | 25 g |
| Protein | 5 g |
| Fat | 2.5 g |
| Fiber | 3 g |
| Sugar | 5 g |
Frequently Asked Questions (FAQs) for Beginner Bakers
It’s normal to have questions when you’re starting out. Here are some common ones:
Q1: Why is my bread dense and heavy?
A: A dense loaf can be caused by several factors:
- Old or inactive yeast: Always check your yeast’s freshness.
- Too much flour: If you packed your flour, you might have added too much. Use the spoon and level method.
- Not enough liquid: The dough needs proper hydration.
- Opening the lid during rising: A sudden temperature drop can cause the dough to deflate.
Q2: Can I use all-purpose flour instead of bread flour?
A: Yes, you can, but the texture will be slightly different. Bread flour has a higher protein content, which results in a chewier, more structured loaf. All-purpose flour will yield a softer, perhaps less airy bread. If substituting, you might need a tiny bit less liquid, as all-purpose flour absorbs less.
Q3: My bread machine makes a hole in the bottom of the loaf. Is this normal?
A: Yes, this is completely normal! The hole is where the kneading paddle was located. You can gently remove the paddle after the baking cycle (careful, it’s hot!) and before cooling to minimize the hole, but a slight indentation is unavoidable.
Q4: How do I store homemade bread to keep it fresh?
A: Once completely cooled, store your bread in an airtight bread box, a sealed plastic bag, or wrapped in foil at room temperature for up to 3-4 days. For longer storage, slice the cooled loaf and freeze the slices in a freezer-safe bag for up to 3 months. Toast frozen slices directly from the freezer.
Q5: What if my bread rises too much and collapses?
A: This often indicates too much yeast, too much liquid, or high humidity. Ensure you’re measuring your yeast accurately and check the dough consistency during the initial kneading cycle to make sure it’s not too wet.
Conclusion
There you have it! Your very own delicious, wholesome, and perfectly baked **Bread Machine Honey Wheat Bread**. The satisfaction of pulling a warm, fragrant loaf from your bread machine is truly unmatched, and we hope this recipe has proven just how accessible and enjoyable baking can be, even for absolute beginners. Don’t be afraid to experiment and make this recipe your own. With a little practice, you’ll be baking incredible bread every time. Share your triumphs in the comments below – we’d love to hear about your first loaf! Happy baking!
“`
2 thoughts on “Bread Machine Honey Wheat Bread Recipe – Baking Perfection”