
Welcome, fellow home bakers! If you’ve ever dreamt of the aroma of freshly baked bread filling your kitchen but felt intimidated by the process, you’re in the right place. This Bread Machine Rye Bread Recipe is specifically designed for beginners, making it one of the easiest easy baking recipes you’ll ever try. Forget complicated kneading or endless proofing; your bread machine does all the heavy lifting! We’ll walk you through every step, ensuring a delicious, perfectly textured loaf of rye bread with minimal effort. Get ready to impress yourself and your family with this delightful, hearty bread, packed with flavor and perfect for sandwiches, toast, or alongside a warm bowl of soup. We’ve included plenty of baking tips for beginners to guarantee success, even if this is your very first loaf!
Why You’ll Love This Bread Machine Rye Bread Recipe
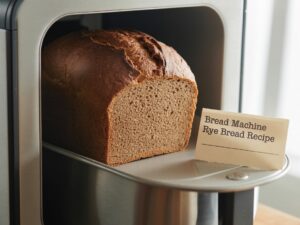
This recipe takes the guesswork out of baking a classic rye bread. Using a bread machine not only simplifies the process but also ensures consistent results every time. You’ll get a beautifully risen loaf with a tender crumb and that characteristic tangy, earthy flavor of rye. It’s perfect for busy weeknights, lazy weekends, or whenever you crave homemade goodness without the fuss. Plus, knowing exactly what goes into your bread makes it a healthier, more satisfying choice than store-bought alternatives.
Ingredients List
Gathering your ingredients before you start is a crucial step in any baking endeavor. For this recipe, precise measurements are key, so make sure your measuring cups and spoons are accurate!
Wet Ingredients
| Ingredient | Quantity | Unit |
|---|---|---|
| Warm Water (105-115°F / 40-46°C) | 1 | cup |
| Vegetable Oil or Melted Butter | 2 | tablespoons |
| Molasses (or Honey/Brown Sugar) | 2 | tablespoons |
Dry Ingredients
| Ingredient | Quantity | Unit |
|---|---|---|
| Bread Flour | 1 ½ | cups |
| Rye Flour (Light or Medium) | 1 | cup |
| Salt | 1 ½ | teaspoons |
| Caraway Seeds (optional, but highly recommended!) | 1 | tablespoon |
| Active Dry Yeast (or Bread Machine Yeast) | 2 | teaspoons |
Step-by-Step Instructions: How to Make Bread Machine Rye Bread
Follow these detailed steps carefully for a perfect loaf every time. Remember, the order of ingredients in a bread machine is important!
Step 1: Before You Begin & Prep is Key!
- Gather All Ingredients: Make sure everything is measured out and ready to go. This prevents last-minute scrambling.
- Check Water Temperature: The water temperature is critical for activating the yeast. It should be warm to the touch, like a baby’s bath – not too hot (which kills yeast) and not too cold (which won’t activate it). Use a thermometer for precision: between 105-115°F (40-46°C).
- Prepare Your Bread Machine Pan: Ensure your bread machine pan and kneading paddle are clean and securely in place inside the machine.
Step 2: Loading Your Bread Machine (The Correct Order Matters!)
This is where many beginners can go wrong, but it’s super simple if you follow the “wet first, then dry, then yeast on top” rule.
- Add Wet Ingredients: Pour the warm water, vegetable oil (or melted butter), and molasses (or honey/brown sugar) into the bread machine pan first. The liquid forms a protective barrier for the yeast.
- Add Dry Ingredients (except yeast): Carefully spoon the bread flour, followed by the rye flour, over the wet ingredients. Try to create a small “mound” in the center. Then, add the salt and caraway seeds (if using) into separate corners of the pan, away from where the yeast will go. Why separate? Salt can inhibit yeast activity if it comes into direct contact too early.
- Add the Yeast: Make a small indentation or “well” in the center of the dry ingredients (the flour mound). Gently place the active dry yeast into this well. This ensures the yeast stays dry and dormant until the kneading cycle begins, preventing premature activation.
Step 3: The Magic Happens! Setting Your Bread Machine
- Select Your Cycle: Close the lid of your bread machine. Choose the “Whole Wheat” or “Basic/White Bread” cycle for a 1.5 lb loaf. Some bread machines have a specific “Rye Bread” setting, which would be ideal. If using “Whole Wheat,” your loaf will have a slightly longer rise time, which is good for rye flour.
- Choose Crust Color: Select your desired crust color – “Medium” is usually a good starting point for rye bread.
- Start the Machine: Press the “Start” button and let your bread machine do its work!
- Monitor the Dough (Optional but Recommended for Beginners): About 5-10 minutes into the first kneading cycle, lift the lid (briefly!) and check the dough consistency.
- Too Dry? If the dough looks very stiff, crumbly, and isn’t forming a smooth ball, add water, 1 teaspoon at a time, until it reaches the right consistency.
- Too Wet? If the dough is very sticky and loose, add bread flour, 1 teaspoon at a time, until it forms a soft, pliable ball.
- The Goal: The dough should be a smooth, soft, slightly sticky ball that cleans the sides of the pan as it kneads. This is a crucial **baking tip for beginners** to learn the feel of good dough.
Step 4: After the Bake & Enjoy!
- Remove from Machine: Once the baking cycle is complete and the machine beeps, immediately unplug the machine and carefully remove the bread pan using oven mitts. The pan will be very hot!
- Release the Loaf: Invert the bread pan onto a wire cooling rack. If the paddle is stuck in the bread, carefully remove it with a small non-stick spatula or by hand once the bread has cooled slightly. Be gentle to avoid tearing the bread.
- Cool Completely: This is a critical step! Allow the rye bread to cool on the wire rack for at least 1-2 hours (or longer, up to 4 hours) before slicing. Why? Slicing hot bread can make it gummy and dense inside, as the internal structure is still setting. Patience here will be rewarded with perfect slices!
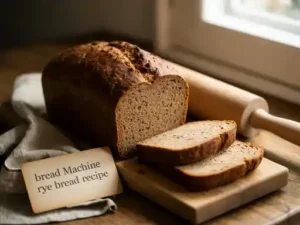
- Slice and Serve: Once cooled, slice your delicious homemade rye bread with a serrated knife. Enjoy it with butter, cheese, deli meats, or simply on its own!
Tips & Tricks for Perfect Rye Bread Every Time
Achieving a perfect loaf of rye bread in your bread machine is easy with a few insider tips:
- Measure Accurately: Baking is a science! Use proper measuring cups and spoons. For flour, use the “spoon and level” method: spoon flour into your measuring cup until it overflows, then level it off with the back of a knife. Don’t pack it down! This prevents adding too much flour, which can lead to a dense loaf.
- Fresh Ingredients are Key: Ensure your yeast is fresh and active. Old yeast is a common culprit for bread that doesn’t rise. Store yeast in the refrigerator or freezer for longevity. Flour can also go stale, so try to use fresh flour.
- Water Temperature is Crucial: As mentioned in the steps, water that’s too hot will kill the yeast, and water that’s too cold won’t activate it. Stick to the 105-115°F (40-46°C) range.
- Don’t Open the Lid (Too Often!): Resist the urge to constantly open the bread machine lid during the kneading and rising cycles. Each time you open it, you release heat and humidity, which can affect the dough’s rise. A quick peek during the first knead to check consistency is fine, but after that, let it do its work.
- Cool Completely: Seriously, don’t rush this step! Cooling on a wire rack allows steam to escape, preventing a gummy texture and ensuring the bread’s internal structure fully sets.
- Experiment with Caraway Seeds: If you’re new to rye bread, you might want to start with half the amount of caraway seeds or even omit them. If you love that distinct rye flavor, feel free to add a bit more next time!
Essential Baking Tools
While your bread machine does most of the heavy lifting, a few basic tools will make your baking experience even smoother. Here are some essentials (with affiliate links to Amazon for your convenience):
- Bread Machine (of course!)
- Mixing Bowl (handy for measuring and prepping ingredients)
- Whisk (for quickly combining dry ingredients if you pre-mix)
- Baking Pan (not strictly needed for this recipe, but good for general baking)
- Measuring Cups & Measuring Spoons (essential for accuracy!)
- Spatula (silicone spatulas are great for scraping bowls and being gentle with dough)
- Kitchen Thermometer (for precise water temperature)
- Wire Cooling Rack (crucial for proper cooling!)
- Serrated Bread Knife (for easy slicing)
Nutrition Information (Estimated per slice, 12 slices per loaf)
Please note that these values are estimates and can vary based on specific ingredient brands and quantities used.
| Nutrient | Amount |
|---|---|
| Calories | 160 kcal |
| Carbohydrates | 30g |
| Protein | 5g |
| Fat | 3g |
| Fiber | 2.5g |
| Sugar | 4g |
Frequently Asked Questions (FAQs)
Q1: My bread didn’t rise. What went wrong?
A: This is usually due to inactive yeast. Ensure your yeast is fresh (check the expiration date) and stored properly. Also, make sure your water temperature was correct – too hot kills yeast, too cold won’t activate it. Too much salt in direct contact with the yeast can also inhibit its activity.
Q2: Can I use all-purpose flour instead of bread flour?
A: While you can substitute all-purpose flour, your bread might be a bit less chewy and have a slightly different texture. Bread flour has a higher protein content, which creates more gluten, resulting in a chewier, more structured loaf, especially when combined with rye flour. For best results, stick to bread flour.
Q3: Why is my bread dense and heavy?
A: A dense loaf can be caused by too much flour (leading to a dry dough), not enough liquid, old or inactive yeast, or not allowing the bread to cool completely before slicing. Make sure you’re measuring your flour correctly (spoon and level) and check the dough consistency during the first knead.
Q4: How should I store homemade rye bread?
A: Store your cooled rye bread at room temperature in an airtight container or a bread bag for 3-4 days. For longer storage, you can slice the cooled loaf and freeze the slices in a freezer-safe bag for up to 2-3 months. Thaw individual slices as needed in a toaster or microwave.
Q5: Can I add other seeds or ingredients?
A: Absolutely! Feel free to experiment. Besides caraway seeds, you could try adding a tablespoon of dill seeds, fennel seeds, or even a couple of tablespoons of dried minced onion for a different flavor profile. Add these with the other dry ingredients.
Conclusion: Your Journey to Delicious Homemade Rye Bread Starts Now!
Congratulations! You’ve just unlocked the secret to baking incredible Bread Machine Rye Bread with ease. This recipe is a fantastic starting point for anyone looking to expand their baking repertoire, proving that homemade bread doesn’t have to be complicated. With your trusty bread machine and these straightforward instructions, you’re well on your way to enjoying warm,
flavorful rye bread anytime you desire. Don’t be afraid to experiment, and most importantly, have fun with the process! Happy baking, and get ready to savor the delightful taste of your very own creation. Share your successes with us in the comments!