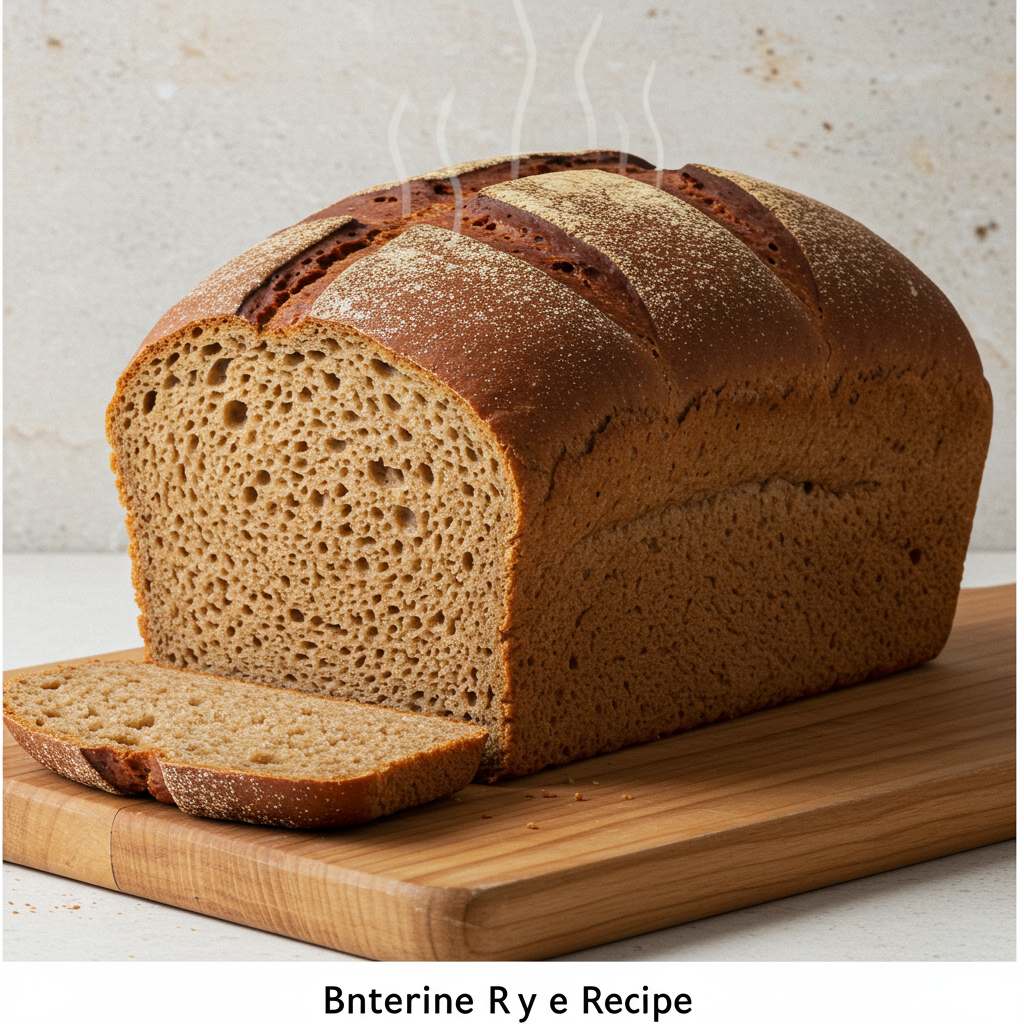
Easy Bread Machine Rye Bread Recipe: Your Gateway to Homemade Goodness!
Welcome, fellow food lovers and aspiring bakers! Are you ready to dive into the wonderful world of homemade bread, but feel a little intimidated by traditional methods? You’ve come to the right place! This **Bread Machine Rye Bread Recipe** is specifically designed for beginners, making it one of the most **easy baking recipes** you’ll ever try. With the magic of your bread machine, you’ll be enjoying warm, aromatic rye bread with minimal effort. Forget about complicated kneading or proofing schedules; we’re going to use simple **baking tips for beginners** to achieve a perfect loaf every single time. Get ready to impress yourself (and everyone else!) with this delicious, hearty bread!
Ingredients for Your Perfect Rye Loaf
Gathering your ingredients correctly is the first step to baking success. Accuracy matters, especially when it comes to yeast and liquids!
| Ingredient | Quantity | Unit |
|---|---|---|
| Warm Water (105-115°F / 40-46°C) | 1 ¼ | cups |
| Vegetable Oil or Melted Butter | 2 | tablespoons |
| Molasses (optional, for darker color & flavor) | 1 | tablespoon |
| Rye Flour (Dark or Light) | 1 | cup |
| Bread Flour (or All-Purpose Flour) | 2 | cups |
| Granulated Sugar | 1 ½ | tablespoons |
| Salt | 1 ½ | teaspoons |
| Active Dry Yeast or Bread Machine Yeast | 2 | teaspoons |
| Caraway Seeds (optional, for classic rye flavor) | 1-2 | teaspoons |
Step-by-Step Instructions: Baking Your Rye Bread
Follow these detailed steps carefully, and you’ll be rewarded with a beautiful, fragrant loaf of rye bread!
Step 1: Prepare Your Bread Machine Pan
Start by removing the bread machine pan from your unit. Ensure the kneading paddle is securely in place at the bottom of the pan. A little non-stick spray on the paddle and the bottom of the pan can help prevent sticking, though it’s often not strictly necessary with well-maintained pans.
Step 2: Add the Liquid Ingredients First
This is a crucial step for bread machine baking! Always add your liquids to the pan first. Pour in the **warm water** (remember, 105-115°F is ideal – too hot will kill the yeast, too cold won’t activate it properly). Next, add the **vegetable oil or melted butter** and the **molasses** (if using). The molasses will give your rye bread a richer color and a subtle, traditional sweetness that pairs wonderfully with rye flour. Don’t worry if the molasses is a bit thick; it will blend in.
Beginner Tip: Use a kitchen thermometer to check your water temperature. It’s a small step that makes a big difference in yeast activation and dough rise!
Step 3: Layer the Dry Ingredients
Now, it’s time for the dry ingredients. Carefully add the **rye flour** first, spreading it evenly over the liquids. Follow with the **bread flour**. Try to keep the flour somewhat separated from the liquids for now; this gives the yeast a better start. Next, add the **granulated sugar** and the **salt** to separate corners of the pan, away from where the yeast will go. If you’re adding **caraway seeds**, sprinkle them in now as well.
Common Mistake & Fix: Adding salt directly on top of the yeast can inhibit its activity. By placing them in separate corners, you ensure the yeast starts working effectively when it’s time.
Step 4: Create a Well for the Yeast
Using your finger, gently create a small indentation or “well” in the center of the dry ingredients. This is where your yeast will go. Carefully measure and add the **active dry yeast or bread machine yeast** into this well. This method keeps the yeast dry and separate from the liquids and salt until the mixing cycle begins, ensuring optimal activation.
Step 5: Place Pan in Machine and Select Settings
Carefully place the bread machine pan back into your bread machine, ensuring it clicks securely into place. Close the lid. Now, select your program. For this recipe, the “Basic,” “White Bread,” or “Whole Wheat” cycle usually works best for a 1.5 or 2-pound loaf. If your machine has a specific “Rye” or “Dark Bread” cycle, even better! Choose the crust setting you prefer – “Light” for a softer crust, “Medium” for a classic golden crust, or “Dark” for a more robust crunch. “Medium” is usually a great starting point.
Step 6: Start the Machine and Monitor the Dough
Press the “Start” button! Your bread machine will begin its cycle, which typically involves a kneading phase, a rise phase, and finally, the baking phase. During the first kneading cycle (usually the first 5-10 minutes), take a peek inside the machine. The dough should form a smooth, somewhat elastic ball. It shouldn’t be too sticky (sticking excessively to the sides of the pan) or too dry (crumbling apart). If it’s too sticky, add a teaspoon of bread flour at a time until it’s just right. If it’s too dry, add a teaspoon of warm water at a time. Close the lid quickly after checking.
Beginner Tip: Don’t be afraid to adjust the dough! This is one of the most important **baking tips for beginners** for bread machine success. Different flours and humidity levels can slightly alter the ideal consistency.
Step 7: The Waiting Game (Mostly!)
Once you’ve adjusted the dough (if needed), let the bread machine do its work! Avoid opening the lid during the rising and baking cycles, as this can cause the bread to collapse or affect the internal temperature, leading to an uneven bake.
Step 8: Remove and Cool Your Loaf
When the bread machine beeps, signaling the end of the cycle, carefully open the lid. Your kitchen should smell amazing! Using oven mitts, remove the bread pan from the machine. Invert the pan onto a wire cooling rack and gently shake the bread out. If the kneading paddle is stuck in the bottom of the loaf, carefully remove it with a utensil (be careful not to burn yourself or tear the bread). Allow the bread to cool completely on the wire rack for at least 1-2 hours before slicing. Slicing warm bread can lead to a gummy texture.
Step 9: Enjoy!
Once cooled, slice your homemade rye bread and enjoy! It’s fantastic with butter, cheese, deli meats, or simply toasted. Store any leftovers in an airtight container at room temperature for up to 3-4 days, or freeze for longer storage.
Tips & Tricks for Bread Machine Rye Bread Success
Even with an easy recipe, a few extra pointers can elevate your bread machine experience from good to absolutely fantastic!
- Fresh Yeast is Key: Always check the expiration date on your yeast. Old or inactive yeast is the number one reason bread doesn’t rise. Store opened yeast in an airtight container in the refrigerator or freezer to prolong its shelf life.
- Accurate Measuring: Use proper measuring cups and spoons. For flour, spoon it into the measuring cup and level it off with a straight edge (like a knife or spatula) rather than scooping directly from the bag, which can compact the flour and result in too much.
- Water Temperature Matters: As mentioned, water that is too hot will kill the yeast, and water that is too cold won’t activate it effectively. Aim for that sweet spot between 105-115°F (40-46°C).
- Don’t Be Afraid to Adjust: The “peek and adjust” during the first kneading cycle is vital. Humidity, brand of flour, and even altitude can affect dough consistency. A perfect dough ball should be soft, pliable, and just slightly tacky to the touch.
- Cool Completely: Resist the urge to slice into your bread right out of the machine! Cooling allows the internal structure of the bread to set and steam to escape, preventing a gummy texture and ensuring a better slice.
- Experiment with Caraway Seeds: If you love that classic deli rye flavor, don’t skip the caraway seeds! You can even toast them lightly before adding for an intensified aroma.
- Store Properly: Once cooled, store your bread in an airtight bag or container to keep it fresh. For longer storage, slice the loaf and freeze the slices in a freezer-safe bag. You can then toast individual slices as needed.
Essential Baking Tools
While your bread machine does most of the heavy lifting, a few basic tools will make your baking journey even smoother:
- Mixing Bowl (for prep, though less critical with a bread machine)
- Whisk (for light mixing if needed)
- Baking Pan (not needed for this recipe, but good to have)
- Measuring Cups
- Spatula (for leveling flour and removing bread if stuck)
- Kitchen Scale: (Highly recommended for accuracy, especially with flour)
- Kitchen Thermometer: (Essential for checking water temperature)
- Wire Cooling Rack: (Crucial for proper cooling)
Nutrition Information (Estimated per slice, 1/12 of a 1.5lb loaf)
Please note: These are estimated values and can vary based on specific ingredients and brands used.
| Nutrient | Amount |
|---|---|
| Calories | 160 |
| Carbohydrates | 30g |
| Protein | 5g |
| Fat | 2.5g |
| Fiber | 2g |
| Sugar | 3g |
Frequently Asked Questions (FAQs)
Q1: Can I use all-purpose flour instead of bread flour?
Yes, you can! Bread flour has a higher protein content, which gives bread a chewier texture and better rise. However, all-purpose flour will still work, resulting in a slightly less chewy and potentially denser loaf. If using all-purpose, you might need a tiny bit less water.
Q2: My dough didn’t rise. What went wrong?
The most common culprits are inactive yeast (check the expiration date and ensure it’s fresh), water that was too hot or too cold, or too much salt/sugar directly on the yeast. Make sure your water temperature is correct (105-115°F) and that your yeast is fresh and added last, away from salt.
Q3: Can I add other seeds or ingredients to my rye bread?
Absolutely! Feel free to experiment. Besides caraway seeds, you could try dill seeds, fennel seeds, or even a sprinkle of poppy seeds. Some people like to add a tablespoon or two of cocoa powder for a darker pumpernickel-like flavor and color. Add these extra ingredients along with the flours.
Q4: What’s the difference between light rye and dark rye flour?
Light rye flour has had most of the bran and germ removed, giving it a milder flavor and lighter color, similar to white flour. Dark rye flour contains more of the outer layers of the rye grain, resulting in a stronger, more robust rye flavor and a darker color. You can use either in this recipe, but dark rye will give you a more traditional “rye bread” taste.
Q5: How do I store homemade bread?
Once completely cooled, store your bread in an airtight container or a bread bag at room temperature for 3-4 days. For longer storage, slice the bread and freeze the slices in a freezer-safe bag for up to 2-3 months. You can then pop individual slices into a toaster for a quick treat!
Q6: Can I make this recipe without a bread machine?
While this recipe is optimized for a bread machine, you can adapt it. You would need to combine ingredients, knead by hand or with a stand mixer for about 8-10 minutes, let it rise in a greased bowl for 1-1.5 hours, punch down, shape into a loaf, let it rise again for 30-45 minutes, and then bake in a preheated oven at 375°F (190°C) for 30-35 minutes. It’s more hands-on, but certainly doable!
Conclusion: Your Homemade Rye Bread Journey Begins!
And there you have it! A simple, stress-free path to making your very own delicious **Bread Machine Rye Bread**. You’ve just unlocked a secret weapon for amazing homemade goodies, all thanks to your trusty bread machine. Don’t be afraid to experiment a little, and remember that every loaf is a learning experience. The aroma of freshly baked bread filling your home is a reward in itself, and the taste is simply incomparable to store-bought. So go ahead, give this recipe a try, and get ready to savor the incredible flavor of homemade rye. Happy baking!
“`