There’s nothing quite like the aroma of freshly baked bread wafting through your home, especially when it comes to warm, pillowy yeast rolls straight from the oven. For many, baking from scratch can seem intimidating, but what if we told you there’s a secret weapon to make it incredibly simple? Enter the bread machine! This amazing appliance takes all the hard work out of kneading and rising,
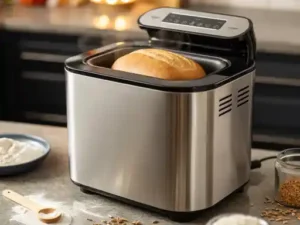
making this Bread Machine Yeast Rolls Recipe an absolute game-changer for anyone looking for easy baking recipes. Whether you’re a complete novice or just short on time, this detailed guide is packed with baking tips for beginners to help you achieve perfect, golden rolls every single time. Get ready to impress your family and friends with minimal effort!
Ingredients List
Gathering your ingredients correctly is the first step to baking success. Remember to measure precisely!
| Ingredient | Quantity | Unit |
|---|---|---|
| Warm Milk (around 105-115°F / 40-46°C) | 1 | cup |
| Large Egg, room temperature | 1 | |
| Unsalted Butter, melted and cooled slightly | 1/4 | cup (4 tbsp) |
| All-Purpose Flour | 3 | cups |
| Granulated Sugar | 1/4 | cup |
| Salt | 1 | teaspoon |
| Active Dry Yeast or Instant Yeast | 2 | teaspoons |
| Melted Butter (for brushing, optional) | 2 | tablespoons |
Step-by-Step Instructions: Achieve Perfect Rolls Every Time!
Follow these detailed steps carefully, and you’ll be enjoying warm, homemade yeast rolls in no time!
Step 1: Prepare Your Ingredients and Bread Machine
- Read Your Bread Machine Manual: Every bread machine is slightly different. Familiarize yourself with the recommended order for adding ingredients. Most models suggest liquids first, followed by dry ingredients, and finally yeast on top.
- Warm Your Milk: Gently warm your milk until it’s between 105-115°F (40-46°C). This temperature is crucial for activating the yeast without killing it. You can use a microwave (heat in 15-second intervals) or a small saucepan.
- Room Temperature Egg and Butter: Ensure your egg is at room temperature and your butter is melted but cooled slightly. Cold ingredients can shock the yeast and hinder rising.
- Add Ingredients to Bread Machine Pan: In the order recommended by your bread machine manufacturer (typically: warm milk, then the egg, then the melted butter).
- Add Dry Ingredients: Carefully add the all-purpose flour, granulated sugar, and salt over the wet ingredients.
- Add Yeast: Make a small indentation on top of the flour (don’t let it touch the wet ingredients yet) and add the active dry or instant yeast. This separation helps prevent premature activation.
Step 2: Start the Bread Machine Dough Cycle
- Select “Dough” Cycle: Place the bread machine pan into the machine and select the “Dough” cycle. This cycle typically kneads the dough and allows it to complete its first rise. It usually takes about 1.5 to 2 hours.
- Monitor the Dough (Optional but Recommended): After about 5-10 minutes of kneading, open the lid and check the dough’s consistency.
- Too Sticky? If the dough is very sticky and adheres heavily to the sides of the pan, add flour one tablespoon at a time until it forms a soft, pliable ball.
- Too Dry? If the dough looks too dry, crumbly, or the machine seems to be struggling to knead it, add warm water or milk one teaspoon at a time until it comes together.
- Let it Rise: Close the lid and let the bread machine complete its dough cycle. The dough should rise significantly, often doubling in size.
Step 3: Shape Your Rolls
- Prepare Your Workspace: Lightly flour a clean countertop or a large cutting board. Have a 9×13 inch baking pan ready, lightly greased or lined with parchment paper.
- Remove Dough: Once the dough cycle is complete, carefully remove the dough from the bread machine pan. It will be soft and airy.
- Gently Deflate: Gently punch down the dough to release the air. Avoid overworking it, as this can make your rolls tough.
- Divide the Dough: Divide the dough into 12-16 equal pieces. For beginners, a kitchen scale can help ensure even rolls (aim for about 2-2.5 oz or 60-70g per roll). If you don’t have a scale, you can roll the dough into a log and cut it into equal segments.
- Shape the Rolls: Take each piece of dough and gently shape it into a smooth ball. You can do this by cupping the dough in your palm and rolling it against the counter, or by pinching the seams together at the bottom.
- Arrange in Pan: Place the shaped rolls into your prepared 9×13 inch baking pan, leaving a little space between each one for them to expand.
Step 4: Second Rise (Proofing)
- Cover the Rolls: Loosely cover the baking pan with plastic wrap or a clean kitchen towel. This prevents the dough from drying out.
- Let Them Rise: Place the covered pan in a warm, draft-free spot for 30-45 minutes, or until the rolls have nearly doubled in size and look puffy. A warm oven (turned off, with the light on) or a slightly warmed microwave (turned off) can be good spots.
- Preheat Oven: While the rolls are rising for the second time, preheat your oven to 375°F (190°C).
Step 5: Bake and Enjoy!
- Bake the Rolls: Once the rolls are fully proofed, remove the cover and place the baking pan in the preheated oven.
- Baking Time: Bake for 18-22 minutes, or until the rolls are golden brown on top. The exact time may vary based on your oven.
- Optional Butter Brush: For an extra shiny, soft crust and rich flavor, immediately after removing the rolls from the oven, brush them with 2 tablespoons of melted butter.
- Cool Slightly: Let the rolls cool in the pan for 5-10 minutes before transferring them to a wire rack to cool completely. While they are tempting to eat immediately, this allows them to set properly.
- Serve Warm: These rolls are best served warm, perhaps with a pat of butter, jam, or alongside your favorite meal. Enjoy your delicious, homemade creations!
Tips & Tricks for Beginner Bakers
Baking can be an art, but with these simple tips, you’ll feel like a pro in no time!
- Ingredient Temperature is Crucial: Always ensure your milk is warm (not hot!) and your egg and butter are at room temperature. This helps the yeast activate properly and creates a consistent dough. Cold ingredients can slow down or even kill your yeast, leading to dense rolls.
- Measure Flour Correctly: For accurate results, use the “spoon and level” method. Spoon flour into your measuring cup until it overflows, then use the back of a knife or a straight edge to level it off. Don’t pack the flour into the cup, as this can add too much, making your dough dry.
- Don’t Skip the Second Rise: The second rise, or proofing, is vital for light and fluffy rolls. It allows the yeast to produce more gas, creating that airy texture. If you bake them before they’ve adequately risen, they’ll be dense.
- How to Tell if Yeast is Active: If you’re unsure about your yeast, you can “proof” it. Mix 1 teaspoon of sugar with 1/4 cup of warm water (105-115°F / 40-46°C) and sprinkle 1 teaspoon of yeast over it. Let it sit for 5-10 minutes. If it becomes foamy and bubbly, your yeast is active and ready to use!
- Avoid Too Much Flour During Shaping: When shaping your rolls, use just enough flour on your hands and surface to prevent sticking. Too much added flour at this stage can make your rolls tough and dry.
- Storage: Store leftover rolls in an airtight container at room temperature for up to 2-3 days. For longer storage, freeze them in a freezer-safe bag for up to 3 months. Reheat gently in the microwave or oven.
- Customization: Feel free to experiment! Add a sprinkle of garlic powder and herbs for savory rolls, or a touch of cinnamon for a sweeter treat.
Essential Baking Tools
Having the right tools makes baking a breeze. Here are some essentials you might need:
- Mixing Bowl (for prep and shaping)
- Whisk (for mixing wet ingredients if not using a bread machine)
- Baking Pan (a 9×13 inch pan is ideal for this recipe)
- Measuring Cups (for dry ingredients)
- Measuring Spoons (for smaller quantities like yeast, salt, sugar)
- Spatula (for scraping dough)
- Kitchen Scale (optional, but great for precise dividing of dough)
- Pastry Brush (for brushing with melted butter)
Nutrition Information (Estimated per Roll)
Please note: This is an estimated nutritional breakdown per roll (assuming 16 rolls from the recipe) and can vary based on exact ingredient brands and measurements.
| Nutrient | Amount |
|---|---|
| Calories | ~180-200 kcal |
| Carbohydrates | ~30-35 g |
| Protein | ~5-6 g |
| Fat | ~6-8 g |
| Fiber | ~1-2 g |
| Sugar | ~4-6 g |
Frequently Asked Questions (FAQs)
Q1: My dough isn’t rising, what went wrong?
A: The most common culprits for dough not rising are usually related to the yeast. Either your water/milk was too hot (killing the yeast) or too cold (inhibiting activation), or your yeast might be old or inactive. Make sure your liquid is between 105-115°F (40-46°C) and check the expiration date on your yeast. You can also proof your yeast separately to ensure it’s active before adding it to the bread machine.
Q2: Can I make these rolls ahead of time?
A: Yes! After shaping the rolls and placing them in the baking pan (Step 3), instead of letting them rise at room temperature, cover them tightly with plastic wrap and refrigerate overnight (up to 12-18 hours). The next day, take them out of the fridge and let them come to room temperature and rise for about 1-1.5 hours in a warm spot before baking as usual. This is called a “cold proof” and can develop more flavor!
Q3: Why are my rolls dense?
A: Dense rolls can happen for a few reasons. You might have added too much flour, especially if you scooped it directly instead of spooning and leveling. Another reason could be insufficient rising time – the rolls need to nearly double in size during both the first and second rises. Lastly, over-kneading the dough after the first rise can develop too much gluten, making the rolls tough, so handle the dough gently.
Q4: Can I use whole wheat flour instead of all-purpose flour?
A: While you can substitute some whole wheat flour, for a beginner-friendly recipe aiming for light and fluffy rolls, we recommend sticking to all-purpose flour. Whole wheat flour absorbs more liquid and has a higher protein content, which can result in a denser roll. If you do want to experiment, start by replacing only 1/2 to 1 cup of all-purpose flour with whole wheat flour and be prepared to adjust liquid content slightly.
Q5: How do I store leftover rolls?
A: Store any leftover rolls in an airtight container or a resealable plastic bag at room temperature for up to 2-3 days. For longer storage, you can freeze them for up to 3 months. To reheat, simply warm them gently in the microwave for 15-30 seconds per roll, or wrap them in foil and heat in a preheated oven at 300°F (150°C) for 10-15 minutes.
Conclusion: Your Journey to Homemade Bread Starts Here!
Congratulations! You’ve just discovered how incredibly easy and rewarding it is to make warm, homemade yeast rolls with the help of your bread machine. This Bread Machine Yeast Rolls Recipe isn’t just about baking; it’s about creating comforting memories and enjoying the simple pleasures of life. Don’t be afraid to try it – your bread machine is your friend, and every bake is a learning experience. So go ahead, gather your ingredients, follow these steps, and prepare to fill your home with the irresistible scent of fresh bread. We can’t wait to hear how your rolls turn out! Happy baking!
“`