Are you ready to dive into the wonderful world of baking but feel a little intimidated by ovens, mixing, and precise timings? Fear not, aspiring bakers. This Bread Maker Banana Bread Recipe is specifically designed to make your journey into easy baking recipes an absolute delight.
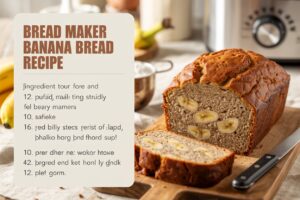
Forget complicated steps and endless cleanup – your trusty bread maker is about to become your new best friend, helping you create a moist, flavorful, and utterly irresistible banana bread with minimal effort. This recipe is packed with baking tips for beginners to ensure your success, transforming those ripe bananas sitting on your counter into a golden-brown loaf of pure comfort. Get ready to impress yourself and your loved ones with this foolproof method!
Ingredients You’ll Need
Gathering your ingredients beforehand, also known as “mise en place,” is a fantastic habit for beginners. It ensures you have everything on hand and makes the baking process smoother!
| Ingredient | Quantity |
|---|---|
| Overripe Bananas, mashed | 1 ½ cups (about 3-4 large) |
| Large Eggs | 2 |
| Unsalted Butter, melted and cooled | ½ cup (113g) |
| Granulated Sugar | ½ cup (100g) |
| Light Brown Sugar, firmly packed | ½ cup (100g) |
| All-Purpose Flour | 1 ¾ cups (210g) |
| Baking Soda | 1 teaspoon |
| Salt | ½ teaspoon |
| Vanilla Extract | 1 teaspoon |
| Ground Cinnamon (optional) | ½ teaspoon |
| Chopped Walnuts or Chocolate Chips (optional) | ½ cup |
Step-by-Step Instructions for Bread Maker Banana Bread
Follow these detailed steps, and you’ll be enjoying warm, homemade banana bread in no time!
-
Prepare Your Bananas:
Start by peeling your overripe bananas. The riper they are (brown spots galore!), the sweeter and more flavorful your bread will be. Place them in a medium bowl and mash them thoroughly with a fork or a potato masher until mostly smooth with a few small lumps remaining. Aim for about 1 ½ cups of mashed banana. Beginner Tip: Don’t try to mash underripe bananas; they won’t yield the same moisture or sweetness!
-
Add Liquid Ingredients to Bread Maker Pan:
Carefully remove the bread pan from your bread maker. This is where the magic begins! First, pour in the mashed bananas. Then, add the two large eggs, the melted and cooled unsalted butter, granulated sugar, light brown sugar, and vanilla extract. Important for Beginners: Ensure your butter is melted but cooled, not hot, as hot butter can “cook” the eggs prematurely and affect the texture of your bread.
-
Layer Dry Ingredients:
Now it’s time for the dry ingredients. Gently spoon the all-purpose flour over the wet ingredients in the bread pan, creating an even layer. On top of the flour, add the baking soda, salt, and optional ground cinnamon. Beginner Tip: Most bread makers recommend adding wet ingredients first, then dry, and yeast (if using a yeast recipe) last. For quick breads like this, the order helps prevent the leavening agents from activating too early.
-
Place Pan in Bread Maker and Select Setting:
Carefully place the bread pan back into your bread maker, ensuring it’s securely locked in place. Close the lid. Now, select the appropriate cycle. Most bread makers have a “Quick Bread,” “Sweet Bread,” or “Cake” setting. This cycle typically mixes the ingredients, pauses, and then bakes. Consult your bread maker’s manual if you’re unsure which setting to use. The cycle usually takes around 1 hour and 30 minutes to 2 hours.
-
Add Optional Mix-ins (If Desired):
If you’re adding chopped walnuts or chocolate chips, your bread maker will likely beep partway through the mixing cycle to signal when to add them. This usually happens about 10-15 minutes into the mixing. Open the lid and carefully sprinkle in your chosen mix-ins. Close the lid and let the machine continue its work. Beginner Tip: Don’t add mix-ins too early, as they can get overly pulverized during the initial mixing phase.
-
Check for Doneness:
Once the bread maker cycle finishes, it’s a good idea to double-check if your banana bread is fully baked. Carefully open the lid (it will be hot!) and insert a toothpick into the center of the loaf. If it comes out clean or with only a few moist crumbs attached, your bread is done. If it’s still wet, you can sometimes run the bread maker on a “Bake Only” cycle for another 10-15 minutes, or simply remove the pan and bake it in a preheated oven at 350°F (175°C) until done.
-
Cool the Bread:
With oven mitts, carefully remove the hot bread pan from the bread maker. Invert the pan onto a wire cooling rack to release the banana bread. If it sticks, gently tap the bottom of the pan. Allow the banana bread to cool on the wire rack for at least 30 minutes before slicing. Why Cool? Slicing hot banana bread can make it crumbly and difficult to cut neatly. Cooling allows the internal structure to set and ensures a perfectly moist slice.
-
Slice and Enjoy!
Once cooled, slice your delicious homemade bread maker banana bread with a serrated knife and enjoy! It’s perfect for breakfast, a snack, or even a simple dessert with a cup of coffee or tea.
Tips & Tricks for Perfect Bread Maker Banana Bread Every Time
Elevate your banana bread game with these actionable tips:
- Overripe Bananas are Key: Don’t skimp on the ripeness! Bananas with lots of brown spots are sweeter and moister, contributing significantly to the flavor and texture of your bread. If you only have yellow bananas, you can speed up ripening by baking them unpeeled at 300°F (150°C) for 15-20 minutes until they turn black.
- Room Temperature Ingredients: Ensure your eggs and butter are at room temperature. This allows them to emulsify better with other ingredients, creating a smoother, more uniform batter and a lighter texture in your final bread.
- Don’t Overmix (Even in a Machine): While the bread maker does the mixing, be mindful if you’re manually adding mix-ins. Overmixing flour can develop gluten too much, leading to a tough, dense banana bread. The bread maker’s quick bread cycle is usually designed to prevent this.
- Experiment with Add-ins: Beyond walnuts and chocolate chips, try pecans, shredded coconut, dried cranberries, or a swirl of cream cheese frosting after baking and cooling.
- Proper Storage: Store your banana bread in an airtight container at room temperature for up to 3-4 days. For longer storage, wrap individual slices or the whole loaf tightly in plastic wrap and then foil, and freeze for up to 3 months. Thaw at room temperature.
- Flavor Boost: A pinch of nutmeg or a dash of allspice can complement the cinnamon beautifully. For a richer flavor, toast your walnuts before adding them.
Essential Baking Tools
While your bread maker does most of the heavy lifting, these basic tools will make preparing your ingredients a breeze:
- Mixing Bowl (for mashing bananas)
- Whisk (optional, for light pre-mixing)
- Baking Pan (not strictly needed for the bread maker itself, but useful if you need to finish baking in an oven)
- Measuring Cups
- Spatula (for scraping bowls and general utility)
- Your Bread Maker! The star of the show.
Nutrition Information (Approximate per serving)
Please note: This is an approximate nutritional breakdown based on common ingredient values and a loaf yielding 10-12 servings. Actual values may vary based on specific ingredients and serving size.
| Nutrient | Per Serving (approx.) |
|---|---|
| Calories | 300-350 |
| Carbohydrates | 45-55g |
| Protein | 4-6g |
| Fat | 12-16g |
| Fiber | 2-3g |
| Sugar | 25-35g |
Frequently Asked Questions (FAQs)
Q: Can I use frozen bananas for this recipe?
A: Absolutely! Frozen overripe bananas work wonderfully. Just make sure to thaw them completely first, then drain any excess liquid before mashing. The thawing process often makes them even softer and easier to mash.
Q: My banana bread is too dense. What went wrong?
A: A dense texture can often be caused by using too much flour or not enough leavening (baking soda). Ensure you’re measuring your flour correctly (spoon into the measuring cup and level off, don’t scoop directly from the bag). Also, double-check that your baking soda isn’t expired.
Q: Can I reduce the sugar in this recipe?
A: Yes, you can. Overripe bananas naturally provide a lot of sweetness. You can reduce the total sugar (granulated and brown sugar combined) by about ¼ to ½ cup without significantly altering the texture. Experiment to find your preferred level of sweetness.
Q: What if my bread maker doesn’t have a “Quick Bread” or “Sweet Bread” setting?
A: If your bread maker lacks a specific quick bread cycle, you can often use a “Cake” setting if available, or a “Dough” cycle followed by a “Bake” cycle. For the latter, use the dough cycle to mix the ingredients, then remove the mixing paddle, reshape the dough if needed, and then run a “Bake” cycle until done. Consult your manual for the best alternative.
Q: How do I know if my baking soda is still good?
A: To test your baking soda, mix about ¼ teaspoon with 2 tablespoons of vinegar. If it fizzes immediately and vigorously, it’s still active. If there’s little to no fizz, it’s time to replace it.
Conclusion: Your Bread Maker Banana Bread Adventure Awaits!
Congratulations, budding baker! You’ve just discovered how incredibly simple and satisfying it is to make delicious banana bread using your bread maker. This Bread Maker Banana Bread Recipe is truly a game-changer for anyone looking for easy baking recipes that deliver maximum flavor with minimal fuss. From the comforting aroma filling your kitchen to that first, perfect slice, you’ll be so proud of what you’ve created.
Don’t stop here! Use these baking tips for beginners as a foundation for more culinary adventures. Experiment with different mix-ins, share your creations with friends and family, and most importantly, enjoy the process. Happy baking!