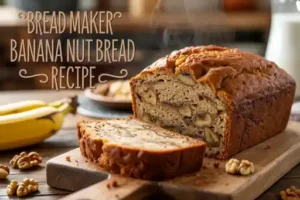
your trusty bread maker is about to become your new best friend for all your easy baking recipes. We’re going to walk through every step, offering plenty of baking tips for beginners, so you can achieve a perfectly moist, flavorful banana nut bread every single time. Get ready to fill your home with the irresistible aroma of freshly baked goods!
Essential Ingredients for Your Bread Maker Banana Nut Bread
Gathering your ingredients is the first step to baking success. Make sure to use ripe (even overripe!) bananas for the best flavor and moisture. Here’s everything you’ll need:
| Ingredient | Quantity | Unit |
|---|---|---|
| Very Ripe Bananas, mashed | 1.5 | cups (approx. 3-4 medium) |
| Large Eggs | 2 | |
| Vegetable Oil (or melted butter) | 1/2 | cup |
| Granulated Sugar | 3/4 | cup |
| All-Purpose Flour | 1.5 | cups |
| Baking Soda | 1 | teaspoon |
| Salt | 1/2 | teaspoon |
| Ground Cinnamon (optional) | 1/2 | teaspoon |
| Vanilla Extract | 1 | teaspoon |
| Chopped Walnuts (or pecans) | 1/2 | cup |
Step-by-Step Instructions: Baking Banana Nut Bread in Your Bread Maker
This is where the magic happens! Follow these detailed steps for a perfect loaf every time. Remember, the key to using a bread maker for quick breads is often the order of ingredients.
Step 1: Prepare Your Bananas
- First things first, let’s get those bananas ready. You want them to be very ripe – think brown spots, soft to the touch. This ensures maximum sweetness and moisture.
- Peel your bananas and place them in a medium-sized mixing bowl. Using a fork or a potato masher, thoroughly mash them until they are mostly smooth with a few small lumps remaining. Aim for about 1.5 cups of mashed banana. Beginner Tip: Don’t worry if they’re not perfectly smooth; a few lumps add lovely texture to the finished bread!
Step 2: Wet Ingredients First!
- Carefully remove the bread pan from your bread maker. This makes it easier to add ingredients without spills.
- Pour the mashed bananas directly into the bottom of the bread pan.
- Next, crack your two large eggs into the pan, followed by the 1/2 cup of vegetable oil (or melted butter) and the 1 teaspoon of vanilla extract.
- Why wet ingredients first? For most bread maker quick bread cycles, adding liquids first helps prevent dry ingredients from sticking to the bottom and ensures even mixing.
Step 3: Layer in the Dry Ingredients
- Now it’s time for the dry components. Gently spoon the 3/4 cup of granulated sugar over the wet ingredients in the pan.
- Next, add the 1.5 cups of all-purpose flour on top of the sugar. Don’t mix it yet!
- In separate small mounds on top of the flour, add the 1 teaspoon of baking soda, 1/2 teaspoon of salt, and the optional 1/2 teaspoon of ground cinnamon. Beginner Tip: Try to keep the baking soda and salt separate from the wet ingredients for as long as possible, especially if your bread maker has a pre-heat cycle. This helps prevent premature activation.
Step 4: Select Your Bread Maker Setting
- Return the bread pan to your bread maker, making sure it clicks securely into place. Close the lid.
- Select the appropriate setting on your bread maker. Most bread makers have a “Quick Bread,” “Cake,” or “Sweet Bread” setting. These cycles typically don’t involve yeast proofing and have a shorter, gentler mixing and baking process suitable for batters.
- Common Mistake & Solution: Accidentally selecting a “Basic Bread” or “Whole Wheat” setting will likely overmix and overbake your banana bread. Always double-check your setting! If your machine doesn’t have a specific quick bread setting, you might use a “Dough” cycle for mixing and then transfer to a conventional oven, but for simplicity, aim for a “Quick Bread” option.
- Press “Start.”
Step 5: Adding the Nuts (Crucial Timing!)
- Your bread maker will begin its mixing cycle. This is usually the stage where you’ll add the nuts.
- Many bread makers have an audible “beep” or a designated “add-in” signal about 5-10 minutes into the first mixing cycle. When you hear this, carefully open the lid and add the 1/2 cup of chopped walnuts (or pecans) directly into the pan.
- What if my bread maker doesn’t beep? No problem! Just keep an eye on it. After the initial mixing has combined the wet and dry ingredients (usually within the first 10-15 minutes), open the lid and add the nuts. Close the lid quickly to allow the cycle to continue. Adding them too early might result in them being overly chopped by the paddle.
Step 6: The Baking Journey
- Now, let your bread maker do its job! Resist the urge to open the lid frequently, as this can cause temperature fluctuations and affect the rising of your bread.
- The quick bread cycle typically takes between 1 hour and 1 hour 45 minutes, depending on your machine and loaf size.
Step 7: Check for Doneness
- Towards the end of the baking cycle, it’s a good idea to check for doneness.
- Carefully open the lid and insert a wooden skewer or toothpick into the center of the loaf. If it comes out clean or with only a few moist crumbs attached, your banana bread is done! If it’s still very wet, you might need to run a short “bake” only cycle (if your machine has one) or let it finish the current cycle.
- Beginner Tip: Don’t overbake! Banana bread can dry out quickly. Once the toothpick is clean, it’s ready.
Step 8: Cooling is Key!
- Once the cycle finishes and the bread is done, immediately remove the bread pan from the machine using oven mitts. The pan will be very hot!
- Let the bread pan sit on a wire rack for about 10-15 minutes. This initial cooling helps the bread firm up before removal.
- After 10-15 minutes, carefully invert the pan onto the wire rack to release the loaf. If the paddle is stuck in the bread, gently remove it.
- Allow the banana bread to cool completely on the wire rack before slicing. Why cool completely? Slicing warm quick bread can make it gummy and cause it to crumble. Cooling allows the internal structure to set properly, resulting in a perfectly sliceable and moist loaf.
Step 9: Slice and Enjoy!
- Once cooled, slice your delicious Bread Maker Banana Nut Bread with a serrated knife and enjoy! It’s fantastic for breakfast, a snack, or even dessert.
Tips & Tricks for Bread Maker Banana Nut Bread Success
Even though this is an easy recipe, a few extra pointers can make your banana bread even better and help you troubleshoot common issues:
- Overripe Bananas are Gold: The browner and spottier your bananas, the sweeter and more flavorful your bread will be. They also mash more easily and contribute to a moister crumb. If you have extra overripe bananas, mash them, portion them, and freeze them for future baking!
- Accurate Measuring: Baking is a science! Use proper measuring cups and spoons. For flour, spoon it into your measuring cup and then level it off with a straight edge (like the back of a knife) rather than scooping directly from the bag, which can compact the flour and lead to a dry loaf.
- Don’t Skimp on Cooling: We know it’s hard to resist, but letting the bread cool completely on a wire rack is crucial. It allows the bread’s texture to set, preventing a gummy interior and making it easier to slice cleanly.
- Experiment with Nuts: While walnuts are classic, feel free to substitute with pecans, or even a mix of both! For extra flavor, lightly toast your nuts in a dry pan for a few minutes before adding them to the bread.
- Spice it Up: A touch of nutmeg or a pinch of allspice can complement the cinnamon beautifully. Feel free to adjust spices to your liking.
- Preventing a Soggy Bottom: If you find your bread maker quick breads sometimes have a slightly dense or gummy bottom, ensure you’re using the correct “Quick Bread” or “Cake” setting. Also, make sure your bananas aren’t excessively watery.
- Storage: Once completely cooled, store your banana bread in an airtight container at room temperature for up to 3-4 days. For longer storage, wrap individual slices or the whole loaf tightly in plastic wrap and then foil, and freeze for up to 3 months.
Essential Baking Tools for Beginners
While your bread maker does most of the heavy lifting, a few basic tools will make your baking experience even smoother:
- Mixing Bowl (for mashing bananas)
- Whisk (optional, but good for quick ingredient blending outside the bread maker)
- Baking Pan (not strictly needed for this recipe, but useful for other quick breads or if you want to transfer dough)
- Measuring Cups (for dry and liquid ingredients)
- Spatula (for scraping bowls and general utility)
- Wire Cooling Rack (essential for proper cooling!)
Estimated Nutrition Information (per serving)*
Here’s an approximate nutritional breakdown for a single slice (assuming 12 slices per loaf) of your delicious banana nut bread:
| Nutrient | Amount |
|---|---|
| Calories | 280-320 kcal |
| Carbohydrates | 40-45 g |
| Protein | 4-5 g |
| Fat | 12-15 g |
| Fiber | 2-3 g |
| Sugar | 20-25 g |
*Please note: These are estimated values and can vary based on specific ingredients, brands, and serving size.
Frequently Asked Questions (FAQs) for Beginner Bakers
Q1: My bananas aren’t very ripe. Can I still use them?
While very ripe (brown-spotted) bananas yield the best flavor and moisture, you can still use less ripe ones. To speed up ripening, place them in a paper bag with an apple or tomato overnight. If you’re in a pinch, you can bake unpeeled bananas on a baking sheet at 300°F (150°C) for 15-30 minutes until their skins turn black and they soften. Let them cool before mashing.
Q2: Can I substitute ingredients, like oil for butter or different nuts?
Absolutely! You can use an equal amount of melted butter instead of vegetable oil for a richer flavor. For nuts, pecans are a fantastic alternative to walnuts. If you have nut allergies or prefer no nuts, simply omit them – your banana bread will still be delicious!
Q3: How do I know when my banana bread is perfectly baked in the bread maker?
The best way to check is with the toothpick test. Towards the end of the baking cycle (or when your machine beeps that it’s done), insert a wooden skewer or toothpick into the center of the loaf. If it comes out clean or with only a few moist crumbs attached, it’s done. If it’s still wet with batter, you might need to run a short additional “bake” cycle if your machine allows, or let it finish its standard cycle if it’s not quite there yet.
Q4: Why did my banana bread turn out dry or crumbly?
There are a few common reasons for dry banana bread. The most frequent culprits are using too much flour (often from scooping it directly rather than spooning and leveling), not using ripe enough bananas (which add moisture), or overbaking. Ensure you measure flour accurately and stick to the recommended baking time, checking for doneness as described above.
Q5: How should I store my leftover banana bread?
Once your banana bread has completely cooled, store it in an airtight container at room temperature for up to 3-4 days. For longer storage, you can wrap individual slices or the entire loaf tightly in plastic wrap, then aluminum foil, and freeze for up to 3 months. Thaw at room temperature or gently warm in the microwave.
Time to Enjoy Your Homemade Masterpiece!
Congratulations, baker! You’ve just created a wonderfully moist and flavorful Bread Maker Banana Nut Bread with minimal effort. This recipe proves that delicious homemade treats are absolutely within reach, even for the most novice bakers. We hope these easy baking recipes and baking tips for beginners have empowered you to confidently use your bread maker for more than just traditional loaves.
So, go ahead, grab a slice, pour yourself a cup of coffee, and savor the sweet reward of your labor. Don’t forget to share your baking success with friends and family, and perhaps even share a photo in the comments below! Happy baking!