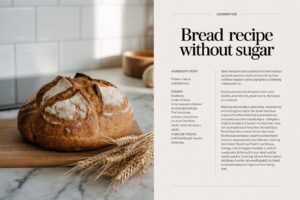
Welcome, aspiring bakers! Are you ready to experience the incredible satisfaction of baking your own fresh bread right in your kitchen? This Bread Recipe Without Sugar is designed specifically for you, whether you’re a seasoned pro or just dipping your toes into the wonderful world of baking. We understand that navigating easy baking recipes can sometimes feel daunting, but trust us, this recipe is straightforward, forgiving, and incredibly rewarding. Say goodbye to store-bought loaves and hello to the comforting aroma of warm, homemade bread. We’ve packed this guide with detailed baking tips for beginners to ensure your first (or hundredth!) loaf is a resounding success. Get ready to impress yourself and your loved ones with a wholesome, delicious bread that’s perfectly suited for sandwiches, toast, or simply tearing apart and enjoying on its own.
Ingredients You’ll Need
Gather these simple ingredients – you likely have most of them in your pantry already!
| Ingredient | Quantity | Unit |
|---|---|---|
| Warm Water (105-115°F / 40-46°C) | 1 ½ | cups |
| Active Dry Yeast | 2 ¼ | teaspoons (1 standard packet) |
| All-Purpose Flour (or Bread Flour) | 3 ½ – 4 | cups |
| Salt | 1 ½ | teaspoons |
| Olive Oil (plus extra for greasing) | 2 | tablespoons |
Step-by-Step Instructions: Baking Your Perfect Loaf
Follow these detailed steps carefully, and you’ll be enjoying homemade bread in no time!
Step 1: Activate Your Yeast
In a large mixing bowl, pour in the 1 ½ cups of warm water. It’s crucial that the water is between 105-115°F (40-46°C). If it’s too cold, the yeast won’t activate; too hot, and it will kill the yeast. A kitchen thermometer is very helpful here! Sprinkle the 2 ¼ teaspoons of active dry yeast over the water. Stir gently, then let it sit for 5-10 minutes. You’ll know your yeast is alive and well when it becomes foamy and bubbly on the surface. If it doesn’t foam, your yeast might be old or the water temperature was off – you’ll need to start this step over.
Step 2: Mix the Wet Ingredients
Once your yeast is activated, add the 2 tablespoons of olive oil to the yeast mixture. Give it a quick stir to combine.
Step 3: Combine Dry Ingredients
In a separate medium bowl, whisk together 3 ½ cups of the flour and the 1 ½ teaspoons of salt. The salt is essential for flavor and also helps to control the yeast’s activity. Mixing it with the flour first ensures even distribution.
Step 4: Form the Dough
Gradually add the dry flour mixture to the wet yeast mixture, about one cup at a time. Use a sturdy spoon or a spatula to mix until a shaggy, somewhat sticky dough forms. At this point, it might look like a messy blob, and that’s perfectly normal! You might not need all 4 cups of flour; stop adding when the dough starts to come together but is still a bit sticky.
Step 5: Kneading the Dough (The Arm Workout!)
Now for the fun part that develops the bread’s structure: kneading! Transfer your shaggy dough onto a lightly floured surface. Don’t add too much flour at this stage, just enough to prevent sticking.
- Technique: Push the dough away from you with the heels of your hands, fold it back over itself, give it a quarter turn, and repeat. Continue this motion for about 8-10 minutes.
- What to look for: Initially, the dough will be sticky and messy. As you knead, it will become smoother, more elastic, and less sticky. It should feel pliable and spring back slowly when poked.
- Beginner Tip: A good test for readiness is the ‘windowpane test.’ Tear off a small piece of dough and gently stretch it. If you can stretch it thin enough to see light through it without tearing, your gluten is well developed, and it’s ready! If it tears easily, keep kneading.
Step 6: First Rise (Bulk Fermentation)
Lightly grease a clean large bowl with a little olive oil. Place your kneaded dough into the bowl, turning it once to coat the top with oil (this prevents it from drying out). Cover the bowl tightly with plastic wrap or a clean kitchen towel. Place it in a warm, draft-free spot in your kitchen. This could be a sunny windowsill, on top of the fridge, or even in a turned-off oven with just the light on (the heat from the bulb is enough). Let the dough rise for 1 to 1 ½ hours, or until it has doubled in size. The exact time depends on the warmth of your room and the vitality of your yeast. To check if it’s ready, gently poke two fingers into the dough; if the indentations remain, it’s ready.
Step 7: Shape the Loaf
Once doubled, gently punch down the dough to release the air. Transfer it to a lightly floured surface. Gently shape the dough into a loaf. The easiest way for beginners is to flatten it into a rectangle, then roll it up tightly from one of the long sides, pinching the seam closed at the bottom. Tuck the ends under slightly to create a neat loaf shape. Place the loaf, seam-side down, into a lightly greased 9×5-inch loaf pan.
Step 8: Second Rise (Proofing)
Cover the loaf pan loosely with plastic wrap or a clean kitchen towel. Return it to your warm, draft-free spot for another 30-45 minutes, or until the dough has again almost doubled in size and looks puffy. Be gentle with it at this stage, as too much handling can deflate it.
Step 9: Preheat Your Oven
About 15 minutes before the second rise is complete, preheat your oven to 375°F (190°C). It’s crucial to bake bread in a fully preheated oven for the best rise and crust.
Step 10: Bake Your Bread
Place the loaf pan in the preheated oven. Bake for 30-35 minutes, or until the crust is golden brown and the internal temperature of the bread reaches 200-210°F (93-99°C) when measured with an instant-read thermometer. If the top is browning too quickly, you can loosely tent it with foil for the last 10-15 minutes of baking.
Step 11: Cool Completely
Once baked, immediately remove the bread from the loaf pan and place it on a wire rack to cool completely. This step is often overlooked but is incredibly important! Cooling allows the internal structure of the bread to set and prevents it from becoming gummy. Resist the urge to slice into it too soon! Let it cool for at least 1-2 hours, or until it’s barely warm to the touch.
Tips & Tricks for Baking Success
- Check Your Yeast: Always ensure your yeast is fresh. If it doesn’t foam in Step 1, it’s dead, and your bread won’t rise. Buy new yeast!
- Water Temperature is Key: Invest in a kitchen thermometer. The perfect temperature for activating active dry yeast is 105-115°F (40-46°C). Too cold, it’s sluggish; too hot, it dies.
- Don’t Add All Flour at Once: Flour absorption varies. Start with the lower amount and add more gradually only if the dough is too sticky to handle. A slightly sticky dough is better than a dry, dense one.
- Patience with Kneading: Don’t rush this step. Proper kneading develops the gluten, which gives bread its structure and chewiness. If you have a stand mixer with a dough hook, it can do the work for you (about 6-8 minutes on medium speed).
- Find a Warm Spot for Rising: Dough loves warmth. If your kitchen is cool, try turning your oven on for a minute, then turning it off and letting the dough rise inside with the door slightly ajar (and the light on for extra warmth).
- Don’t Over-Proof: While rising is good, too much rising (over-proofing) can lead to a collapsed loaf. Keep an eye on your dough; it should look puffy, not enormous and stretched.
- Use an Oven Thermometer: Oven temperatures can vary widely from what the dial says. An inexpensive oven thermometer will ensure you’re baking at the correct temperature.
- Cool Completely: Seriously, this is vital! Slicing into hot bread can make it gummy and dense. The bread continues to “cook” and set as it cools.
Essential Baking Tools
Having the right tools makes the baking process smoother and more enjoyable:
- Mixing Bowl (Large)
- Whisk
- 9×5 inch Loaf Pan
- Measuring Cups
- Measuring Spoons
- Rubber Spatula
- Instant-Read Thermometer (for water and bread internal temp)
- Wire Cooling Rack
Nutrition Information (Estimated per slice, assuming 12 slices per loaf)
This is an approximation and can vary based on exact ingredient quantities and brands.
| Nutrient | Amount (per slice) |
|---|---|
| Calories | ~110-130 kcal |
| Carbohydrates | ~20-25 g |
| Protein | ~4-5 g |
| Fat | ~1-2 g |
| Fiber | ~1 g |
| Sugar | ~0-1 g (naturally occurring from flour) |
Frequently Asked Questions (FAQs)
Q1: Why isn’t my dough rising?
The most common culprits are dead yeast (check expiration date, or if it didn’t foam in step 1), or the water temperature for activation was too hot or too cold. Ensure your rising environment is warm and draft-free.
Q2: Can I use whole wheat flour for this recipe?
Yes, but you might need to adjust the liquid. Whole wheat flour absorbs more water, so you might need an extra ¼ cup of water. Also, whole wheat dough can be denser and may not rise as high or quickly. A 50/50 blend of whole wheat and all-purpose flour is a great starting point for beginners.
Q3: How do I know if my dough is kneaded enough?
Besides the windowpane test (described in Step 5), the dough should be smooth, elastic, and spring back slowly when poked with a finger. It should also feel less sticky than when you started.
Q4: How should I store homemade bread?
Once completely cooled, store your bread in an airtight container or a bread bag at room temperature for 3-4 days. For longer storage, slice the bread and freeze it in a freezer-safe bag for up to 2-3 months. You can toast slices directly from frozen!
Q5: Can I add other ingredients to this basic bread?
Absolutely! This sugar-free base is perfect for customization. Consider adding dried herbs (like rosemary or thyme), garlic powder, onion powder, or a handful of seeds (sesame, poppy, sunflower) to the dough during the mixing stage for extra flavor and texture. Just be mindful that additions like cheese should be added carefully to avoid altering the dough’s structure too much.
Enjoy Your Homemade Bread!
There’s truly nothing quite like the smell and taste of freshly baked bread. You’ve just created something wonderful with your own hands, a delicious and wholesome loaf without any added sugar. This Bread Recipe Without Sugar is not just a recipe; it’s an invitation to explore the joys of baking. Don’t be afraid to experiment and make it your own. We hope this detailed guide has given you the confidence to become a regular bread baker. Slice it, toast it, make a sandwich, or simply enjoy a warm piece with a smear of butter. Happy baking, and we can’t wait to hear about your successful loaves!