Ingredients List: Simple Staples for Amazing Flavor
Gathering your ingredients is the first step to baking success. Accuracy is key, especially with bread, so make sure to measure everything carefully!
| Ingredient | Quantity | Notes |
|---|---|---|
| Warm Water | 1 ¼ cups | Around 105-115°F (40-46°C). Too hot will kill yeast, too cold won’t activate it. |
| Olive Oil | 2 tablespoons | Adds flavor, tenderness, and a lovely crust. |
| Granulated Sugar | 1 tablespoon | Feeds the yeast, contributing to a good rise and golden crust. |
| Salt | 1 ½ teaspoons | Essential for flavor and controls yeast activity. |
| Bread Flour | 3 ½ cups | High protein flour gives a chewy texture. Spoon and level for accuracy. |
| Active Dry Yeast | 2 ¼ teaspoons | One standard packet. Ensure it’s fresh! |
| Dried Italian Herbs (Optional) | 1 tablespoon | For an extra burst of classic Italian flavor. |
Step-by-Step Instructions: Your Path to Perfect Italian Bread

Follow these detailed steps, and you’ll be enjoying warm, homemade Italian bread in no time. Remember, the breadmaker does most of the hard work!
Step 1: Layer Your Ingredients in the Breadmaker
This is a crucial step! Most bread machines recommend adding liquids first, followed by dry ingredients, and then the yeast last, nestled in a small well. This prevents the yeast from activating too early or coming into direct contact with salt, which can inhibit its activity.
- Add Liquids First: Pour the warm water and olive oil into your bread machine pan. The warmth of the water is vital for waking up your yeast!
- Add Dry Ingredients (Except Yeast): Carefully add the granulated sugar, salt, and bread flour on top of the liquids. If you’re using them, sprinkle in the dried Italian herbs now.
- Create a Well for Yeast: With your finger, make a small indentation or “well” in the center of the flour.
- Add the Yeast: Spoon the active dry yeast directly into this well. Try to keep it from touching the liquid or salt initially.
Step 2: Select the “Dough” Cycle
Now, let your breadmaker work its magic! This cycle will mix, knead, and allow the dough to complete its first rise.
- Program Your Machine: Place the bread pan back into your breadmaker and select the “Dough” cycle. This cycle typically lasts between 1 hour 30 minutes to 2 hours 30 minutes, depending on your machine.
- Close the Lid: Close the lid and let the machine do its work. Resist the urge to open the lid during the mixing and kneading phase, as this can affect the dough’s temperature and rise.
- Monitor the Dough (Optional but Recommended for Beginners): About 5-10 minutes into the kneading cycle, peek at the dough. It should form a smooth, elastic ball. If it looks too wet and sticky (like pancake batter), add flour, 1 tablespoon at a time. If it looks too dry and crumbly, add warm water, 1 teaspoon at a time. This adjustment can make a big difference in the final texture of your bread!
Step 3: Prepare and Shape Your Dough
Once the dough cycle is complete, your dough will be beautifully risen and ready for the next stage.
- Remove the Dough: Carefully remove the dough from the breadmaker pan. It will be light and airy. Gently punch it down to release the air – don’t be too aggressive!
- Lightly Flour Your Surface: Turn the dough out onto a lightly floured surface.
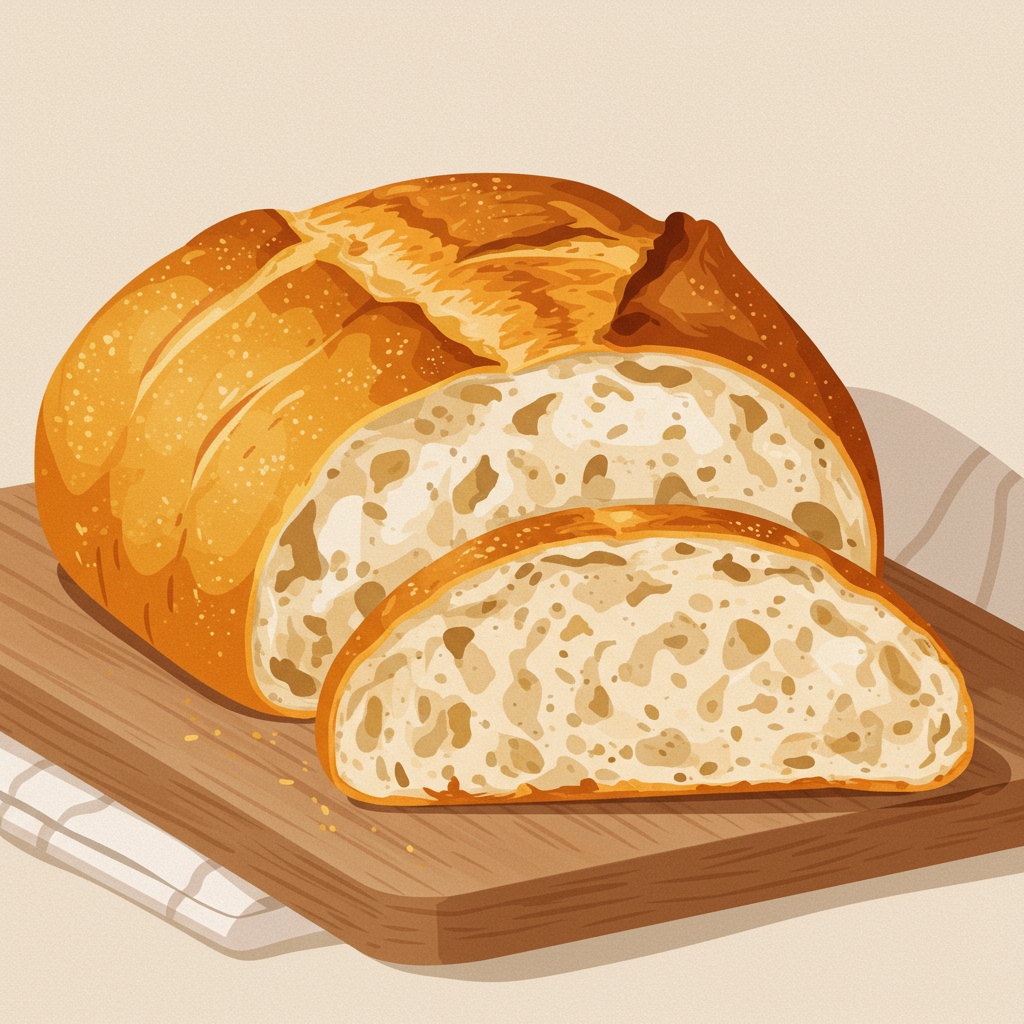
- Shape the Loaf: Shape the dough into your desired Italian bread form. You can make a traditional long, oval loaf (like a baguette or ciabatta shape), or even a round boule. To shape a long loaf, gently flatten the dough into a rectangle, then roll it up tightly from one long side, pinching the seam to seal it.
- Prepare Your Baking Sheet: Place the shaped loaf onto a baking sheet lined with parchment paper or a silicone baking mat. This prevents sticking and makes cleanup easier.
Step 4: Second Rise (Proofing)
This second rise helps develop flavor and gives your bread its final volume and airy texture.
- Cover the Dough: Lightly cover the shaped dough with a clean kitchen towel or plastic wrap (sprayed with non-stick spray to prevent sticking).
- Allow to Rise: Let the dough rise in a warm, draft-free place for about 30-45 minutes, or until it has nearly doubled in size. You can tell it’s ready if you gently poke it with a floured finger and the indentation slowly springs back.
- Preheat Oven: About 15 minutes before the second rise is complete, preheat your oven to 375°F (190°C).
Step 5: Score and Bake
Scoring isn’t just for looks; it helps the bread expand evenly in the oven and prevents uncontrolled cracking.
- Score the Loaf (Optional but Recommended): Using a very sharp knife, a lame (a special bread-scoring tool), or even a razor blade, make 2-3 diagonal slashes about ½ inch deep across the top of the loaf. This allows the bread to expand beautifully during baking.
- Bake the Bread: Place the baking sheet with the bread into your preheated oven.
- Baking Time: Bake for 25-35 minutes, or until the crust is golden brown and the internal temperature reaches 200-210°F (93-99°C) when checked with an instant-read thermometer. If the crust is browning too quickly, you can loosely tent it with aluminum foil.
Step 6: Cool and Enjoy!
This final step is crucial for the bread’s texture and flavor.
- Cool Completely: Remove the bread from the oven and immediately transfer it to a wire cooling rack. This allows air to circulate around the entire loaf, preventing the bottom from becoming soggy.
- Resist the Urge: It’s tempting to cut into warm bread, but for the best texture and flavor, allow it to cool for at least 30-60 minutes before slicing. This allows the internal moisture to redistribute.
- Serve and Enjoy: Once cooled, slice your delicious homemade Italian bread and serve it with olive oil, butter, or alongside your favorite Italian meal!
Tips & Tricks for Breadmaker Success (Especially for Beginners!)
Baking bread is a science, but with a few simple tips, you can ensure a perfect loaf every time:
- Measure Accurately: This cannot be stressed enough! Use proper measuring cups and spoons. For flour, spoon it into your measuring cup and then level it off with a straight edge. Don’t scoop directly from the bag, as this compacts the flour and you’ll end up with too much.
- Check Your Yeast: Yeast is a living organism! To check if it’s still active, dissolve 1 teaspoon of sugar in ¼ cup of warm water (105-115°F/40-46°C). Sprinkle 2 ¼ teaspoons of yeast on top. Let it sit for 5-10 minutes. If it becomes foamy and bubbly, your yeast is good to go! If not, it’s time for a new packet.
- Ingredient Temperature Matters: Ensure your water is warm (not hot!) to activate the yeast properly. Cold ingredients can slow down or inhibit yeast activity, leading to a poor rise.
- Don’t Skimp on the Cool-Down: Cooling bread completely on a wire rack allows residual steam to escape and moisture to redistribute. Slicing too early can result in a gummy texture. Patience is a virtue here!
- Experiment with Add-ins: Once you’re comfortable with the basic recipe, try adding ½ cup of grated Parmesan cheese, sun-dried tomatoes (drained and chopped), or a handful of pitted olives during the last 5-10 minutes of the kneading cycle.
- Clean Your Breadmaker: Always clean the bread pan and kneading paddle thoroughly after each use to prevent residue buildup, which can affect future loaves.
Essential Baking Tools: Your Kitchen Companions
Having the right tools makes all the difference, especially when you’re starting your baking journey. These basics will set you up for success:
- Mixing Bowl (for light flouring or mix-ins)
- Whisk (for combining dry ingredients if not using a breadmaker)
- Baking Pan (a standard baking sheet for oven baking)
- Measuring Cups & Spoons (accurate measurement is critical!)
- Spatula (for gently scraping dough)
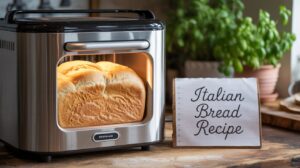
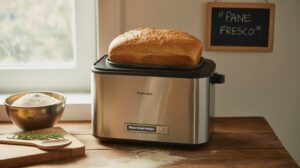
- Breadmaker: Of course! The star of this recipe.
- Parchment Paper or Silicone Baking Mat: For non-stick baking.
- Wire Cooling Rack: Essential for preventing a soggy bottom.
Nutrition Info (Per Serving, Estimated)
Please note: This is an estimated nutritional breakdown for one slice of Italian bread (assuming 12 slices per loaf) and can vary based on exact ingredient brands and measurements.
| Nutrient | Amount |
|---|---|
| Calories | ~160 kcal |
| Carbohydrates | ~30g |
| Protein | ~5g |
| Fat | ~2.5g |
| Fiber | ~1g |
| Sugar | ~2g |
FAQs: Your Beginner Baking Questions Answered!
Why didn’t my bread rise?
There are a few common culprits! The most frequent reasons are inactive yeast (it might be old or expired), water that’s too hot (which kills the yeast) or too cold (which prevents it from activating), or too much salt directly contacting the yeast before mixing. Always check your yeast’s freshness and ensure your water temperature is just right (105-115°F is ideal).
Can I use all-purpose flour instead of bread flour?
While you can, bread flour is highly recommended for this recipe. Bread flour has a higher protein content, which develops more gluten, giving Italian bread its characteristic chewy texture and better structure. All-purpose flour will still yield a loaf, but it might be less chewy and have a slightly different crumb.
How do I store homemade Italian bread?
Homemade bread, without preservatives, generally lasts 2-3 days at room temperature. Store it in a paper bag to maintain its crust, or a plastic bag to keep it softer. For longer storage, you can slice the cooled bread and freeze it in an airtight freezer bag for up to 2-3 months. Just pop slices into the toaster when you’re ready!
My crust isn’t as crispy as I’d like. What can I do?
For a crispier crust, try placing a pan of hot water on the bottom rack of your oven during baking. The steam helps create a beautiful, crackly crust. You can also spray the loaf with water a few times during the first 10-15 minutes of baking. Ensure your oven is fully preheated and don’t overcrowd the oven if baking multiple loaves.
Can I skip the second rise and just bake directly from the breadmaker?
Some breadmakers have a “Bake” cycle, but for a traditional Italian bread shape and texture, using the “Dough” cycle and then shaping/baking in a conventional oven is best. The second rise (proofing) after shaping allows the dough to relax, develop more flavor, and achieve its final structure, resulting in a lighter, airier loaf with a better crust.
Conclusion: Your Delicious Breadmaking Journey Begins!
Congratulations! You’ve just unlocked the secret to baking incredible homemade Italian bread with the help of your breadmaker. This Breadmaker Italian Bread Recipe is truly a game-changer for anyone wanting to enjoy the simple pleasure of fresh bread without the fuss. From the enticing aroma filling your kitchen to that first perfect bite, you’ll be so proud of what you’ve created.
Don’t be afraid to experiment, and remember that every loaf is a learning experience. With a little practice, you’ll be churning out bakery-quality bread with ease. So go ahead, tie on that apron, follow these easy baking recipes steps, and get ready to savor the taste of your very own artisan Italian bread. Happy baking!
“`