Welcome, fellow baking enthusiasts and curious beginners! Are you ready to embark on a delightful culinary journey that promises a loaf of bread that’s as wholesome as it is delicious? Today, we’re diving deep into the world of Bulgur Bread Recipes, a fantastic alternative to your everyday loaf that brings unique texture and a nutty flavor to your table. If you’ve been looking for easy baking recipes to expand your repertoire, you’ve come to the right place. This detailed guide is packed with practical baking tips for beginners, ensuring your first (or fiftieth!) attempt at bulgur bread is a resounding success. Get ready to fill your kitchen with the irresistible aroma of freshly baked bread!
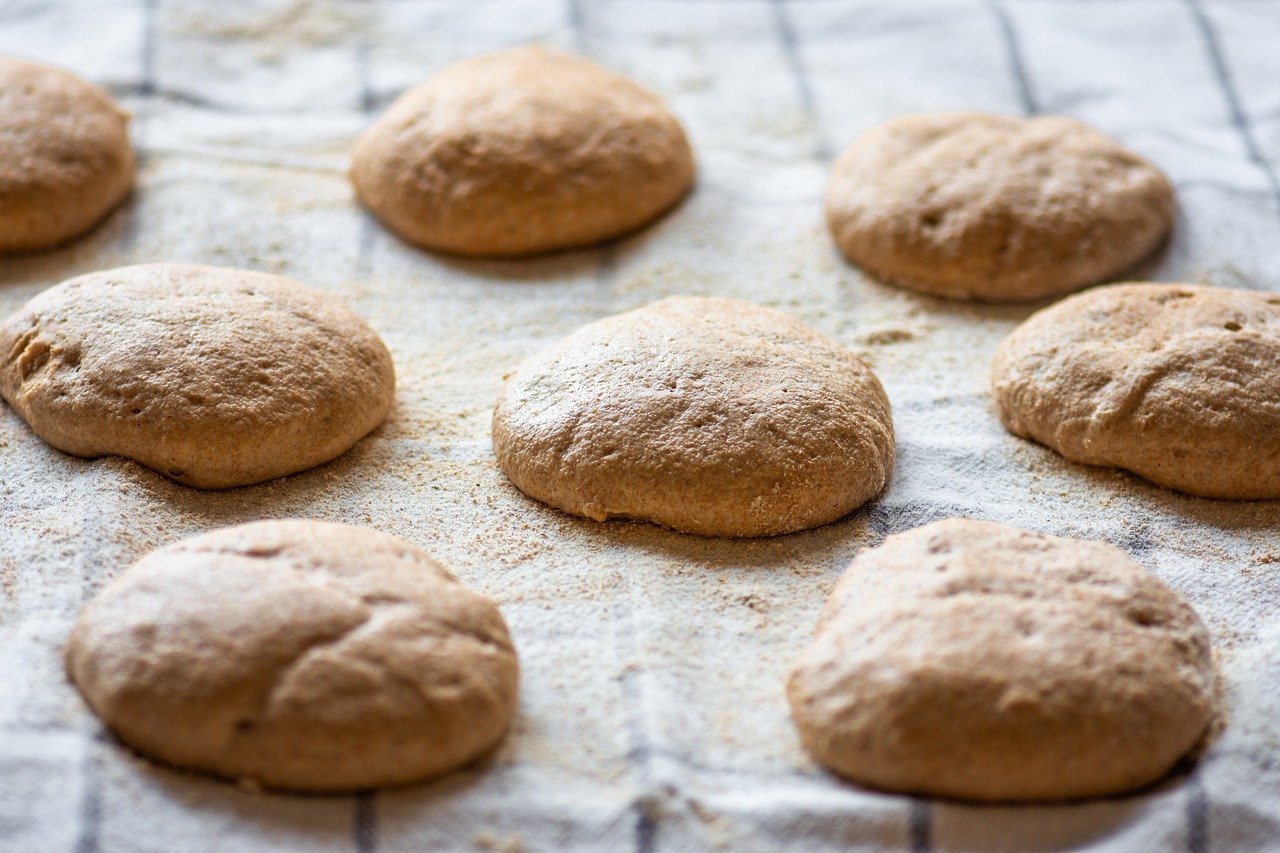
Bulgur bread is not just another bread; it’s a testament to simple ingredients coming together to create something truly special. The addition of bulgur wheat provides a wonderful chewiness and a gentle whole-grain earthiness that complements a wide array of meals, from hearty stews to simple sandwiches. Don’t be intimidated by yeast or kneading; we’ll walk you through every single step with clear, actionable advice, making this a rewarding experience for even the most novice bakers. Let’s get baking!
Essential Ingredients for Your Bulgur Bread
Gathering your ingredients is the first exciting step! Quality ingredients make a difference, so try to use fresh yeast and good quality flour. Here’s what you’ll need:
| Ingredient | Quantity | Unit |
|---|---|---|
| Warm Water (105-115°F / 40-46°C) | 1.5 | cups |
| Active Dry Yeast | 2.25 | teaspoons (1 standard packet) |
| Granulated Sugar (or Honey) | 1 | tablespoon |
| Fine or Medium Bulgur Wheat | 0.5 | cup |
| All-Purpose Flour (plus extra for dusting) | 3.5 – 4 | cups |
| Salt | 1.5 | teaspoons |
| Olive Oil (or other vegetable oil) | 2 | tablespoons |
Step-by-Step Instructions: Baking Your Perfect Bulgur Loaf
Follow these detailed steps carefully, and you’ll be pulling a golden-brown, fragrant loaf out of your oven in no time!
Step 1: Activate Your Yeast – The Foundation of Great Bread
- In a large mixing bowl, pour in 1.5 cups of warm water. The temperature is crucial here – it should feel comfortably warm to the touch, like a baby’s bath. If it’s too hot, it will kill the yeast; too cold, and the yeast won’t activate. An instant-read thermometer is your best friend here, aiming for 105-115°F (40-46°C).
- Sprinkle 1 tablespoon of granulated sugar (or honey) and 2.25 teaspoons of active dry yeast over the warm water. The sugar acts as food for the yeast, helping it to wake up.
- Gently whisk or stir the mixture once or twice.
- Let it sit undisturbed for 5-10 minutes. During this time, the yeast should “bloom” – meaning it will become foamy and bubbly on the surface. This is your sign that your yeast is alive and ready to work its magic! If it doesn’t foam, your yeast might be old, or your water temperature was off. Don’t proceed; start over with fresh yeast and check your water temperature.
Step 2: Prepare the Bulgur Wheat
- While your yeast is activating, place 0.5 cup of bulgur wheat in a heatproof bowl.
- Pour about 1 cup of boiling water over the bulgur, just enough to cover it by about an inch.
- Cover the bowl with a plate or plastic wrap and let it sit for 15-20 minutes, or until the bulgur has softened and absorbed most of the water. This step ensures your bulgur is tender and doesn’t make your bread gritty.
- Once softened, drain any excess water thoroughly. You can press it gently against a sieve to remove as much liquid as possible. Let it cool slightly before adding it to your dough.
Step 3: Combine Wet Ingredients
- Once your yeast mixture is foamy, add 2 tablespoons of olive oil and the cooled, drained bulgur wheat to the bowl.
- Stir gently to combine.
Step 4: Add Dry Ingredients and Form the Dough
- In a separate medium bowl, whisk together 3.5 cups of all-purpose flour and 1.5 teaspoons of salt. Mixing them beforehand ensures even distribution of salt.
- Gradually add the flour mixture to the wet ingredients in the large bowl, about a cup at a time.
- Using a sturdy spoon or a dough whisk, mix until a shaggy dough forms and most of the flour is incorporated. At this stage, it might look a bit messy and sticky – that’s perfectly normal!
- If the dough seems too sticky to handle, add the remaining 0.5 cup of flour slowly, one tablespoon at a time, until it just comes together. Be careful not to add too much flour, as this can result in dense, dry bread.
Step 5: Kneading – Developing the Gluten for a Chewy Texture
- Lightly flour a clean work surface (like your kitchen counter).
- Turn the dough out onto the floured surface.
- Begin kneading the dough. This involves folding the dough over on itself, pushing it down and away with the heel of your hand, rotating it, and repeating the process.
- Knead for about 8-10 minutes by hand. If using a stand mixer with a dough hook attachment, knead on medium-low speed for 6-8 minutes.
- Beginner Tip: The dough will be sticky at first, but as you knead, it will become smoother, more elastic, and less sticky. You’ll know it’s properly kneaded when it passes the “windowpane test”: pinch off a small piece of dough and gently stretch it. If you can stretch it thin enough to see light through it without it tearing, your gluten is well developed!
Step 6: First Rise (Bulk Fermentation) – Giving the Yeast Time to Work
- Lightly grease a large clean bowl with a little olive oil.
- Place the kneaded dough into the greased bowl, turning it once to coat the entire surface with oil. This prevents it from drying out.
- Cover the bowl tightly with plastic wrap or a clean kitchen towel.
- Place the bowl in a warm, draft-free spot in your kitchen. A slightly warm oven (turned off, but warmed briefly) or near a sunny window works well.
- Let the dough rise for 1 to 1.5 hours, or until it has visibly doubled in size. The exact time depends on the warmth of your kitchen. Patience is key here! An under-risen dough will result in a dense loaf.
Step 7: Punch Down and Shape Your Loaf
- Once the dough has doubled, gently “punch down” the dough with your fist to release the accumulated gases. This is a satisfying step!
- Turn the dough out onto a lightly floured surface.
- Gently shape the dough into a loaf. For a classic loaf, flatten the dough into a rectangle, then roll it up tightly from one of the longer sides, pinching the seam closed at the bottom. Tuck the ends under.
- Alternative: You can also divide the dough into smaller rolls or shape it into a round boule.
Step 8: Second Rise (Proofing) – The Final Puff
- Grease a standard 9×5 inch (23×13 cm) loaf pan.
- Carefully place the shaped dough into the prepared loaf pan.
- Cover the loaf pan loosely with plastic wrap or a clean kitchen towel.
- Return the pan to your warm, draft-free spot for another 30-45 minutes, or until the dough has risen significantly and looks puffy, nearly doubled again, and extends slightly above the rim of the pan. This second rise, known as proofing, gives the bread its final texture and volume.
- Common Mistake: Over-proofing can cause the bread to collapse in the oven, so keep an eye on it!
Step 9: Preheat Oven and Bake
- About 15 minutes before the end of the second rise, preheat your oven to 375°F (190°C).
- Once the oven is preheated and your dough has proofed, place the loaf pan into the hot oven.
- Bake for 30-40 minutes, or until the crust is golden brown and the loaf sounds hollow when tapped on the bottom. For extra assurance, an internal temperature of 190-200°F (88-93°C) indicates it’s fully baked.
- Optional: For a crispier crust, you can place a pan of hot water on the bottom rack of your oven during baking to create steam.
Step 10: Cool Before Slicing
- Once baked, immediately remove the bread from the loaf pan and transfer it to a wire cooling rack.
- Let the bread cool completely (or at least for 30-60 minutes) before slicing. This is crucial! Slicing hot bread can make it gummy inside because the internal cooking process continues even after it’s out of the oven.
- Enjoy your homemade Bulgur Bread!
Tips & Tricks for Beginner Bakers
Baking bread is an art and a science, and these little nuggets of wisdom will help you master your craft:
- Measure Accurately: Especially flour. Use the “spoon and level” method: spoon flour into your measuring cup until it overflows, then level it off with a straight edge (like a knife). Don’t scoop directly from the bag, as this compacts the flour and you’ll end up with too much. For ultimate accuracy, invest in a kitchen scale.
- Yeast Temperature is King: Seriously, this is one of the most common pitfalls. If your water is too hot, your yeast dies. Too cold, and it stays dormant. Stick to the 105-115°F (40-46°C) range.
- Patience with Rising: Don’t rush the rising process. If your kitchen is cool, it might take longer than the recipe states. Look for the visual cues (doubled in size, puffy) rather than strictly adhering to time. An under-risen dough results in a dense loaf.
- Don’t Over-Flour: While tempting to add more flour if the dough is sticky, too much flour will make your bread dry and tough. Trust the kneading process; the dough will become less sticky as gluten develops. A lightly floured surface is all you need.
- Listen to Your Oven: Every oven is different. Your oven might run hotter or cooler than the set temperature. Consider investing in an oven thermometer to ensure accuracy. Adjust baking times slightly if needed.
- Cool Completely: As mentioned, resist the urge to slice into your beautiful loaf right away. Cooling allows the internal structure to set and steam to escape, preventing a gummy texture.
- Storage: Store cooled bread in an airtight container or bread bag at room temperature for 3-4 days. For longer storage, slice the bread and freeze it in a freezer-safe bag for up to 3 months.
- Experiment with Add-ins: Once you’re comfortable with the basic recipe, try adding a tablespoon of dried herbs (rosemary, thyme), a handful of sesame or poppy seeds, or even some grated cheese to the dough during the kneading stage for a customized flavor!
Essential Baking Tools
Having the right tools makes the baking process much smoother and more enjoyable. Here are a few essentials:
- Mixing Bowl
- Whisk
- Baking Pan (specifically a loaf pan)
- Measuring Cups and Measuring Spoons
- Spatula (or dough scraper)
- Instant-Read Thermometer (for water temperature and internal bread temperature)
- Kitchen Scale (highly recommended for accuracy)
- Wire Cooling Rack
Bulgur Bread Nutrition Information (Estimated per serving)
This information is an estimate based on a loaf yielding 12 slices. Actual values may vary based on specific ingredients and preparation.
| Nutrient | Amount |
|---|---|
| Calories | 180 kcal |
| Carbohydrates | 35g |
| Protein | 6g |
| Fat | 2g |
| Fiber | 3g |
| Sugar | 2g |
Frequently Asked Questions (FAQs)
Here are some common questions beginners often ask about baking this Bulgur Bread:
What kind of bulgur wheat should I use for this recipe?
For this recipe, fine or medium-grain bulgur wheat works best. Fine bulgur will absorb water quickly and integrate seamlessly into the dough, giving a very subtle texture. Medium-grain bulgur will offer a bit more chewiness and visible texture. Coarse bulgur is generally not recommended as it might make the bread too dense and gritty.
My dough isn’t rising, what went wrong?
The most common culprits for dough that won’t rise are: dead or old yeast, or incorrect water temperature. Ensure your water is between 105-115°F (40-46°C) for activating the yeast. If your yeast doesn’t become foamy and bubbly after 5-10 minutes in the warm, sweetened water, it’s likely no longer active, and you’ll need to start again with fresh yeast. Also, ensure your rising spot is warm and draft-free.
Can I make this recipe gluten-free?
Unfortunately, no. Both bulgur wheat and all-purpose flour contain gluten, which is essential for the structure and elasticity of this bread. Substituting with gluten-free flours would require significant adjustments to the recipe, and bulgur itself is not gluten-free.
How should I store my homemade Bulgur Bread?
Once completely cooled, store your bulgur bread in an airtight container, a bread box, or a sealed plastic bag at room temperature. It will stay fresh for about 3-4 days. For longer storage, you can slice the bread and freeze it in a freezer-safe bag or container for up to 3 months. Thaw slices as needed in a toaster or microwave.
Can I use a stand mixer to knead the dough?
Absolutely! A stand mixer with a dough hook attachment is a fantastic tool for this recipe. After combining all the ingredients, attach the dough hook and knead on medium-low speed for about 6-8 minutes. The dough should pull away from the sides of the bowl and look smooth and elastic. This saves your arms a good workout!
Why is my bread dense and not light and fluffy?
Several factors can lead to dense bread: not enough kneading (which means poor gluten development), too much flour (making the dough stiff), not enough rising time (the yeast didn’t produce enough gas), or over-proofing (where the gases escape before baking). Ensure you follow the steps for proper kneading and rising, and be mindful of your flour measurements.
Conclusion: Your Homemade Bulgur Bread Awaits!
And there you have it a comprehensive guide to baking your very own delicious, wholesome Bulgur Bread! We hope this detailed breakdown, complete with baking tips for beginners and solutions for common challenges, empowers you to create something truly wonderful in your kitchen. There’s immense satisfaction in pulling a warm, crusty loaf of bread from the oven, especially one you’ve made yourself from scratch.
Don’t be afraid to get your hands a little floury and embrace the process. Each loaf you bake will teach you something new, and soon you’ll be baking with confidence and joy. So go ahead, gather your ingredients, set aside some time, and let the aroma of fresh bulgur bread fill your home. Happy baking, and we can’t wait to hear about your successes!