Are you ready to elevate your baking game without breaking a sweat? If you’ve ever dreamt of baking a cake that’s incredibly moist, wonderfully tender, and bursting with flavor, then you’ve come to the right place! We’re about to unveil the magic behind our Cake Mix With Pudding Added Recipe – a simple yet revolutionary twist on the classic boxed cake mix that promises bakery-quality results right in your home kitchen. This isn’t just another one of those easy baking recipes; it’s a secret weapon for creating an unforgettable dessert every single time.
Perfect for beginners and seasoned bakers alike, we’ll walk you through every step, sharing invaluable baking tips for beginners to ensure your success. Get ready to impress everyone (including yourself!) with a cake so good, they’ll never guess it started from a mix!

Ingredients You’ll Need
Gathering your ingredients before you start is a key step in hassle-free baking. Here’s what you’ll need for this incredibly moist cake:
| Quantity | Unit | Ingredient |
|---|---|---|
| 1 | box | Yellow Cake Mix (15.25 oz / 432g – standard size for USA) |
| 1 | box | Instant Vanilla Pudding Mix (3.4 oz / 96g – small box, NOT cook-and-serve) |
| 4 | large | Eggs (at room temperature) |
| 1 | cup | Milk (whole milk or 2% recommended, at room temperature) |
| 1/2 | cup | Vegetable Oil (or other neutral oil like canola) |
| 1 | teaspoon | Vanilla Extract (optional, but highly recommended for extra flavor) |
| Non-stick baking spray or butter/flour for pan preparation |
Step-by-Step Instructions for the Perfect Moist Cake
Follow these detailed steps carefully, and you’ll be on your way to baking a cake that will have everyone asking for the recipe!
Step 1: Preheat and Prepare
- Preheat Your Oven: Start by preheating your oven to 350°F (175°C). This ensures the oven is at a consistent temperature when your cake goes in, which is crucial for even baking.
- Prepare Your Baking Pan: Grease and flour a 9×13 inch baking pan (or two 8-inch round pans, or a bundt pan). This step is vital to prevent your cake from sticking.
- Beginner Tip: To grease and flour, spray the pan generously with non-stick baking spray, making sure to get into all corners. Then, add about 1-2 tablespoons of all-purpose flour to the pan. Tilt and tap the pan, rotating it until the flour coats all greased surfaces. Invert the pan and tap out any excess flour. This creates a non-stick barrier.
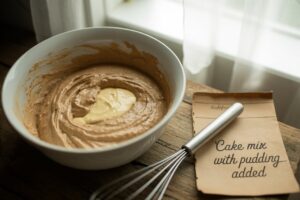
Step 2: Combine Dry Ingredients
- Whisk Together: In a large mixing bowl, combine the entire box of yellow cake mix and the entire box of instant vanilla pudding mix.
- Beginner Tip: Use a whisk to thoroughly combine these dry ingredients. This ensures the pudding mix is evenly distributed throughout the cake mix, preventing pockets of unmixed powder and contributing to a uniform texture and flavor in your final cake.
- Important Note: Make sure you’re using instant pudding mix, not “cook-and-serve.” Instant pudding is designed to set without heat, which is what works magic in this recipe.
Step 3: Add Wet Ingredients
- Introduce the Liquids: To the dry mixture, add the 4 large eggs, 1 cup of milk, and 1/2 cup of vegetable oil. If you’re using vanilla extract, now is the time to add your 1 teaspoon.
- Beginner Tip: Ensure your eggs and milk are at room temperature. Room temperature ingredients emulsify (mix) better, creating a smoother batter and a more uniform, tender crumb in your baked cake. If your eggs are cold, place them in a bowl of warm water for 5-10 minutes.
Step 4: Mix the Batter
- Mix Carefully: Using an electric mixer (handheld or stand mixer with a paddle attachment) on low speed, mix the ingredients until just combined. Then, increase the speed to medium and mix for about 2-3 minutes, scraping down the sides of the bowl once or twice with a spatula.
- Beginner Tip: Don’t overmix! Overmixing develops the gluten in the flour too much, leading to a tough, dry cake. Mix only until the batter is smooth and no dry streaks remain. A few small lumps are perfectly fine.
- Common Mistake: Many beginners mix until the batter looks “perfectly smooth” for a long time. Stop as soon as it’s just combined and smooth.
Step 5: Pour and Bake
- Pour into Pan: Pour the prepared cake batter evenly into your greased and floured baking pan. Use your spatula to get every last drop!
- Bake Time: Place the pan in your preheated oven. Bake for approximately 30-35 minutes for a 9×13 inch pan, 30-35 minutes for two 8-inch rounds, or 45-55 minutes for a bundt pan.
- Beginner Tip: Baking times can vary depending on your oven. Start checking for doneness a few minutes before the minimum recommended time. Avoid opening the oven door frequently, especially in the first 20 minutes, as this can cause the cake to sink.
Step 6: Check for Doneness
- The Toothpick Test: To check if your cake is done, insert a wooden toothpick into the center of the cake. If it comes out clean or with a few moist crumbs attached (but no wet batter), your cake is ready. If it comes out with wet batter, continue baking for another 2-5 minutes and test again.
- Beginner Tip: If the cake starts to brown too much on top but isn’t fully baked, you can loosely tent it with aluminum foil for the remaining baking time.
Step 7: Cool and Serve
- Cool in Pan: Once baked, remove the cake from the oven and let it cool in the pan on a wire rack for about 10-15 minutes. This allows the cake to set and firm up, making it less likely to break when removed.
- Invert onto Rack: After 10-15 minutes, carefully invert the cake onto a wire cooling rack to cool completely.
- Beginner Tip: Cooling completely on a wire rack is essential. If you frost a warm cake, the frosting will melt and slide right off. Patience is a virtue here!
- Frost (Optional): Once fully cooled, you can frost your cake with your favorite frosting (vanilla buttercream, chocolate ganache, or cream cheese frosting would all be delicious!).
Tips & Tricks for Cake Mix Success
Want to make your cake even better? These actionable tips will help you bake like a pro, even if you’re just starting out!
- Room Temperature Ingredients are Key: We mentioned it in the steps, but it bears repeating. Eggs and milk at room temperature blend more easily into the batter, creating a smoother, more uniform emulsion. This leads to a finer, more tender crumb and a cake that rises beautifully. Plan ahead and take them out of the fridge about 30-60 minutes before you start.
- Do Not Overmix: This is arguably the most important rule for a tender cake. Overmixing develops the gluten in the flour, resulting in a tough, rubbery texture. Mix only until the ingredients are just combined and no dry streaks remain. A few small lumps are perfectly acceptable!
- Proper Pan Preparation: Don’t skimp on greasing and flouring your pan. For extra assurance, especially with intricate bundt pans, you can use a homemade “cake goop” (equal parts flour, shortening, and vegetable oil mixed together) or line the bottom of round pans with parchment paper after greasing.
- Flavor Variations are Endless: Get creative! Use different cake mix flavors (chocolate, lemon, funfetti) with complementary instant pudding flavors (chocolate, lemon, cheesecake). Add mix-ins like chocolate chips, sprinkles, nuts, or zest from citrus fruits (lemon, orange) to the batter for an extra pop of flavor and texture.
- High Altitude Adjustments: If you live at a high altitude (above 3,500 feet), you might need to make slight adjustments. Typically, this involves reducing sugar, increasing liquid, and/or increasing flour slightly. Check online resources for specific high-altitude baking charts.
- Storage: Store your unfrosted cake at room temperature, tightly covered, for up to 3 days. Once frosted, it can be stored at room temperature for up to 2 days or refrigerated for up to 5 days, depending on the frosting. Always bring refrigerated cake to room temperature before serving for the best texture and flavor.
Essential Baking Tools
Having the right tools makes baking much more enjoyable and efficient. Here are some essentials for this recipe:
- Mixing Bowl
- Whisk
- Baking Pan (9×13 inch, 8-inch round, or bundt)
- Measuring Cups & Measuring Spoons
- Spatula (for scraping bowls)
- Electric Mixer (handheld or stand mixer)
- Wire Cooling Rack
Nutrition Information (Estimated per Serving)
Please note that this is an estimate based on a standard 15.25 oz cake mix + 3.4 oz pudding mix, divided into 12 servings, without frosting. Actual values may vary based on specific brands and ingredients used.
| Nutrient | Amount |
|---|---|
| Calories | ~380 kcal |
| Carbohydrates | ~55g |
| Protein | ~5g |
| Fat | ~17g |
| Fiber | ~1g |
| Sugar | ~35g |
Frequently Asked Questions (FAQs)
Q1: Can I use cook-and-serve pudding instead of instant pudding?
A: No, absolutely not! Cook-and-serve pudding requires cooking to thicken and will not work the same way in this recipe. You must use instant pudding mix, which thickens without heat, to achieve the desired moist and tender texture.
Q2: What if I don’t have milk? Can I use water instead?
A: While the cake box often calls for water, using milk (especially whole milk or 2%) in this recipe adds richness and moisture that water simply can’t provide. If you absolutely must, you can use water, but the cake might not be as rich or moist. Buttermilk is also an excellent substitute for an even more tender crumb.
Q3: Why is my cake dry?
A: The most common reasons for a dry cake are overmixing the batter or overbaking the cake. Overmixing develops the gluten, making the cake tough, and overbaking dries out the moisture. Make sure to mix just until combined and use the toothpick test to avoid baking longer than necessary.
Q4: Can I make this recipe into cupcakes?
A: Yes, absolutely! This recipe works wonderfully for cupcakes. Line a cupcake tin with paper liners and fill each about two-thirds full. The baking time will be shorter, typically around 18-22 minutes. Test for doneness with a toothpick as you would for a cake.
Q5: How do I know if my cake is done baking?
A: The best way to check for doneness is the toothpick test. Insert a wooden toothpick into the center of the cake. If it comes out clean or with a few moist crumbs attached, it’s done. If it comes out with wet batter, continue baking for a few more minutes. Also, the top of the cake should spring back lightly when gently pressed.
Q6: Can I add other mix-ins like chocolate chips or nuts?
A: Yes, this recipe is very versatile! You can absolutely fold in about 1 cup of chocolate chips, chopped nuts, sprinkles, or even dried fruit (like cranberries or raisins) into the batter during the final mixing stage. This is a great way to customize your cake!
Ready to Bake Your Best Cake Yet?
There you have it! Our comprehensive guide to making the most deliciously moist cake using a simple cake mix and a secret ingredient: instant pudding. This Cake Mix With Pudding Added Recipe is truly a game-changer, turning an ordinary boxed mix into an extraordinary homemade-tasting dessert. We hope our detailed steps and baking tips for beginners empower you to confidently create a cake that will delight everyone who tries it.

Don’t be afraid to experiment with different flavors and make it your own. Baking should be fun, rewarding, and, most importantly, delicious! So go ahead, preheat your oven, grab your ingredients, and get ready to bake a cake that will make you proud. Happy baking!
1 thought on “Cake Mix With Pudding Added Recipe – Easy Steps for Success”