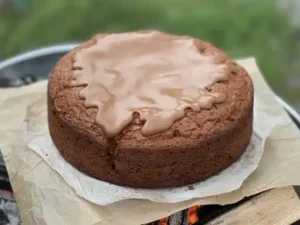
crunchy graham cracker, and gooey toasted marshmallows. Perfect for a cozy night in, a potluck, or just satisfying that sweet tooth, this recipe is designed to be one of the most easy baking recipes you’ll ever try. Even if you’re new to the world of flour and sugar, we’ve packed this post with all the essential baking tips for beginners to ensure your success. So grab your apron, preheat that oven, and let’s bake some unforgettable memories!
What You’ll Need: Ingredients for Your Campfire Cake
Accuracy in measuring is a key baking tip for beginners! Make sure to level off your dry ingredients and use proper liquid measuring cups.
| Ingredient | Quantity | Unit |
|---|---|---|
| For the Graham Cracker Crust: | ||
| Graham Cracker Crumbs | 1.5 | cups |
| Unsalted Butter, melted | 6 | tablespoons |
| For the Chocolate Cake: | ||
| All-Purpose Flour | 1.75 | cups |
| Granulated Sugar | 1.75 | cups |
| Unsweetened Cocoa Powder | 0.75 | cup |
| Baking Soda | 1.5 | teaspoons |
| Baking Powder | 1.5 | teaspoons |
| Salt | 1 | teaspoon |
| Large Eggs | 2 | |
| Milk (whole or 2%) | 1 | cup |
| Vegetable Oil | 0.5 | cup |
| Vanilla Extract | 1 | teaspoon |
| Hot Water or Hot Coffee | 1 | cup |
| For the Topping: | ||
| Mini Marshmallows | 4-5 | cups |
| Chocolate Chips (milk or semi-sweet) | 0.5 | cup |
Step-by-Step Instructions: Your Easy Guide to Campfire Cake Perfection
Follow these detailed instructions carefully for a flawless Campfire Cake Recipe. Remember, baking is a science, so precision helps!
Step 1: Get Prepped (The Foundation of Easy Baking Recipes)
- Preheat your oven to 350°F (175°C).
- Grease and flour a 9×13 inch baking pan. For extra non-stick insurance, you can also line the bottom with parchment paper after greasing, then grease the parchment too. This is a great baking tip for beginners to prevent sticking!
Step 2: Craft the Graham Cracker Crust (Optional, but Highly Recommended!)
- In a medium bowl, combine the 1.5 cups of graham cracker crumbs with the 6 tablespoons of melted butter. Mix until the crumbs are evenly moistened.
- Press the mixture firmly and evenly into the bottom of your prepared 9×13 inch baking pan. Use the bottom of a glass or your knuckles to get a nice, compact layer.
- Bake the crust for 5-7 minutes in the preheated oven. This helps set it and makes it extra sturdy. Remove from oven and set aside to cool slightly while you make the cake batter.
Step 3: Mix Your Dry Ingredients
- In a large mixing bowl, whisk together the 1.75 cups all-purpose flour, 1.75 cups granulated sugar, 0.75 cup unsweetened cocoa powder, 1.5 teaspoons baking soda, 1.5 teaspoons baking powder, and 1 teaspoon salt.
- Beginner Tip: Whisking these dry ingredients thoroughly ensures they are well combined, which helps the cake rise evenly. If you have a sieve, you can sift them together for an even lighter texture!
Step 4: Combine Your Wet Ingredients
- In a separate medium bowl, whisk together the 2 large eggs, 1 cup milk, 0.5 cup vegetable oil, and 1 teaspoon vanilla extract until well combined.
- Beginner Tip: Using room temperature eggs and milk can lead to a more evenly mixed batter and a lighter, fluffier cake. If your ingredients are cold, you can warm the milk slightly in the microwave (don’t boil!) and place eggs in warm water for a few minutes.
Step 5: Marry Wet and Dry (Carefully!)
- Pour the wet ingredients mixture into the dry ingredients. Mix with a spatula or an electric mixer on low speed until just combined.
- Beginner Mistake Alert: Do NOT overmix! Overmixing develops the gluten in the flour too much, which can lead to a tough, dense cake. Mix only until no streaks of dry flour remain.
Step 6: The Secret to a Super Moist Cake
- Carefully pour the 1 cup hot water or hot coffee into the batter. Stir gently until just incorporated. The batter will be quite thin, and that’s perfectly normal! The hot liquid helps bloom the cocoa, intensifying the chocolate flavor, and contributes to a wonderfully moist cake.
- Alternative: If you don’t drink coffee, hot water works perfectly fine. Coffee simply enhances the chocolate flavor without making the cake taste like coffee.
Step 7: Bake Your Chocolatey Base
- Pour the thin cake batter evenly over the pre-baked graham cracker crust (if using) or directly into your prepared 9×13 inch pan.
- Bake for 30-35 minutes, or until a wooden skewer or toothpick inserted into the center of the cake comes out clean or with a few moist crumbs attached (no wet batter).
- How to Check for Doneness: The cake should also spring back slightly when gently pressed in the center. Every oven is different, so start checking at 30 minutes.
- Once baked, remove the cake from the oven and let it cool on a wire rack for about 10-15 minutes.
Step 8: Add the Campfire Magic!
- While the cake is still warm (but not piping hot), sprinkle the 4-5 cups of mini marshmallows evenly over the top. Then, scatter the 0.5 cup of chocolate chips over the marshmallows.
- Turn your oven to the BROIL setting (usually Hi or Low, depending on your oven). Place the cake back into the oven on the top rack, keeping a very close eye on it!
- Broil for just 1-3 minutes, or until the marshmallows are beautifully golden brown and gooey, and the chocolate chips are slightly melted. This happens incredibly fast, so do NOT walk away!
- Alternative: If you have a kitchen torch, you can use that to toast the marshmallows for more precise control and to avoid heating the entire kitchen again.
Step 9: Cool and Serve
- Remove the glorious Campfire Cake from the oven. Let it cool for at least 15-20 minutes before slicing and serving. This allows the marshmallows and chocolate to set slightly, making it easier to cut.
- Serve warm for the ultimate gooey experience! Enjoy your delicious, homemade Campfire Cake Recipe!
Tips & Tricks for Campfire Cake Success (Baking Tips for Beginners!)
Mastering these simple techniques will elevate your baking game and ensure your Campfire Cake turns out perfect every time. These are invaluable baking tips for beginners!
- Room Temperature Ingredients are Key: For a smooth, even batter, ensure your eggs and milk are at room temperature. Cold ingredients can cause the batter to curdle or become lumpy, and they don’t emulsify as well with other ingredients. Take them out of the fridge at least 30 minutes before you start.
- Measure Accurately: Baking is a science! Use proper measuring cups and spoons. For flour, spoon it into your measuring cup and then level it off with the back of a knife – don’t scoop directly from the bag, as this can compact the flour and lead to too much being added.
- Don’t Overmix the Batter: Once you add the wet ingredients to the dry, mix only until just combined. Overmixing develops the gluten in the flour, making your cake tough and dense instead of light and fluffy. A few small lumps are okay!
- Watch Your Oven: Ovens can vary wildly in temperature. Consider getting an oven thermometer to ensure your oven is truly at the temperature you set. This can drastically improve your baking results.
- Broiler Vigilance: When toasting the marshmallows, do NOT walk away from the oven. Marshmallows can go from perfectly golden to burnt in a matter of seconds. Keep the oven door slightly ajar and watch them like a hawk!
- Customize Your Topping: Feel free to experiment with different types of chocolate chips (dark, white chocolate), or even add a drizzle of caramel or a sprinkle of sea salt before serving for an extra gourmet touch.
Essential Baking Tools for Your Kitchen
Having the right tools makes all the difference, especially when trying new easy baking recipes! Here are a few essentials to get you started:
- Mixing Bowl – You’ll need at least two: one large for dry ingredients, one medium for wet.
- Whisk – Essential for combining dry ingredients and light mixing.
- Baking Pan – A sturdy 9×13 inch pan is perfect for this cake.
- Measuring Cups & Measuring Spoons – Accurate measurements are crucial for baking success.
- Spatula – Great for mixing, scraping down bowls, and spreading batter.
- Wire Rack – For cooling your cake evenly after baking.
- Parchment Paper – For easy pan release and cleanup.
Nutrition Information (Estimated per Serving)
Please note: These are estimated nutritional values per serving (assuming 1/16th of the cake) and may vary based on exact ingredients and brands used. This is a rich, indulgent dessert!
| Nutrient | Amount |
|---|---|
| Calories | 420 kcal |
| Carbohydrates | 65 g |
| Protein | 5 g |
| Fat | 18 g |
| Fiber | 2 g |
| Sugar | 45 g |
Frequently Asked Questions (FAQs) for Beginner Bakers
Q1: Can I make this Campfire Cake ahead of time?
Absolutely! You can bake the chocolate cake portion up to 1-2 days in advance. Store it covered at room temperature. Add the marshmallow and chocolate topping, then broil/torch, just before serving for the best gooey, toasted effect.
Q2: How do I store leftovers?
Store any leftover Campfire Cake tightly covered with plastic wrap or in an airtight container at room temperature for up to 2-3 days. While it’s best warm, it’s still delicious cold! You can gently reheat individual slices in the microwave for a few seconds to get the marshmallows slightly gooey again.
Q3: What if I don’t have mini marshmallows? Can I use large ones?
You can! If using large marshmallows, cut them into smaller pieces with kitchen shears (lightly greased if they stick) to ensure they melt and toast more evenly across the cake. Mini marshmallows are generally easier to work with for this recipe.
Q4: My marshmallows burned under the broiler! What went wrong?
This is a common beginner mistake! The broiler is very intense. The most likely cause is placing the cake too close to the heating element or leaving it in for too long. Ensure the cake is on the top rack but not directly touching the top heating element, and watch it constantly – literally, do not look away for a second. Every broiler is different, so start with 1 minute and add 30-second increments if needed.
Q5: Can I make this cake gluten-free?
Yes, you can! Substitute the all-purpose flour with a 1:1 gluten-free baking flour blend (ensure it contains xanthan gum). For the graham cracker crust, use gluten-free graham crackers or omit the crust entirely. The rest of the ingredients are typically gluten-free, but always check labels to be sure.
Q6: Do I have to use coffee in the cake?
No, you don’t! The recipe calls for “hot water or hot coffee.” The coffee helps to deepen and enhance the chocolate flavor without making the cake taste like coffee, but hot water works perfectly fine and will still result in a delicious, moist cake.
Time to Get Baking!
There you have it – your complete guide to creating an absolutely irresistible Campfire Cake Recipe! We hope these baking tips for beginners and detailed instructions have given you the confidence to tie on that apron and get baking. This cake isn’t just a dessert; it’s an experience, a taste of cozy nights and shared laughter, all from the comfort of your home. Don’t be afraid to experiment, have fun, and most importantly, enjoy the delicious fruits of your labor!
We’d love to see your creations! Share your Campfire Cake photos and tell us about your baking journey in the comments below. Happy baking!
“`