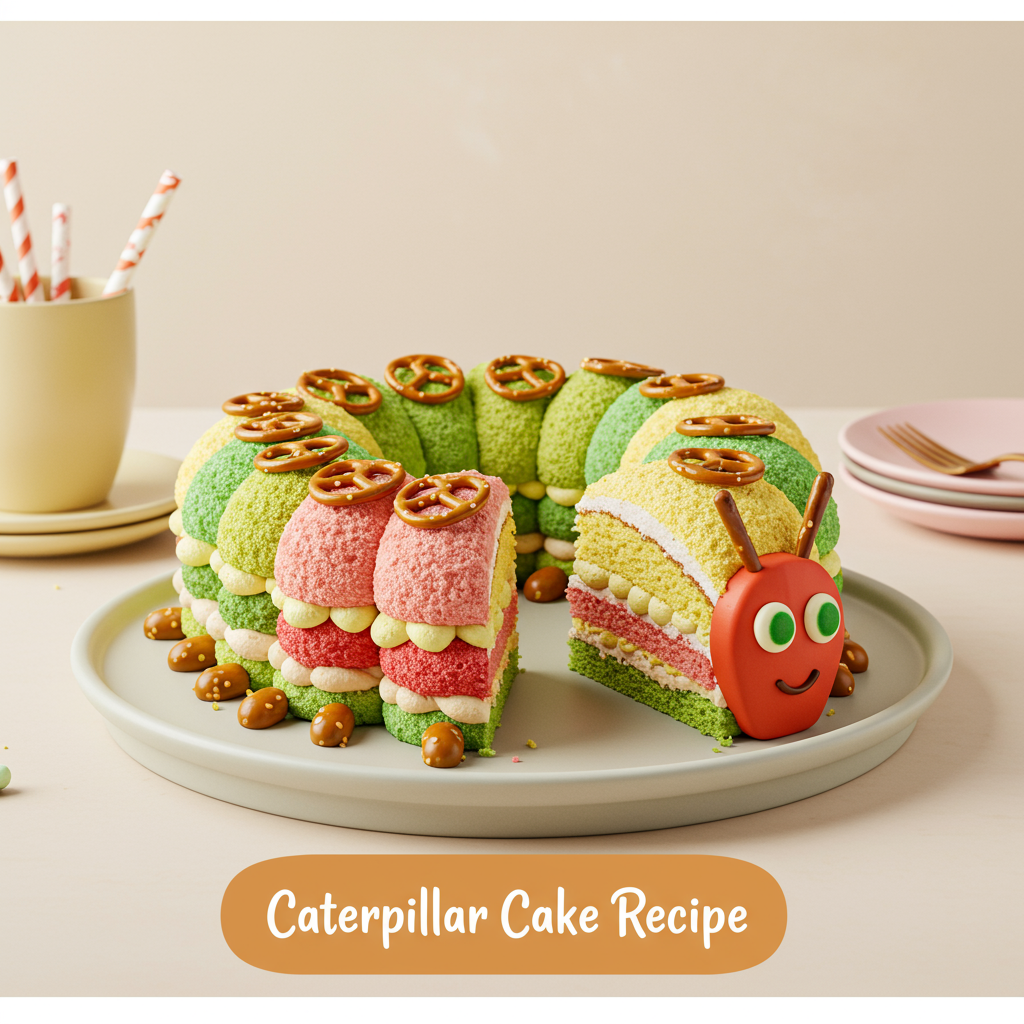
Get ready to unleash your inner baker with one of the most charming and delightful cakes you can make: the Caterpillar Cake Recipe! This isn’t just any cake; it’s a guaranteed showstopper that brings smiles to faces, perfect for birthdays, parties, or just a fun weekend treat. Many people think baking a themed cake is complicated, but I’m here to tell you that this particular recipe is incredibly straightforward and perfect for anyone looking for easy baking recipes.
Whether you’re a complete novice or just looking to refine your skills, this detailed guide is packed with baking tips for beginners to ensure your Caterpillar Cake turns out perfectly moist, delicious, and, of course, absolutely adorable. We’ll walk through every step, from mixing your batter to decorating your charming edible creature, making sure you feel confident and excited throughout the entire process. Let’s get baking!
Ingredients List
Gathering all your ingredients before you start is a key baking tip for beginners! This ensures a smooth and stress-free baking experience. Make sure your butter, milk, and eggs are at room temperature for the best results in your cake batter and frosting.
For the Moist Chocolate Cake:
| Quantity | Unit | Ingredient |
|---|---|---|
| 1 ¾ | cups | All-purpose flour |
| 1 ¾ | cups | Granulated sugar |
| ¾ | cup | Unsweetened cocoa powder (natural, not Dutch-processed) |
| 1 ½ | teaspoons | Baking soda |
| 1 ½ | teaspoons | Baking powder |
| 1 | teaspoon | Salt |
| 2 | large | Eggs (room temperature) |
| 1 | cup | Milk (whole or 2%, room temperature) |
| ½ | cup | Vegetable oil (or other neutral oil) |
| 2 | teaspoons | Vanilla extract |
| 1 | cup | Hot water or hot brewed coffee (enhances chocolate flavor) |
For the Velvety Green Buttercream:
| Quantity | Unit | Ingredient |
|---|---|---|
| 1 | cup (2 sticks) | Unsalted butter, softened (room temperature) |
| 4-5 | cups | Powdered sugar (confectioners’ sugar), sifted |
| 1 | teaspoon | Vanilla extract |
| 3-5 | tablespoons | Milk or heavy cream |
| ½ – 1 | teaspoon | Green gel food coloring (gel works best for vibrant color) |
For Decoration:
| Quantity | Unit | Ingredient |
|---|---|---|
| 2 | large | Chocolate chips or M&Ms (for eyes) |
| 4-6 | pieces | Chocolate finger biscuits or chocolate rolls (for feet) |
| 2 | pieces | Licorice laces or thin fondant strips (for antennae) |
| Sprinkles (optional, for extra fun!) |
Step-by-Step Instructions: Your Caterpillar Cake Journey
Follow these steps carefully, and you’ll be amazed at what you can create! Don’t rush, and remember, baking is all about having fun.
Part 1: Baking the Chocolate Cake
- Preheat and Prep: Start by preheating your oven to 350°F (175°C). This is crucial for even baking. Take a 9×13 inch rectangular baking pan (or two 8 or 9-inch round pans if you prefer a different shape to cut from) and grease it thoroughly with butter or baking spray. Then, lightly flour it, tapping out any excess. This prevents your cake from sticking, a common beginner”s woe!
- Combine Dry Ingredients: In a large mixing bowl, sift together the all-purpose flour, granulated sugar, unsweetened cocoa powder, baking soda, baking powder, and salt. Sifting is important because it breaks up any lumps and aerates the flour, leading to a lighter, fluffier cake. Whisk these dry ingredients together until they are well combined.
- Mix Wet Ingredients (Except Hot Water/Coffee): In a separate medium bowl, whisk together the room temperature eggs, milk, vegetable oil, and vanilla extract until smooth. Using room temperature ingredients helps them emulsify better, creating a more uniform batter.
- Combine Wet and Dry: Pour the wet ingredients into the dry ingredients. Using a whisk or a rubber spatula, mix until just combined. Do not overmix! Overmixing develops the gluten in the flour too much, which can lead to a tough, dry cake. A few lumps are perfectly fine.
- Add Hot Liquid: Carefully pour the hot water or hot coffee into the batter. Mix gently until the batter is smooth. The hot liquid helps to “bloom” the cocoa powder, enhancing its chocolate flavor, and also contributes to a moist cake texture. The batter will be quite thin – don’t worry, this is normal!
- Pour and Bake: Pour the thin batter evenly into your prepared baking pan. Place it in the center of your preheated oven. Bake for 30-35 minutes (or 25-30 minutes for round pans), or until a wooden skewer or toothpick inserted into the center of the cake comes out clean or with a few moist crumbs attached. Avoid opening the oven door too early, especially in the first 20 minutes, as this can cause the cake to sink.
- Cooling Down: Once baked, remove the cake from the oven and let it cool in the pan on a wire rack for about 15-20 minutes. This allows the cake to firm up slightly. Then, carefully invert the cake onto the wire rack to cool completely. This step is crucial! Trying to frost a warm cake will melt your buttercream into a messy puddle. Allow at least 1-2 hours for complete cooling.
Part 2: Making the Green Buttercream Frosting
- Cream the Butter: In a large mixing bowl (or the bowl of a stand mixer fitted with the paddle attachment), beat the softened unsalted butter on medium speed for 2-3 minutes until it’s light and fluffy. Make sure your butter is truly softened (press your finger into it, and it should leave an indentation easily).
- Add Powdered Sugar: Gradually add the sifted powdered sugar, about a cup at a time, beating well after each addition. Start on low speed to avoid a “sugar cloud,” then increase to medium-high. Scrape down the sides of the bowl frequently to ensure everything is incorporated.
- Achieve Desired Consistency: Once all the sugar is in, add the vanilla extract and 3 tablespoons of milk or cream. Beat on medium-high speed for another 3-5 minutes until the frosting is light, fluffy, and smooth. If the frosting is too thick, add more milk/cream, one teaspoon at a time, until you reach your desired consistency. If it’s too thin, you can add a little more sifted powdered sugar.
- Color Your Frosting: Add the green gel food coloring, starting with about ½ teaspoon. Mix on low speed until the color is evenly distributed. Add more coloring a tiny bit at a time until you achieve your desired vibrant green “caterpillar” shade. Gel colors are more concentrated and won’t thin your frosting as much as liquid colors.
Part 3: Assembling and Decorating Your Caterpillar Cake
- Trim and Prepare Cake: Once your cake is completely cool, you might want to gently level the top with a serrated knife if it has a domed top. This isn’t strictly necessary for a fun caterpillar, but it helps create a more stable base for stacking.
- Cut the Cake: Carefully cut your 9×13 inch cake lengthwise into **three equal strips**. Each strip will form a segment of your caterpillar. If using round cakes, you can cut them into crescent shapes or simply stack them and cut the assembled cake into segments.
- Arrange the Caterpillar Body: Arrange the three strips of cake on a serving platter or cake board in a gentle S-shape or a wavy line, slightly offsetting them to create a natural “segmented” look for your caterpillar. You can trim one end of one strip to be slightly rounded for the head.
- The Crumb Coat (Optional but Recommended for Beginners!): Apply a very thin layer of green buttercream over the entire cake. This is called a “crumb coat.” Its purpose is to trap any loose crumbs, preventing them from mixing into your final, smooth layer of frosting. Pop the cake in the refrigerator for 15-20 minutes to let the crumb coat set. This step makes frosting much easier for beginners!
- Apply Final Frosting: Once the crumb coat is set, apply a generous, even layer of the green buttercream over the entire caterpillar body. Use an offset spatula or a butter knife to spread it smoothly. Don’t worry if it’s not perfectly smooth; a slightly textured look can also be charming!
- Add the Eyes: Take your two large chocolate chips or M&Ms and place them near the front (head) of your caterpillar to create the eyes. A tiny dab of frosting on the back can help them stick.
- Attach the Antennae: Gently insert the two pieces of licorice lace or thin fondant strips into the top of the caterpillar’s head, slightly behind the eyes, to form the antennae.
- Place the Feet: Arrange the chocolate finger biscuits or chocolate rolls along the sides of the caterpillar’s body to look like little feet. You can gently press them into the frosting to secure them.
- Final Touches: If desired, sprinkle some colorful sprinkles over the caterpillar for an extra festive touch.
- Serve and Enjoy!: Your adorable and delicious Caterpillar Cake is ready to be admired and devoured!
Tips & Tricks for Baking Success
Even with an easy baking recipe like this, a few simple tips can make all the difference, especially for those new to baking. These baking tips for beginners will help you achieve perfect results every time!
- Room Temperature Ingredients are Key: This is a golden rule! Eggs, butter, and milk at room temperature emulsify better, creating a smoother batter and a more uniform cake texture. For butter, take it out an hour or two before. For eggs and milk, about 30 minutes.
- Measure Accurately: Baking is a science! Use proper measuring cups and spoons. For flour, spoon it into your measuring cup and then level it off with a straight edge (like the back of a knife). Don’t scoop directly from the bag, as this can compact the flour and lead to too much being added.
- Don’t Overmix the Batter: Once you add the wet ingredients to the dry, mix only until just combined. Overmixing develops gluten, which can make your cake tough and chewy instead of tender and moist. A few small lumps are perfectly acceptable.
- Sift Dry Ingredients: Sifting flour, cocoa, and powdered sugar (for frosting) removes lumps and aerates them, leading to a lighter, fluffier cake and smoother frosting.
- Cool Cake Completely: Patience is a virtue in baking! Trying to frost a warm cake will result in melted, runny frosting. Ensure your cake is absolutely, completely cool before you even think about applying that delicious buttercream.
- The Power of a Crumb Coat: This thin initial layer of frosting is a game-changer for beginners. It traps all those pesky loose crumbs, giving you a smooth canvas for your final, thicker layer of frosting. Don’t skip it if you want a professional-looking finish!
- Use Gel Food Coloring: For vibrant colors without thinning your frosting, opt for gel food coloring instead of liquid drops. A little goes a long way!
- Practice Makes Perfect: Don’t be discouraged if your first attempt isn’t exactly like the picture. Every bake is a learning experience. The most important thing is that it tastes delicious!
Essential Baking Tools
Having the right tools makes baking easier and more enjoyable. Here are some essentials you’ll need for your Caterpillar Cake adventure:
- Mixing Bowl
- Whisk
- Baking Pan (9×13 inch recommended)
- Measuring Cups & Spoons
- Spatula (rubber and offset)
- Wire Cooling Rack
- Electric Mixer (handheld or stand mixer)
- Sifter (optional, but recommended)
- Serrated Knife (for leveling/cutting cake)
Nutrition Information (Estimated per serving)
Please note that these are approximate values and can vary based on specific ingredient brands and portion sizes. This estimate is for one slice of the Caterpillar Cake.
| Nutrient | Amount |
|---|---|
| Calories | 420 kcal |
| Carbohydrates | 65 g |
| Protein | 4 g |
| Fat | 18 g |
| Fiber | 2 g |
| Sugar | 45 g |
Frequently Asked Questions for Beginner Bakers
Q1: Can I use a different cake flavor for the Caterpillar Cake?
Absolutely! While chocolate is a classic, you can easily adapt this Caterpillar Cake Recipe to your favorite cake flavor. A vanilla, lemon, or even a funfetti cake would work wonderfully. Just swap out the cocoa powder for an equal amount of flour (for vanilla/funfetti) or add lemon zest (for lemon cake) and follow the rest of the instructions.
Q2: How do I prevent my cake from sinking in the middle?
This is a common issue for beginners! The most frequent culprits are opening the oven door too early (especially in the first 20 minutes), overmixing the batter, or an inaccurate oven temperature. Ensure your oven is preheated properly, avoid peeking, and mix the batter just until the ingredients are combined. Also, make sure your baking powder and soda aren’t expired!
Q3: My frosting is too thin or too thick, what should I do?
Don’t panic! If your frosting is too thin, add more sifted powdered sugar, one tablespoon at a time, beating well after each addition until it reaches your desired consistency. If it’s too thick, add more milk or cream, one teaspoon at a time, until it’s spreadable. Remember to use room temperature butter for the best consistency.
Q4: How far in advance can I make this Caterpillar Cake?
You can bake the cake layers up to 2-3 days in advance. Once completely cooled, wrap them tightly in plastic wrap and store them at room temperature. The buttercream can also be made 2-3 days ahead and stored in an airtight container in the refrigerator. Just bring it to room temperature and re-whip it for a few minutes before frosting. For the best flavor and texture, assemble and decorate the cake no more than 1 day before serving.
Q5: What if I don’t have all the decorating items?
Get creative! The beauty of the **Caterpillar Cake Recipe** is its flexibility. Instead of chocolate finger biscuits for feet, you could use Rolo candies, mini Oreos, or even piped frosting circles. For antennae, pretzel sticks, Pocky sticks, or even just piped frosting lines work. The eyes can be mini M&Ms, candy eyes, or just two dots of black frosting. Make it your own!
Conclusion
And there you have it – your very own adorable and incredibly tasty Caterpillar Cake! We hope this detailed guide, filled with easy baking recipes principles and baking tips for beginners, has made your baking journey enjoyable and successful. This cake isn’t just a dessert; it’s a conversation starter, a memory maker, and a testament to your newfound baking confidence.
Don’t be afraid to experiment, have fun with the decorations, and most importantly, enjoy the process. Every bake is a step forward in your culinary adventure. We’d love to see your creations, so feel free to share your Caterpillar Cake photos with us! Happy baking, and happy eating!
“`