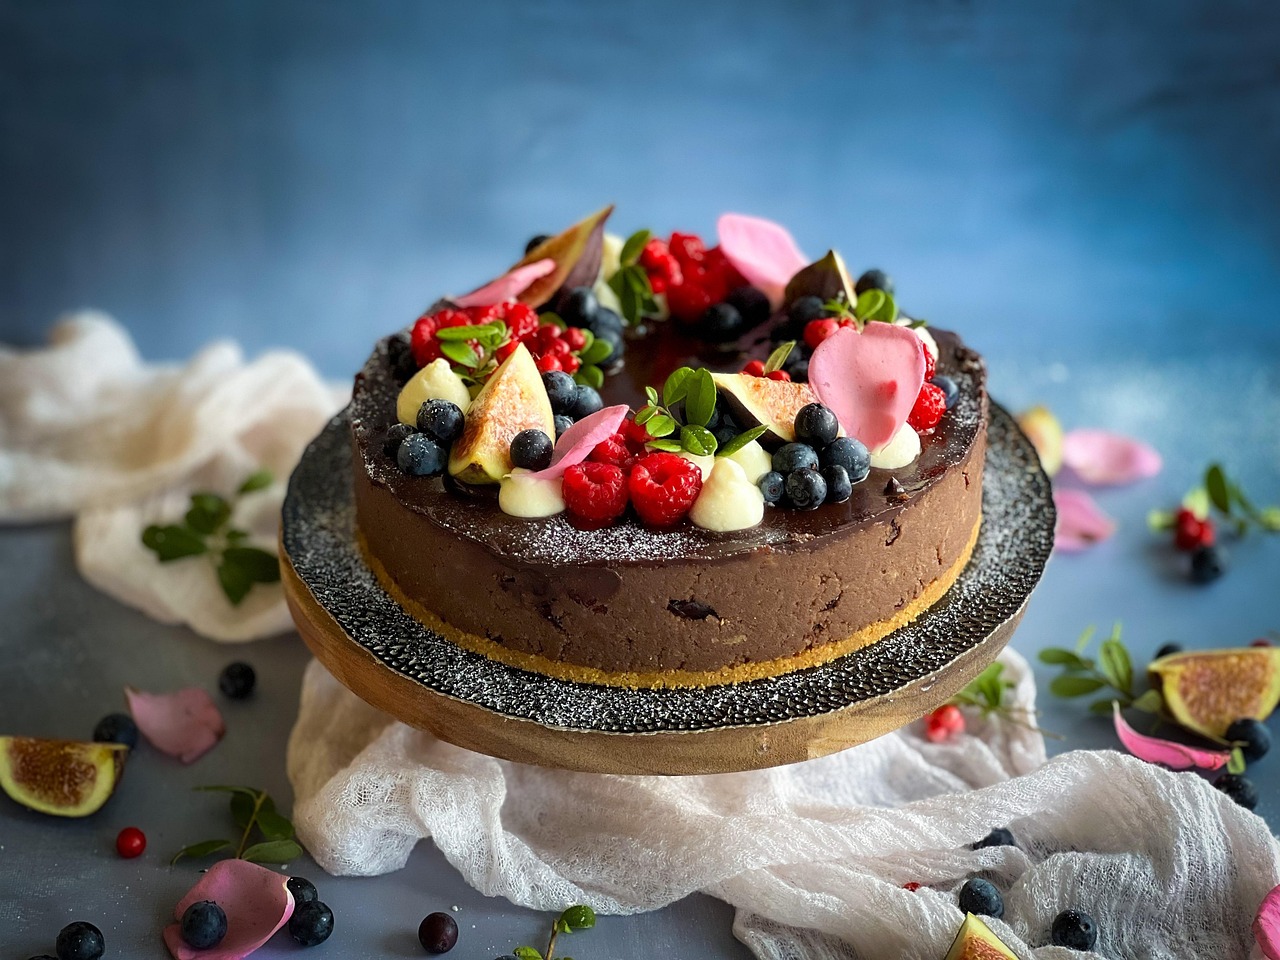
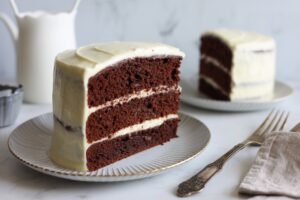
Welcome, fellow baking enthusiasts! Are you ready to dive into the wonderful world of homemade desserts? Today, we’re tackling a classic that’s surprisingly simple to master, even if you’ve never baked anything more complicated than toast: our incredible Chocolate Cake Recipe With Cream Cheese Frosting. This isn’t just any cake; it’s a moist, rich chocolate delight paired with a tangy, creamy frosting that will make your taste buds sing. Forget those intimidating recipes this guide is packed with easy baking recipes principles and crucial baking tips for beginners to ensure your first attempt is a show-stopping success. Get ready to impress yourself and everyone you share it with!
Ingredients List
Before we begin, gather all your ingredients. Having everything measured and ready (this is called “mise en place” by pros!) makes the baking process much smoother and less stressful.
For the Chocolate Cake:
| Quantity | Unit | Ingredient |
|---|---|---|
| 1 ¾ | cups | All-purpose flour |
| ¾ | cup | Unsweetened cocoa powder |
| 1 ¾ | cups | Granulated sugar |
| 1 ½ | teaspoons | Baking soda |
| 1 | teaspoon | Baking powder |
| 1 | teaspoon | Salt |
| 2 | large | Eggs |
| 1 | cup | Whole milk |
| ½ | cup | Vegetable oil |
| 2 | teaspoons | Vanilla extract |
| 1 | cup | Hot water or hot brewed coffee (highly recommended for deeper flavor!) |
For the Cream Cheese Frosting:
| Quantity | Unit | Ingredient |
|---|---|---|
| 1 | (8 oz) package | Cream cheese, softened |
| ½ | cup (1 stick) | Unsalted butter, softened |
| 4 | cups | Powdered sugar (confectioners’ sugar), sifted |
| 2 | teaspoons | Vanilla extract |
| 1-2 | tablespoons | Whole milk or heavy cream (optional, for consistency) |
Step-by-Step Instructions
Follow these detailed steps carefully, and you’ll be on your way to a perfectly baked cake!
Part 1: Preparing the Chocolate Cake
- Preheat Your Oven & Prepare Pans:
- Preheat your oven to 350°F (175°C). This is crucial for even baking!
- Grease and flour two 8-inch round baking pans. You can also line the bottoms with parchment paper for extra insurance against sticking. Beginner Tip: To grease, use a little butter or non-stick spray, then dust with flour, tapping out the excess. This creates a non-stick layer.
- Combine Dry Ingredients:
- In a large bowl, whisk together the all-purpose flour, cocoa powder, granulated sugar, baking soda, baking powder, and salt.
- Beginner Tip: Whisking ensures all ingredients are evenly distributed, especially the leavening agents (baking soda and powder), which help your cake rise beautifully. No one wants a flat cake!
- Combine Wet Ingredients:
- In a separate, medium-sized bowl, whisk together the eggs, whole milk, vegetable oil, and vanilla extract until well combined.
- Beginner Tip: Make sure your eggs and milk are at room temperature. This helps them emulsify better with other ingredients, leading to a smoother batter and a more tender cake. Take them out of the fridge about 30 minutes before you start.
- Combine Wet and Dry:
- Pour the wet ingredients into the dry ingredients. Mix on low speed with an electric mixer, or by hand with a whisk or spatula, until just combined.
- Beginner Tip: Do NOT overmix! Overmixing develops the gluten in the flour too much, resulting in a tough, dry cake. Mix until no streaks of flour remain, then stop.
- Add the Hot Liquid:
- Carefully stir in the hot water or hot brewed coffee. The batter will be thin, and that’s perfectly normal – this is what makes the cake incredibly moist and enhances the chocolate flavor.
- Beginner Tip: Hot coffee specifically deepens the chocolate flavor without making the cake taste like coffee. If you don’t have coffee, hot water works fine!
- Bake the Cakes:
- Divide the batter evenly between your two prepared baking pans.
- Bake for 30-35 minutes, or until a wooden skewer or toothpick inserted into the center of the cakes comes out clean.
- Beginner Tip: Avoid opening the oven door during the first 20-25 minutes of baking. The sudden temperature drop can cause your cakes to sink in the middle.
- Cooling Time:
- Once baked, remove the cakes from the oven and let them cool in their pans on a wire rack for about 10-15 minutes.
- After 10-15 minutes, carefully invert the cakes onto the wire rack to cool completely.
- Beginner Tip: This step is CRITICAL! Do NOT try to frost warm cakes. The frosting will melt and slide right off, turning your beautiful creation into a messy puddle. Patience is a virtue in baking!
Part 2: Making the Cream Cheese Frosting
- Cream Butter and Cream Cheese:
- In a large bowl, using an electric mixer, beat the softened cream cheese and softened unsalted butter together on medium speed until smooth and creamy, about 2-3 minutes.
- Beginner Tip: Ensure both are truly softened (at room temperature). If they’re cold, your frosting will be lumpy. You should be able to press a finger into them easily.
- Add Powdered Sugar:
- Gradually add the sifted powdered sugar, one cup at a time, beating well after each addition until fully incorporated. Start on low speed to avoid a cloud of sugar!
- Beginner Tip: Sifting your powdered sugar is important to prevent lumps in your frosting. Don’t skip this step!
- Add Vanilla and Adjust Consistency:
- Beat in the vanilla extract.
- If the frosting seems too thick, add 1-2 tablespoons of milk or heavy cream, one tablespoon at a time, until you reach your desired spreading consistency. If it’s too thin, you can add a bit more sifted powdered sugar.
Part 3: Assembling Your Chocolate Cake
- Level the Cakes (Optional but Recommended):
- Once the cakes are completely cool, you can use a long serrated knife to level the tops if they have a dome. This creates flat surfaces for easier stacking and a more professional look.
- Beginner Tip: Don’t worry if it’s not perfect! The frosting will hide minor imperfections.
- First Layer of Frosting:
- Place one cake layer on your serving plate or cake stand. Spread about 1 to 1 ½ cups of cream cheese frosting evenly over the top.
- Stack and Frost:
- Carefully place the second cake layer on top of the first.
- Spread the remaining frosting over the top and sides of the cake, using an offset spatula or knife to create smooth sides and a swirled top.
- Beginner Tip: Start with a “crumb coat” – a thin layer of frosting all over the cake to trap any loose crumbs. Chill for 15-20 minutes, then apply your final, thicker layer of frosting. This makes for a much cleaner finish.
- Chill and Serve:
- Chill the cake in the refrigerator for at least 30 minutes to allow the frosting to set.
- Slice and serve! Store any leftover cake covered in the refrigerator.
Tips & Tricks for Baking Success
Baking is a science, but with these simple tips, you’ll feel like a pro in no time!
- Room Temperature Ingredients are Key: This cannot be stressed enough! For cakes, room temperature eggs, milk, and butter emulsify better, leading to a smoother batter and a more tender, evenly baked cake. For frosting, softened butter and cream cheese prevent lumps and ensure a silky smooth finish.
- Measure Accurately: Use proper measuring cups for dry ingredients and liquid measuring cups for liquids. When measuring flour, spoon it into the measuring cup and then level it off with the back of a knife – don’t scoop directly from the bag, as this compacts the flour and you’ll end up with too much.
- Don’t Overmix: Once you add flour to wet ingredients, mix only until just combined. Overmixing develops gluten, making your cake tough and chewy instead of tender and moist.
- Trust Your Oven Thermometer: Oven temperatures can vary significantly. An inexpensive oven thermometer can be a game-changer, ensuring your oven is truly at the temperature you set.
- Cool Cakes Completely: Resist the urge to frost warm cakes. Warm cakes will melt your frosting, turning your beautiful creation into a mess. Patience will be rewarded!
- Read the Recipe First: Before you even get started, read through the entire recipe from start to finish. This helps you understand the process, identify any steps that might need extra time, and ensure you have all ingredients and tools ready.
- Sift Dry Ingredients: Especially for cocoa powder and powdered sugar, sifting helps remove lumps and ensures a smoother, more uniform batter and frosting.
Essential Baking Tools
Having the right tools makes all the difference. Here are a few essentials to get you started:
- Mixing Bowl
- Whisk
- Baking Pan (two 8-inch round pans)
- Measuring Cups and Spoons
- Spatula (rubber or offset)
- Electric Mixer (handheld or stand mixer)
- Wire Cooling Rack
- Parchment Paper (optional but recommended)
Nutrition Information (Approximate per serving)
Enjoying a slice of homemade cake is a treat! Here’s an approximate nutritional breakdown per serving (based on 12 servings per cake):
| Nutrient | Amount |
|---|---|
| Calories | ~420 kcal |
| Carbohydrates | ~65 g |
| Protein | ~5 g |
| Fat | ~18 g |
| Fiber | ~2 g |
| Sugar | ~50 g |
*Please note: These are approximate values and can vary based on specific brands and exact measurements used.
Frequently Asked Questions for Beginner Bakers
Q1: My cake sank in the middle! What went wrong?
A: This is a common issue! It can be caused by several factors:
- Oven Temperature: The oven might have been too cool, or you might have opened the oven door too early, causing a sudden temperature drop.
- Expired Leavening Agents: Baking soda and baking powder lose their potency over time. Make sure yours are fresh!
- Overmixing: As mentioned, overmixing develops gluten too much and can cause the cake to rise too quickly then collapse.
- Too Much Liquid: Double-check your measurements, especially for the hot water/coffee.
Don’t worry, even experienced bakers face this sometimes! Try again, keeping these points in mind.
Q2: Why is my cream cheese frosting lumpy?
A: The most common culprit here is cold cream cheese or butter. If they’re not at room temperature, they won’t cream together smoothly, leading to lumps. Also, ensure you sift your powdered sugar to break up any clumps before adding it to the mixture.
Q3: Can I make this cake ahead of time?
A: Absolutely!
- Cake Layers: You can bake the cake layers a day or two in advance. Once completely cooled, wrap them tightly in plastic wrap and store them at room temperature (or in the fridge if it’s very humid).
- Frosting: The cream cheese frosting can also be made a day ahead. Store it in an airtight container in the refrigerator. Before using, let it come to room temperature and give it a quick whip with your mixer to restore its creamy consistency.
- Assembled Cake: The fully assembled and frosted cake can be stored in an airtight container in the refrigerator for up to 3-4 days. Let it sit at room temperature for about 30 minutes before serving for the best texture.
Q4: What if I don’t have brewed coffee for the cake?
A: No problem at all! The recipe specifically mentions “hot water or hot brewed coffee.” While coffee significantly enhances the depth of the chocolate flavor, hot water works perfectly fine and will still result in a delicious, moist cake. You won’t miss out on the texture, just a subtle flavor boost.
Q5: How do I store the finished cake?
A: Because cream cheese frosting contains dairy, it’s best to store the frosted cake in an airtight container in the refrigerator. It will stay fresh for 3-4 days. For optimal taste and texture, let slices come to room temperature for about 15-30 minutes before serving.
Conclusion
Congratulations, baker! You’ve just mastered the art of creating a truly irresistible Chocolate Cake Recipe With Cream Cheese Frosting. This journey from simple ingredients to a stunning dessert is one of the most rewarding experiences in the kitchen. Remember, every great baker started as a beginner, and every attempt is a step towards perfection. Don’t be afraid to experiment, have fun, and most importantly, enjoy the delicious fruits of your labor!
We hope these detailed instructions and beginner-friendly tips empower you to bake with confidence. Share your baking triumphs with us – we can’t wait to see your beautiful chocolate cakes!
“`