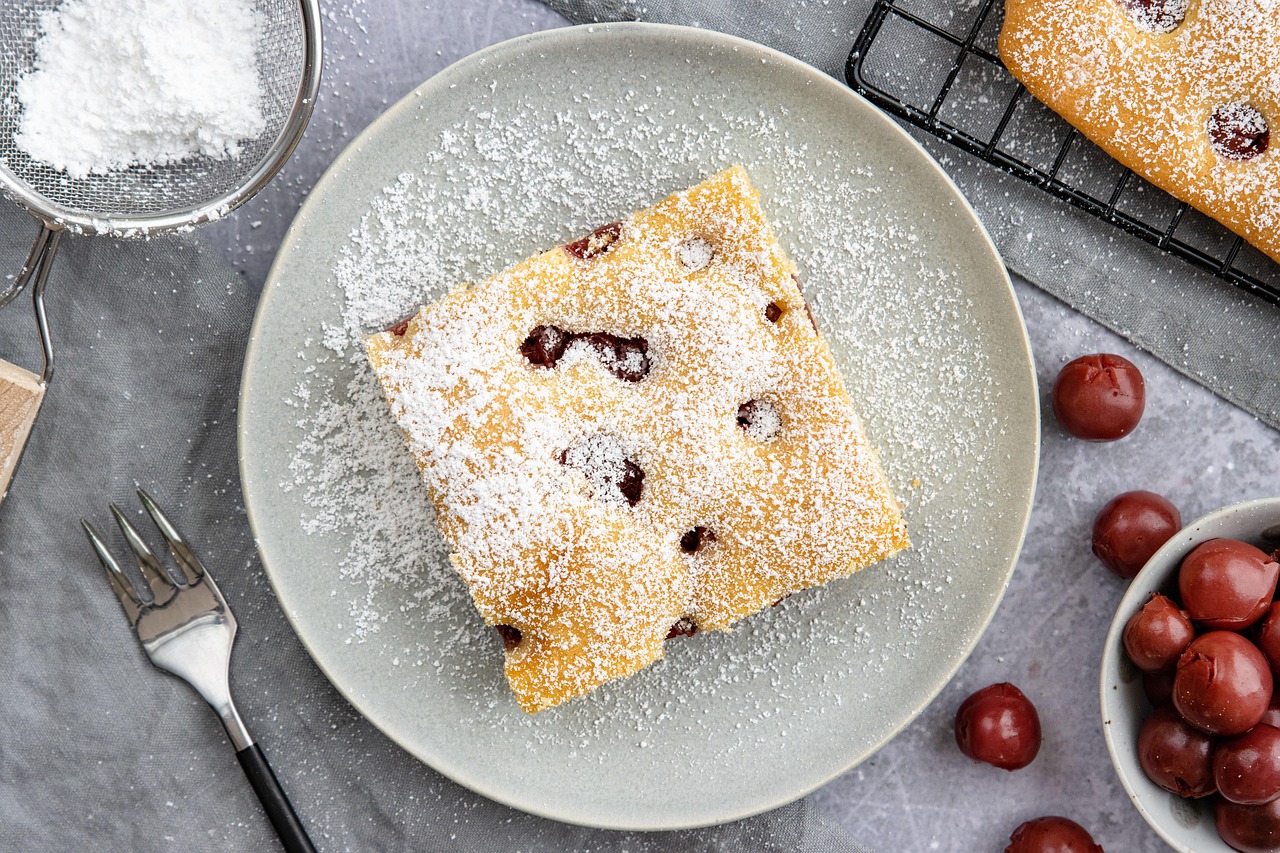
Welcome, aspiring bakers! Are you ready to embark on a delightful culinary journey that will fill your kitchen with the sweet aroma of success? If you’ve been looking for an easy baking recipe to kickstart your baking adventures, you’ve come to the right place. Our Cuban Cake Recipe is designed specifically for beginners, offering a simple yet incredibly satisfying experience. This isn’t just any cake; it’s a moist, tender vanilla cake with a hint of bright citrus, topped with a luscious cream cheese frosting that will transport your taste buds straight to a sun-drenched Cuban café. We’ll walk you through every step, providing essential baking tips for beginners to ensure your first homemade cake is nothing short of perfect. Get ready to impress yourself and your loved ones!
Ingredients List
Gathering your ingredients is the first step to baking success. Ensure everything is measured accurately and at room temperature where specified for the best results!
For the Moist Vanilla Cake
| Quantity | Unit | Ingredient |
|---|---|---|
| 2 ½ | cups | All-Purpose Flour (sifted) |
| 1 ½ | cups | Granulated Sugar |
| 2 | teaspoons | Baking Powder |
| ½ | teaspoon | Salt |
| ¾ | cup (1 ½ sticks) | Unsalted Butter, softened |
| 3 | large | Eggs, room temperature |
| 1 | cup | Whole Milk, room temperature |
| 2 | teaspoons | Vanilla Extract |
| 1 | tablespoon | Lime Zest (from 1-2 limes, optional for Cuban flair) |
For the Luscious Cream Cheese Frosting
| Quantity | Unit | Ingredient |
|---|---|---|
| 8 | ounces | Cream Cheese, softened |
| ½ | cup (1 stick) | Unsalted Butter, softened |
| 3-4 | cups | Powdered Sugar (confectioners’ sugar), sifted |
| 1 | teaspoon | Vanilla Extract |
| Pinch | Salt |
Step-by-Step Instructions: Your Guide to Baking Success
Follow these detailed steps carefully, and you’ll have a gorgeous, delicious cake ready to enjoy!
Step 1: Get Ready to Bake (Prepping Your Workspace)
- Preheat Your Oven: Adjust your oven rack to the middle position. Preheat your oven to 350°F (175°C). This is crucial for even baking!
- Prepare Your Baking Pan: Grease a 9-inch round baking pan with butter or baking spray. Then, lightly flour the pan, tapping out any excess. For an extra non-stick measure and easy removal, you can line the bottom with a circle of parchment paper after greasing, then grease and flour the parchment too.
- Gather and Measure: Lay out all your ingredients. Use proper measuring cups and spoons. For dry ingredients like flour, spoon it into the measuring cup and level it off with a straight edge (like the back of a knife) – don’t scoop directly from the bag, as this can compact the flour and lead to a dry cake!
Step 2: Combine the Dry Ingredients
- Sift Your Dry Ingredients: In a medium bowl, whisk together the 2 ½ cups of **sifted all-purpose flour**, 2 teaspoons of **baking powder**, and ½ teaspoon of **salt**. Sifting helps aerate the flour and ensures there are no lumps, making for a lighter, more even cake texture. Set aside.
Step 3: Cream Butter and Sugar
- Cream Butter and Sugar: In a large mixing bowl (or the bowl of a stand mixer fitted with the paddle attachment), beat the ¾ cup of softened unsalted butter and 1 ½ cups of granulated sugar together on medium-high speed until the mixture is light, fluffy, and pale in color. This usually takes about 3-5 minutes. This step incorporates air, which is vital for a tender cake.
- Beginner Tip: Ensure your butter is truly softened (room temperature, not melted!). It should yield slightly when pressed but not be greasy. Cold butter won’t cream properly, and melted butter will result in a dense cake.
Step 4: Add Eggs and Vanilla
- Add Eggs Gradually: Add the 3 large eggs, one at a time, beating well after each addition until fully incorporated. Scrape down the sides of the bowl with a spatula after each egg to ensure everything is mixed evenly.
- Incorporate Vanilla and Zest: Stir in the 2 teaspoons of vanilla extract and 1 tablespoon of **lime zest** (if using). The lime zest adds a fantastic, subtle brightness that complements the vanilla beautifully, giving it that Cuban-inspired twist.
Step 5: Alternate Dry and Wet Ingredients
- Add Dry and Wet Alternately: With the mixer on low speed, add about one-third of the dry ingredient mixture to the wet ingredients, mixing until just combined.
- Follow with Milk: Pour in half of the 1 cup of room temperature whole milk, mixing until just combined.
- Repeat: Add another third of the dry ingredients, mix, then the remaining milk, mix, and finally the last third of the dry ingredients. Mix until just combined and no streaks of flour remain.
- Crucial Beginner Tip: Do not overmix! Overmixing develops the gluten in the flour too much, leading to a tough, dry cake. Mix only until the ingredients are incorporated. A few small lumps are okay.
Step 6: Bake the Cake
- Pour into Pan: Pour the cake batter evenly into your prepared 9-inch round baking pan. Gently tap the pan on the counter a couple of times to release any large air bubbles.
- Bake: Bake in your preheated oven for 30-35 minutes, or until a wooden skewer or toothpick inserted into the center of the cake comes out clean.
- Common Mistake: Resist the urge to open the oven door during the first 20-25 minutes of baking, as this can cause the cake to sink.
- Check for Doneness: If the toothpick comes out with wet batter, bake for a few more minutes and check again. If it comes out with moist crumbs, it’s perfect!
Step 7: Cool the Cake
- Cool in Pan: Once baked, remove the cake from the oven and let it cool in the pan on a wire rack for about 10-15 minutes. This allows the cake to firm up slightly, making it easier to handle.
- Invert and Cool Completely: After 10-15 minutes, carefully invert the cake onto the wire rack, remove the pan, and peel off any parchment paper. Let the cake cool completely to room temperature before frosting.
- Why Cool Completely?: Frosting a warm cake will cause the frosting to melt and slide right off – a common beginner mistake! Patience is key here.
Step 8: Prepare the Cream Cheese Frosting
- Cream Cheese and Butter: In a large mixing bowl (or stand mixer), beat the 8 ounces of softened cream cheese and ½ cup of softened unsalted butter together on medium speed until smooth and creamy, about 2-3 minutes. Make sure there are no lumps of cream cheese.
- Add Remaining Ingredients: Gradually add the 3-4 cups of sifted powdered sugar, 1 teaspoon of vanilla extract, and a pinch of salt. Start with 3 cups of powdered sugar and add more if you prefer a thicker or sweeter frosting.
- Mix Until Fluffy: Beat on low speed until the sugar is incorporated, then increase to medium-high speed and beat for another 2-3 minutes until the frosting is light, fluffy, and smooth.
- Alternative Frosting: If cream cheese isn’t your preference, a simple vanilla buttercream or even a dulce de leche topping would also be delicious and fit the Cuban theme!
Step 9: Frost and Serve!
- Frost Your Cake: Once the cake is completely cool, use an offset spatula or knife to spread the cream cheese frosting evenly over the top and sides of the cake. Get creative with swirls or smooth finishes!
- Garnish (Optional): For an extra touch, you can garnish with a little extra lime zest, toasted coconut flakes, or fresh fruit.
- Serve and Enjoy: Slice and serve your beautiful homemade Cuban-inspired cake! Store any leftovers covered in the refrigerator.
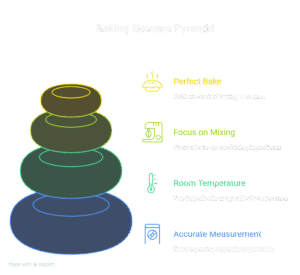
Tips & Tricks for Baking Beginners
Mastering these simple tips will elevate your baking from good to great, especially with our Cuban Cake Recipe!
- Room Temperature Ingredients are Key: This is arguably the most important tip for cakes. Softened butter, room temperature eggs, and milk emulsify better, creating a smooth, uniform batter that traps air efficiently. This results in a lighter, more tender cake. Plan ahead by taking these ingredients out of the fridge at least 30-60 minutes before you start.
- Measure Accurately: Baking is a science! Use proper measuring cups and spoons. For dry ingredients like flour, spoon it into the cup and level it off. For liquids, measure at eye level. Digital kitchen scales are a fantastic investment for precision.
- Don’t Overmix: Once you add flour to your wet ingredients, mix only until the flour streaks disappear. Overmixing develops gluten, leading to a tough, chewy cake. A light hand is best!
- Preheat Your Oven Properly: Always preheat your oven for at least 15-20 minutes before baking. Ovens fluctuate, and a properly preheated oven ensures even heat distribution from the moment your cake goes in, preventing uneven baking or sinking.
- Cool Completely Before Frosting: Patience is a virtue in baking! Frosting a warm cake will cause the frosting to melt and slide off, making a mess. Ensure your cake is completely cool to the touch, inside and out, before applying any frosting.
- Read the Entire Recipe First: Before you even get out a single ingredient, read through the entire recipe from start to finish. This helps you understand the process, anticipate steps, and avoid missing anything crucial.
Essential Baking Tools
Having the right tools makes baking easier and more enjoyable. Here are some essentials (with links to help you find them!):
- Mixing Bowls (various sizes)
- Whisk
- 9-inch Round Baking Pan
- Measuring Cups and Spoons
- Rubber Spatula
- Hand Mixer or Stand Mixer (optional, but highly recommended for creaming and beating)
- Wire Cooling Rack
- Parchment Paper
- Offset Spatula (great for frosting)
Nutrition Information (Estimated per slice)
Please note: These are approximate values and can vary based on specific brands and exact measurements. This estimation is for one of 12 slices of the cake with frosting.
| Nutrient | Amount |
|---|---|
| Calories | 380 kcal |
| Carbohydrates | 55 g |
| Protein | 4 g |
| Fat | 17 g |
| Fiber | 1 g |
| Sugar | 40 g |
Frequently Asked Questions (FAQs)
Q1: Why do my ingredients need to be at room temperature?
A: Room temperature ingredients (especially butter, eggs, and milk) emulsify better, meaning they mix together more smoothly and evenly. This creates a uniform batter that can hold more air, resulting in a lighter, fluffier cake texture. Cold ingredients can cause the batter to curdle and result in a dense, heavy cake.
Q2: How do I know if my cake is fully baked?
A: The most reliable way is the “toothpick test.” Insert a wooden skewer or toothpick into the very center of the cake. If it comes out clean (no wet batter), the cake is done. If it has moist crumbs attached, it’s perfectly baked. If it comes out with wet batter, continue baking for a few more minutes and test again. Also, the edges of the cake should start to pull away slightly from the sides of the pan, and the top should spring back when lightly touched.
Q3: Can I use a different size baking pan?
A: Yes, but you’ll need to adjust the baking time. If you use a smaller pan, the cake will be thicker and require more baking time. If you use a larger pan, it will be thinner and bake faster. For beginners, sticking to the specified 9-inch round pan is highly recommended for consistent results. If using an 8-inch pan, you might need to increase baking time by 5-10 minutes; for a 13×9 inch rectangular pan, it might bake faster (around 25-30 minutes).
Q4: My cream cheese frosting is too thin/thick. What do I do?
A: If your frosting is too thin, gradually beat in more sifted powdered sugar, one tablespoon at a time, until it reaches your desired consistency. If it’s too thick, you can add a tiny splash (about ½-1 teaspoon) of milk or cream, beating until it loosens up. Remember to add small amounts and mix well before adding more to avoid over-correcting.
Q5: Can I make this cake gluten-free?
A: Yes, you can! Substitute the all-purpose flour with a 1:1 gluten-free baking flour blend that contains xanthan gum. The baking powder and other ingredients are naturally gluten-free. Follow the same instructions, but keep in mind that gluten-free cakes can sometimes be a bit more delicate, so handle with care.
Q6: How should I store leftover cake?
A: Because of the cream cheese frosting, this cake should be stored in an airtight container in the refrigerator. It will stay fresh for up to 3-4 days. For the best taste and texture, allow slices to come to room temperature for about 15-20 minutes before serving.
Conclusion: Your Baking Adventure Begins Now!
Congratulations, future master baker! You’ve just completed your very first (or one of your first!) homemade cake recipes. This Cuban Cake Recipe is more than just a dessert; it’s a testament to what you can create with a little patience, precision, and passion. We hope these easy baking recipes and detailed baking tips for beginners have empowered you and shown you that baking isn’t as intimidating as it seems. There’s a unique joy in pulling a perfectly baked cake from the oven and sharing it with those you love. Don’t be afraid to experiment, try new flavors, and make this recipe your own. We can’t wait to see what you bake next! Happy baking!