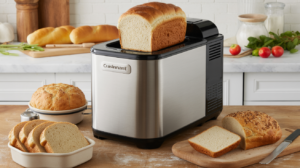
We know that navigating new kitchen appliances can feel daunting, especially when trying to find reliable Cuisinart Bread Maker Recipes Pdf online. That’s why we’ve put together one of the most straightforward and easy baking recipes out there, specifically tailored for your machine. This recipe is packed with essential baking tips for beginners to ensure success every single time. Get ready to fill your home with the irresistible aroma of freshly baked bread!
Ingredients List: Simple & Sweet
Gathering your ingredients is the first step to baking success. Accuracy is key, especially with bread making, so ensure you have proper measuring tools.
| Quantity | Unit | Ingredient |
|---|---|---|
| 1 | cup | Warm Water (105-115°F / 40-46°C) |
| 2 | tablespoons | Granulated Sugar |
| 1 | teaspoon | Salt |
| 2 | tablespoons | Vegetable Oil (or melted butter) |
| 3 | cups | All-Purpose Flour (spooned and leveled) |
| 2 | teaspoons | Active Dry Yeast (or Instant Yeast) |
Beginner Tip: Ensure your water is the correct temperature! Too hot will kill the yeast, too cold won’t activate it properly, leading to a flat loaf.
Step-by-Step Instructions: Your Path to Perfect Bread
Follow these detailed steps to achieve a beautifully baked loaf every time. Remember, the bread maker does most of the work, but careful preparation ensures the best results!
Step 1: Prep Your Bread Maker Pan
Carefully remove the bread pan from your Cuisinart Bread Maker. Make sure the kneading paddle is securely in place at the bottom of the pan. Give the pan a quick wipe to ensure it’s clean and dry.
Why this matters: A clean pan prevents old crumbs from burning, and a properly seated paddle ensures even mixing.
Step 2: Add Liquids First
Pour the warm water into the bread pan. Next, add the vegetable oil (or melted butter). This order is crucial for most bread maker recipes, as it prevents the yeast from activating too early or coming into direct contact with salt, which can inhibit its activity.
Beginner Tip: If using active dry yeast, make sure your water is truly warm (like bathwater, not hot!). If using instant yeast, the water temperature is slightly less critical but still aim for warm.
Step 3: Introduce Dry Ingredients (The “Wells” Method)
Carefully add the sugar and salt to the pan, ensuring they don’t directly touch the water too much yet. Now, spoon and level your all-purpose flour directly over the liquids and other dry ingredients. Create a small “well” or indentation in the center of the flour with your finger – this is where the yeast will go.
Common Mistake & Fix: Many beginners scoop flour directly from the bag, which compacts it, leading to too much flour. This results in dense, dry bread. Always “spoon and level” by spooning flour into your measuring cup and then leveling off the top with a straight edge.
Step 4: Add the Yeast
Pour the active dry yeast (or instant yeast) into the well you created in the flour. Try to keep the yeast separate from the wet ingredients and the salt until the mixing cycle begins. This controlled separation ensures the yeast activates at the right time.
Why separate? Salt can inhibit yeast activity, and premature contact with liquids can cause the yeast to activate too early or unevenly.
Step 5: Place Pan in Machine & Select Cycle
Carefully place the bread pan back into your Cuisinart Bread Maker, ensuring it clicks securely into place. Close the lid. Now, select your bread maker’s “Basic White” or “White Bread” cycle. For a 1.5 lb loaf, this is typically the default. You can also choose your crust setting (light, medium, dark) according to your preference. We recommend “medium” for beginners.
Important Note: Most bread makers have a specific loaf size setting (e.g., 1.5 lb or 2 lb). This recipe is for a 1.5 lb loaf. If your machine is set for 2 lb, you might need to adjust ingredients or simply make a slightly smaller loaf.
Step 6: Let the Machine Do the Work!
Press the “Start” button and let your Cuisinart Bread Maker work its magic! The machine will go through several stages: kneading, rising, and baking. You’ll hear it whirring, mixing, and eventually, the delightful aroma of baking bread will fill your kitchen.
Observation Tip: During the first kneading cycle (usually within the first 5-10 minutes), you can peek at the dough. It should form a soft, pliable ball. If it looks too sticky (more like a batter), add flour one tablespoon at a time. If it looks too dry or crumbly, add water one teaspoon at a time. This is your best chance to correct consistency!
Step 7: The Waiting Game (and the Aroma!)
Resist the urge to open the lid during the rising and baking cycles. Opening the lid can cause the bread to collapse, especially during the crucial rising phase, and can significantly drop the internal temperature, affecting the bake.
Patience is a virtue! The machine is engineered to maintain optimal temperature and humidity for perfect bread.
Step 8: Remove and Cool
Once the cycle is complete, your bread maker will usually beep. Carefully remove the bread pan from the machine using oven mitts – it will be very hot! Invert the pan onto a wire cooling rack and gently shake the bread out. The kneading paddle might stick to the bottom of the loaf; if so, carefully remove it once the bread has cooled slightly.
Crucial Step: Let the bread cool completely on the wire rack for at least 1-2 hours before slicing. Slicing hot bread can make it gummy and dense inside. Cooling allows the internal structure to set properly.
Step 9: Slice, Serve, and Enjoy!
Once cooled, slice your homemade white sandwich bread to your desired thickness. It’s perfect for sandwiches, toast, or simply slathered with butter. Enjoy the fruits of your (minimal) labor!
Alternative Ideas: Feel free to add 1/4 cup of rolled oats, sunflower seeds, or flax seeds to the dough during the mixing cycle for added texture and nutrition. Just sprinkle them in after the initial ingredients are in the pan, before the machine starts kneading.
Tips & Tricks for Bread Maker Success
Mastering your bread maker is easy with a few insider tips. Here’s how to ensure your loaves are always perfect:
- Check Your Yeast: Yeast is a living organism. Always check the expiration date. If your yeast is old, your bread won’t rise. You can “proof” active dry yeast by dissolving 1 teaspoon of sugar in 1/4 cup of warm water (from your recipe’s total water). Sprinkle 2 1/4 teaspoons of yeast over it. If it foams within 5-10 minutes, it’s active!
- Measure Accurately: Baking is a science. Use proper measuring cups and spoons, and always spoon and level your flour, don’t scoop directly from the bag. Small discrepancies can lead to big problems.
- Water Temperature is Key: For active dry yeast, water between 105-115°F (40-46°C) is ideal. Use a kitchen thermometer if you’re unsure. Too hot kills the yeast, too cold won’t activate it.
- Room Temperature Ingredients: While not as critical as traditional baking, having ingredients like oil or butter at room temperature can help with more even mixing.
- Don’t Open the Lid: Resist the temptation! Opening the lid during the rising and baking cycles can cause the dough to deflate and affect the final texture and rise.
- Cool Completely: Always let your bread cool entirely on a wire rack before slicing. Slicing hot bread can make it dense and gummy inside.
- Store Properly: Homemade bread doesn’t contain preservatives, so it can go stale faster. Store it in an airtight container or bread bag at room temperature for 3-4 days. For longer storage, slice and freeze for up to 3 months.
- Clean Your Machine: Always clean the bread pan and paddle thoroughly after each use. Avoid abrasive cleaners that can damage the non-stick coating.
Essential Baking Tools for Your Kitchen
While your Cuisinart Bread Maker does most of the heavy lifting, a few basic tools will make your baking experience even smoother and more precise. These are great additions to any beginner baker’s kitchen:
- Mixing Bowl: Useful for proofing yeast or preparing other ingredients.
- Whisk: Great for combining dry ingredients evenly.
- Baking Pan: While your bread maker has one, extra pans are useful for other baking projects.
- Measuring Cups: Essential for accurate ingredient measurement.
- Spatula: Perfect for scraping down bowls or leveling flour.
Nutrition Information (Per Slice – Approx.)
This is an approximate nutritional breakdown for one slice of the white sandwich bread, based on a 1.5 lb loaf yielding about 12-14 slices. Values can vary slightly based on specific ingredients and loaf size.
| Nutrient | Amount |
|---|---|
| Calories | 120-130 kcal |
| Carbohydrates | 23-25 g |
| Protein | 4-5 g |
| Fat | 2-3 g |
| Fiber | 1 g |
| Sugar | 2-3 g |
Frequently Asked Questions (FAQs) for Beginner Bakers
1. Why didn’t my bread rise properly?
This is a common issue! The most likely culprits are inactive or expired yeast, water that was too hot (killing the yeast) or too cold (not activating it), or too much salt/sugar inhibiting yeast growth. Ensure your yeast is fresh, your water temperature is correct, and you’ve measured accurately.
2. Can I use different types of flour?
Absolutely! Once you’re comfortable with this basic recipe, you can experiment. Bread flour has a higher protein content, which can result in a chewier bread. Whole wheat flour will create a denser loaf and often requires slightly more liquid. Always check specific recipes for flour substitutions, as ratios might need adjustment.
3. My bread is too dense or too crumbly. What went wrong?
Too dense often means too much flour or not enough liquid, leading to a stiff dough that can’t rise properly. Too crumbly usually indicates too little liquid, making the dough dry. Pay close attention to the dough consistency during the initial kneading phase (as mentioned in Step 6) and adjust with small amounts of flour or water.
4. How do I store homemade bread to keep it fresh?
Homemade bread lacks preservatives, so it has a shorter shelf life than store-bought. Store it in an airtight bread box, a sealed plastic bag, or wrapped in foil at room temperature. Avoid refrigerating, as it can dry out the bread faster. For longer storage, slice the bread and freeze it in a freezer-safe bag for up to 3 months.
5. Do I really need to use warm water?
Yes, for active dry yeast, warm water (105-115°F / 40-46°C) is crucial. It “wakes up” the yeast, allowing it to begin feeding on the sugar and producing carbon dioxide, which makes your bread rise. If using instant yeast, the temperature is less critical, but still aim for lukewarm water for optimal results.
6. Can I open the lid of the bread maker during the cycle?
It’s best to avoid opening the lid, especially during the rising and baking stages. Opening the lid can cause a sudden drop in temperature, which can make the dough collapse or prevent it from rising properly. During the initial kneading, a quick peek to check dough consistency is generally fine, but keep it brief.
Conclusion: Your Homemade Bread Journey Begins!
Congratulations, you’ve now got everything you need to bake a fantastic loaf of white sandwich bread in your Cuisinart Bread Maker! There’s truly nothing quite like the smell and taste of freshly baked bread, and with these easy baking recipes and baking tips for beginners, you’re well on your way to becoming a confident home baker.
Don’t be afraid to experiment once you’ve mastered this basic recipe. Add herbs, cheese, or different flours to discover new favorites. The joy of baking is in the creation and, of course, the eating! We hope this detailed guide has made baking with your Cuisinart Bread Maker an enjoyable and successful experience. Happy baking!