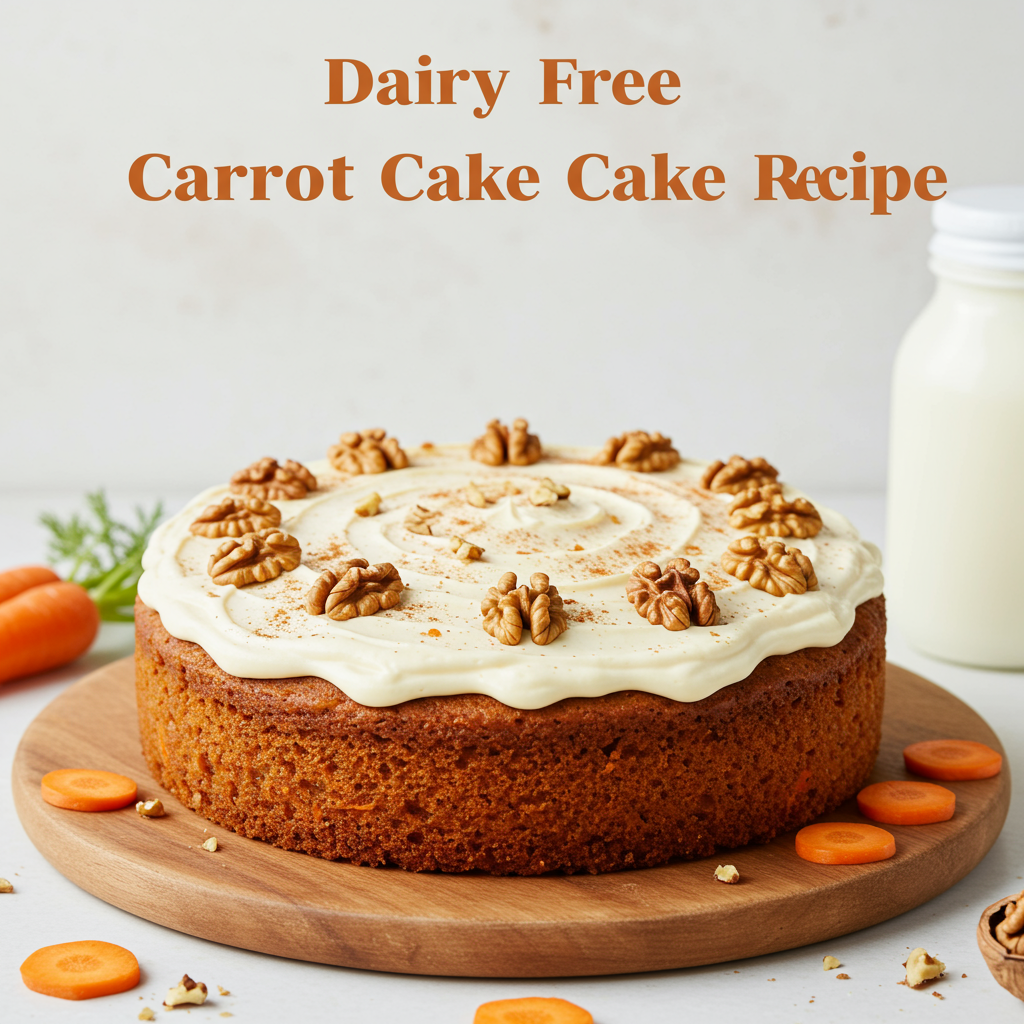
Welcome, budding bakers! Are you ready to dive into the delightful world of baking with a recipe that’s as comforting as it is impressive? Today, we’re making a show-stopping Dairy Free Carrot Cake Recipe that is incredibly moist, perfectly spiced, and topped with a luscious dairy-free cream cheese frosting. Don’t be intimidated if you’re new to the kitchen; this recipe is designed to be one of your go-to easy baking recipes, complete with all the baking tips for beginners you’ll need for success. We’ll walk through every step together, ensuring you create a delicious masterpiece without any dairy. Get ready to impress yourself and your loved ones with this plant-based treat!
Ingredients You’ll Need
Gathering your ingredients before you start is one of the best baking tips for beginners. It ensures a smooth baking process!
| Quantity | Unit | Ingredient |
|---|---|---|
| For the Dairy-Free Carrot Cake: | ||
| 2 | cups | All-purpose flour (sifted for best results) |
| 2 | tsp | Baking soda |
| 1 | tsp | Ground cinnamon |
| ½ | tsp | Ground nutmeg |
| ¼ | tsp | Ground ginger (optional, but adds a nice kick!) |
| ½ | tsp | Salt |
| 1 ½ | cups | Granulated sugar |
| ½ | cup | Light brown sugar, packed |
| ¾ | cup | Unsweetened applesauce (or vegetable oil for an even richer cake) |
| ¼ | cup | Plant-based milk (e.g., almond, soy, oat – unsweetened) |
| 2 | tsp | Vanilla extract |
| 3 | cups | Finely grated carrots (about 4-5 medium carrots) |
| ½ | cup | Chopped pecans or walnuts (optional, but highly recommended!) |
| For the Dairy-Free Cream Cheese Frosting: | ||
| ½ | cup | Dairy-free butter, softened (1 stick or 8 tablespoons) |
| 8 | oz | Dairy-free cream cheese, softened (ensure it’s block-style for best results) |
| 3-4 | cups | Powdered sugar, sifted (add more or less to taste/consistency) |
| 1 | tsp | Vanilla extract |
| 1-2 | tbsp | Plant-based milk (if needed for desired consistency) |
Step-by-Step Instructions for Your Dairy-Free Carrot Cake
Follow these detailed steps carefully, and you’ll be enjoying your homemade cake in no time!
Part 1: Preparing Your Cake Batter
- Preheat and Prep: Start by preheating your oven to 350°F (175°C). This is crucial for even baking. Next, lightly grease and flour two 8 or 9-inch round baking pans. You can also line the bottoms with parchment paper for extra insurance against sticking. Beginner Tip: Greasing and flouring properly prevents your cake from sticking, making removal much easier!
- Combine Dry Ingredients: In a large mixing bowl, whisk together the sifted all-purpose flour, baking soda, ground cinnamon, ground nutmeg, optional ground ginger, and salt. Whisking ensures these ingredients are evenly distributed, so your cake rises properly and is perfectly spiced. Set this bowl aside.
- Mix Wet Ingredients: In a separate, medium-sized bowl, combine the granulated sugar, light brown sugar, unsweetened applesauce (or oil), plant-based milk, and vanilla extract. Whisk these together until they are well combined and smooth. The applesauce provides moisture and helps reduce the amount of oil needed, making the cake wonderfully tender.
- Combine Wet and Dry: Pour the wet ingredients into the dry ingredients. Using a spatula or a wooden spoon, gently mix until just combined. Do not overmix! Overmixing develops the gluten in the flour too much, which can lead to a tough, dense cake. A few lumps are perfectly normal.
- Fold in Carrots and Nuts: Now, it’s time for the stars of the show! Gently fold in the finely grated carrots and the optional chopped pecans or walnuts. Make sure they are evenly distributed throughout the batter. Beginner Tip: Grate your carrots finely; this ensures they soften perfectly during baking and blend seamlessly into the cake texture.
- Fill the Pans: Divide the batter evenly between your two prepared baking pans. You can use a kitchen scale for precision, or simply eyeball it. Smooth the tops with your spatula.
Part 2: Baking Your Dairy-Free Carrot Cake
- Bake to Perfection: Place the pans in the preheated oven and bake for 30-35 minutes, or until a wooden skewer or toothpick inserted into the center of the cakes comes out clean. Baking times can vary depending on your oven, so start checking around the 28-minute mark.
- Cooling Down: Once baked, remove the cakes from the oven and let them cool in their pans on a wire rack for about 10-15 minutes. This crucial step allows the cakes to firm up before you attempt to remove them.
- Fully Cool: After the initial cooling, carefully invert the cakes onto the wire rack to cool completely. **Do not frost warm cakes!** The frosting will melt and slide right off, creating a mess. Ensure they are completely cool to the touch, which can take 1-2 hours.
Part 3: Making the Dairy-Free Cream Cheese Frosting
- Cream the “Butter”: In a large mixing bowl, using an electric mixer (handheld or stand mixer with paddle attachment), beat the softened dairy-free butter until light and fluffy. This usually takes 2-3 minutes.
- Add Dairy-Free Cream Cheese: Add the softened dairy-free cream cheese to the bowl. Beat it with the dairy-free butter until smooth and well combined. Beginner Tip: Make sure both the dairy-free butter and cream cheese are truly softened (room temperature) but not melted. This helps prevent a lumpy frosting. If your cream cheese is too cold, it will be hard to incorporate smoothly.
- Gradually Add Powdered Sugar: Gradually add the sifted powdered sugar, one cup at a time, beating well after each addition until smooth. Start with 3 cups and add more if you want a thicker or sweeter frosting.
- Finish with Vanilla and Adjust: Stir in the vanilla extract. If the frosting seems too thick, add plant-based milk one tablespoon at a time until you reach your desired consistency. If it’s too thin, you can add a bit more sifted powdered sugar.
Part 4: Assembling and Decorating Your Cake
- Frosting Time: Once your cakes are completely cool, place one cake layer on your serving plate or cake stand. Spread about a third of the frosting evenly over the top.
- Stack and Frost: Carefully place the second cake layer on top of the first. Use the remaining frosting to cover the top and sides of the entire cake. Use an offset spatula or the back of a spoon to create swirls or a smooth finish.
- Optional Garnish: If desired, sprinkle some extra chopped pecans or walnuts on top or around the base of the cake for a beautiful finish.
- Chill and Serve: For best results and easier slicing, chill your frosted cake in the refrigerator for at least 30 minutes before serving. This allows the frosting to firm up. Slice and enjoy your magnificent **Dairy Free Carrot Cake Recipe**!
Tips & Tricks for Beginner Bakers
Mastering baking is all about a few key techniques. Here are some extra pointers to ensure your dairy-free carrot cake is a resounding success:
- Read the Recipe First: Always read the entire recipe from start to finish before you even pull out an ingredient. This helps you understand the process and avoid surprises.
- Room Temperature Ingredients: For the frosting especially, ensure your dairy-free butter and cream cheese are at true room temperature. This makes for a smoother, lump-free frosting that’s easy to spread.
- Sifting Flour and Powdered Sugar: Don’t skip sifting! It removes lumps from flour, making the cake lighter, and ensures a silky-smooth frosting with powdered sugar.
- Don’t Overmix: This is a golden rule in baking. Mix wet and dry ingredients just until combined. Overmixing develops gluten, leading to a tough cake.
- Measure Accurately: Baking is a science! Use proper measuring cups and spoons. For flour, spoon it into the measuring cup and level it off with a straight edge, rather than scooping directly from the bag.
- Patience with Cooling: Resist the urge to frost a warm cake. It will melt your beautiful frosting. Let the cakes cool completely on a wire rack.
- Oven Temperature: Invest in an oven thermometer. Oven temperatures can vary greatly from what the dial indicates, and consistent temperature is key to good baking.
Essential Baking Tools
Having the right tools makes all the difference for easy baking recipes.
- Mixing Bowl (set of various sizes)
- Whisk (balloon whisk for dry, flat whisk for wet)
- Round Baking Pans (two 8-inch or 9-inch pans)
- Measuring Cups and Spoons (accurate sets are vital)
- Rubber Spatula (for folding and scraping)
- Electric Hand Mixer or Stand Mixer (for frosting)
- Wire Cooling Rack
- Parchment Paper (optional, but highly recommended)
- Box Grater (for carrots)
Nutrition Information (Estimated per serving)
This is an estimated nutritional breakdown for one slice (assuming 12 servings per cake).
| Nutrient | Amount |
|---|---|
| Calories | ~480 kcal |
| Carbohydrates | ~75 g |
| Protein | ~5 g |
| Fat | ~28 g |
| Fiber | ~3 g |
| Sugar | ~55 g |
*Please note: These are estimated values and can vary based on specific ingredients and brands used.
Frequently Asked Questions (FAQs)
Q: Can I make this cake ahead of time?
A: Absolutely! The cake layers can be baked a day or two in advance. Let them cool completely, then wrap them tightly in plastic wrap and store at room temperature. The frosting can also be made a day ahead and stored in an airtight container in the refrigerator. Just let it come to room temperature and give it a quick whip before frosting your cake.
Q: What’s the best way to store leftover carrot cake?
A: Due to the cream cheese frosting, it’s best to store your dairy-free carrot cake in an airtight container in the refrigerator. It will stay fresh for up to 3-5 days. For longer storage, you can freeze individual slices for up to a month.
Q: My frosting is too runny/too thick. What should I do?
A: If your frosting is too runny, gradually add more sifted powdered sugar, 1/4 cup at a time, until it reaches your desired consistency. If it’s too thick, add plant-based milk, 1 tablespoon at a time, until it loosens up. Remember to mix well after each addition.
Q: Can I use pre-shredded carrots from the store?
A: While you can, it’s generally recommended to grate your own carrots. Pre-shredded carrots are often thicker and drier, which can affect the moisture and texture of your cake. Finely grated fresh carrots yield the best results.
Q: Can I make this a single-layer cake?
A: Yes, you can! You can bake the entire batter in a single 9×13 inch baking pan. The baking time will be longer, likely around 40-50 minutes, so keep an eye on it and test with a toothpick. You may also want to halve the frosting recipe.
Conclusion: Your Dairy-Free Baking Adventure Awaits!
Congratulations, you’ve just unlocked the secrets to baking a truly spectacular Dairy Free Carrot Cake Recipe! We hope this detailed, beginner-friendly guide has given you the confidence and the skills to create a delicious and satisfying treat. Remember, baking is a journey of learning and discovery, so don’t be afraid to experiment and make it your own. Whether it’s for a special occasion or just a cozy evening in, this cake is sure to bring joy. Happy baking, and enjoy every single dairy-free bite!
“`