There’s nothing quite like the aroma of freshly baked bread wafting through your home. For many, the idea of baking bread from scratch can seem daunting, but what if we told you there’s a super simple way to achieve bakery-quality loaves right in your kitchen? Enter the Dark Rye Bread Machine Recipe!
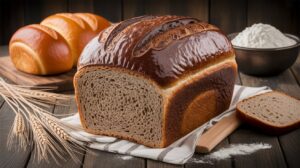
This recipe is designed specifically for your bread machine, making it one of the most easy baking recipes you’ll ever try. Whether you’re a complete novice or just looking for a convenient way to enjoy hearty, flavorful dark rye bread, this guide is for you. We’ll walk you through every step, providing essential baking tips for beginners to ensure your first (and every subsequent) loaf is a resounding success. Get ready to impress yourself and your family with this delicious, wholesome bread!
Ingredients for Your Perfect Dark Rye Loaf
Gathering your ingredients is the first step to baking success. Precision matters in bread making, so make sure to measure accurately!
Wet Ingredients:
| Ingredient | Quantity |
|---|---|
| Warm Water (105-115°F / 40-46°C) | 1 ¼ cups |
| Molasses (unsulphured, dark) | ¼ cup |
| Vegetable Oil or Olive Oil | 2 tablespoons |
Dry Ingredients:
| Ingredient | Quantity |
|---|---|
| Salt | 1 ½ teaspoons |
| Dark Rye Flour | 1 ½ cups |
| Bread Flour | 1 ½ cups |
| Vital Wheat Gluten (optional, but recommended for denser rye) | 1 tablespoon |
| Caraway Seeds (optional, for authentic rye flavor) | 1-2 teaspoons |
| Active Dry Yeast or Instant Yeast | 2 teaspoons |
Step-by-Step Instructions: Baking Your Dark Rye Bread Machine Loaf
Follow these detailed steps, and you’ll be enjoying homemade dark rye bread in no time!
Step 1: Prepare Your Bread Machine Pan
Before you add any ingredients, ensure your bread machine pan is clean and the kneading paddle is securely in place. This might seem obvious, but it’s a common oversight! Having the paddle correctly installed prevents dough from getting stuck and ensures proper mixing.
Step 2: Add Wet Ingredients First
This is a crucial step for bread machine baking! Always add your liquids to the pan first. Pour in the **warm water**, followed by the **molasses**, and then the **vegetable oil**. The warm water helps activate the yeast, while the molasses adds that characteristic dark color and a touch of sweetness to balance the rye’s earthiness.
- Beginner Tip: Ensure your water is warm, not hot. Water that’s too hot will kill the yeast, and water that’s too cold won’t activate it properly, leading to a dense loaf. A quick check with a thermometer is ideal, but if you don’t have one, it should feel comfortably warm to the touch, like a baby’s bath.
Step 3: Add Dry Ingredients (Except Yeast)
Carefully add the dry ingredients on top of the wet ones. Start with the **salt**, placing it in one corner of the pan (away from where the yeast will go). Then, add the **dark rye flour**, followed by the **bread flour**. If you’re using **vital wheat gluten** and **caraway seeds**, sprinkle those in now too. The vital wheat gluten provides extra structure to the rye flour, which is lower in gluten than regular wheat flour, preventing a super dense loaf. Caraway seeds are optional but highly recommended for that classic rye bread flavor.
- Beginner Tip: Measure your flour by spooning it into your measuring cup and then leveling off the top with a straight edge (like a knife). Scooping directly from the bag can compact the flour, leading to too much flour and a dry, heavy loaf.
- Common Mistake & Fix: If you omit vital wheat gluten, your bread might be a bit denser. To compensate slightly, you can increase the bread flour by 1-2 tablespoons.
Step 4: Create a Well for the Yeast
Using your finger, gently create a small indentation or “well” in the center of the dry ingredients. This is where your yeast will go. It’s important to keep the yeast separate from the salt and liquids initially, as direct contact with salt can inhibit yeast activity, and premature contact with liquids can activate it too early.
Step 5: Add the Yeast Last
Carefully spoon the **active dry yeast or instant yeast** into the well you created. Make sure it sits on top of the flour and is not touching the wet ingredients below. This isolation allows the bread machine’s cycle to properly mix and activate the yeast when the time is right.
- Beginner Tip: Always check the expiration date on your yeast! Old yeast is a common culprit for bread that doesn’t rise. If you’re unsure, you can “proof” a small amount by dissolving 1 teaspoon in ¼ cup warm water with a pinch of sugar. If it foams within 5-10 minutes, it’s active.
Step 6: Select Your Bread Machine Cycle
Close the lid of your bread machine. Now, select the appropriate cycle. For dark rye bread, look for a “Rye,” “Whole Wheat,” or “Dark Bread” setting. If your machine doesn’t have these specific options, a “Basic” or “French” cycle will usually work well, though the texture might be slightly different. Choose your desired crust setting (light, medium, dark).
- Alternative: If your machine only has basic cycles, the “Whole Wheat” setting is often the best choice for rye bread as it usually has a longer knead and rise time suitable for denser flours.
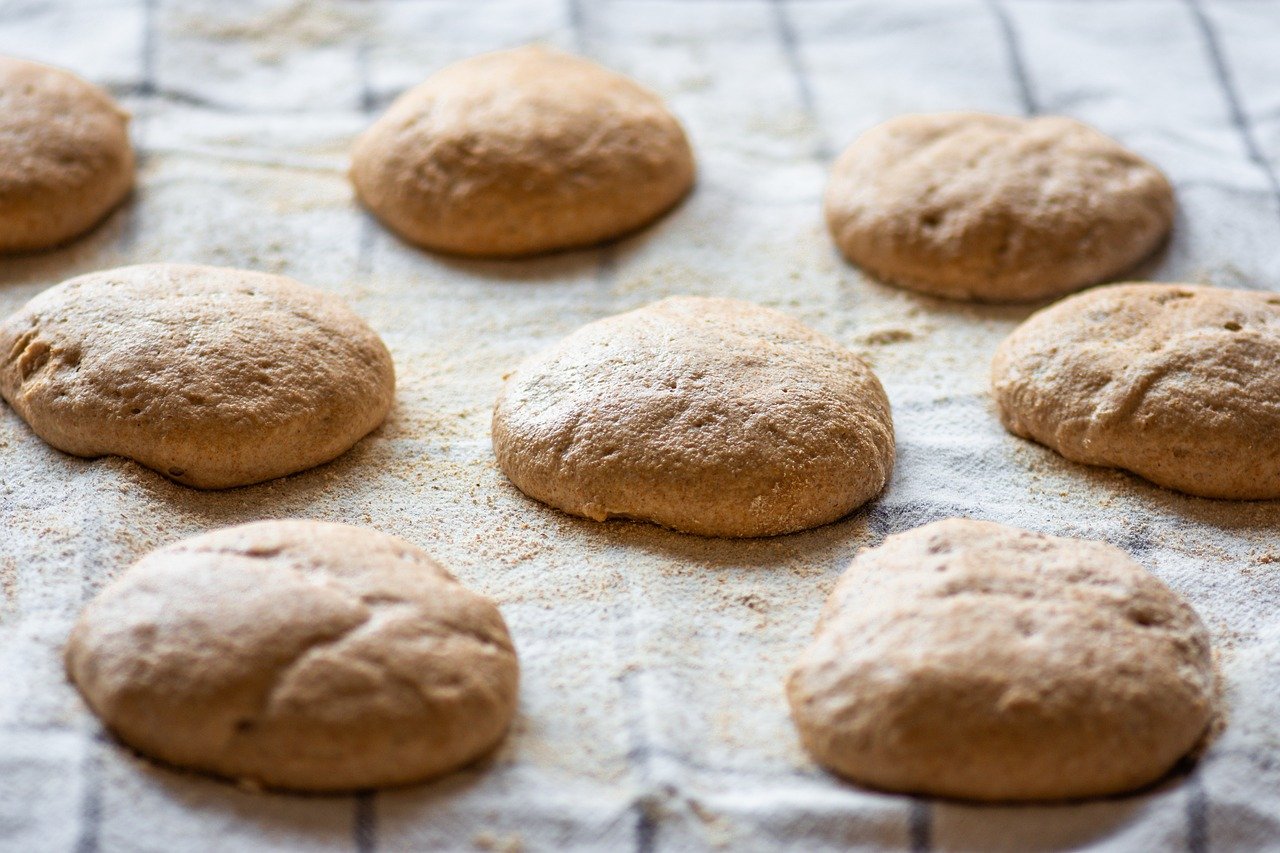
Step 7: Start the Machine and Monitor Dough Consistency
Press the start button. The bread machine will begin its cycle, usually starting with a kneading phase. During the first 5-10 minutes of kneading, keep an eye on the dough. It should form a smooth, elastic ball that cleans the sides of the pan. It shouldn’t be too sticky or too dry.
- Dough Monitoring Tips:
- If the dough looks too dry and crumbly: Add water, one teaspoon at a time, until it forms a cohesive ball.
- If the dough looks too wet and sticky: Add bread flour, one teaspoon at a time, until it pulls away from the sides of the pan.
Make these adjustments slowly, as a little goes a long way! This is where you really learn to “feel” the dough.
Step 8: Let the Bread Machine Do Its Work
Once you’ve made any necessary adjustments, simply let the bread machine complete its cycle. It will knead, rise, and bake the bread automatically. The beautiful part of a bread machine is that it handles all the temperature and timing controls perfectly.
Step 9: Cool the Bread Properly
Once the baking cycle is complete, carefully remove the bread pan from the machine (it will be hot!). Immediately invert the pan onto a wire cooling rack to remove the loaf. If the kneading paddle is stuck in the bread, you can gently remove it once the bread has cooled slightly.
- Crucial Beginner Tip: **Do not cut into hot bread!** This is perhaps the most important tip for achieving perfect texture. Hot bread continues to cook and firm up as it cools. Slicing it too early will result in a gummy, dense texture. Let your dark rye bread cool completely on the wire rack for at least 1-2 hours (or longer for larger loaves). This allows the internal moisture to redistribute and the crumb to set properly.
Step 10: Slice and Enjoy!
Once your dark rye bread is completely cool, slice it with a serrated bread knife. Enjoy your homemade dark rye bread with butter, cream cheese, or as the base for a delicious sandwich. You’ve done it!
Tips & Tricks for Bread Machine Success
Mastering your bread machine is all about understanding a few key principles. These actionable tips will help you consistently bake perfect loaves:
- Ingredient Temperature Matters: Ensure liquids are warm (not hot!) and other ingredients are at room temperature. Cold ingredients can slow down yeast activity, leading to a poor rise.
- Measure Accurately: Especially with flour, use the “spoon and level” method. Too much flour is the most common reason for dense, dry bread in a bread machine.
- Check Your Yeast: Always verify your yeast’s expiration date. If in doubt, proof it. Active yeast is the heart of a good loaf.
- Observe the Dough Ball: Pay attention during the first kneading cycle. This is your chance to make minor adjustments. The dough should be smooth, elastic, and form a ball that cleans the sides of the pan. It shouldn’t be excessively sticky or crumbly.
- Resist the Urge to Peek: Once the rising cycle begins, avoid opening the lid. Each time you open it, warm air escapes, which can cause the dough to deflate and negatively impact the final rise.
- Cool Completely: We can’t stress this enough! Cooling your bread on a wire rack for at least 1-2 hours prevents a gummy texture and allows the crust to crisp up and the interior to set.
- Store Properly: Store cooled bread in an airtight container or a bread bag at room temperature for 3-4 days. For longer storage, slice the bread and freeze it in an airtight freezer bag for up to 3 months.
- Experiment with Add-ins: Once you’re comfortable, try adding different seeds (like flax, sunflower, or pumpkin seeds) or a tablespoon of cocoa powder for an even darker, richer color.
Essential Baking Tools
While your bread machine does most of the heavy lifting, a few basic tools will make your baking experience even smoother:
- Mixing Bowl (for pre-measuring ingredients)
- Whisk (to combine dry ingredients if desired)
- Wire Cooling Rack (essential for proper bread cooling)
- Measuring Cups
- Measuring Spoons
- Serrated Bread Knife (for easy slicing)
Nutrition Information (Estimated per slice)
Below is an estimated nutritional breakdown for one slice (assuming 12 slices per 1.5 lb loaf) of dark rye bread. Please note these are approximations and can vary based on specific ingredients and brands used.
| Nutrient | Amount |
|---|---|
| Calories | ~110-130 |
| Total Carbohydrates | ~20-25g |
| Protein | ~4-5g |
| Total Fat | ~1-2g |
| Dietary Fiber | ~2-3g |
| Sugars | ~2-3g |
Disclaimer: Nutritional information is an estimate. Actual values may vary.
Frequently Asked Questions (FAQs)
Q1: Why is my dark rye bread too dense?
A dense loaf can be caused by several factors: old or inactive yeast, using too much flour (especially if you scooped it directly from the bag), not enough liquid, or if your bread machine’s “knead” cycle wasn’t long enough for the heavier rye flour. Ensure your yeast is fresh, measure flour by spooning and leveling, and monitor the dough consistency during the first knead to adjust liquid if needed.
Q2: Can I substitute ingredients like molasses or vital wheat gluten?
You can substitute molasses with honey or brown sugar (use slightly less as brown sugar is less concentrated), but the flavor and color will be a bit different. Vital wheat gluten is highly recommended for rye bread as it helps with structure and rise. If you omit it, your loaf will likely be denser. You can try increasing the bread flour by 1-2 tablespoons if you don’t have gluten, but the results won’t be identical.
Q3: How do I know if my yeast is still good?
The easiest way is to check the expiration date on the package. If you’re unsure, you can “proof” it: dissolve 1 teaspoon of yeast and a pinch of sugar in ¼ cup of warm (105-115°F) water. If it gets foamy and bubbly within 5-10 minutes, your yeast is active and ready to use!
Q4: What bread machine setting should I use if I don’t have a “Rye” setting?
If your bread machine doesn’t have a specific “Rye” or “Dark Bread” setting, the “Whole Wheat” cycle is often the best alternative. It typically has a longer kneading and rising time, which is beneficial for flours like rye that are denser and require more work to develop gluten. A “Basic” or “French” cycle can also work, but keep an eye on the dough consistency during the first knead.
Q5: How long does homemade dark rye bread last, and how should I store it?
Homemade dark rye bread, when stored properly, will typically last for 3-4 days at room temperature. Store it in an airtight container, a bread box, or a sealed plastic bag to prevent it from drying out. For longer storage, slice the cooled bread and place the slices in a freezer-safe bag. It can be frozen for up to 3 months, and you can simply toast slices directly from the freezer.
Conclusion: Enjoy Your Homemade Dark Rye Bread!
Congratulations! You’ve successfully navigated the world of bread machine baking and created a delicious, wholesome loaf of dark rye bread. This Dark Rye Bread Machine Recipe truly is one of the most easy baking recipes out there, proving that homemade bread is within everyone’s reach, especially with the right baking tips for beginners. Don’t be afraid to experiment with different add-ins or slight variations once you’ve mastered this basic recipe. The joy of baking your own bread is not just in the eating, but in the process itself. So go ahead, slice yourself another piece, and savor the rich, earthy flavors you brought to life. Happy baking!