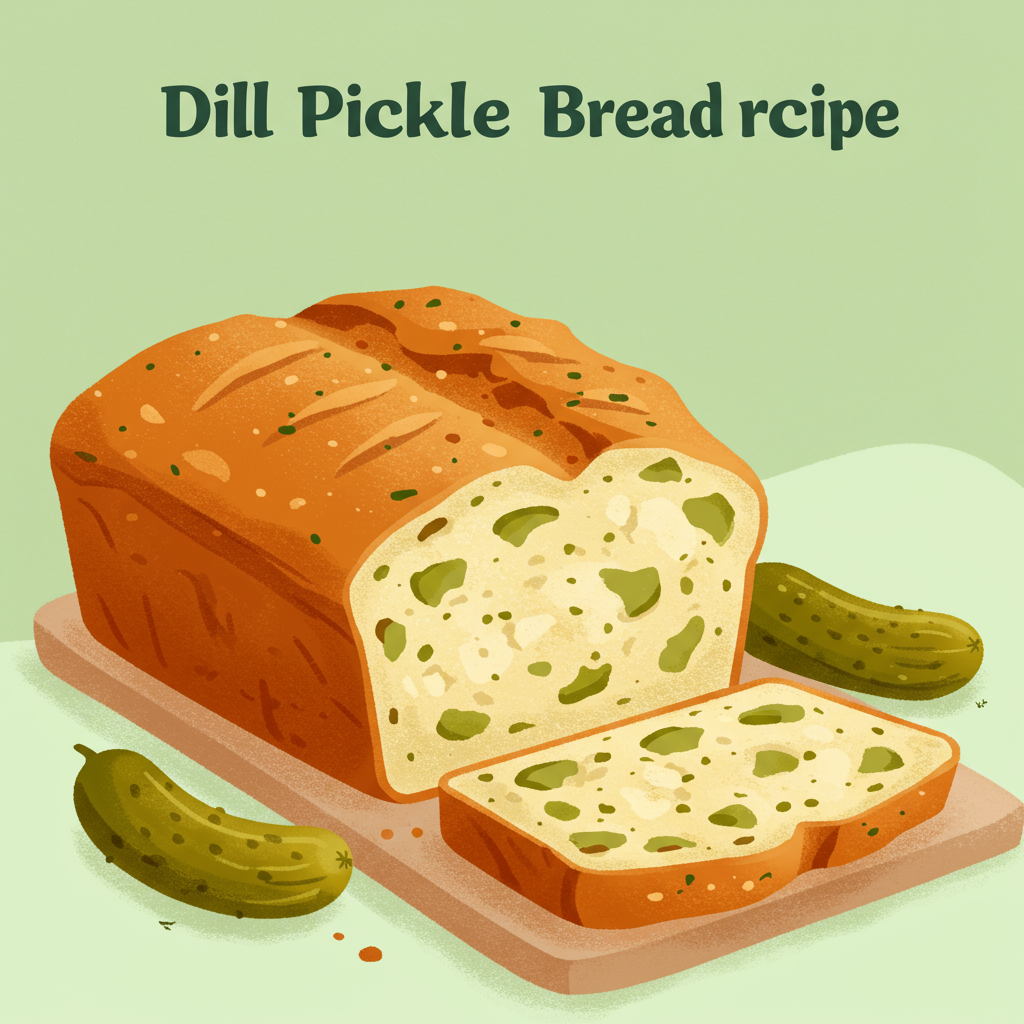
Are you ready for a flavor adventure that combines two of life’s greatest comforts: fresh-baked bread and tangy dill pickles? Then you’ve come to the right place! This Dill Pickle Bread Recipe is an absolute game-changer, offering a unique savory twist that’s surprisingly easy to master, even if you’re new to the world of bread making. Forget complicated techniques; we’re focusing on easy baking recipes that deliver incredible results.
Get ready to impress your taste buds and your friends with this delightfully aromatic and flavorful loaf. We’ve packed this guide with detailed instructions and essential baking tips for beginners to ensure your success from start to finish. So, grab your apron, preheat your oven, and let’s dive into making some irresistible Dill Pickle Bread!
Ingredients You’ll Need
Gathering your ingredients before you start is one of the best baking tips for beginners. It makes the whole process smoother and more enjoyable!
| Ingredient | Quantity |
|---|---|
| Warm Water (105-115°F / 40-46°C) | 1 cup |
| Granulated Sugar | 1 tablespoon |
| Active Dry Yeast | 2 ¼ teaspoons (1 packet) |
| All-Purpose Flour | 3 to 3 ½ cups |
| Salt | 1 ½ teaspoons |
| Dill Pickle Juice | ½ cup |
| Diced Dill Pickles (well-drained) | 1 cup |
| Melted Unsalted Butter (for brushing) | 2 tablespoons |
| Fresh Dill (chopped, optional, for topping) | 1 tablespoon |
Step-by-Step Instructions: Mastering Your Dill Pickle Bread
Follow these steps carefully, and you’ll be enjoying your homemade Dill Pickle Bread in no time. Remember, baking is a journey, and every loaf is a learning experience!

Step 1: Activate the Yeast
In a large mixing bowl, combine the warm water (make sure it’s between 105-115°F – too hot will kill the yeast, too cold won’t activate it) and granulated sugar. Sprinkle the active dry yeast over the top. Stir gently. Let it sit for 5-10 minutes. You should see a foamy layer form on top – this means your yeast is active and ready to work! If it doesn’t foam, your yeast might be old or the water temperature was off, and you’ll need to start this step over.
Step 2: Combine Wet and Dry Ingredients
Once your yeast is foamy, add the dill pickle juice, salt, and 2 cups of the all-purpose flour to the bowl. Stir with a sturdy spoon or a dough whisk until well combined. The mixture will be thick.
Step 3: Add Remaining Flour and Pickles
Gradually add the remaining flour, about ½ cup at a time, mixing well after each addition. When the dough starts to come together and is shaggy but still a bit sticky, add the diced dill pickles. Continue adding flour until the dough forms a ball and pulls away from the sides of the bowl. You might not need all 3 ½ cups of flour, or you might need a tiny bit more – the goal is a dough that is soft and slightly sticky, but manageable.
Beginner Tip: Avoid adding too much flour too quickly. A common mistake is to add excessive flour because the dough feels sticky. A slightly sticky dough leads to a softer, more tender bread. Resist the urge to add more flour than necessary!
Step 4: Knead the Dough
Turn the dough out onto a lightly floured surface. Knead the dough for 8-10 minutes. If you’re new to kneading, the process involves folding the dough over itself, pressing down with the heels of your hands, turning it a quarter turn, and repeating. It might feel sticky at first, but as you knead, it will become smoother and more elastic.
Beginner Tip: If you have a stand mixer with a dough hook, you can use it! Knead on medium-low speed for about 6-8 minutes, or until the dough is smooth and elastic.
Step 5: First Rise (Proofing)
Lightly grease a clean large bowl with a little oil. Place the kneaded dough in the bowl, turning it once to coat the top. Cover the bowl with plastic wrap or a clean kitchen towel. Place the bowl in a warm, draft-free spot. Let the dough rise for 1 to 1 ½ hours, or until it has doubled in size. This is called “proofing,” and it’s essential for a light and airy bread.
Beginner Tip: A warm spot could be near a sunny window, in a slightly warmed (but turned off!) oven, or on top of your refrigerator. Patience is key here – don’t rush the rise!
Step 6: Shape the Loaf
Once the dough has doubled, gently punch it down to release the air. Turn the dough out onto a lightly floured surface. Gently shape it into a rectangular loaf that will fit comfortably into your prepared loaf pan (9×5 inch is standard). You can simply fold the long sides towards the middle, then roll it into a tight log, pinching the seam closed at the bottom.
Step 7: Second Rise
Grease your 9×5 inch loaf pan. Place the shaped dough seam-side down into the pan. Cover the pan loosely with plastic wrap or a kitchen towel. Let the dough rise again in a warm, draft-free spot for another 30-45 minutes, or until it has nearly doubled in size and looks puffy.
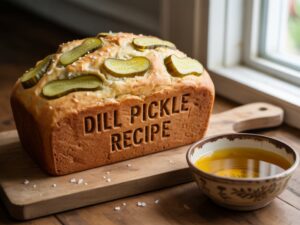
Step 8: Preheat Oven & Prepare for Baking
While the dough is on its second rise, preheat your oven to 375°F (190°C). Once the dough has completed its second rise, brush the top generously with the melted unsalted butter. If using, sprinkle with fresh chopped dill for extra flavor and a beautiful presentation.
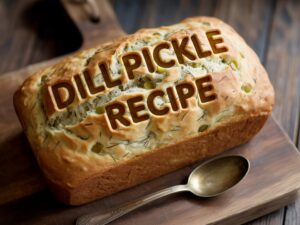
Step 9: Bake Your Bread!
Bake for 30-35 minutes, or until the crust is golden brown and the internal temperature of the bread reaches 200-210°F (93-99°C) when measured with an instant-read thermometer. If the top starts to brown too quickly, you can loosely tent it with aluminum foil.
Step 10: Cool and Enjoy
Once baked, remove the loaf from the oven and immediately turn it out onto a wire rack to cool completely. This is crucial! Cooling on a wire rack prevents the bottom of the bread from becoming soggy. Resist the urge to slice into it while it’s hot – it continues to cook internally as it cools, and slicing too early can result in a gummy texture. Once fully cooled (about 1-2 hours), slice and enjoy!
Tips & Tricks for Beginner Bakers
Baking bread can seem daunting, but these simple tips will help you achieve success with your Dill Pickle Bread Recipe!
- Measure Accurately: Use proper measuring cups and spoons, especially for flour. For flour, spoon it into your measuring cup and then level it off with a straight edge (like the back of a knife) rather than scooping directly from the bag, which can compact the flour and lead to too much being used.
- Yeast is Alive: Treat your yeast with care! Ensure your water temperature is just right for activation. If your yeast doesn’t foam, it’s best to discard and start with fresh yeast.
- Don’t Over-Flour: A common mistake! A slightly sticky dough is good. Adding too much flour results in a dense, dry bread. Trust the process of kneading to develop the gluten.
- Warm Environment for Rising: Dough loves warmth. If your kitchen is cool, find a warm spot for proofing. A turned-off oven with the light on, or a microwave with a cup of hot water (removed before adding dough), can create ideal conditions.
- Patience is a Virtue: Don’t rush the rising times. The dough will tell you when it’s ready by doubling in size. If it needs a little longer, give it time.
- Cool Completely: As tempting as it is, letting your bread cool fully on a wire rack is essential for the best texture and flavor.
Essential Baking Tools
Having the right tools makes all the difference! Here are some basics that will help you master this Dill Pickle Bread Recipe and many more easy baking recipes.
- Mixing Bowl
- Whisk
- Loaf Pan (9×5 inch)
- Measuring Cups and Spoons
- Rubber Spatula or Dough Scraper
- Instant-Read Thermometer (highly recommended for checking doneness)
- Wire Cooling Rack
Nutrition Information (per slice, estimated)
Here’s an estimated nutritional breakdown for a single slice of this delicious Dill Pickle Bread, based on 12 slices per loaf. Please note, these are approximations and can vary based on specific ingredients and brands used.
| Nutrient | Amount |
|---|---|
| Calories | 180 kcal |
| Carbohydrates | 35g |
| Protein | 6g |
| Fat | 2g |
| Fiber | 2g |
| Sugar | 3g |
Frequently Asked Questions (FAQs)
Q1: Can I use fresh dill instead of dried?
A: Absolutely! Fresh dill will provide a brighter, more vibrant flavor. If using fresh dill, we recommend adding about 2-3 tablespoons, finely chopped, to the dough along with the diced pickles. You can also sprinkle some on top before baking for extra freshness.
Q2: What if my dough isn’t rising?
A: The most common reasons for dough not rising are inactive yeast (due to old yeast or incorrect water temperature) or a too-cold environment. Double-check your yeast’s expiry date, ensure your water is between 105-115°F, and find a warmer spot for your dough to proof. Sometimes, it just needs a little more time!
Q3: Can I make this bread without a stand mixer?
A: Yes, definitely! The instructions above are written for hand-kneading. While a stand mixer can make the process easier, kneading by hand is a classic and satisfying way to make bread. It will just require a bit more arm work!
Q4: How should I store leftover Dill Pickle Bread?
A: Store your Dill Pickle Bread at room temperature in an airtight container or a bread bag for up to 3-4 days. For longer storage, you can slice the bread and freeze it in a freezer-safe bag for up to 2-3 months. Thaw slices as needed or toast directly from frozen.
Q5: Can I use different types of pickles?
A: While dill pickles give this recipe its signature flavor, you could experiment with other types! Just be mindful of their sweetness or spice level, as that will impact the final taste of the bread. Ensure they are well-drained and diced before adding to the dough.
Conclusion: Your Dill Pickle Bread Adventure Awaits!
Congratulations, future bread baker! You now have all the tools and knowledge to create a truly unique and delicious loaf of Dill Pickle Bread. This isn’t just a recipe; it’s an invitation to explore the joy of baking and discover new flavors. Don’t be afraid to get your hands a little messy, trust the process, and most importantly, have fun!
We’re confident that this Dill Pickle Bread Recipe will become a staple in your collection of easy baking recipes. Whether you enjoy it as a sandwich, alongside a hearty meal, or simply toasted with a smear of butter, it’s sure to be a hit. Happy baking, and we can’t wait to hear about your successful loaves!
1 thought on “Dill Pickle Bread Recipe – Delight Every Bite”