Welcome, aspiring bakers! Are you ready to dive into the wonderful world of baking with a twist? Today, we’re unlocking the secrets to creating moist, delicious cakes right in your trusty cast iron Dutch Oven. Forget complicated techniques; these Dutch Oven Cake Recipes are designed to be incredibly approachable, even if you’ve never baked anything more complex than toast.
A Dutch oven isn’t just for stews and roasts; it’s a fantastic vessel for baking, providing even heat distribution that results in a perfectly cooked cake every time. We’ll walk you through an easy baking recipe for a rich, fudgy chocolate cake that’s guaranteed to impress. Plus, we’ve loaded this guide with essential baking tips for beginners to ensure your first (and every subsequent!) Dutch oven cake is a roaring success. Get ready to bake something truly special!
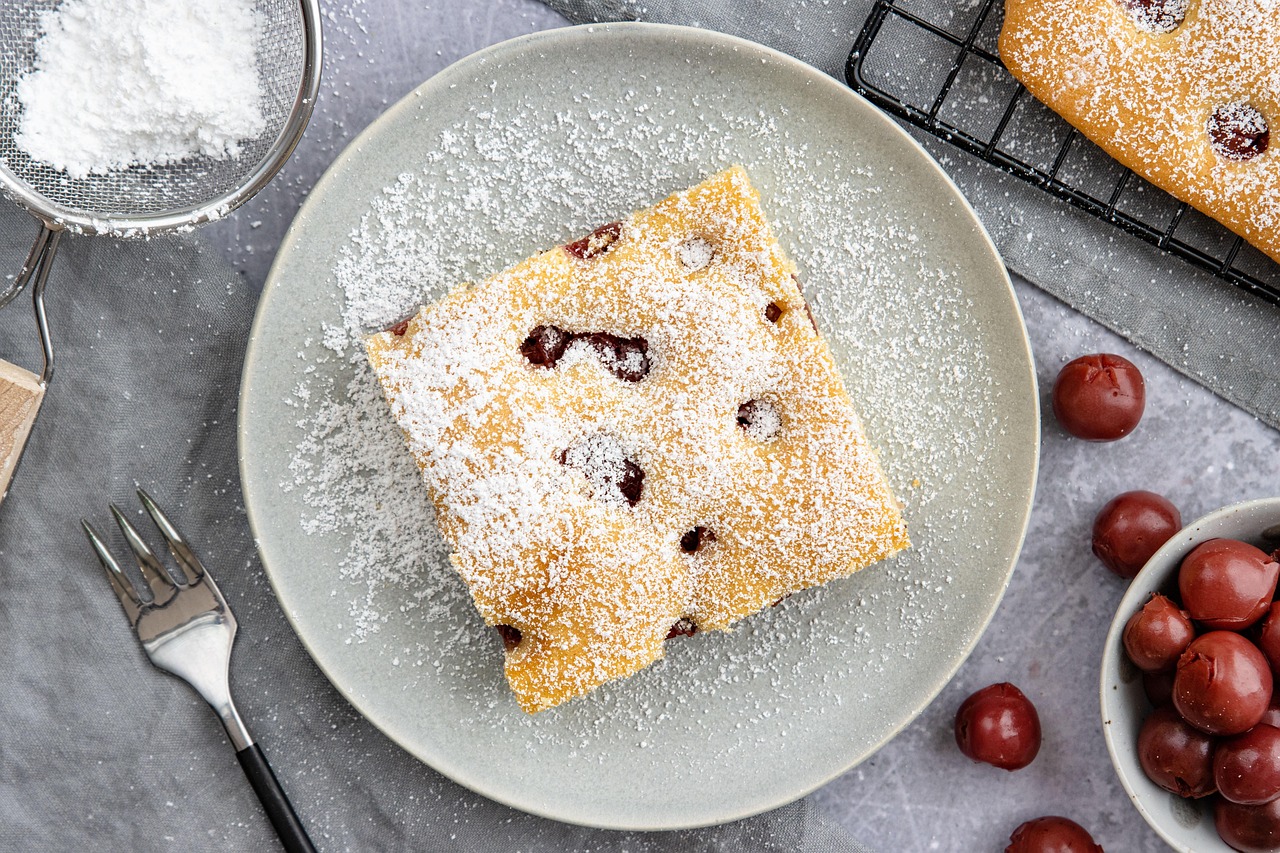
Fudgy Chocolate Dutch Oven Cake Recipe
Ingredients List
Gather your ingredients! For best results, ensure your perishable ingredients like eggs and milk are at room temperature.
| Ingredient | Quantity | Unit |
|---|---|---|
| All-Purpose Flour | 1 ½ | cups |
| Granulated Sugar | 1 ½ | cups |
| Unsweetened Cocoa Powder | ¾ | cup |
| Baking Soda | 1 ½ | teaspoons |
| Salt | 1 | teaspoon |
| Large Eggs | 2 | |
| Whole Milk | 1 | cup |
| Vegetable Oil (or Canola) | ½ | cup |
| Vanilla Extract | 1 | teaspoon |
| Hot Water (freshly boiled) | 1 | cup |
| Powdered Sugar (for dusting, optional) | ¼ | cup |
Step-by-Step Instructions: Bake Your First Dutch Oven Cake!
Follow these detailed steps carefully, and you’ll have a magnificent cake in no time. Don’t worry, we’ve included plenty of advice to help you along the way!
Step 1: Get Prepped and Preheat!
- Preheat Your Oven: Start by preheating your oven to 350°F (175°C). Giving your oven ample time to reach and stabilize its temperature is crucial for even baking.
- Prepare Your Dutch Oven: Take your 5-7 quart Dutch oven. Grease the bottom and sides thoroughly with butter, shortening, or non-stick spray. Then, lightly flour it. To flour, add a tablespoon or two of flour, shake the pot around to coat all greased surfaces, and then dump out any excess. This creates a non-stick barrier, ensuring your cake slides out easily. Beginner Tip: For extra insurance, you can also line the bottom with a round of parchment paper after greasing, then grease and flour the parchment and sides.
Step 2: Combine Dry Ingredients
- Whisk the Dry Goodies: In a large mixing bowl, combine your 1 ½ cups of all-purpose flour, 1 ½ cups of granulated sugar, ¾ cup of unsweetened cocoa powder, 1 ½ teaspoons of baking soda, and 1 teaspoon of salt.
- Mix Thoroughly: Use a whisk to mix these ingredients together really well. You want to break up any lumps in the flour or cocoa and ensure the baking soda and salt are evenly distributed. This step is important for a consistent texture in your cake.
Step 3: Mix the Wet Ingredients
- Another Bowl, Please! In a separate, medium-sized mixing bowl, crack your 2 large eggs. Add 1 cup of whole milk, ½ cup of vegetable oil, and 1 teaspoon of vanilla extract.
- Lightly Whisk: Whisk these wet ingredients together just until they are combined. You don’t need to beat them vigorously, just ensure the yolks and whites are fully incorporated with the milk, oil, and vanilla.
- Beginner Tip: Using room temperature eggs and milk helps them emulsify (mix) better with the oil, leading to a smoother, more uniform batter and a finer crumb in your cake.
Step 4: Bring Them Together
- Combine Wet and Dry: Pour the wet ingredient mixture into the bowl with your dry ingredients.
- Gentle Mixing: Using a spatula or a whisk, mix the ingredients on low speed (if using an electric mixer) or by hand until just combined. There might still be a few small lumps, and that’s perfectly okay!
- Common Mistake & Fix: Do not overmix! Overmixing develops the gluten in the flour too much, which can lead to a tough, dense, and chewy cake rather than a light and tender one. Mix only until no streaks of dry flour remain.
Step 5: The Hot Water Secret
- The Final Addition: Carefully pour 1 cup of freshly boiled hot water into your cake batter.
- Stir Until Smooth: Stir gently until the batter is smooth and very liquidy. Don’t be alarmed by how thin it looks; this is intentional and helps create that incredibly moist, fudgy texture. The hot water helps to “bloom” the cocoa powder, intensifying its flavor.
Step 6: Bake Your Masterpiece!
- Pour into Dutch Oven: Carefully pour your liquid cake batter into the prepared Dutch oven.
- Bake Time: Place the Dutch oven (without its lid) into your preheated 350°F (175°C) oven.
- Baking Duration: Bake for approximately 30-40 minutes.
- Checking for Doneness: Around the 30-minute mark, insert a toothpick into the center of the cake. When it comes out clean or with a few moist crumbs attached (no wet batter!), your cake is done. If it comes out with wet batter, continue baking in 5-minute increments, checking each time.
- Beginner Tip: Avoid opening the oven door frequently, especially during the first 20 minutes of baking, as this can cause the cake to sink.
- Alternative: Outdoor Dutch Oven Baking: If you’re adventurous and want to bake outdoors over coals, you’ll need to manage your heat carefully. Place about 8-10 briquettes on the lid and 6-8 underneath the Dutch oven for a 5-7 quart pot. Rotate the pot and lid every 10-15 minutes for even baking. This requires practice to get the temperature just right!
Step 7: Cool and Serve
- Cool in the Pot: Once baked, carefully remove the Dutch oven from the oven. Let the cake cool in the Dutch oven for about 10-15 minutes. This allows the cake to firm up slightly and makes it easier to remove.
- Transfer to a Rack: After 10-15 minutes, carefully invert the Dutch oven onto a wire cooling rack to release the cake. If you used parchment paper, peel it off. If not, the greasing and flouring should ensure it comes out cleanly.
- Full Cool Down: Let the cake cool completely on the wire rack before dusting with powdered sugar or frosting. Cooling completely is crucial for the cake’s structure and flavor.
- Serve and Enjoy: Once cool, slice, dust with powdered sugar (if using), and serve! This cake is fantastic on its own, with a scoop of vanilla ice cream, or a dollop of whipped cream.
Tips & Tricks for Dutch Oven Cake Success
Here are some extra nuggets of wisdom to make your baking journey even smoother and more delicious:
- Room Temperature Ingredients are Key: This is a recurring tip for a reason! Eggs and milk at room temperature blend more easily into the batter, creating a smoother, more emulsified mixture. This leads to a more uniform cake texture and a finer crumb. Plan ahead and take them out of the fridge at least 30 minutes before you start.
- Measure Accurately: Baking is a science! Use proper measuring cups and spoons. For dry ingredients like flour and cocoa, spoon them into the measuring cup and level off with a straight edge (like the back of a knife). Don’t pack them down unless the recipe specifies. For liquids, measure at eye level.
- Don’t Peek Too Soon: Resist the urge to open your oven door frequently while the cake is baking. Each time you open the door, the oven temperature drops, which can cause the cake to sink in the middle. Wait until at least ¾ of the baking time has passed before checking.
- The Power of Parchment Paper: As mentioned, lining the bottom of your Dutch oven with parchment paper is a fantastic beginner hack. It guarantees easy release and prevents any potential sticking, making cleanup a breeze.
- Know Your Oven: Ovens can vary in temperature. If you find your cakes are always baking too fast or too slow, consider investing in an inexpensive oven thermometer to check if your oven’s thermostat is accurate.
- Customization Fun: Feel free to get creative! Stir in ½ cup of chocolate chips, chopped nuts (like walnuts or pecans), or even a dash of espresso powder (enhances chocolate flavor!) into the batter before baking.
- Proper Storage: Store any leftover cake at room temperature in an airtight container for up to 3-4 days. For longer storage, you can freeze individual slices, wrapped tightly, for up to 2-3 months.
Essential Baking Tools
Having the right tools makes all the difference, especially when you’re starting out. Here are a few essentials for this recipe:
- Dutch Oven (5-7 quart)
- Large Mixing Bowl
- Whisk
- Measuring Cups and Spoons
- Rubber Spatula
- Wire Cooling Rack
- Parchment Paper (optional, but recommended)
Nutrition Info (Estimated per serving)
This information is an estimate based on 12 servings of the cake recipe, without any additional frosting or toppings.
| Nutrient | Amount |
|---|---|
| Calories | 380 kcal |
| Carbohydrates | 55 g |
| Protein | 5 g |
| Fat | 17 g |
| Fiber | 3 g |
| Sugar | 38 g |
Frequently Asked Questions (FAQs)
1. Can I use a different size Dutch oven?
Yes, but you might need to adjust baking time. A smaller Dutch oven (e.g., 3-4 quart) will result in a taller cake that might need more time to bake through. A larger one (e.g., 8-9 quart) will create a thinner cake that bakes faster. Always use the toothpick test to confirm doneness.
2. My cake turned out dry, what went wrong?
A dry cake is usually a sign of overbaking or using too much flour. Ensure you’re measuring your flour correctly (spoon and level, don’t scoop directly from the bag). Also, rely on the toothpick test; remove the cake from the oven as soon as it’s done, as it continues to cook slightly from residual heat once removed.
3. Can I make this dairy-free or gluten-free?
For a dairy-free version, substitute whole milk with a plain unsweetened plant-based milk (like almond or soy milk). For gluten-free, you would need to use a 1:1 gluten-free all-purpose flour blend (one that contains xanthan gum). Results may vary slightly in texture and rise, but it’s generally adaptable.
4. How do I know my cake is truly done?
The best indicator is the toothpick test. Insert a wooden toothpick into the very center of the cake. If it comes out clean or with only a few moist crumbs attached (no wet batter), it’s done. Another sign is that the edges of the cake will start to pull away slightly from the sides of the Dutch oven, and the top will spring back lightly when gently pressed.
5. Can I bake this outdoors over coals?
Absolutely! Dutch ovens are famous for campfire baking. To bake this cake outdoors, you’ll need hot charcoal briquettes. For a 5-7 quart Dutch oven, aim for about 8-10 briquettes on the lid and 6-8 underneath the pot. This creates an even heat distribution (more heat on top to bake the top of the cake). Rotate the Dutch oven and its lid every 10-15 minutes to prevent hot spots. This method requires a bit more practice to master the heat, but it’s incredibly rewarding!
6. How long does this cake last?
When stored properly in an airtight container at room temperature, this fudgy chocolate cake will stay fresh and delicious for 3-4 days. If refrigerated, it can last up to a week, but the texture might become slightly denser. For longer storage, individual slices can be wrapped well and frozen for up to 2-3 months; thaw at room temperature before serving.
Time to Get Baking!
Congratulations, you’re now equipped with everything you need to bake a show-stopping fudgy chocolate cake in your Dutch oven! This recipe is more than just a dessert; it’s an experience, a journey into the comforting world of homemade goodness. Don’t be intimidated; remember that every great baker started as a beginner.
So grab your ingredients, fire up your oven, and prepare to fill your home with the irresistible aroma of freshly baked cake. We’re confident that with these Dutch Oven Cake Recipes and baking tips for beginners, you’ll create a moist, delicious masterpiece that you’ll be proud to share (or devour all by yourself!). Happy baking, and enjoy every single fudgy bite!