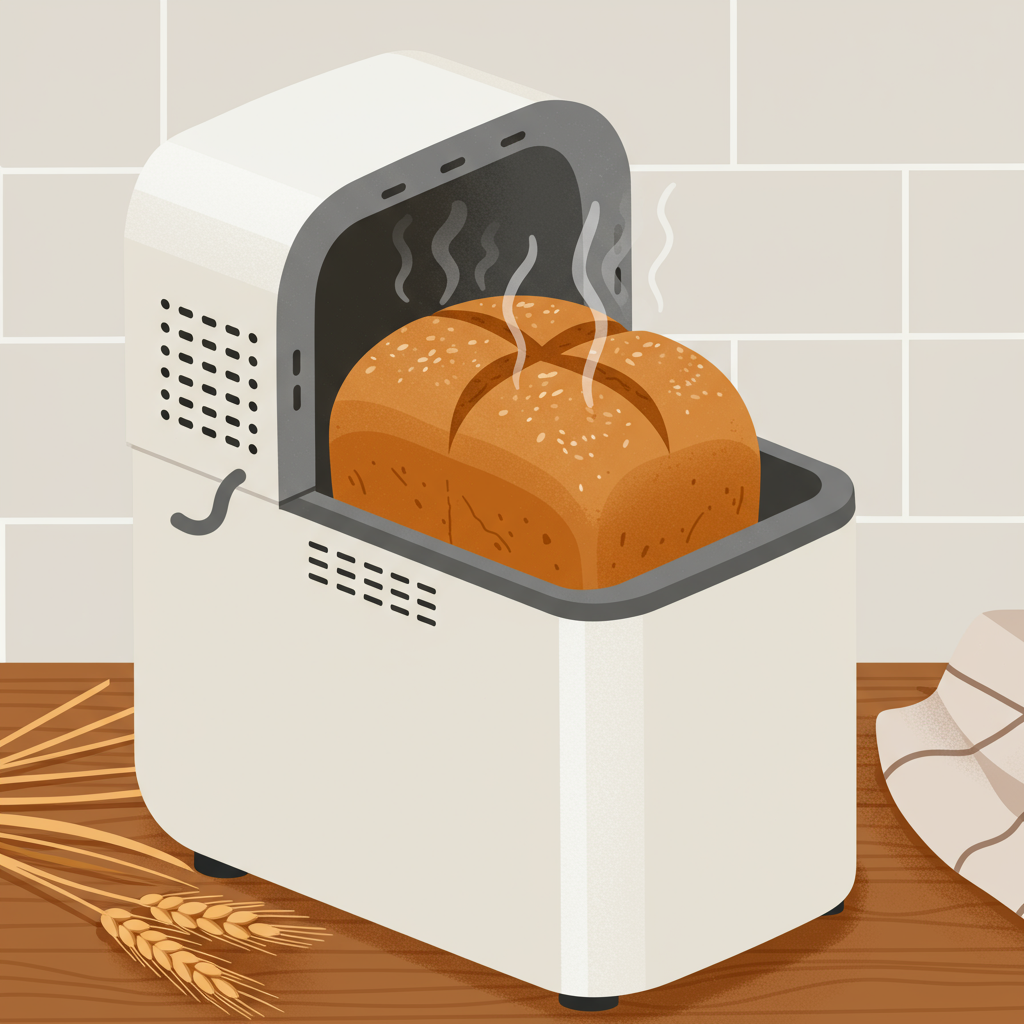
Einkorn Bread Machine Recipe: Your Easy Path to Ancient Grain Goodness!
Welcome, fellow baking enthusiasts and curious beginners! Are you ready to dive into the wonderful world of homemade bread, but feel a little intimidated by the kneading and rising? Fear not! This **Einkorn Bread Machine Recipe** is your perfect starting point. We’re about to unlock the secrets to creating a delicious, wholesome loaf with minimal effort, making it one of the most **easy baking recipes** you’ll ever try. Einkorn, an ancient grain, offers a unique flavor and nutritional profile that’s both satisfying and gentle. With the magic of your bread machine, you’ll be enjoying warm, aromatic bread in no time. Get ready to impress yourself and your loved ones with these straightforward **baking tips for beginners** and a recipe that truly delivers!
Why Choose Einkorn Flour?
Einkorn is often referred to as the “original” wheat, dating back thousands of years. Unlike modern wheat, it has a simpler genetic structure and a different type of gluten, which many find easier to digest. It boasts a rich, slightly nutty flavor that’s absolutely divine in bread. Plus, it’s packed with protein, fiber, and essential nutrients. Using it in your bread machine means you get all these benefits with incredible convenience!
Ingredients for Your Einkorn Bread Machine Loaf
Gathering your ingredients correctly is the first step to a perfect loaf. For a standard 1.5 lb loaf, here’s what you’ll need:
| Ingredient | Quantity | Unit |
|---|---|---|
| Warm Water (105-115°F / 40-46°C) | 1 | cup |
| Olive Oil or Melted Butter | 2 | tablespoons |
| Honey or Granulated Sugar | 1 | tablespoon |
| Salt | 1 | teaspoon |
| All-Purpose Einkorn Flour | 2 ¾ | cups |
| Instant Yeast (Rapid Rise) | 1 ½ | teaspoons |
Step-by-Step Instructions: Baking Your Einkorn Bread
Follow these detailed steps for a perfectly baked Einkorn loaf. Remember, the key to bread machine success is often the order of ingredients!
Step 1: Prepare Your Bread Machine Pan
Remove the bread pan from your bread machine. Make sure the kneading paddle is securely in place at the bottom of the pan. A quick check ensures it won’t fall off during mixing, which can lead to an unmixed loaf.
Step 2: Add Liquids First
This is crucial for most bread machines! Pour the warm water (ensure it’s not too hot, or it will kill the yeast!) into the bread pan. Next, add the olive oil or melted butter and the honey or granulated sugar. Liquids go in first to protect the yeast from the salt and provide an immediate environment for the flour.
Step 3: Add Dry Ingredients (Except Yeast)
Carefully add the salt to one corner of the bread pan, away from where the yeast will be placed. Then, gently spoon or pour the all-purpose Einkorn flour over the liquids, completely covering them. Create a small “well” or indentation in the center of the flour, but do not let it reach the liquid below.
Beginner Tip: Measuring flour correctly is vital! Spoon the flour into your measuring cup and then level it off with a straight edge (like the back of a knife). Don’t scoop directly from the bag, as this compacts the flour and you’ll end up with too much. For best results, consider weighing your flour (about 330-350g for 2 ¾ cups of Einkorn).
Step 4: Add the Yeast
Sprinkle the instant yeast directly into the well you made in the flour. It’s important that the yeast sits on top of the flour and doesn’t directly touch the liquid or the salt at this stage. This ensures it doesn’t activate prematurely or get inhibited by the salt, leading to a much better rise.
Step 5: Select Your Bread Machine Settings
Place the bread pan back into your bread machine, ensuring it clicks securely into place. Close the lid. Now, select your settings:
- Cycle: Choose the “Basic,” “White,” or “Rapid Bake” setting for a 1.5 lb loaf. Einkorn can sometimes be a bit more delicate than modern wheat, so a standard cycle works well. If your machine has a “Sweet Bread” setting, that can also work due to the honey/sugar.
- Loaf Size: Select “1.5 lb.”
- Crust Color: Choose “Light” or “Medium” based on your preference. Einkorn tends to brown beautifully.
Press “Start” and let your bread machine do all the hard work!
Step 6: Monitor and Adjust (Optional but Recommended)
During the first kneading cycle (usually within the first 5-15 minutes), gently open the lid and check the dough.
- If the dough looks too dry and crumbly: Add 1 teaspoon of warm water at a time until it forms a soft, cohesive ball.
- If the dough looks too wet and sticky, clinging to the sides: Add 1 tablespoon of Einkorn flour at a time until it forms a smooth, elastic ball.
Common Mistake: Don’t add too much liquid or flour at once! Small adjustments make a big difference. Close the lid promptly after checking to maintain the internal temperature.
Step 7: The Waiting Game (and the Wonderful Aroma!)
Let the bread machine complete its full cycle – mixing, kneading, rising, and baking. Your kitchen will soon be filled with the most incredible aroma of freshly baked bread!
Step 8: Cool and Enjoy
Once the cycle is complete, carefully remove the bread pan from the machine using oven mitts. Immediately invert the pan onto a wire cooling rack to release the loaf. If the kneading paddle is stuck in the bottom of the bread, gently remove it with a utensil (be careful not to burn yourself). Allow the bread to cool completely for at least 1-2 hours before slicing. Slicing warm bread can make it gummy and dense. Patience is key for the best texture!
Tips & Tricks for Einkorn Bread Machine Success
Mastering bread machine baking, especially with ancient grains, comes down to a few key insights. Here are some actionable tips to ensure your Einkorn loaf is always perfect:
- Weigh Your Flour: For ultimate precision, especially with Einkorn (which can absorb liquid differently), use a kitchen scale. Approximately 1 cup of all-purpose Einkorn flour is about 120-125 grams. Weighing eliminates inconsistencies from scooping.
- Check Yeast Freshness: Old yeast is the number one culprit for bread that doesn’t rise. To check, mix 1 teaspoon of yeast with 1/4 cup warm water and a pinch of sugar. If it doesn’t get foamy within 5-10 minutes, your yeast is probably expired.
- Mind the Water Temperature: “Warm” water is critical. Too hot kills the yeast; too cold won’t activate it. Aim for 105-115°F (40-46°C) – think warm bathwater, not scalding. A kitchen thermometer is your friend here.
- Don’t Peek Too Much: While a quick check during the first knead is fine, avoid opening the lid during the rising cycles. This can cause a sudden drop in temperature, leading to a collapsed or under-risen loaf.
- Adjust for Altitude: If you live at a high altitude, you might need to make slight adjustments. Often, a tiny bit less yeast, a bit less sugar, or slightly more liquid can help. Start with the recipe as written and adjust if your first loaf is too dense or collapses.
- Cool Completely: We know it’s hard to resist, but letting your bread cool fully on a wire rack allows the internal structure to set, preventing a gummy texture.
- Store Properly: Once cooled, store your Einkorn bread in an airtight container or bread bag at room temperature for 3-4 days. For longer storage, slice and freeze.
- Experiment with Add-ins: Once you’re comfortable with the basic recipe, try adding a tablespoon of flax seeds, poppy seeds, or sunflower seeds at the “add-ins” beep (if your machine has one) for extra flavor and texture.
Essential Baking Tools for Your Kitchen
Having the right tools makes all the difference for a smooth baking experience. Here are some essentials:
- Bread Machine (of course!)
- Kitchen Scale (for precise flour measurement)
- Liquid Measuring Cups
- Dry Measuring Cups
- Measuring Spoons
- Instant-Read Thermometer (for water temperature)
- Wire Cooling Rack
- Oven Mitts
- Serrated Bread Knife
Nutrition Information (Estimated Per Slice)
This is an estimate based on a 1.5 lb loaf yielding approximately 12 slices. Actual values may vary depending on ingredients and specific bread machine models.
| Nutrient | Amount |
|---|---|
| Calories | 140-160 kcal |
| Carbohydrates | 25-30g |
| Protein | 5-6g |
| Fat | 3-4g |
| Fiber | 2-3g |
| Sugar | 2-3g |
Frequently Asked Questions (FAQs)
Q1: What makes Einkorn flour different from regular all-purpose flour?
Einkorn is an ancient, unhybridized wheat with a simpler genetic structure and a different type of gluten than modern wheat. Many people find it easier to digest. It also has a unique, slightly nutty flavor and a higher protein content. It tends to absorb liquid a bit differently, so measuring accurately (preferably by weight) is key.
Q2: Can I use whole wheat Einkorn flour instead of all-purpose Einkorn?
Yes, you can! However, whole wheat Einkorn flour will absorb more liquid. You might need to increase the water by 1-2 tablespoons. Also, select the “Whole Wheat” or “Basic” setting on your bread machine, and the loaf might be a bit denser and shorter than one made with all-purpose Einkorn.
Q3: My bread didn’t rise, what went wrong?
The most common culprits are old or inactive yeast, water that was too hot (killing the yeast) or too cold (not activating it), or too much salt directly touching the yeast. Ensure your yeast is fresh, your water is lukewarm, and you follow the ingredient layering order carefully.
Q4: How should I store my homemade Einkorn bread?
Once completely cooled, store your bread in an airtight container, a bread box, or a large Ziploc bag at room temperature for 3-4 days. For longer storage (up to 3 months), slice the loaf and freeze the slices in a freezer-safe bag. You can then toast individual slices as needed.
Q5: Can I add seeds or nuts to this recipe?
Absolutely! Most bread machines have an “add-ins” beep during the first kneading cycle. This is the perfect time to add up to 1/4 cup of seeds (like flax, sesame, or sunflower), dried herbs, or chopped nuts. If your machine doesn’t have a beep, you can manually add them about 5-10 minutes into the first kneading cycle.
Q6: Why did my bread sink in the middle?
A sunken loaf usually means there was too much liquid, too much yeast, or not enough flour. Too much liquid makes the dough too weak to hold its structure. High altitude can also cause this; try slightly reducing yeast and liquid if you’re at a higher elevation.
Conclusion: Enjoy Your Homemade Einkorn Masterpiece!
And there you have it! A truly simple, yet incredibly rewarding **Einkorn Bread Machine Recipe** that brings the joy of homemade, ancient-grain bread right to your table. There’s nothing quite like the smell and taste of a fresh loaf, especially when you know it’s made with wholesome ingredients. Don’t be afraid to experiment a little once you’ve mastered the basics – maybe a sprinkle of herbs, a dash of garlic powder, or some different seeds. Happy baking, and enjoy every delicious slice of your beautiful Einkorn bread!
“`