Welcome, aspiring bakers! Are you ready to embark on a delightful journey into the world of homemade bread? If you’ve ever felt intimidated by baking, fear not! This guide to Einkorn Bread Recipes is crafted specifically for you. Einkorn, an ancient grain, offers a wonderfully tender crumb and a slightly nutty flavor that’s simply irresistible. Its unique gluten structure often makes it easier to digest for some people compared to modern wheat, and it’s surprisingly forgiving for new bakers.

We’re going to walk through an easy baking recipe for a rustic, flavorful loaf that will fill your home with an incredible aroma. Forget complex techniques; we’ll focus on straightforward steps and provide all the essential baking tips for beginners to ensure your first loaf is a resounding success. Get ready to impress yourself (and your taste buds!) with a beautiful, wholesome loaf of homemade Einkorn bread.
Ingredients List
Gather these simple ingredients, and let’s get started!
| Ingredient | Quantity | Unit |
|---|---|---|
| Warm Water (105-115°F / 40-46°C) | 1 | cup |
| Active Dry Yeast | 2 ¼ | teaspoons (1 packet) |
| Honey or Maple Syrup | 1 | tablespoon |
| Einkorn All-Purpose Flour (or Light Einkorn Flour) | 3 | cups (approx. 360g) |
| Fine Sea Salt | 1 | teaspoon |
| Unsalted Butter (melted) or Olive Oil | 2 | tablespoons |
| Extra flour for dusting |
Step-by-Step Instructions: Baking Your First Einkorn Loaf
Follow these detailed steps, and you’ll be enjoying warm, homemade bread in no time!
Step 1: Activate Your Yeast
- In a large mixing bowl, combine the warm water (make sure it’s not too hot, or it will kill the yeast, and not too cold, or it won’t activate properly – think bathwater temperature!), active dry yeast, and honey (or maple syrup). The sugar here is food for the yeast!
- Gently whisk them together.
- Let this mixture sit for 5-10 minutes. You should see it become foamy and bubbly on the surface. This is your yeast waking up and telling you it’s alive and ready to work! If it doesn’t foam, your yeast might be old or the water temperature was off. Don’t proceed; start again with fresh yeast.
Step 2: Combine Dry and Wet Ingredients
- To the activated yeast mixture, add the Einkorn flour and fine sea salt.
- Pour in the melted butter or olive oil.
- Using a wooden spoon or a sturdy spatula, mix everything together until just combined. Einkorn flour absorbs liquid differently than modern wheat, so it might seem a bit sticky. Don’t worry about overmixing; just ensure there are no dry pockets of flour remaining. The dough will be softer and stickier than traditional wheat dough, which is perfectly normal for Einkorn!
Step 3: The First Rise (Bulk Fermentation)
- Cover the bowl tightly with plastic wrap or a clean kitchen towel.
- Place the bowl in a warm, draft-free spot in your kitchen. A slightly warm oven (turned off, of course!) can work, or near a sunny window.
- Let the dough rise for 1 to 1.5 hours, or until it has visibly doubled in size. Einkorn dough tends to rise a bit faster than modern wheat dough, so keep an eye on it.
- Beginner Tip: Over-proofing (letting it rise too long) can lead to a loaf that collapses in the oven. Under-proofing (not letting it rise enough) will result in a dense loaf. Aim for it to look puffy and significantly larger.
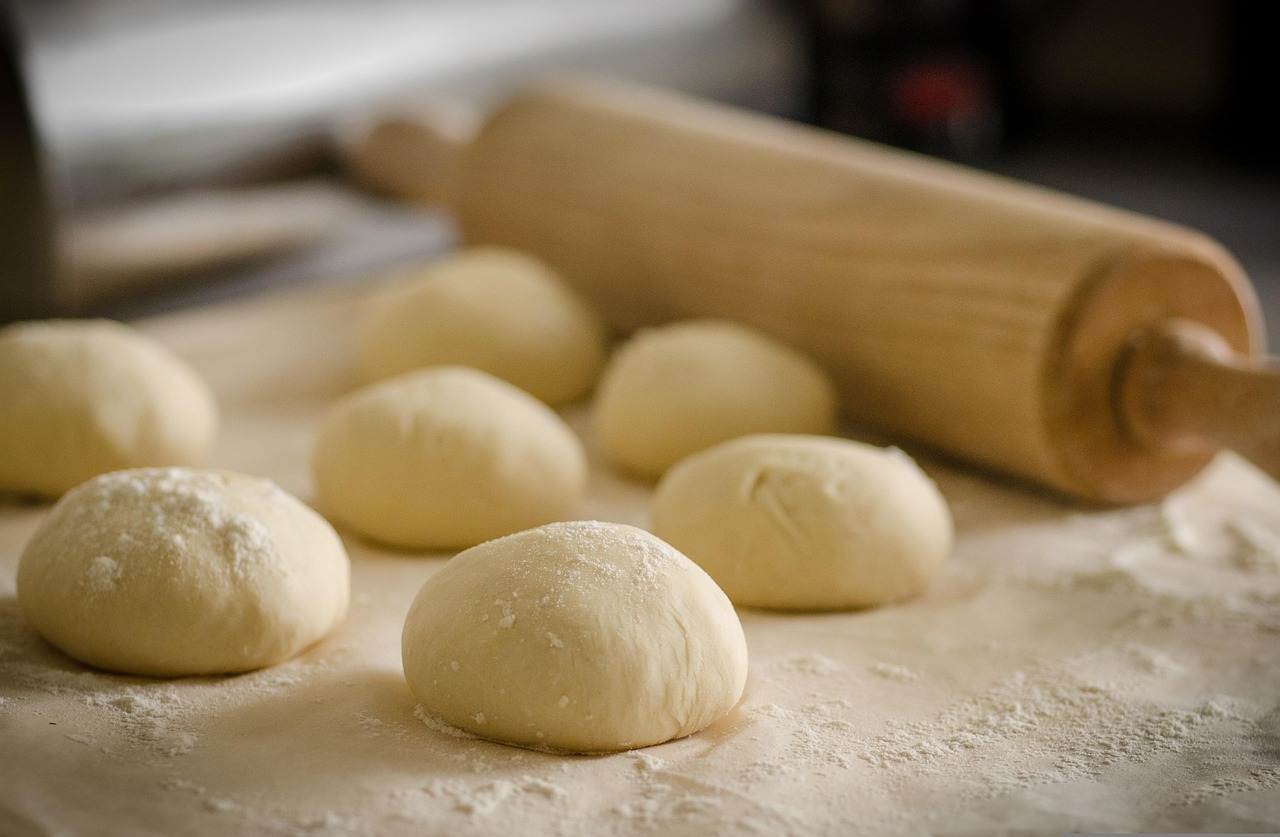
Step 4: Shape the Loaf
- Lightly flour your work surface (a clean countertop or large cutting board).
- Gently scrape the risen dough out onto the floured surface. Avoid deflating it too much.
- For a simple loaf: Gently pat the dough into a rectangle. Fold one-third of the dough over the middle, then fold the other third over that (like folding a letter). Turn the dough 90 degrees and repeat the fold. Then, gently roll it into a log shape that fits your loaf pan. Pinch the seam shut at the bottom.
- Lightly grease a 9×5 inch loaf pan with butter or cooking spray.
- Carefully transfer the shaped dough into the prepared loaf pan, seam-side down.
Step 5: The Second Rise (Proofing)
- Cover the loaf pan loosely with plastic wrap or a clean kitchen towel.
- Let it rise again in a warm, draft-free place for another 30-45 minutes, or until it has risen significantly above the rim of the pan and looks puffy. It won’t double in size quite as dramatically as the first rise, but it should look light and airy.
- Beginner Tip: While the dough is on its second rise, preheat your oven!
Step 6: Preheat Your Oven
- About 20 minutes before the second rise is complete, preheat your oven to 375°F (190°C).
- If you like a crispier crust, you can place a shallow oven-safe pan on the bottom rack of your oven while it preheats. We’ll add water to this later to create steam.
Step 7: Bake Your Bread!
- Once the oven is preheated and your dough has completed its second rise, carefully place the loaf pan into the preheated oven.
- If using a steam pan, carefully pour about ½ cup of hot water into the shallow pan on the bottom rack (be quick and close the oven door to trap the steam!). This steam helps the crust develop beautifully.
- Bake for 30-40 minutes.
- Beginner Tip: The bread is done when the crust is a beautiful golden brown and, if you tap the bottom of the loaf (carefully remove it from the pan first!), it sounds hollow. An internal temperature of 190-200°F (88-93°C) is also a reliable indicator if you have a thermometer.
Step 8: Cool and Enjoy
- Once baked, immediately remove the bread from the loaf pan and transfer it to a wire cooling rack. This prevents the bottom from getting soggy.
- Let the bread cool completely (or at least for 30-60 minutes) before slicing. Slicing hot bread can make it gummy and difficult to cut neatly.
- Slice, slather with butter, and enjoy your incredible homemade Einkorn bread! You did it!
Tips & Tricks for Beginner Bakers
Baking bread is a craft, and these simple tips will help you master it:
- Accurate Measuring: Especially for flour, spoon it into your measuring cup and then level it off with a straight edge. Don’t scoop directly from the bag, as this compacts the flour and you’ll end up with too much, leading to a dry dough. Using a kitchen scale for flour (360g for 3 cups) is even more accurate.
- Temperature is Key: Yeast is sensitive! Always check your water temperature with a thermometer. Too hot, and the yeast dies; too cold, and it won’t activate.
- Don’t Over-Knead Einkorn: Unlike modern wheat, Einkorn’s gluten is weaker and can become brittle if over-kneaded. Our recipe uses a minimal-knead approach, which is perfect for this flour and beginners. Just mix until combined.
- Patience is a Virtue: Don’t rush the rising times. The dough needs to develop flavor and structure. If your kitchen is cooler, it might take a little longer.
- Listen to Your Bread: The “hollow sound” test is a classic for a reason. If it sounds dull, it might need a few more minutes.
- Crust Perfection: For an extra crispy crust, consider brushing the top of your loaf with a little water before baking, in addition to using the steam method in the oven.
- Storage Savvy: Once cooled, store your bread in an airtight container or a bread bag at room temperature for 3-4 days. For longer storage, slice and freeze!
Essential Baking Tools
Having the right tools makes baking a breeze. Here are a few essentials:
- Large Mixing Bowl
- Whisk
- 9×5 Inch Loaf Pan
- Measuring Cups and Spoons
- Sturdy Rubber Spatula or Wooden Spoon
- Kitchen Scale (highly recommended for accuracy)
- Instant-Read Thermometer (for water and bread)
- Wire Cooling Rack
Nutrition Info (Estimated per slice, assuming 12 slices per loaf)
Enjoy your delicious homemade bread knowing its wholesome goodness!
| Nutrient | Amount |
|---|---|
| Calories | ~170 kcal |
| Carbohydrates | ~30g |
| Protein | ~6g |
| Fat | ~4g |
| Fiber | ~2g |
| Sugar | ~3g |
Note: Nutritional information is an estimate and can vary based on specific ingredients and brands used.
Frequently Asked Questions (FAQs)
Q1: My yeast didn’t foam. What went wrong?
A: If your yeast didn’t foam, it’s usually due to one of two reasons: either your water was too hot (killing the yeast) or too cold (not activating it), or your yeast is old and no longer active. Always check the water temperature with a thermometer (105-115°F is ideal) and ensure your yeast isn’t expired.
Q2: My Einkorn bread came out dense. Why?
A: A dense loaf can be caused by several factors for beginners. Common culprits include not letting the dough rise enough during the first or second proofing (under-proofing), using too much flour (always spoon and level!), or over-kneading Einkorn dough, which can damage its delicate gluten structure. Ensure your rising environment is warm and give the dough enough time to become visibly puffy.
Q3: Can I use whole grain Einkorn flour for this recipe?
A: While you can certainly bake with whole grain Einkorn flour, this specific recipe is optimized for all-purpose or light Einkorn flour, which yields a softer, more beginner-friendly loaf. Whole grain Einkorn absorbs more liquid and can result in a denser loaf, requiring adjustments to the hydration. For your first loaf, stick with the recommended flour type.
Q4: How do I store homemade Einkorn bread?
A: Once completely cooled, store your Einkorn bread in an airtight container, a bread box, or a sealed plastic bag at room temperature. It will stay fresh for about 3-4 days. For longer storage, slice the cooled loaf and freeze the slices in a freezer-safe bag or container for up to 2-3 months. You can then toast individual slices directly from frozen.
Q5: Can I make this recipe without a loaf pan?
A: Yes, you can! Instead of shaping it into a log for a loaf pan, you can gently form the dough into a round boule (ball) on a lightly floured surface. Place it on a baking sheet lined with parchment paper for the second rise and baking. The baking time might be similar, but keep an eye on the internal temperature for doneness.
Conclusion: Your Homemade Bread Adventure Awaits!
Congratulations, baker! You’ve just taken the first exciting step into the rewarding world of homemade bread with our Einkorn Bread Recipes. There’s truly nothing quite like the smell and taste of a fresh loaf pulled from your own oven. Don’t worry if your first loaf isn’t picture-perfect; every bake is a learning experience, and the most important thing is that you tried!
Keep practicing, pay attention to the little details, and most importantly, have fun with it! Soon, you’ll be confidently baking delicious, wholesome Einkorn bread that your family and friends will rave about. Happy baking!