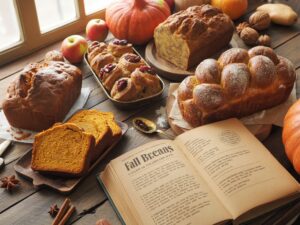
Welcome, fellow baking enthusiasts and kitchen novices alike! As the leaves begin to turn vibrant shades of red and gold, and a crisp coolness fills the air, there’s nothing quite like the comforting aroma of freshly baked bread wafting through your home. Fall isn’t just a season; it’s an invitation to cozy up, embrace warmth, and get creative in the kitchen. And what better way to do that than with some delightful Fall Bread Recipes?
If you’ve ever felt intimidated by baking, fear not! This post is designed to be your ultimate guide to an easy baking recipe that yields incredibly moist and flavorful pumpkin spice bread – a true autumn classic. We’re going to walk through every step together, providing essential baking tips for beginners to ensure your success. So grab your apron, get ready to fill your home with irresistible scents, and let’s bake something wonderful!
The Ultimate Easy Pumpkin Spice Bread for Fall!
Ingredients List
Gathering your ingredients before you start is one of the best baking tips for beginners. It ensures you have everything on hand and makes the process smooth and stress-free!
| Quantity | Unit | Ingredient |
|---|---|---|
| 1 ½ | cups | All-purpose flour |
| 1 | teaspoon | Baking soda |
| ½ | teaspoon | Baking powder |
| ½ | teaspoon | Salt |
| 1 | teaspoon | Ground cinnamon |
| ½ | teaspoon | Ground nutmeg |
| ¼ | teaspoon | Ground ginger |
| ⅛ | teaspoon | Ground cloves (or ½ tsp pumpkin pie spice instead of individual spices) |
| 1 | cup | Granulated sugar |
| ½ | cup | Packed light brown sugar |
| 2 | large | Eggs |
| 1 | can (15 oz) | Canned pumpkin puree (NOT pumpkin pie filling) |
| ½ | cup | Vegetable oil (or other neutral oil like canola) |
| 1 | teaspoon | Vanilla extract |
| Optional Add-ins: | ||
| ½ | cup | Chopped pecans or walnuts |
| ½ | cup | Chocolate chips |
Step-by-Step Instructions: Your Path to Pumpkin Perfection
Follow these detailed steps carefully, and you’ll be enjoying warm, delicious pumpkin bread in no time!
- Preheat Your Oven & Prepare Your Pan: First things first! Preheat your oven to 350°F (175°C). This ensures your oven is at the correct temperature when your bread goes in, which is crucial for even baking. Next, lightly grease and flour a 9×5 inch loaf pan, or spray it generously with non-stick baking spray. You can also line it with parchment paper, leaving an overhang on the long sides to easily lift the bread out later. This preparation prevents your bread from sticking, a common frustration for beginners.
- Whisk Your Dry Ingredients: In a large mixing bowl, combine the all-purpose flour, baking soda, baking powder, salt, ground cinnamon, nutmeg, ginger, and cloves (or pumpkin pie spice if using). Use a whisk to thoroughly combine them. Beginner Tip: Whisking dry ingredients together ensures that the leavening agents (baking soda, baking powder) and spices are evenly distributed throughout the flour. This prevents pockets of plain flour or uneven rising in your finished bread. No one wants a bite that’s all cinnamon or a dense spot!
- Combine Your Wet Ingredients: In a separate, medium-sized bowl, whisk together the granulated sugar, brown sugar, eggs, canned pumpkin puree, vegetable oil, and vanilla extract. Whisk until the mixture is smooth and well combined. Make sure there are no lumps of brown sugar. Beginner Tip: Using separate bowls for wet and dry ingredients helps you control the mixing process and prevents overmixing later on. It also ensures all wet ingredients are fully incorporated before they interact with the dry.
- Gently Combine Wet and Dry: Pour the wet ingredient mixture into the bowl with your dry ingredients. Using a spatula or a wooden spoon, gently fold the ingredients together until just combined. This is arguably the most crucial step for beginners! Stop mixing as soon as you no longer see streaks of dry flour. Common Mistake & Solution: Overmixing develops the gluten in the flour too much, which can lead to a tough, dense, and chewy bread instead of a soft, tender one. A few lumps are perfectly fine; in fact, they’re preferred over an overmixed batter!
- Add Optional Mix-ins (If Desired): If you’re adding chopped nuts, chocolate chips, or dried cranberries, gently fold them into the batter now. Don’t stir vigorously, just enough to distribute them evenly. This is a great way to personalize your bread!
- Pour into Pan & Bake: Pour the batter into your prepared loaf pan. Gently tap the pan on the counter a couple of times to release any large air bubbles and level the top. Place the pan in the preheated oven. Bake for 55-65 minutes. Beginner Tip: Baking times can vary slightly depending on your oven. Don’t open the oven door too early, especially in the first 30-40 minutes, as this can cause the bread to sink.
- Check for Doneness: To check if your bread is done, insert a wooden skewer or a toothpick into the center of the loaf. If it comes out clean or with a few moist crumbs attached (but no wet batter), your bread is ready. If it comes out wet, continue baking for another 5-10 minutes and check again. Beginner Tip: A good sign that bread is nearly done is when the top is golden brown and springs back slightly when gently pressed.
- Cooling Process: Once baked, remove the loaf pan from the oven and place it on a wire rack. Let the bread cool in the pan for about 10-15 minutes. Beginner Tip: This step is important! The bread continues to “set” as it cools in the pan, making it stronger and less likely to fall apart when you remove it. If you try to remove it too soon, it might stick or break.
- Transfer to Wire Rack: After 10-15 minutes, carefully run a knife around the edges of the pan (if not using parchment paper) to loosen the bread. Then, invert the pan onto the wire rack, lift the pan, and turn the bread right-side up. Allow the bread to cool completely on the wire rack before slicing. Beginner Tip: Cooling completely prevents steam from being trapped, which can make the bottom of your bread soggy. Patience is a virtue here; warm bread is tempting, but fully cooled bread slices much better and has a better texture.
- Slice and Enjoy!: Once completely cool, slice your pumpkin spice bread with a serrated knife. Enjoy it plain, with a smear of cream cheese, or a drizzle of maple syrup. This bread is perfect for breakfast, a snack, or even dessert!
Tips & Tricks for Beginner Bakers
Baking is a science and an art, and these tips will help you master your kitchen endeavors, especially with **Fall Bread Recipes** like this one!
- Measure Accurately: Precision is key in baking. Use proper measuring cups for dry ingredients and liquid measuring cups for liquids. For flour, use the “spoon and level” method: spoon flour into your measuring cup until it overflows, then level off the excess with the back of a knife. Never scoop directly from the bag, as this compacts the flour and you’ll end up with too much.
- Room Temperature Ingredients: For most baking recipes, having eggs and other dairy at room temperature helps them incorporate better into the batter, creating a smoother, more emulsified mixture. For this recipe, eggs are the main one to consider.
- Don’t Overmix! (It Bears Repeating): We mentioned this in the instructions, but it’s so important! Overmixing develops gluten, leading to tough bread. Mix just until combined. A few lumps are okay.
- Know Your Oven: Ovens can vary widely in temperature. Consider investing in an inexpensive oven thermometer to ensure your oven is truly heating to the temperature you set. This can save you from under or over-baked goods.
- Patience with Cooling: It’s tempting to slice into warm bread, but cooling allows the bread to set fully, preventing a gummy texture and making it easier to slice without crumbling.
- Customize Your Loaf: Don’t be afraid to experiment with add-ins! Besides nuts and chocolate chips, try dried cranberries, raisins, or even a streusel topping before baking for extra crunch and sweetness.
- Storage is Key: Store your pumpkin bread in an airtight container at room temperature for up to 3-4 days. For longer storage, wrap individual slices or the whole loaf tightly in plastic wrap and then foil, and freeze for up to 2-3 months. Thaw at room temperature.
Essential Baking Tools
Having the right tools makes all the difference! Here are some basics you’ll want in your kitchen for this and many other **easy baking recipes**:
- Mixing Bowls
- Whisk
- 9×5 Inch Loaf Baking Pan
- Measuring Cups and Spoons
- Rubber Spatula
- Wire Cooling Rack
- Oven Mitts
Nutrition Information (per slice, estimated for 12 slices)
Please note: These are approximate values and can vary based on specific ingredients and portion sizes.
| Nutrient | Amount |
|---|---|
| Calories | 280-310 kcal |
| Carbohydrates | 45-50 g |
| Protein | 4-5 g |
| Fat | 10-14 g |
| Fiber | 2-3 g |
| Sugar | 28-32 g |
Frequently Asked Questions for Beginners
Got questions? We’ve got answers to help you troubleshoot your **Fall Bread Recipes** success!
- Can I use fresh pumpkin instead of canned?Yes, but it requires more prep. You’ll need to roast, puree, and drain the excess water from fresh pumpkin. For beginners, canned pumpkin puree (not pie filling!) is highly recommended for its consistent moisture and texture.
- Why is my pumpkin bread dry or dense?A few common culprits: Overmixing the batter (the most common reason for toughness), using too much flour (always spoon and level!), or baking at too high a temperature for too long. Ensure your oven temperature is accurate and don’t overbake.
- How do I store leftover pumpkin bread?Store your cooled pumpkin bread in an airtight container at room temperature for up to 3-4 days to maintain its moisture. For longer storage, wrap it tightly in plastic wrap and then foil, and freeze for up to 2-3 months. Thaw at room temperature before serving.
- Can I turn this recipe into muffins?Absolutely! This recipe works wonderfully as muffins. Simply line a muffin tin with paper liners or grease it well. Fill each cup about two-thirds full. Bake at 375°F (190°C) for 20-25 minutes, or until a toothpick inserted into the center comes out clean. Adjust baking time as needed.
- What if I don’t have all the individual spices?No problem! You can substitute the individual spices (cinnamon, nutmeg, ginger, cloves) with 1 to 1 ½ teaspoons of pumpkin pie spice. This blend typically contains all those spices and will give you that classic fall flavor.
Happy Fall Baking!
There you have it – a truly beginner-friendly guide to making the most delicious pumpkin spice bread! This Fall Bread Recipe is more than just a treat; it’s an experience, a memory in the making. Don’t be afraid to get your hands a little messy, follow the baking tips for beginners, and enjoy the process.
Whether you’re baking for yourself, your family, or sharing with friends, this easy recipe is sure to bring smiles and warmth. So go ahead, embrace the autumn spirit, and fill your home with the irresistible aroma of homemade goodness. Happy baking, and we can’t wait to hear about your pumpkin bread adventures!