Are you dreaming of crusty, airy, and utterly delicious French bread right from your own kitchen? Good news! With a bread machine, making authentic-tasting French bread is not only possible but incredibly straightforward, even for absolute beginners. This detailed guide will walk you through an easy baking recipe for a fantastic French Bread Recipe With Bread Machine, transforming the intimidating art of bread-making into a joyous and simple experience. Get ready to impress yourself and your family with warm, homemade bread.

Forget complex kneading and endless waiting; your bread machine handles the heavy lifting, giving you perfectly proofed dough ready for its final shaping and bake. We’ll cover everything from precise ingredient measurements to crucial baking tips for beginners to ensure your success. So, tie on your apron, grab your bread machine, and let’s embark on this delightful baking adventure together!
Ingredients List
Accuracy is key in baking, especially with bread! Make sure to measure your ingredients carefully for the best results. We recommend using a kitchen scale for flour and water for ultimate precision, but cup measurements are provided for convenience.
| Ingredient | Quantity | Unit |
|---|---|---|
| Warm Water (105-115°F / 40-46°C) | 1 ¼ | cups |
| Bread Flour (or All-Purpose Flour) | 3 | cups |
| Granulated Sugar | 1 | tablespoon |
| Salt | 1 ½ | teaspoons |
| Active Dry Yeast or Instant Yeast | 2 ¼ | teaspoons |
| Olive Oil (optional, for softer crumb) | 1 | tablespoon |
| Cornmeal (for dusting) | 2 | tablespoons |
Step-by-Step Instructions: From Dough to Delicious!
This recipe uses your bread machine for the dough-making process, then finishes in a conventional oven to achieve that signature crusty French bread texture and shape. Follow these steps carefully for perfect results!
1. Prepare Your Bread Machine
First things first, gather all your ingredients and ensure they are at the correct temperature. Warm water is essential for activating the yeast, but not too hot, or it will kill it. Aim for a temperature you’d comfortably bathe a baby in.
- Add Liquids First: Pour the warm water into the bread machine pan. If using, add the olive oil now.
- Layer Dry Ingredients: Carefully add the sugar and salt. Then, gently spoon the flour over the liquids, creating a “mound.”
- Add Yeast Last: Make a small indentation in the center of the flour mound (avoiding the water and salt directly) and add the yeast. This prevents the yeast from activating too early or being inhibited by the salt.
Beginner Tip: The order of ingredients is crucial for bread machines. Liquids first, then dry ingredients, and yeast last, separated from salt and water, is generally the golden rule!
2. Start the Dough Cycle
- Select the Right Setting: Place the pan securely into your bread machine. Close the lid. Select the “Dough” or “French Dough” cycle on your bread machine. This cycle typically mixes, kneads, and allows for the first rise (proofing) of the dough. It usually takes between 1 hour 30 minutes to 2 hours.
- Monitor the Dough (Optional but Recommended): During the first 5-10 minutes of kneading, peek at your dough. It should form a smooth, elastic ball. If it’s too sticky (sticking excessively to the sides), add flour one tablespoon at a time. If it’s too dry and crumbly, add water one teaspoon at a time. This adjustment ensures perfect consistency.
Common Mistake & Fix: Dough not forming a ball? Too much or too little liquid is usually the culprit. Adjust slowly and patiently.
3. Prepare for Shaping
- Remove the Dough: Once the “Dough” cycle is complete, carefully remove the dough from the bread machine pan. It will be warm, soft, and significantly larger than before.
- Punch Down: Gently punch down the dough to release the air. This step helps create a finer, more even crumb in your finished bread.
- Rest the Dough: Place the dough on a lightly floured surface. Cover it loosely with plastic wrap or a clean kitchen towel and let it rest for about 10-15 minutes. This allows the gluten to relax, making the dough easier to shape.
4. Shaping Your French Bread
You can shape your dough into two smaller baguettes or one larger bâtard (a shorter, fatter baguette). For beginners, a bâtard might be easier.
- For Baguettes (2 loaves):
- Divide the dough in half.
- Take one half and gently pat it into a rectangle.
- Fold the top third of the dough down to the center, pressing firmly to seal.
- Fold the bottom third up and over the previous fold, pressing to seal.
- Roll the dough seam-side down, stretching it gently to form a log about 12-15 inches long, tapering the ends slightly. Aim for an even thickness.
- For a Bâtard (1 loaf):
- Form the entire dough into a rectangle.
- Follow the same folding and rolling process as for baguettes, creating one larger log, about 10-12 inches long.
Beginner Tip: Don’t overwork the dough during shaping. Gentle handling keeps the air pockets intact, contributing to that characteristic airy crumb.
5. Second Rise (Proofing)
- Prepare Baking Sheet: Lightly grease a baking sheet or line it with parchment paper. Sprinkle generously with cornmeal. The cornmeal prevents sticking and adds a rustic touch.
- Place Dough: Carefully transfer your shaped loaves to the prepared baking sheet. Leave ample space between them if making two.
- Proof: Cover the loaves loosely with plastic wrap or a clean kitchen towel. Let them rise in a warm, draft-free place for 45-60 minutes, or until almost doubled in size and puffy. They should spring back slowly when gently poked.
Common Mistake & Fix: Dough not rising enough? Your proofing environment might be too cold, or your yeast might be old. Try a warmer spot (like a slightly warm oven, turned off, with a pan of hot water).
6. Preheat Oven & Prepare for Steam
A crispy, crackly crust is a hallmark of French bread, and steam is the secret!
- Oven Temperature: Preheat your oven to 450°F (232°C).
- Create Steam: Place an empty oven-safe pan (like a cast iron skillet or a metal baking dish) on the bottom rack of your oven while it preheats. When you’re ready to bake, you’ll pour hot water into this pan to create steam.
7. Score and Bake!
- Score the Loaves: Just before baking, use a very sharp knife, a razor blade (lame), or kitchen shears to make 3-5 diagonal slashes across the top of each loaf. These slashes allow the bread to expand properly in the oven, preventing uncontrolled tearing and creating beautiful patterns.
- Bake with Steam: Carefully open the oven door. Quickly pour about ½ cup of hot water into the hot pan on the bottom rack (be cautious of the steam!). Immediately place your baking sheet with the loaves into the oven and close the door.
- Initial Bake: Bake for 15 minutes with the steam.
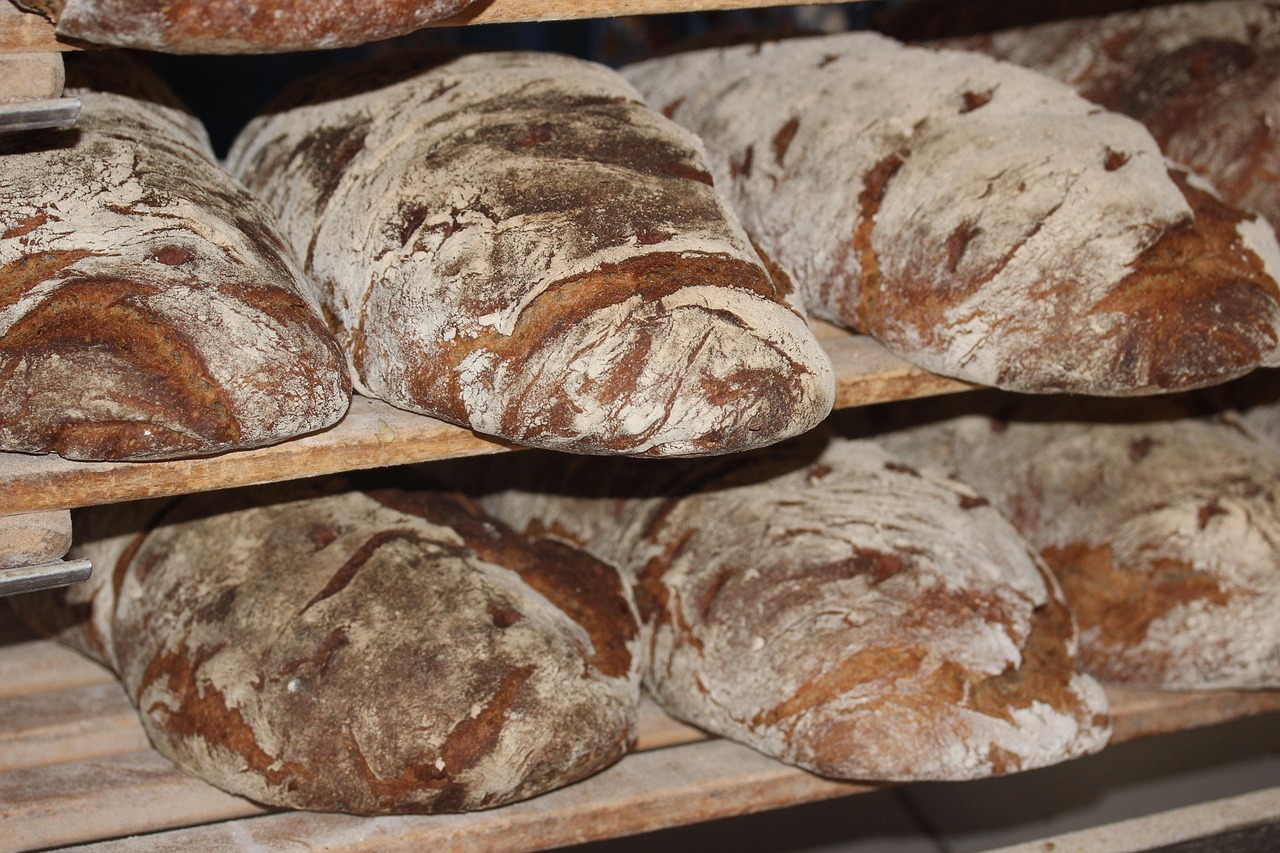
- Finish Baking: After 15 minutes, carefully open the oven door and remove the pan of water. Reduce the oven temperature to 400°F (200°C) and continue baking for another 15-25 minutes, or until the bread is a deep golden brown and sounds hollow when tapped on the bottom.
8. Cool Completely
- Cooling Rack: Once baked, immediately transfer the French bread to a wire cooling rack.
- Patience is Key: Let the bread cool completely for at least 30-60 minutes before slicing. Slicing hot bread can lead to a gummy texture inside. Cooling allows the internal structure to set properly and the crust to become perfectly crisp.
Congratulations! You’ve just made homemade French bread. Enjoy it with butter, olive oil, or alongside your favorite meal!
Tips & Tricks for Perfect French Bread
Achieving bakery-quality French bread at home is within reach! Here are some actionable tips to help you perfect your loaf every time:
- Measure Accurately: For bread, precision is paramount. While cups are provided, using a digital kitchen scale for flour and water (grams) will yield the most consistent results.
- Water Temperature Matters: Yeast is sensitive! Water that’s too cold won’t activate it, and water that’s too hot will kill it. Aim for 105-115°F (40-46°C).
- Yeast Freshness: Always check the expiration date on your yeast. Old yeast is a common culprit for dough that doesn’t rise. You can proof it separately in warm water with a pinch of sugar to ensure it’s active.
- Don’t Skip the Rest: After the bread machine cycle, letting the dough rest for 10-15 minutes before shaping allows the gluten to relax, making it much easier to handle and preventing it from snapping back.
- Mastering the Scoring: A sharp blade is essential for clean slashes. Don’t be afraid to make quick, confident cuts. This not only looks professional but also helps the bread expand beautifully.
- The Power of Steam: The steam created by adding hot water to a preheated pan in the oven is crucial for a thin, crisp, and glossy crust. Don’t skip this step!
- Listen to Your Loaf: A perfectly baked French bread will sound hollow when tapped on the bottom. This is a great indicator that it’s cooked through.
- Cool Completely: Resist the urge to slice into your bread immediately. Cooling on a wire rack allows steam to escape and the internal structure to set, preventing a gummy texture.
- Flour Type: Bread flour has a higher protein content than all-purpose flour, leading to a chewier crumb and better structure. While AP flour works, bread flour will give you superior results for French bread.
Essential Baking Tools
Having the right tools makes all the difference in your baking journey!
- Mixing Bowl (for prep and resting dough)
- Whisk (for mixing dry ingredients)
- Baking Sheet (or baguette pan for perfect shape)
- Measuring Cups and Spoons (for accurate ingredient portions)
- Spatula (for scraping dough)
- Digital Kitchen Scale (highly recommended for precision)
- Oven Thermometer (to ensure your oven is at the correct temperature)
- Wire Cooling Rack (essential for proper cooling)
- Sharp Knife or Lame (for scoring)
- Bread Machine (of course!)
Nutrition Info (Estimated per serving, 1/12th of recipe)
Please note: These are approximate values and can vary based on specific ingredients and preparation methods.
| Nutrient | Amount |
|---|---|
| Calories | 160 kcal |
| Carbohydrates | 32g |
| Protein | 5g |
| Fat | 1g |
| Fiber | 1g |
| Sugar | 1g |
Frequently Asked Questions (FAQs)
Q1: Can I bake the French bread entirely in my bread machine?
While you can bake a loaf of bread entirely in your bread machine, it won’t yield the traditional shape, texture, or crispy crust of true French bread. The bread machine bakes in a loaf pan, and its heating element doesn’t typically provide the high, moist heat needed for a classic French bread crust. This recipe uses the bread machine for the “dough” cycle and finishes in a conventional oven for authentic results.
Q2: Why is my dough not rising in the bread machine?
The most common reasons for dough not rising are inactive yeast (check the expiration date!), water temperature that’s too hot or too cold, or too much salt inhibiting yeast activity. Ensure your water is between 105-115°F (40-46°C) and your yeast is fresh. Also, make sure salt doesn’t come into direct contact with the yeast initially in the bread machine pan.
Q3: How do I get a really crispy crust on my French bread?
The secret to a crispy crust is steam during the initial baking phase and high oven temperature. Preheat your oven with an empty, oven-safe pan on the bottom rack. When you put the bread in, carefully pour hot water into that pan to create a burst of steam. This keeps the crust pliable longer, allowing the bread to expand fully before the crust sets, leading to a thin, crispy, and often shiny finish.
Q4: Can I use whole wheat flour for this recipe?
You can substitute a portion of the bread flour with whole wheat flour, but it will change the texture and density of the bread. Whole wheat flour absorbs more liquid, so you might need to add a tablespoon or two more water. Also, whole wheat dough tends to be denser and may not rise as high. For a true French bread experience, sticking to bread flour (or all-purpose) is recommended for beginners.
Q5: How should I store leftover French bread?
French bread is best enjoyed fresh on the day it’s baked. However, if you have leftovers, store them at room temperature in a paper bag to maintain some of its crispness (plastic bags will make the crust soft). For longer storage, wrap tightly in plastic wrap and then foil, and freeze for up to 1-2 months. Reheat frozen bread in a 350°F (175°C) oven for about 10-15 minutes until warmed through and crisp.
Conclusion
There’s nothing quite like the aroma and taste of freshly baked French bread, and now you have all the tools and knowledge to create it right in your own kitchen with the help of your trusty bread machine! This French Bread Recipe With Bread Machine takes the guesswork out of kneading and rising, allowing you to focus on the satisfying steps of shaping, scoring, and baking a truly impressive loaf.
Don’t be afraid to experiment and make this recipe your own. With a little practice, you’ll be pulling out golden, crusty loaves that rival any bakery. So go ahead, bake a batch, and enjoy the pure delight of homemade French bread. Happy baking!