Are you ready to transform simple ingredients into a masterpiece of flavor and texture? Baking your own sourdough bread, especially with fresh milled flour, is one of the most rewarding culinary experiences. It might seem intimidating at first, but with this Fresh Milled Flour Sourdough Bread Recipe, we’re breaking down every step into manageable, easy baking recipes for beginners.
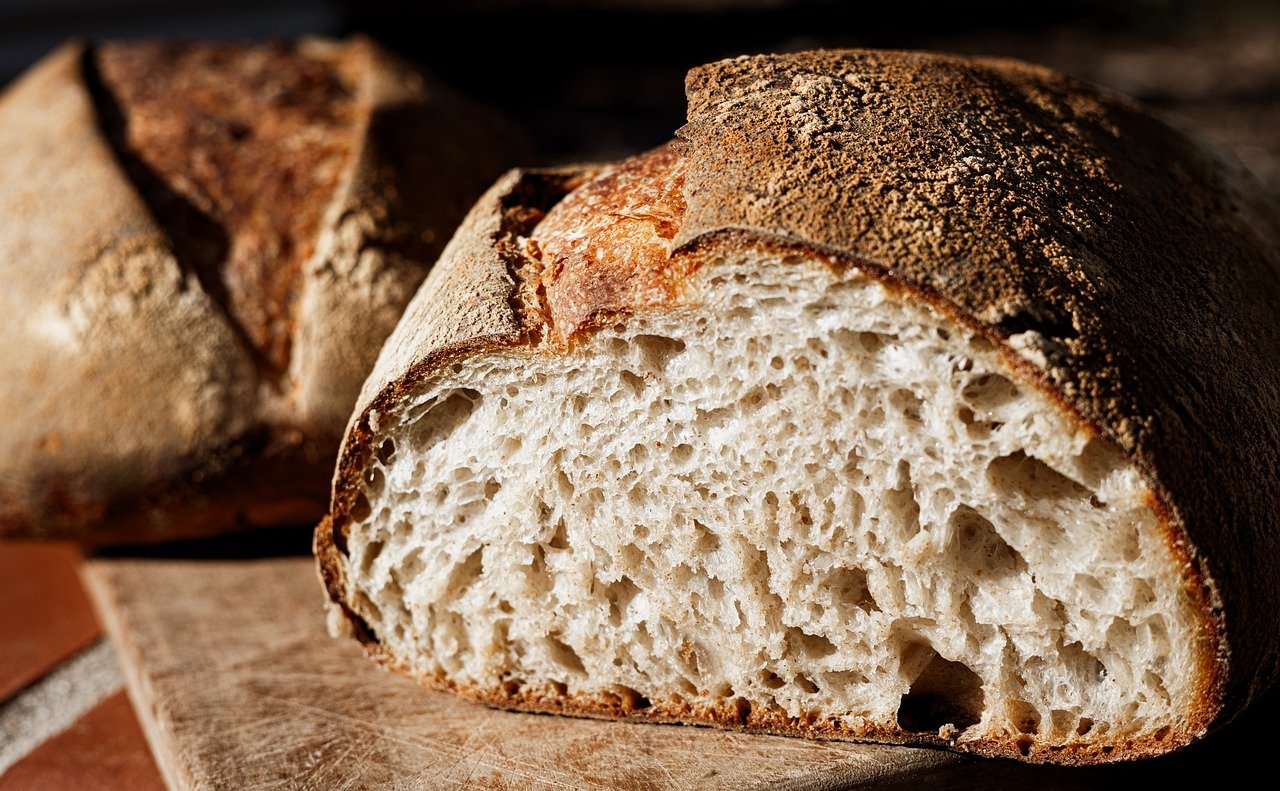
Forget store-bought loaves you’re about to create something truly special, packed with nutrients and an incredible depth of flavor that only fresh milling can provide. Get ready to dive into the wonderful world of sourdough with our comprehensive baking tips for beginners and achieve that perfect crust and airy crumb!
Essential Ingredients for Your Sourdough Loaf
Using a kitchen scale for accuracy is highly recommended for sourdough baking. Precision makes a big difference!
| Ingredient | Quantity | Unit |
|---|---|---|
| Active Sourdough Starter | 80 | grams |
| Fresh Milled Hard Red Wheat Flour | 400 | grams |
| Warm Water (90-95°F / 32-35°C) | 300 | grams |
| Fine Sea Salt | 8 | grams |
Step-by-Step Instructions: Mastering Fresh Milled Sourdough Bread
This detailed guide will walk you through each stage, ensuring even first-time bakers can achieve a beautiful loaf. Remember, sourdough is a journey, not a race – embrace the process!
1. Prepare Your Sourdough Starter (The Night Before / 12-18 Hours Before Baking)
- Feed Your Starter: Ensure your sourdough starter is active and bubbly. Feed it 12-18 hours before you plan to mix your dough. A good rule of thumb is to feed it 1:2:2 (1 part starter, 2 parts flour, 2 parts water). For example, 25g starter, 50g fresh milled flour, 50g water.
- Check for Activity: Your starter is ready when it has roughly doubled or tripled in size, is full of bubbles, and passes the “float test” (a small dollop floats in water).
2. Autolyse (30-60 Minutes Before Mixing)
The autolyse step is particularly beneficial for fresh milled flour as it allows the bran and germ to fully hydrate, leading to a smoother dough and better gluten development without excessive kneading.
- Combine Flour and Water: In a large mixing bowl, combine 400g of fresh milled flour and 300g of warm water. Mix with your hands or a Danish dough whisk until no dry flour remains. It will be shaggy and not smooth – that’s perfectly normal!
- Rest: Cover the bowl with a damp cloth or plastic wrap and let it rest at room temperature for 30-60 minutes. This allows the flour to fully hydrate and gluten development to begin naturally.
3. Mixing the Dough (After Autolyse)
Now it’s time to introduce your active starter and salt.
- Add Starter: Add 80g of active sourdough starter to the autolysed dough. Gently dimple it into the dough.
- Add Salt: Sprinkle 8g of fine sea salt over the dough.
- Incorporate: Using your hands, gently squeeze and fold the dough to fully incorporate the starter and salt. It will feel sticky at first. Continue for 2-3 minutes until everything is evenly distributed. You might need to wet your hands slightly to prevent sticking.
- Initial Rest: Cover the bowl and let the dough rest for 30 minutes.
4. Bulk Fermentation (First Rise) & Folding (3-5 Hours)
This is where the magic happens! Bulk fermentation (or the first rise) develops flavor and strength. The duration will vary based on your kitchen temperature. Aim for a dough temperature of around 75-78°F (24-25°C).
- Set Up: Keep your dough covered in a warm spot in your kitchen (ideally 75-80°F / 24-27°C).
- Stretch and Folds (First Set): After the initial 30-minute rest, perform your first set of stretch and folds. Lightly wet your hands. Grab a portion of the dough from one side, gently stretch it upwards, and fold it over itself to the opposite side. Rotate the bowl and repeat this process 3-4 times until you’ve worked your way around the dough. This builds strength.
- Rest: Cover and rest for 30-45 minutes.
- Repeat Stretch and Folds: Repeat the stretch and fold process 3-4 more times, with 30-45 minute rests in between each set. As you progress, you’ll notice the dough becoming smoother, stronger, and more elastic.
- Coil Folds (Optional but recommended): For the last 1-2 sets, you can try coil folds, which are gentler. Wet your hands, slide them under the center of the dough, lift it, and let the ends coil underneath themselves.
- Monitor Progress: The dough is ready when it has increased in volume by about 20-30% (fresh milled flour won’t double like white flour), feels jiggly and aerated, and has a domed top with some bubbles visible. This can take anywhere from 3 to 5 hours, sometimes longer in cooler kitchens. Beginner Tip: Don’t rush this! An under-proofed dough will be dense; an over-proofed dough will be hard to handle.
5. Pre-Shaping (15-20 Minutes)
This step creates initial tension and makes final shaping easier.
- Prepare Surface: Lightly flour your work surface.
- Gentle Transfer: Gently scrape the dough out of the bowl onto your floured surface.
- Form a Round: Gently shape the dough into a loose round or rectangle. Use a bench scraper to tuck the edges underneath, creating surface tension without tearing. Don’t press too hard.
- Bench Rest: Cover the dough with a damp cloth or inverted bowl and let it rest for 15-20 minutes. This allows the gluten to relax, making final shaping much easier.
6. Final Shaping
This is crucial for a good oven spring and structure. You can shape into a boule (round) or a batard (oval).
- Prepare Banneton: Generously flour a banneton (proofing basket) with rice flour (it prevents sticking better than wheat flour).
- Shape (Boule Method): Gently flip the dough over so the sticky side is up. Stretch the top edge away from you, then fold it down to the center. Stretch the bottom edge away from you, then fold it up to overlap the first fold. Repeat with the left and right sides. Then, gently roll the dough towards you, creating tension on the surface. Use your hands to cup the dough and gently spin it on the surface to create a tight, round ball.
- Shape (Batard Method): Similar to the boule, but once you’ve folded the top and bottom, gently stretch the dough into an oblong shape. Fold the left side towards the middle, then the right side over the left, creating a seam. Gently roll the dough back and forth to seal the seam and create an even shape.
- Transfer to Banneton: Carefully place the shaped dough, seam-side up, into the floured banneton.
7. Cold Proof (Second Rise) – (12-18 Hours)
A cold proof slows down fermentation, develops deeper flavors, and makes the dough much easier to handle and score.
- Cover and Refrigerate: Cover the banneton with a plastic bag or plastic wrap to prevent the dough from drying out. Place it in the refrigerator for 12-18 hours.
- Benefits: This step is not optional for a truly great loaf! It dramatically improves flavor, crust, and crumb structure.
8. Preheat Oven & Dutch Oven (1 Hour Before Baking)
Achieving a super hot oven is key for a great crust and oven spring.
- Place Dutch Oven: Place your empty Dutch oven (with lid) in the oven.
- Preheat: Preheat your oven to 475°F (245°C) for at least 60 minutes. This ensures the Dutch oven is scorching hot.
9. Score and Bake!
- Prepare for Baking: Carefully remove the scorching hot Dutch oven from the oven (use thick oven mitts!). Gently invert your cold dough from the banneton directly into the hot Dutch oven.
- Score: Using a sharp razor blade or a lame, score the top of the dough. A single deep slash at a 45-degree angle will create an “ear,” or you can do more intricate patterns. Beginner Tip: Don’t be afraid to go deep enough (about 1/2 inch).
- Bake Covered: Immediately place the lid back on the Dutch oven and return it to the preheated oven. Bake covered for 25 minutes. The steam trapped inside creates a fantastic crust and allows for maximum oven spring.
- Bake Uncovered: Remove the lid from the Dutch oven. Reduce the oven temperature to 450°F (230°C). Bake uncovered for another 20-30 minutes, or until the crust is a deep golden brown and reaches an internal temperature of 200-210°F (93-99°C).
10. Cool Completely (Crucial!)
- Transfer: Carefully remove the bread from the Dutch oven and transfer it to a wire rack.
- Cool Down: Allow the bread to cool completely for at least 1-2 hours before slicing. This is perhaps the hardest step, but it’s vital! Slicing hot bread traps steam, leading to a gummy interior. Cooling allows the starches to set and finishes the baking process, resulting in a perfect texture.
Tips & Tricks for Sourdough Success
- Listen to Your Dough: Every batch of flour, every kitchen temperature, and every starter is unique. Pay attention to how your dough feels and looks rather than strictly adhering to timings. If it feels sluggish, give it more time; if it’s super active, move faster.
- Hydration Adjustment: Fresh milled flours can be thirstier than commercial white flours. If your dough feels too stiff, don’t be afraid to add a tablespoon or two more water during the autolyse or initial mix. Conversely, if it’s too sticky, reduce water slightly next time.
- Warmth is Key: Sourdough loves warmth! If your kitchen is cool, find a warm spot for bulk fermentation – near a sunny window, on top of the fridge, or in an oven with just the light on.
- Handle with Care: Especially after bulk fermentation, handle your dough gently. You want to preserve all those beautiful air bubbles you’ve worked so hard to create.
- Rice Flour for Banneton: Rice flour is excellent for dusting your banneton because it doesn’t contain gluten, so it won’t absorb moisture from the dough and stick.
- Patience is a Virtue: Sourdough baking is a slow process. Rushing any step, especially bulk fermentation or cooling, can negatively impact your final loaf. Enjoy the journey!
- Practice Makes Perfect: Don’t get discouraged if your first loaf isn’t picture-perfect. Each bake is a learning experience. You’ll develop a feel for the dough over time.
Essential Baking Tools
Having the right tools makes the sourdough baking process much smoother and more enjoyable:
- Large Mixing Bowl: For mixing and bulk fermentation.
- Danish Dough Whisk: Excellent for incorporating flour and water without overmixing.
- Dutch Oven (or Baking Pan): Essential for achieving a crispy crust and great oven spring.
- Digital Kitchen Scale: For precise ingredient measurements (more accurate than cups!).
- Bench Scraper: Invaluable for handling and shaping sticky dough.
- Banneton (Proofing Basket): To hold the dough during the cold proof and maintain its shape.
- Lame or Razor Blade: For scoring the dough before baking.
Estimated Nutrition Information (per 1/8 loaf)
Please note: These values are estimates and can vary based on specific flour type, exact quantities, and baking methods. Fresh milled flour often has higher fiber and nutrient content.
| Nutrient | Amount |
|---|---|
| Calories | 220-250 kcal |
| Carbohydrates | 45-50 g |
| Protein | 8-10 g |
| Fat | 1-2 g |
| Fiber | 4-6 g |
| Sugar | 0-1 g |
Frequently Asked Questions (FAQs)
Q1: What’s special about using fresh milled flour for sourdough?
Fresh milled flour retains the bran, germ, and endosperm, meaning it’s packed with more nutrients, fiber, and flavor compared to commercially processed flours. It also has different hydration needs and fermentation characteristics, often leading to a more robust, complex-tasting loaf with a unique texture.
Q2: How do I know if my sourdough starter is active enough?
An active starter will have doubled or tripled in size within 4-8 hours of feeding, be full of bubbles, and smell pleasantly yeasty and slightly sour. The best test is the “float test”: drop a small dollop into a glass of water; if it floats, it’s ready to bake with!
Q3: My dough is really sticky and hard to handle. What should I do?
Fresh milled flour dough can be stickier due to its higher absorption. Don’t add too much extra flour to your work surface, as this can dry out the dough. Instead, lightly wet your hands and bench scraper with water. This prevents sticking without changing the dough’s hydration. With practice, you’ll get used to handling high-hydration doughs.
Q4: Can I skip the cold proof in the refrigerator?
While technically possible, skipping the cold proof is not recommended for the best results. The cold proof develops deeper flavors, improves the crust, makes the dough easier to score, and allows for better oven spring. If you must skip it, you can do a shorter room-temperature proof (1-2 hours) after shaping, but watch it carefully as it will proof much faster.
Q5: How do I store my fresh milled sourdough bread?
Once completely cooled, store your sourdough bread at room temperature. For short-term (1-2 days), a bread bag or paper bag works well to maintain crust crispness. For longer storage (up to a week), wrap it tightly in plastic wrap or beeswax wrap, then place it in a bread box. For longer than a week, slice and freeze the bread; it toasts beautifully from frozen!
Q6: Why didn’t my bread get a good “oven spring” or rise much in the oven?
Several factors can cause poor oven spring: an inactive starter, under-proofed or over-proofed dough during bulk fermentation or cold proof, insufficient shaping (not enough surface tension), or not preheating the Dutch oven hot enough. Review the steps and ensure your starter is robust and your dough is properly fermented and shaped.
Happy Baking!
Congratulations on taking the leap into baking your own **Fresh Milled Flour Sourdough Bread Recipe**! This journey is incredibly rewarding, offering not just delicious bread but also a deeper connection to your food. Don’t be discouraged by imperfections – every loaf is a learning experience, and with each bake, you’ll gain confidence and intuition. Share your creations, ask questions, and most importantly, enjoy the incredible aroma and taste of your homemade sourdough. Happy baking!
“`
“`html
Welcome to Your Fresh Milled Flour Sourdough Journey!
Are you ready to transform simple ingredients into a masterpiece of flavor and texture? Baking your own sourdough bread, especially with fresh milled flour, is one of the most rewarding culinary experiences. It might seem intimidating at first, but with this Fresh Milled Flour Sourdough Bread Recipe, we’re breaking down every step into manageable, easy baking recipes for beginners. Forget store-bought loaves – you’re about to create something truly special, packed with nutrients and an incredible depth of flavor that only fresh milling can provide. Get ready to dive into the wonderful world of sourdough with our comprehensive baking tips for beginners and achieve that perfect crust and airy crumb!
Essential Ingredients for Your Sourdough Loaf
Using a kitchen scale for accuracy is highly recommended for sourdough baking. Precision makes a big difference!
| Ingredient | Quantity | Unit |
|---|---|---|
| Active Sourdough Starter | 80 | grams |
| Fresh Milled Hard Red Wheat Flour | 400 | grams |
| Warm Water (90-95°F / 32-35°C) | 300 | grams |
| Fine Sea Salt | 8 | grams |
Step-by-Step Instructions: Mastering Fresh Milled Sourdough Bread
This detailed guide will walk you through each stage, ensuring even first-time bakers can achieve a beautiful loaf. Remember, sourdough is a journey, not a race – embrace the process!
1. Prepare Your Sourdough Starter (The Night Before / 12-18 Hours Before Baking)
- Feed Your Starter: Ensure your sourdough starter is active and bubbly. Feed it 12-18 hours before you plan to mix your dough. A good rule of thumb is to feed it 1:2:2 (1 part starter, 2 parts flour, 2 parts water). For example, 25g starter, 50g fresh milled flour, 50g water.
- Check for Activity: Your starter is ready when it has roughly doubled or tripled in size, is full of bubbles, and passes the “float test” (a small dollop floats in water).
2. Autolyse (30-60 Minutes Before Mixing)
The autolyse step is particularly beneficial for fresh milled flour as it allows the bran and germ to fully hydrate, leading to a smoother dough and better gluten development without excessive kneading.
- Combine Flour and Water: In a large mixing bowl, combine 400g of fresh milled flour and 300g of warm water. Mix with your hands or a Danish dough whisk until no dry flour remains. It will be shaggy and not smooth – that’s perfectly normal!
- Rest: Cover the bowl with a damp cloth or plastic wrap and let it rest at room temperature for 30-60 minutes. This allows the flour to fully hydrate and gluten development to begin naturally.
3. Mixing the Dough (After Autolyse)
Now it’s time to introduce your active starter and salt.
- Add Starter: Add 80g of active sourdough starter to the autolysed dough. Gently dimple it into the dough.
- Add Salt: Sprinkle 8g of fine sea salt over the dough.
- Incorporate: Using your hands, gently squeeze and fold the dough to fully incorporate the starter and salt. It will feel sticky at first. Continue for 2-3 minutes until everything is evenly distributed. You might need to wet your hands slightly to prevent sticking.
- Initial Rest: Cover the bowl and let the dough rest for 30 minutes.
4. Bulk Fermentation (First Rise) & Folding (3-5 Hours)
This is where the magic happens! Bulk fermentation (or the first rise) develops flavor and strength. The duration will vary based on your kitchen temperature. Aim for a dough temperature of around 75-78°F (24-25°C).
- Set Up: Keep your dough covered in a warm spot in your kitchen (ideally 75-80°F / 24-27°C).
- Stretch and Folds (First Set): After the initial 30-minute rest, perform your first set of stretch and folds. Lightly wet your hands. Grab a portion of the dough from one side, gently stretch it upwards, and fold it over itself to the opposite side. Rotate the bowl and repeat this process 3-4 times until you’ve worked your way around the dough. This builds strength.
- Rest: Cover and rest for 30-45 minutes.
- Repeat Stretch and Folds: Repeat the stretch and fold process 3-4 more times, with 30-45 minute rests in between each set. As you progress, you’ll notice the dough becoming smoother, stronger, and more elastic.
- Coil Folds (Optional but recommended): For the last 1-2 sets, you can try coil folds, which are gentler. Wet your hands, slide them under the center of the dough, lift it, and let the ends coil underneath themselves.
- Monitor Progress: The dough is ready when it has increased in volume by about 20-30% (fresh milled flour won’t double like white flour), feels jiggly and aerated, and has a domed top with some bubbles visible. This can take anywhere from 3 to 5 hours, sometimes longer in cooler kitchens. Beginner Tip: Don’t rush this! An under-proofed dough will be dense; an over-proofed dough will be hard to handle.
5. Pre-Shaping (15-20 Minutes)
This step creates initial tension and makes final shaping easier.
- Prepare Surface: Lightly flour your work surface.
- Gentle Transfer: Gently scrape the dough out of the bowl onto your floured surface.
- Form a Round: Gently shape the dough into a loose round or rectangle. Use a bench scraper to tuck the edges underneath, creating surface tension without tearing. Don’t press too hard.
- Bench Rest: Cover the dough with a damp cloth or inverted bowl and let it rest for 15-20 minutes. This allows the gluten to relax, making final shaping much easier.
6. Final Shaping
This is crucial for a good oven spring and structure. You can shape into a boule (round) or a batard (oval).
- Prepare Banneton: Generously flour a banneton (proofing basket) with rice flour (it prevents sticking better than wheat flour).
- Shape (Boule Method): Gently flip the dough over so the sticky side is up. Stretch the top edge away from you, then fold it down to the center. Stretch the bottom edge away from you, then fold it up to overlap the first fold. Repeat with the left and right sides. Then, gently roll the dough towards you, creating tension on the surface. Use your hands to cup the dough and gently spin it on the surface to create a tight, round ball.
- Shape (Batard Method): Similar to the boule, but once you’ve folded the top and bottom, gently stretch the dough into an oblong shape. Fold the left side towards the middle, then the right side over the left, creating a seam. Gently roll the dough back and forth to seal the seam and create an even shape.
- Transfer to Banneton: Carefully place the shaped dough, seam-side up, into the floured banneton.
7. Cold Proof (Second Rise) – (12-18 Hours)
A cold proof slows down fermentation, develops deeper flavors, and makes the dough much easier to handle and score.
- Cover and Refrigerate: Cover the banneton with a plastic bag or plastic wrap to prevent the dough from drying out. Place it in the refrigerator for 12-18 hours.
- Benefits: This step is not optional for a truly great loaf! It dramatically improves flavor, crust, and crumb structure.
8. Preheat Oven & Dutch Oven (1 Hour Before Baking)
Achieving a super hot oven is key for a great crust and oven spring.
- Place Dutch Oven: Place your empty Dutch oven (with lid) in the oven.
- Preheat: Preheat your oven to 475°F (245°C) for at least 60 minutes. This ensures the Dutch oven is scorching hot.
9. Score and Bake!
- Prepare for Baking: Carefully remove the scorching hot Dutch oven from the oven (use thick oven mitts!). Gently invert your cold dough from the banneton directly into the hot Dutch oven.
- Score: Using a sharp razor blade or a lame, score the top of the dough. A single deep slash at a 45-degree angle will create an “ear,” or you can do more intricate patterns. Beginner Tip: Don’t be afraid to go deep enough (about 1/2 inch).
- Bake Covered: Immediately place the lid back on the Dutch oven and return it to the preheated oven. Bake covered for 25 minutes. The steam trapped inside creates a fantastic crust and allows for maximum oven spring.
- Bake Uncovered: Remove the lid from the Dutch oven. Reduce the oven temperature to 450°F (230°C). Bake uncovered for another 20-30 minutes, or until the crust is a deep golden brown and reaches an internal temperature of 200-210°F (93-99°C).
10. Cool Completely (Crucial!)
- Transfer: Carefully remove the bread from the Dutch oven and transfer it to a wire rack.
- Cool Down: Allow the bread to cool completely for at least 1-2 hours before slicing. This is perhaps the hardest step, but it’s vital! Slicing hot bread traps steam, leading to a gummy interior. Cooling allows the starches to set and finishes the baking process, resulting in a perfect texture.
Tips & Tricks for Sourdough Success
- Listen to Your Dough: Every batch of flour, every kitchen temperature, and every starter is unique. Pay attention to how your dough feels and looks rather than strictly adhering to timings. If it feels sluggish, give it more time; if it’s super active, move faster.
- Hydration Adjustment: Fresh milled flours can be thirstier than commercial white flours. If your dough feels too stiff, don’t be afraid to add a tablespoon or two more water during the autolyse or initial mix. Conversely, if it’s too sticky, reduce water slightly next time.
- Warmth is Key: Sourdough loves warmth! If your kitchen is cool, find a warm spot for bulk fermentation – near a sunny window, on top of the fridge, or in an oven with just the light on.
- Handle with Care: Especially after bulk fermentation, handle your dough gently. You want to preserve all those beautiful air bubbles you’ve worked so hard to create.
- Rice Flour for Banneton: Rice flour is excellent for dusting your banneton because it doesn’t contain gluten, so it won’t absorb moisture from the dough and stick.
- Patience is a Virtue: Sourdough baking is a slow process. Rushing any step, especially bulk fermentation or cooling, can negatively impact your final loaf. Enjoy the journey!
- Practice Makes Perfect: Don’t get discouraged if your first loaf isn’t picture-perfect. Each bake is a learning experience. You’ll develop a feel for the dough over time.
Essential Baking Tools
Having the right tools makes the sourdough baking process much smoother and more enjoyable:
- Large Mixing Bowl: For mixing and bulk fermentation.
- Danish Dough Whisk: Excellent for incorporating flour and water without overmixing.
- Dutch Oven (or Baking Pan): Essential for achieving a crispy crust and great oven spring.
- Digital Kitchen Scale: For precise ingredient measurements (more accurate than cups!).
- Bench Scraper: Invaluable for handling and shaping sticky dough.
- Banneton (Proofing Basket): To hold the dough during the cold proof and maintain its shape.
- Lame or Razor Blade: For scoring the dough before baking.
Estimated Nutrition Information (per 1/8 loaf)
Please note: These values are estimates and can vary based on specific flour type, exact quantities, and baking methods. Fresh milled flour often has higher fiber and nutrient content.
| Nutrient | Amount |
|---|---|
| Calories | 220-250 kcal |
| Carbohydrates | 45-50 g |
| Protein | 8-10 g |
| Fat | 1-2 g |
| Fiber | 4-6 g |
| Sugar | 0-1 g |
Frequently Asked Questions (FAQs)
Q1: What’s special about using fresh milled flour for sourdough?
Fresh milled flour retains the bran, germ, and endosperm, meaning it’s packed with more nutrients, fiber, and flavor compared to commercially processed flours. It also has different hydration needs and fermentation characteristics, often leading to a more robust, complex-tasting loaf with a unique texture.
Q2: How do I know if my sourdough starter is active enough?
An active starter will have doubled or tripled in size within 4-8 hours of feeding, be full of bubbles, and smell pleasantly yeasty and slightly sour. The best test is the “float test”: drop a small dollop into a glass of water; if it floats, it’s ready to bake with!
Q3: My dough is really sticky and hard to handle. What should I do?
Fresh milled flour dough can be stickier due to its higher absorption. Don’t add too much extra flour to your work surface, as this can dry out the dough. Instead, lightly wet your hands and bench scraper with water. This prevents sticking without changing the dough’s hydration. With practice, you’ll get used to handling high-hydration doughs.
Q4: Can I skip the cold proof in the refrigerator?
While technically possible, skipping the cold proof is not recommended for the best results. The cold proof develops deeper flavors, improves the crust, makes the dough easier to score, and allows for better oven spring. If you must skip it, you can do a shorter room-temperature proof (1-2 hours) after shaping, but watch it carefully as it will proof much faster.
Q5: How do I store my fresh milled sourdough bread?
Once completely cooled, store your sourdough bread at room temperature. For short-term (1-2 days), a bread bag or paper bag works well to maintain crust crispness. For longer storage (up to a week), wrap it tightly in plastic wrap or beeswax wrap, then place it in a bread box. For longer than a week, slice and freeze the bread; it toasts beautifully from frozen!
Q6: Why didn’t my bread get a good “oven spring” or rise much in the oven?
Several factors can cause poor oven spring: an inactive starter, under-proofed or over-proofed dough during bulk fermentation or cold proof, insufficient shaping (not enough surface tension), or not preheating the Dutch oven hot enough. Review the steps and ensure your starter is robust and your dough is properly fermented and shaped.
Happy Baking!
Congratulations on taking the leap into baking your own Fresh Milled Flour Sourdough Bread Recipe! This journey is incredibly rewarding, offering not just delicious bread but also a deeper connection to your food. Don’t be discouraged by imperfections – every loaf is a learning experience, and with each bake, you’ll gain confidence and intuition. Share your creations, ask questions, and most importantly, enjoy the incredible aroma and taste of your homemade sourdough. Happy baking!