Get ready to add a burst of color and a whole lot of fun to your baking adventures! If you’ve ever dreamt of transforming your favorite childhood cereal into a spectacular dessert, then you’re in the right place. This Fruity Pebbles Cake Recipe is not just a cake; it’s a celebration in every slice.
Perfect for birthdays, potlucks, or just a whimsical treat, this recipe is designed to be incredibly beginner-friendly. We’ll walk you through every step, offering essential baking tips for beginners to ensure your cake turns out perfectly moist, fluffy, and absolutely delicious. Say goodbye to complicated baking and hello to a vibrant, cereal-infused masterpiece!
Ingredients You’ll Need
Before we dive into the fun, let’s gather our ingredients. Having everything measured out and ready (this is called “mise en place” – a fancy French term for “everything in its place”) will make the baking process much smoother and more enjoyable, especially for beginners!
For the Fruity Pebbles Cake:
| Quantity | Unit | Ingredient |
|---|---|---|
| 2 ½ | cups | All-purpose flour (spooned and leveled) |
| 1 ½ | cups | Granulated sugar |
| 1 | tablespoon | Baking powder |
| ½ | teaspoon | Salt |
| 1 | cup (2 sticks) | Unsalted butter, softened to room temperature |
| 4 | large | Eggs, at room temperature |
| 1 | cup | Whole milk, at room temperature |
| 2 | teaspoons | Vanilla extract |
| 1 | cup | Fruity Pebbles cereal (plus more for topping) |
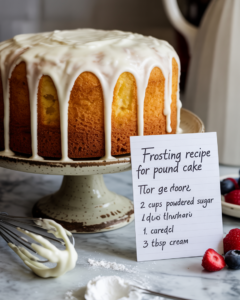
For the Vanilla Buttercream Frosting:
| Quantity | Unit | Ingredient |
|---|---|---|
| 1 | cup (2 sticks) | Unsalted butter, softened to room temperature |
| 4-5 | cups | Powdered sugar (confectioners’ sugar), sifted |
| ¼ | cup | Whole milk or heavy cream |
| 1 | teaspoon | Vanilla extract |
| Pinch | Salt |
Step-by-Step Instructions for Your Fruity Pebbles Cake
Let’s get baking! Follow these detailed steps carefully, and you’ll have a beautiful, delicious cake in no time. Remember, baking is a science, so precise measurements and following steps are key!
Step 1: Prepare Your Oven and Pan
- Preheat Oven: Preheat your oven to 350°F (175°C). Getting the oven to the correct temperature before you put the cake in is crucial for even baking.
- Prepare Baking Pan: Grease and flour two 8-inch round cake pans. You can also use baking spray with flour. Alternatively, line the bottoms with parchment paper circles and then grease and flour the sides. This prevents the cake from sticking and makes removal much easier. Beginner Tip: To grease, rub butter all over the inside of the pan. To flour, add a tablespoon of flour, shake it around to coat all surfaces, then tap out the excess.
Step 2: Combine Dry Ingredients
- In a large bowl, whisk together the all-purpose flour, granulated sugar, baking powder, and salt. Whisking ensures that the leavening agent (baking powder) is evenly distributed, which helps your cake rise beautifully.
Step 3: Cream Butter and Sugar
- In a separate large bowl (or the bowl of a stand mixer), cream together the softened unsalted butter and granulated sugar using an electric mixer on medium speed. Beat for 2-3 minutes until the mixture is light, fluffy, and pale yellow. Beginner Tip: “Creaming” means incorporating air into the butter and sugar, which creates a tender texture in your cake. Softened butter should yield slightly when pressed, but not be melted.
Step 4: Add Eggs and Vanilla
- Beat in the eggs, one at a time, mixing well after each addition. Scrape down the sides of the bowl as needed to ensure everything is fully incorporated.
- Stir in the vanilla extract.
Step 5: Alternate Dry and Wet Ingredients
- With the mixer on low speed, gradually add the dry ingredients to the wet ingredients, alternating with the milk. Begin and end with the dry ingredients. For example: Add about a third of the flour mixture, mix until just combined, then add half of the milk, mix, then another third of the flour, mix, the remaining milk, mix, and finally the last third of the flour.
- Do not overmix! Mix only until just combined. Overmixing develops the gluten in the flour too much, leading to a tough, dense cake. Beginner Tip: As soon as you see no more streaks of dry flour, stop mixing. A few small lumps are better than overmixing.
Step 6: Fold in Fruity Pebbles
- Gently fold in 1 cup of Fruity Pebbles cereal into the cake batter using a spatula. Be gentle to avoid crushing the cereal too much and to keep the air incorporated.
Step 7: Bake the Cakes
- Divide the batter evenly between your two prepared cake pans.
- Bake for 25-30 minutes, or until a wooden skewer or toothpick inserted into the center of the cakes comes out clean. Beginner Tip: Avoid opening the oven door frequently during baking, especially in the first 15-20 minutes, as this can cause the cake to sink.
Step 8: Cool the Cakes
- Once baked, remove the cakes from the oven and let them cool in their pans on a wire rack for 10-15 minutes.
- After 10-15 minutes, carefully invert the cakes onto the wire rack to cool completely. This is a critical step! Attempting to frost warm cakes will result in melted, messy frosting. Ensure the cakes are completely cool to the touch before frosting – this can take 1-2 hours.
Step 9: Prepare the Vanilla Buttercream Frosting
- In a large bowl (or stand mixer), beat the softened unsalted butter on medium speed for 2-3 minutes until light and fluffy.
- Gradually add the sifted powdered sugar, one cup at a time, beating well after each addition. Start on low speed to avoid a sugar cloud!
- Once all the sugar is incorporated, add the milk (or heavy cream), vanilla extract, and pinch of salt. Beat on medium-high speed for another 3-5 minutes until the frosting is light, fluffy, and smooth. If the frosting is too thick, add a tiny bit more milk (1 teaspoon at a time). If it’s too thin, add more sifted powdered sugar (1 tablespoon at a time).
Step 10: Assemble and Decorate Your Fruity Pebbles Cake
- Once your cakes are completely cool, place one cake layer on your serving plate or cake stand. Spread a generous layer of buttercream frosting evenly over the top.
- Carefully place the second cake layer on top.
- Frost the top and sides of the entire cake with the remaining buttercream. Use an offset spatula or a butter knife to get a smooth finish. Don’t worry if it’s not perfect; it’s homemade!
- For the grand finale, generously sprinkle extra Fruity Pebbles cereal all over the top and sides of the frosted cake. Gently press some onto the sides if desired.
- Slice, serve, and enjoy your colorful, delicious, and fun Fruity Pebbles Cake!
Tips & Tricks for Baking Success
Even though this is an easy recipe, these extra **baking tips for beginners** will help you achieve perfect results every time!
- Room Temperature Ingredients: This is not just a suggestion! Room temperature butter and eggs emulsify better with other ingredients, creating a smoother batter and a more uniform cake texture. Pull them out of the fridge at least an hour before you start.
- Measure Flour Correctly: Always spoon flour into your measuring cup and then level it off with the back of a knife. Scooping directly can compact the flour, leading to too much flour and a dry cake.
- Don’t Overmix: As mentioned in the instructions, overmixing develops gluten, making your cake tough. Mix only until ingredients are just combined.
- Cool Completely: Patience is a virtue in baking! Frosting a warm cake is a guaranteed mess. Ensure your cake layers are completely cold before you even think about applying frosting.
- Oven Thermometer: Oven temperatures can vary significantly from what the dial says. An inexpensive oven thermometer can be a game-changer for consistent baking results.
- Sift Powdered Sugar: Sifting powdered sugar for frosting removes lumps, ensuring a super smooth and creamy buttercream.
- Storage: Store leftover cake covered at room temperature for up to 2-3 days, or in the refrigerator for up to 5 days. If refrigerating, let it come to room temperature before serving for the best texture.
Essential Baking Tools
Having the right tools makes baking easier and more fun! Here are some basics you’ll want to have on hand:
- Mixing Bowls (various sizes)
- Whisk
- 8-inch Round Baking Pans
- Measuring Cups and Spoons
- Rubber Spatula
- Electric Mixer (handheld or stand mixer)
- Wire Cooling Rack
- Offset Spatula (for frosting)
Estimated Nutrition Information (per serving)
Please note that these values are estimates and can vary based on specific brands and exact measurements used. This recipe yields approximately 12 servings.
| Nutrient | Amount |
|---|---|
| Calories | ~420 kcal |
| Carbohydrates | ~65 g |
| Protein | ~4 g |
| Fat | ~18 g |
| Fiber | ~1 g |
| Sugar | ~45 g |
Frequently Asked Questions (FAQs)
Q1: Can I make this cake gluten-free or dairy-free?
A: Yes, you can! For a gluten-free version, use a 1:1 gluten-free all-purpose flour blend. For dairy-free, substitute unsalted butter with a plant-based butter alternative (like Miyoko’s or Earth Balance sticks) and use unsweetened almond milk or soy milk for the milk. Ensure your Fruity Pebbles cereal is also certified gluten-free if needed, as some cereals may have cross-contamination. Results may vary slightly in texture.
Q2: How do I know when the cake is perfectly baked?
A: The best way is the toothpick test! Insert a wooden skewer or toothpick into the very center of the cake. If it comes out clean (without wet batter attached), your cake is done. If it has wet batter, bake for a few more minutes and test again. The edges of the cake should also be lightly golden and pulling away slightly from the sides of the pan.
Q3: Can I prepare this cake in advance?
A: Absolutely! You can bake the cake layers up to 2 days in advance. Once completely cooled, wrap them tightly in plastic wrap and store at room temperature. You can also freeze unfrosted cake layers for up to 2 months; wrap them well in plastic wrap and then aluminum foil. Thaw at room temperature before frosting. The frosting can also be made a day ahead and stored in the fridge, then re-whipped before use.
Q4: Why did my cake sink in the middle?
A: There are a few common culprits! It could be that the oven door was opened too early during baking (especially in the first 2/3 of baking time), causing a temperature drop. It might also be underbaked, or you might have used too much leavening agent (baking powder/soda). Make sure your oven is preheated to the correct temperature and avoid opening the door until the last 5-10 minutes of baking.
Q5: Will the Fruity Pebbles get soggy in the cake batter?
A: When folded into the batter, the cereal will soften slightly during baking, giving the cake a unique, chewy-crisp texture. If you want maximum crunch, add the Fruity Pebbles as a topping after the cake is frosted, or mix some into the frosting just before decorating. For the best visual appeal and texture, we recommend adding a generous amount to the outside of the frosted cake!
Ready to Bake Your Own Rainbow?
And there you have it – your complete guide to baking a show-stopping Fruity Pebbles Cake Recipe! We hope these detailed instructions and baking tips for beginners empower you to create something truly special. This cake is more than just a dessert; it’s a nostalgic trip that’s fun to make and even more fun to eat. Don’t be afraid to get creative, sprinkle generously, and most importantly, enjoy the process!
Happy baking, and remember, every cake you bake is a step towards becoming a more confident baker. Share your creations with us, and keep exploring the wonderful world of **easy baking recipes**!