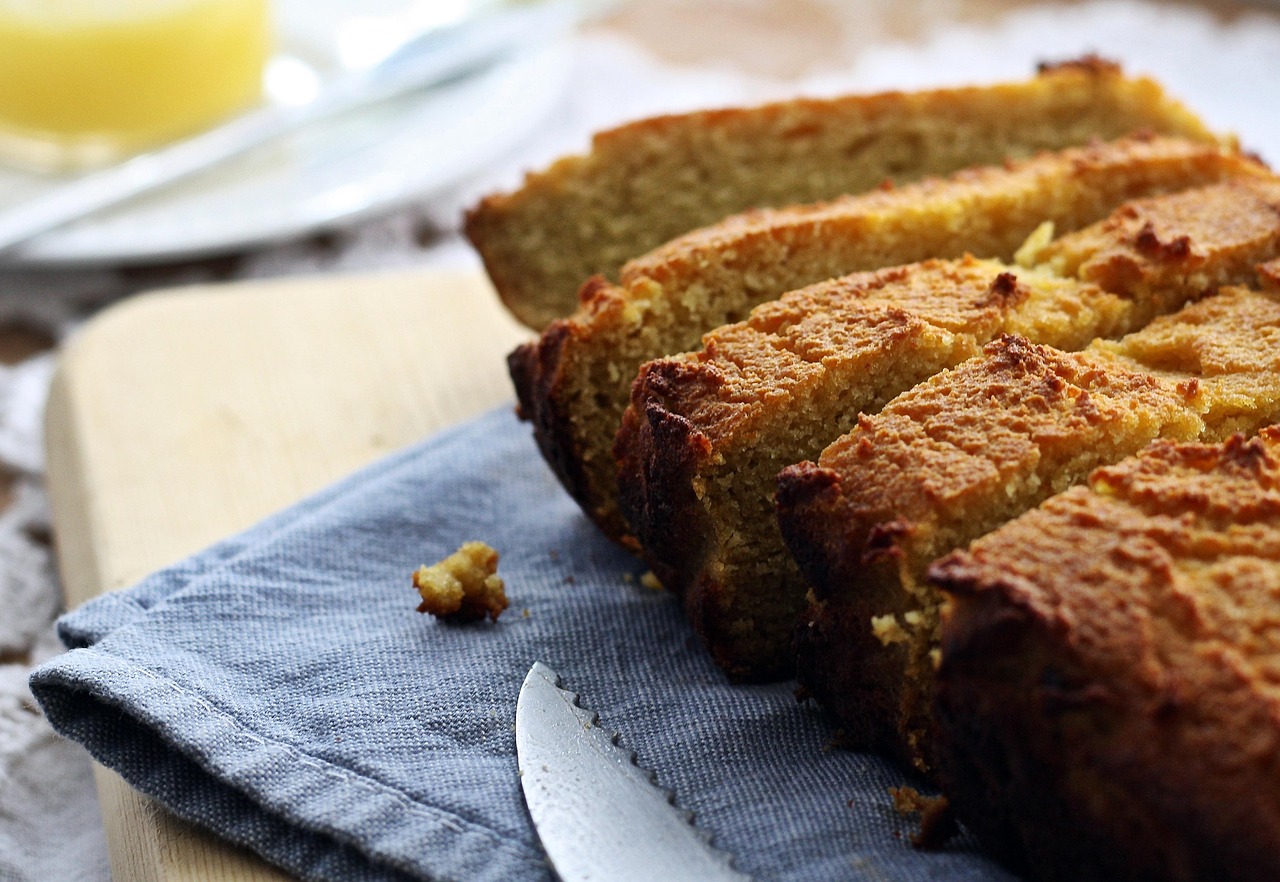
Welcome, aspiring bakers! Are you ready to dive into the wonderful world of homemade bread, even with dietary restrictions? This comprehensive guide will walk you through creating a perfect loaf of Gluten Free And Dairy Free Bread Recipe.
Forget dry, crumbly, or flavorless gluten-free options; our recipe is designed to be moist, tender, and incredibly satisfying. We know that starting out can feel daunting, but this is one of the most easy baking recipes you’ll find, specifically crafted with baking tips for beginners in mind. Get ready to impress yourself and your loved ones with a warm, fresh loaf that caters to everyone’s needs. Let’s make some magic in the kitchen!
Ingredients List
Gathering your ingredients is the first step to baking success. Accuracy is key, especially with gluten-free baking!
| Ingredient | Quantity | Unit |
|---|---|---|
| Warm Water (105-115°F / 40-46°C) | 1 ½ | cups |
| Active Dry Yeast | 2 ¼ | teaspoons |
| Granulated Sugar | 1 | tablespoon |
| Gluten-Free All-Purpose Flour Blend (with xanthan gum, or add separately*) | 3 | cups |
| Xanthan Gum (if your flour blend doesn’t contain it) | 1 | teaspoon |
| Salt | 1 | teaspoon |
| Olive Oil (or other neutral oil like canola/sunflower) | ¼ | cup |
| Apple Cider Vinegar | 1 | tablespoon |
*If your gluten-free flour blend does not contain xanthan gum, add 1 teaspoon separately. Most commercial GF blends already include it. Check your flour’s ingredient list!
Step-by-Step Instructions
Follow these detailed steps carefully, and you’ll be enjoying homemade gluten-free, dairy-free bread in no time!
Step 1: Activate the Yeast (The “Proof” is in the Pudding!)
- In a large mixing bowl, pour in 1 ½ cups of warm water. The temperature is crucial here – it should feel like a warm bath, not hot. If it’s too hot, it will kill the yeast; too cold, and the yeast won’t activate. Aim for 105-115°F (40-46°C). A kitchen thermometer is your best friend for beginners!
- Sprinkle the 1 tablespoon of granulated sugar and 2 ¼ teaspoons of active dry yeast over the warm water.
- Give it a gentle stir and let it sit for 5-10 minutes. This is called “proofing” the yeast. You’ll know it’s working when a foamy, bubbly layer forms on top. If it doesn’t foam, your yeast might be old, or your water temperature was off. Don’t proceed until you see foam – try again with fresh yeast if needed!
Step 2: Combine Dry Ingredients
- While your yeast is proofing, in a separate medium bowl, whisk together the 3 cups of gluten-free all-purpose flour blend, 1 teaspoon of salt, and if your blend doesn’t include it, the 1 teaspoon of xanthan gum. Whisking thoroughly ensures everything is evenly distributed, which is important for the bread’s structure.
Step 3: Mix the Dough (It’s Different from Wheat Dough!)
- Once your yeast mixture is foamy, add the ¼ cup of olive oil and 1 tablespoon of apple cider vinegar to it.
- Gradually add the dry flour mixture to the wet ingredients in the large mixing bowl.
- Using a stand mixer with a paddle attachment or a hand mixer, mix on low speed for 1 minute, then increase to medium speed and mix for another 3-4 minutes. Unlike traditional wheat dough, gluten-free bread dough is often quite wet and sticky – more like a thick batter or soft cookie dough than a traditional bread dough. Do not expect it to form a smooth, elastic ball. Scrape down the sides of the bowl often to ensure all ingredients are well combined. Over-mixing gluten-free dough can sometimes make it tough, so stick to the recommended time.
Step 4: Prepare for Rising
- Lightly grease a 9×5 inch (23×13 cm) loaf pan with oil or line it with parchment paper, leaving an overhang on the long sides to help lift the bread out later.
- Spoon the sticky dough into the prepared loaf pan. Use a wet spatula or your wet hands to gently smooth the top of the dough. This helps create a nice, even crust.
Step 5: The First Rise (Patience is a Virtue!)
- Cover the loaf pan loosely with a clean kitchen towel or plastic wrap (lightly oiled to prevent sticking).
- Place the pan in a warm, draft-free place for 45-60 minutes, or until the dough has nearly doubled in size. A good spot could be a slightly warm oven (turned off!), near a sunny window, or in a microwave (turned off!) with a cup of hot water next to it to create a warm, humid environment. **This rise is crucial for light, airy bread.** Don’t rush it!
Step 6: Preheat and Bake
- About 15-20 minutes before the end of the rising time, preheat your oven to **375°F (190°C)**.
- Once the dough has risen, carefully place the loaf pan into the preheated oven.
- Bake for 45-55 minutes. The bread should be golden brown on top and sound hollow when tapped on the bottom. If the top is browning too quickly, you can loosely tent it with aluminum foil for the last 15-20 minutes of baking.
- **Common mistake for beginners:** Opening the oven door too early. Resist the urge! The internal temperature needs to stabilize. For ultimate assurance, you can use an instant-read thermometer; the internal temperature should reach 200-210°F (93-99°C).
Step 7: Cool and Enjoy!
- Once baked, remove the loaf pan from the oven.
- Immediately turn the bread out onto a wire cooling rack. This prevents the bottom from getting soggy.
- Let the bread cool completely for at least 1-2 hours before slicing. This is perhaps the hardest, but most important, step in gluten-free baking! Slicing hot gluten-free bread can make it gummy and compromise its texture. The structure sets as it cools.
- Once cool, slice, serve, and enjoy your delicious homemade gluten-free and dairy-free bread!
Tips & Tricks for Gluten-Free Baking Success
Gluten-free baking has its own set of rules, but with these tips, you’ll master it in no time!
- Measure Accurately: Especially with gluten-free flours, precision is key. Use a kitchen scale for flour if possible (1 cup GF flour blend is typically around 120-140g, but check your blend’s packaging). Otherwise, spoon flour into your measuring cup and level it off with a straight edge. Don’t pack it down!
- Warmth for Rising: Yeast loves warmth. If your kitchen is cool, place the dough in a slightly warm (but OFF!) oven with a pan of hot water on the bottom rack to create a cozy, humid environment.
- Don’t Overmix (But Mix Thoroughly): Gluten-free dough doesn’t develop gluten, so you’re not looking for elasticity. Mix just until combined and smooth. However, ensure there are no dry pockets of flour left.
- Patience is a Virtue: Especially with the cooling process. Resist the urge to slice hot bread! It needs time to set its structure and prevent a gummy texture.
- Storage: Once completely cooled, store your bread in an airtight container at room temperature for 2-3 days, or slice and freeze for longer storage. Thaw slices in a toaster or microwave for fresh taste.
- Experiment with Add-ins: Feel free to add seeds (sunflower, pumpkin, flax), dried herbs (rosemary, thyme), or even a touch of garlic powder to the dry ingredients for different flavor profiles.
Essential Baking Tools
Having the right tools makes all the difference in your baking journey. Here are some essentials:
- Mixing Bowl
- Whisk
- Baking Pan (9×5 inch loaf pan)
- Measuring Cups
- Spatula
- Kitchen thermometer (for water temperature)
- Wire cooling rack
Nutrition Info (Estimated per slice, 12 slices per loaf)
Please note: These are estimated values and can vary based on specific brands of ingredients used. For precise information, a professional analysis is recommended.
| Nutrient | Amount per serving |
|---|---|
| Calories | 180-200 kcal |
| Carbohydrates | 35-40 g |
| Protein | 3-4 g |
| Fat | 4-6 g |
| Fiber | 2-3 g |
| Sugar | 2-3 g |
Frequently Asked Questions (FAQs)
Q: Can I use a different gluten-free flour blend?
A: Yes, but results may vary slightly. Different blends have different compositions (rice flour, tapioca, potato starch, etc.) and absorbency. Ensure your blend contains xanthan gum, or add it separately as specified in the recipe. Starting with a trusted all-purpose gluten-free blend designed for baking is best for beginners.
Q: My yeast didn’t foam. What went wrong?
A: This is usually due to the water temperature being too hot (killing the yeast) or too cold (not activating it). Also, check the expiration date of your yeast; old yeast won’t activate. Start over with fresh yeast and ensure your water is between 105-115°F (40-46°C).
Q: How do I know when the bread is fully baked?
A: The bread should be golden brown on top and along the sides. When you tap the bottom of the loaf, it should sound hollow. For the most accurate measure, an instant-read thermometer inserted into the center of the loaf should read between 200-210°F (93-99°C).
Q: Can I make this bread in a bread machine?
A: While this recipe is designed for oven baking, many gluten-free bread machines have specific “gluten-free” cycles that might work. You’d typically add wet ingredients first, then dry, and sometimes a specific order for yeast. You might need to adjust liquid amounts slightly depending on your machine and flour blend. Always refer to your bread machine’s manual for gluten-free settings and recommendations.
Q: How should I store leftover gluten-free bread?
A: Once completely cooled, store the bread in an airtight container or a bread bag at room temperature for up to 2-3 days. For longer storage, slice the loaf and freeze individual slices in a freezer-safe bag or container for up to 2-3 months. You can then toast or microwave slices as needed.
Conclusion
Congratulations, baker! You’ve just created a delicious, homemade Gluten Free And Dairy Free Bread Recipe that is sure to become a staple in your kitchen. We hope this beginner-friendly guide has demystified gluten-free baking and shown you just how rewarding it can be. Don’t be afraid to experiment and make this recipe your own. Enjoy the incredible aroma and taste of freshly baked bread. Happy baking!