Welcome, fellow baking enthusiasts! If you’ve been searching for that perfect cozy treat that tastes like a warm hug, but without the gluten, you’ve landed in the right spot. This Gluten Free Coffee Cake Recipe is not just incredibly delicious with its tender crumb and irresistible cinnamon streusel topping, but it’s also design specifically for those new to the kitchen. We believe that easy baking recipes should be accessible to everyone, and that’s why we’ve packed this post with all the essential baking tips for beginners you’ll need to succeed. Get ready to impress yourself and your loved ones with a coffee cake that’s so good, no one will guess it’s gluten-free! Let’s dive into making some magic.
Ingredients You’ll Need
Gathering all your ingredients before you start is a golden rule for stress-free baking. Make sure everything is measured accurately for the best results!
For the Cinnamon Streusel Topping:
| Quantity | Unit | Ingredient |
|---|---|---|
| ½ | cup | Gluten-Free All-Purpose Flour Blend (with xanthan gum) |
| ¼ | cup | Granulated Sugar |
| ¼ | cup | Light Brown Sugar, packed |
| 1 | teaspoon | Ground Cinnamon |
| ¼ | cup (4 tablespoons) | Unsalted Butter, very cold and cubed |
For the Gluten-Free Coffee Cake:
| Quantity | Unit | Ingredient |
|---|---|---|
| 1 ½ | cups | Gluten-Free All-Purpose Flour Blend (with xanthan gum) |
| 1 | cup | Granulated Sugar |
| 1 ½ | teaspoons | Baking Powder |
| ½ | teaspoon | Salt |
| ½ | cup (1 stick) | Unsalted Butter, softened to room temperature |
| 2 | large | Eggs, at room temperature |
| ½ | cup | Sour Cream (or plain full-fat Greek yogurt), at room temperature |
| 1 | teaspoon | Vanilla Extract |
| ¼ | cup | Milk (any kind), at room temperature |
For the Optional Vanilla Glaze:
| Quantity | Unit | Ingredient |
|---|---|---|
| 1 | cup | Powdered Sugar (confectioners’ sugar) |
| 1-2 | tablespoons | Milk or Water |
| ¼ | teaspoon | Vanilla Extract |
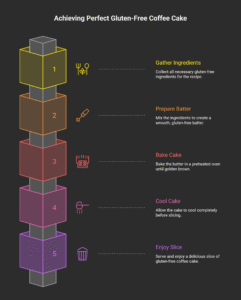
Step-by-Step Baking Instructions for Beginners
Follow these detailed steps carefully, and you’ll be enjoying a perfect slice of gluten-free coffee cake in no time! We’ve included plenty of tips to guide you through.
Step 1: Get Prepped and Preheat Your Oven
- Start by preheating your oven to 350°F (175°C). This ensures your oven is at a consistent temperature when the cake goes in, which is crucial for even baking and proper rising. A consistently hot oven prevents the cake from undercooking or sinking.
- Grease an 8×8 inch (or 9×9 inch) square baking pan with butter or non-stick cooking spray. For easier removal, you can also line the bottom with parchment paper, leaving an overhang on the sides. These “handles” make it simple to lift the cooled cake out of the pan without it breaking apart.
Step 2: Prepare Your Delicious Streusel Topping
The streusel is what makes coffee cake so special, providing that delightful crumbly, cinnamony texture. Let’s get it right!
- In a medium bowl, combine the ½ cup gluten-free flour blend, ¼ cup granulated sugar, ¼ cup packed light brown sugar, and 1 teaspoon ground cinnamon. Whisk them together thoroughly until they are well combined and there are no lumps of brown sugar. This ensures the cinnamon and sugars are evenly distributed.
- Add the ¼ cup of very cold, cubed unsalted butter to the dry ingredients. Now, here’s the fun part: using your fingertips, a pastry blender, or two knives, cut the butter into the flour mixture.
- Beginner Tip: You want to work quickly to prevent the butter from melting from the warmth of your hands. The colder the butter, the flakier your streusel will be. Keep breaking down the butter until the mixture resembles coarse crumbs, with some pea-sized pieces of butter still visible. This is what creates that lovely, crumbly, and slightly crisp texture after baking. If your streusel feels too soft or warm, pop it in the fridge for 10-15 minutes before using. Set this bowl aside.
Step 3: Mix the Wet Ingredients for the Coffee Cake Batter
Room temperature ingredients are key for a smooth, emulsified batter. Don’t skip this critical step!
- In a large mixing bowl, using an electric mixer (handheld or stand mixer with paddle attachment), cream together the ½ cup (1 stick) softened unsalted butter and 1 cup granulated sugar on medium speed. Beat for about 2-3 minutes until the mixture is light, fluffy, and pale in color. This process incorporates air into the butter and sugar, which contributes significantly to a tender and light cake texture.
- Add the 2 large room temperature eggs, one at a time, beating well after each addition until fully incorporated. Scrape down the sides of the bowl with a spatula to ensure everything is fully combined and no unmixed ingredients are left behind.
- Stir in the ½ cup room temperature sour cream and 1 teaspoon vanilla extract. Mix on low speed until just combined. The mixture might look slightly curdled at this point, but don’t worry, this is normal and it will smooth out once the dry ingredients are added.
- Beginner Tip: If your butter or eggs aren’t at room temperature, you can soften butter quickly by cutting it into small pieces and letting it sit on the counter for 15-20 minutes, or by microwaving for 5-10 seconds (be careful not to melt it completely). For eggs, place them in a bowl of warm (not hot) water for 5-10 minutes. This helps them incorporate better into the batter, leading to a smoother consistency.
Step 4: Combine Wet and Dry Ingredients
This step requires a gentle touch, especially with gluten-free flour, to avoid a dense cake.
- In a separate medium bowl, whisk together the 1 ½ cups gluten-free all-purpose flour blend, 1 ½ teaspoons baking powder, and ½ teaspoon salt. Ensure these are thoroughly mixed to distribute the leavening evenly throughout the flour. This is important for an even rise.
- Now, it’s time to combine the wet and dry ingredients. Add about one-third of the dry flour mixture to the wet butter mixture, and mix on low speed until just barely combined.
- Pour in half of the ¼ cup milk, and mix again until just combined.
- Repeat this process: add another third of the dry ingredients, mix, then the remaining milk, mix, and finally the last third of the dry ingredients.
- Beginner Tip: The most crucial part here is to not overmix. Mix only until the flour streaks have disappeared. Overmixing gluten-free flour can sometimes lead to a crumbly or tough texture, even without the gluten development issue! Stop mixing as soon as the last bit of flour is incorporated. A few small lumps are perfectly fine and will bake out.
Step 5: Assemble and Bake Your Coffee Cake
Almost there! The layering is simple but effective, creating beautiful swirls of streusel.
- Pour about half of the coffee cake batter into your prepared baking pan and spread it evenly with a spatula. Don’t worry if it’s not perfectly smooth; it will level out in the oven.
- Sprinkle about half of your prepared streusel topping evenly over the batter. Make sure to get it to the edges for maximum streusel per bite!
- Carefully dollop the remaining cake batter over the streusel layer. You can use two spoons or a small ice cream scoop. Gently spread it out as best you can without disturbing the streusel too much underneath. It’s okay if some streusel peaks through.
- Sprinkle the remaining streusel topping generously over the top of the cake batter. Gently press it down lightly if you wish, but it’s not strictly necessary.
- Place the pan in your preheated oven. Bake for 35-45 minutes.
- Beginner Tip: To check for doneness, insert a wooden skewer or toothpick into the center of the cake. If it comes out clean or with a few moist crumbs attached (but no wet batter), your cake is done! If it’s still wet, bake for another 3-5 minutes and check again. Avoid opening the oven door too frequently, especially in the first 25 minutes, as this can cause the cake to sink due to temperature fluctuations.
- Once baked, remove the cake from the oven and let it cool in the pan on a wire rack for at least 15-20 minutes before attempting to remove it. This allows the cake to set and firm up, preventing it from falling apart when you handle it.
Step 6: Prepare and Drizzle the Optional Vanilla Glaze
A simple glaze adds a lovely finish, extra sweetness, and a touch of elegance!
- While the cake cools, in a small bowl, whisk together the 1 cup powdered sugar, 1-2 tablespoons milk/water, and ¼ teaspoon vanilla extract until smooth. Start with 1 tablespoon of liquid and add more, a tiny bit at a time (like ½ teaspoon), until you reach your desired drizzling consistency. It should be thick enough to cling to the spoon but thin enough to drizzle.
- Once the cake has cooled completely (or is just slightly warm, if you prefer a glaze that melts a little), drizzle the glaze over the top using a spoon in a zig-zag pattern or by transferring it to a small Ziploc bag, snipping off a tiny corner, and piping it.
- Slice, serve, and enjoy your amazing homemade **Gluten Free Coffee Cake Recipe**!
Pro Tips & Tricks for Gluten-Free Baking Success
Even seasoned bakers learn new things, and these tips will help you master this recipe and more!
- Room Temperature Matters: Ensure butter, eggs, and sour cream are at room temperature. This allows them to cream together smoothly, creating an emulsified batter that traps air, leading to a lighter, more even cake texture. Cold ingredients can cause a lumpy, separated batter that doesn’t rise as well.
- Measure Flour Correctly: For accurate results, always “spoon and level” your flour. Use a spoon to lightly scoop flour into your measuring cup, then level off the top with a straight edge (like the back of a knife). Don’t pack it down or scoop directly from the bag, as this can add too much flour, leading to a dry and dense cake.
- Don’t Overmix the Batter: With gluten-free flours, overmixing can still lead to a tough or crumbly texture, even without the gluten development issue. Mix only until the ingredients are just combined and no dry streaks of flour remain. A few small lumps are perfectly fine and will bake out.
- Use a Good Quality Gluten-Free Flour Blend: Not all GF flours are created equal. Look for an all-purpose blend that specifically states it’s for baking or contains xanthan gum (which helps mimic gluten’s elasticity and provides structure). If your blend doesn’t have xanthan gum, add ½ teaspoon to this recipe.
- Check Oven Temperature: Ovens can vary significantly! If you find your bakes are consistently under or overcooked, consider getting an inexpensive oven thermometer to check your oven’s accuracy. This simple tool can drastically improve your baking results.
- Cool Completely Before Slicing: While tempting to dive in, letting the cake cool completely (or at least mostly) allows it to set up properly. Slicing a hot cake can cause it to crumble or fall apart, especially with delicate gluten-free textures. Patience is a virtue here!
- Storage: Store leftover coffee cake tightly covered at room temperature for up to 2-3 days, or in the refrigerator for up to 5 days. You can also freeze individual slices for longer storage (up to 3 months). Wrap slices tightly in plastic wrap and then foil, thawing at room temperature when ready to enjoy.
Essential Baking Tools for Your Kitchen
Having the right tools makes all the difference for a smooth baking experience. Here are some basics we recommend to make this recipe a breeze:
- Mixing Bowl Set (various sizes are helpful!)
- Whisk
- 8×8 or 9×9 Inch Square Baking Pan
- Measuring Cups and Spoons
- Rubber Spatula (for scraping bowls)
- Electric Mixer (handheld or stand mixer)
- Parchment Paper (optional, but highly recommended for easy cake removal)
- Wire Cooling Rack
- Pastry Blender or two knives (for streusel)
Estimated Nutrition Information (per serving)
Please note that this is an estimate based on average ingredient values for one of 12 servings and may vary depending on specific brands, exact measurements used, and whether you include the glaze.
| Nutrient | Amount |
|---|---|
| Calories | 370 kcal |
| Carbohydrates | 55 g |
| Protein | 4 g |
| Fat | 16 g |
| Saturated Fat | 9 g |
| Fiber | 1 g |
| Sugar | 38 g |
Frequently Asked Questions (FAQs)
Got questions? We’ve got answers to help you troubleshoot and customize your baking adventure!
- Q: Can I make this coffee cake dairy-free?
- A: Yes! You can substitute the unsalted butter with a good quality dairy-free butter alternative (choose sticks, not spreads, for best results). For sour cream, use a dairy-free sour cream alternative or a plain, unsweetened dairy-free Greek yogurt. For milk, any plant-based milk (almond, soy, oat) will work perfectly. Just ensure your gluten-free flour blend is also dairy-free if needed for strict dietary requirements.
- Q: Why is my gluten-free coffee cake dry?
- A: The most common culprits for a dry cake are over-baking or using too much flour. Make sure to “spoon and level” your flour accurately, and use an accurate oven thermometer to ensure your oven isn’t running too hot. Always check for doneness at the earliest recommended baking time (e.g., 35 minutes) with the toothpick test.
- Q: Can I prepare the batter ahead of time?
- A: We generally recommend mixing the cake batter just before baking for the best results, as the leavening agents (baking powder) start working once combined with wet ingredients. If left too long, the cake might not rise as well. However, you can prepare the streusel topping a day
3 thoughts on “Gluten Free Coffee Cake Recipe – For Beginners & Experts”