you’ve come to the right place. This recipe is specifically designed with baking tips for beginners in mind, guiding you through each step with clarity and encouragement. Imagine a soft, tender cake, subtly sweet, and incredibly versatile – that’s our Gypsy Cake! It’s perfect for a cozy afternoon snack, a simple dessert, or even a lovely addition to your breakfast table. Get ready to bake something truly magical!
Ingredients You’ll Need
Gathering your ingredients before you start is a golden rule in baking. This ensures a smooth and stress-free process. Here’s everything you’ll need for our delightful Gypsy Cakes:
| Quantity | Unit | Ingredient |
|---|---|---|
| 2 ½ | cups | All-purpose flour |
| 1 ½ | cups | Granulated sugar |
| 1 | tablespoon | Baking powder |
| ½ | teaspoon | Salt |
| 1 | cup | Whole milk (or buttermilk for extra tenderness) |
| ½ | cup | Vegetable oil (or melted unsalted butter, cooled) |
| 2 | large | Eggs, at room temperature |
| 2 | teaspoons | Vanilla extract |
| 1 | tablespoon | Lemon zest (optional, for a brighter flavor) |
Step-by-Step Baking Instructions
Don’t be intimidated! We’ll go through each step slowly and clearly. Follow these instructions, and you’ll have beautiful Gypsy Cakes in no time.
1. Preparation is Key!
- Preheat Your Oven: Start by preheating your oven to 350°F (175°C). This is crucial for even baking. If you put your batter into a cold oven, your cakes might not rise properly.
- Prepare Your Baking Pan: Lightly grease and flour a 9×13 inch baking pan, or line a 12-cup muffin tin with paper liners. If using a loaf pan (8×4 or 9×5 inch), you might need two and adjust baking time. Beginner Tip: Greasing and flouring means rubbing a thin layer of butter or shortening on the inside of the pan, then dusting it with flour, tapping out any excess. This prevents sticking!
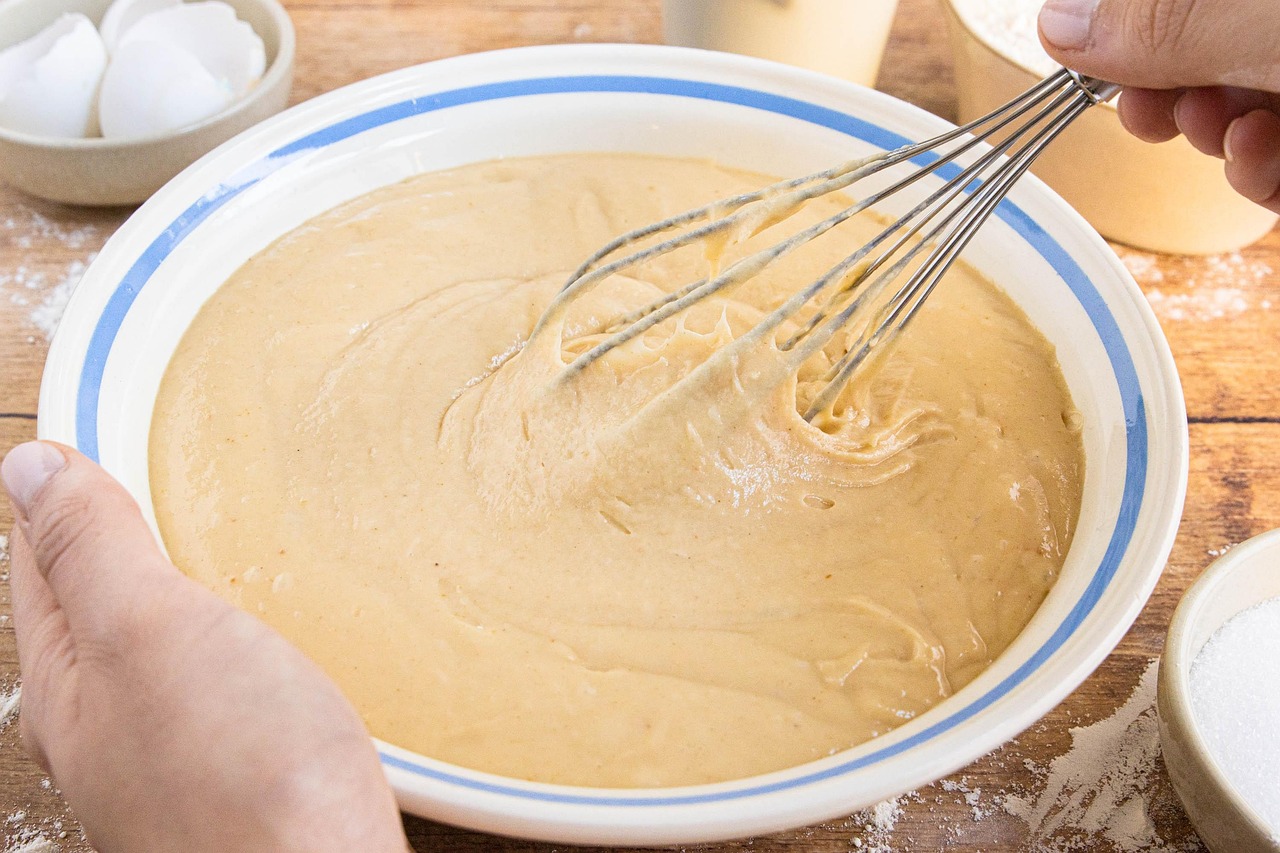
2. Mixing Your Gypsy Cakes
- Combine Dry Ingredients: In a large mixing bowl, whisk together the all-purpose flour, granulated sugar, baking powder, and salt. Why whisk? This distributes the leavening agents (baking powder) evenly, ensuring your cake rises uniformly.
- Mix Wet Ingredients: In a separate medium bowl, whisk together the milk (or buttermilk), vegetable oil (or melted butter), eggs, and vanilla extract. If you’re using lemon zest, add it here too. Beginner Tip: Make sure your eggs are at room temperature. This helps them incorporate better into the batter and creates a smoother, more emulsified mixture. You can quickly warm cold eggs by placing them in a bowl of warm (not hot!) water for 5-10 minutes.
- Combine Wet and Dry: Pour the wet ingredients into the dry ingredients. Stir gently with a spatula or wooden spoon until just combined. Crucial Beginner Tip: Do NOT overmix! Overmixing develops the gluten in the flour too much, leading to a tough, dense cake. A few lumps are perfectly fine and even desirable. Stop mixing as soon as you no longer see streaks of dry flour.
3. Baking to Golden Perfection
- Pour the Batter: Pour the batter evenly into your prepared baking pan or divide it among the muffin cups. If using a large pan, spread it out gently.
- Bake! Place the pan in the preheated oven.
- For a 9×13 inch cake: Bake for 25-35 minutes.
- For muffins: Bake for 20-25 minutes.
- For a loaf cake: Bake for 45-55 minutes.
How to tell if it’s done: The cake should be golden brown, and a wooden skewer or toothpick inserted into the center should come out clean, or with only a few moist crumbs attached. Common Mistake: Opening the oven door too early can cause your cake to sink! Try to wait until at least two-thirds of the estimated baking time has passed before checking.
4. Cooling and Serving
- Cool in the Pan: Once baked, remove the pan from the oven and let the cake cool in the pan for about 10-15 minutes. This allows the cake to set and prevents it from breaking when you remove it.
- Transfer to a Wire Rack: After 10-15 minutes, carefully invert the cake onto a wire cooling rack to cool completely. If it’s a loaf or sheet cake, you might need to place another rack on top and flip them together. Why cool on a wire rack? This allows air to circulate around the entire cake, preventing the bottom from becoming soggy.
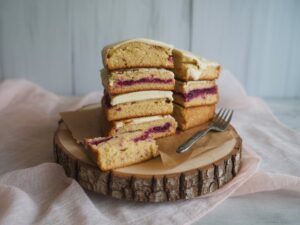
- Serve and Enjoy: Once completely cooled, slice and serve your delicious Gypsy Cakes! They are wonderful plain, with a dusting of powdered sugar, or even a simple glaze.
Pro Tips for Perfect Gypsy Cakes
Baking is a science, but a fun one! Here are some extra tips to ensure your Gypsy Cakes turn out perfectly every single time, even if you’re a novice:
- Room Temperature Ingredients: We mentioned it for eggs, but it applies to milk and butter too (if using). Room temperature ingredients emulsify better, creating a smoother, more uniform batter and a finer crumb in your cake.
- Measure Flour Correctly: Don’t scoop flour directly from the bag with your measuring cup! This compacts the flour, leading to too much being used. Instead, spoon the flour into your measuring cup and then level it off with the back of a knife. This is called the “spoon and level” method.
- Don’t Overbake: An overbaked cake is a dry cake. Start checking for doneness at the lower end of the baking time range. A clean toothpick is your best friend here!
- Customize Your Cakes: This recipe is a fantastic base! Feel free to add 1/2 cup of chocolate chips, blueberries, or finely chopped nuts to the batter just before baking. Gently fold them in to avoid overmixing.
- Storage: Store cooled Gypsy Cakes in an airtight container at room temperature for up to 3-4 days. They also freeze beautifully for up to 2 months. Thaw at room temperature.
- Buttermilk Boost: If you don’t have buttermilk but want that extra tenderness, you can make your own! Add 1 tablespoon of lemon juice or white vinegar to a 1-cup measuring cup, then fill the rest with whole milk. Let it sit for 5-10 minutes until it slightly curdles.
Essential Baking Tools for Your Kitchen
Having the right tools makes all the difference, especially when you’re starting out. Here are some basics that will serve you well for this recipe and many more:
- Mixing Bowl
- Whisk
- Baking Pan (9×13 inch, muffin tin, or loaf pan)
- Measuring Cups
- Spatula (or wooden spoon)
- Measuring spoons
- Wire cooling rack
- Oven mitts
Nutrition Information (Per Serving)
Here’s an estimated nutritional breakdown for one serving of Gypsy Cake (assuming 12 servings from a 9×13 inch cake). Please remember these are approximations and can vary based on exact ingredients and portion sizes.
| Nutrient | Amount |
|---|---|
| Calories | 320 kcal |
| Carbohydrates | 48g |
| Protein | 4g |
| Fat | 13g |
| Fiber | 1g |
| Sugar | 28g |
Frequently Asked Questions
Can I substitute ingredients in this Gypsy Cakes Recipe?
Yes, to a certain extent! You can swap vegetable oil for melted butter (cooled) for a richer flavor, or vice versa. Whole milk can be replaced with buttermilk for a tangier, more tender cake. For dairy-free, use a plant-based milk (like almond or soy) and ensure your oil choice is suitable. However, for best results, stick to the recipe as much as possible, especially for flour and leavening agents.
How do I know if my Gypsy Cake is baked through?
The best way is the “toothpick test.” Insert a wooden skewer or toothpick into the center of the cake. If it comes out clean or with only a few moist crumbs attached, your cake is done. If it’s wet with batter, it needs more time.
My cake sank in the middle, what went wrong?
A sinking cake can be due to a few reasons: opening the oven door too early (before the cake has set), incorrect oven temperature (too high or too low), overmixing the batter, or using too much leavening agent. Ensure your oven temperature is accurate with an oven thermometer and resist the urge to peek!
How should I store leftover Gypsy Cakes?
Once completely cooled, store your Gypsy Cakes in an airtight container at room temperature for up to 3-4 days. For longer storage, you can wrap individual slices or the whole cake tightly in plastic wrap and then foil, and freeze for up to 2 months. Thaw at room temperature before serving.
Can I make these into cupcakes instead of a sheet cake?
Absolutely! This recipe works wonderfully as cupcakes. Simply line a 12-cup muffin tin with paper liners, fill each cup about two-thirds full, and bake for approximately 20-25 minutes, or until a toothpick inserted into the center comes out clean. Adjust baking time as needed.
Happy Baking!
And there you have it your very own delicious Gypsy Cakes Recipe! You’ve just created something wonderful from scratch, and that’s a fantastic achievement. Remember, baking is all about practice and having fun. Don’t worry if your first attempt isn’t absolutely perfect; every bake is a learning experience. These humble, comforting cakes are a testament to simple ingredients coming together to create something truly special.
We hope you enjoy sharing these delightful cakes with your loved ones. We’d love to hear how your Gypsy Cakes turned out – feel free to share your baking journey in the comments below!