Dreaming of warm, fluffy bread with that signature sweet, tropical tang? You’ve come to the right place! If you’re a beginner in the kitchen or just looking for incredibly easy baking recipes, your bread maker is about to become your best friend. This comprehensive guide will walk you through creating a delicious Hawaiian bread loaf or rolls, using the magic of your bread machine for most of the hard work. Forget complicated kneading and endless waiting – we’re making baking approachable, fun, and absolutely delicious. Get ready to impress your family and friends with this irresistible, golden-brown treat. We’ll cover everything from precise measurements to essential baking tips for beginners, ensuring your first (or fiftieth!) loaf is a resounding success!

There’s nothing quite like the aroma of freshly baked bread filling your home, and with this Hawaiian Bread Recipe For Bread Maker, that dream is closer than ever. Whether you plan to serve it alongside a savory meal, use it for sliders, or simply enjoy it with a smear of butter, this recipe promises a delightful experience. Let’s gather our ingredients and get baking!
Ingredients You’ll Need
Precision is key in baking, even with a bread maker! Measure your ingredients carefully to ensure the best results. Here’s what you’ll need to create your incredible Hawaiian bread:
| Ingredient | Quantity | Unit |
|---|---|---|
| Warm Milk (105-115°F / 40-46°C) | 3/4 | cup |
| Pineapple Juice | 1/4 | cup |
| Large Egg | 1 | |
| Unsalted Butter, melted and cooled slightly | 1/4 | cup |
| Granulated Sugar | 1/4 | cup |
| Salt | 1 | teaspoon |
| Bread Flour | 3 | cups |
| Instant Yeast (or Active Dry Yeast) | 2 | teaspoons |
| For Egg Wash (Optional, for golden crust) | ||
| Large Egg | 1 | |
| Water | 1 | tablespoon |
Step-by-Step Instructions: Your Bread Maker Journey
This recipe is designed to be as straightforward as possible, letting your bread maker handle the bulk of the work. Follow these detailed steps for a perfect Hawaiian bread every time!
Step 1: Prepare Your Ingredients
Before you even touch your bread maker, ensure all your ingredients are measured accurately and at the correct temperature. Warm milk is crucial for activating the yeast, so aim for 105-115°F (40-46°C). If it’s too hot, it will kill the yeast; too cold, and the yeast won’t activate properly. Melt your butter and let it cool slightly – you don’t want to add hot butter to the machine. Having everything ready to go makes the process much smoother.
Step 2: Load Your Bread Machine Pan
This is where the magic begins! The order of ingredients matters for most bread makers to prevent the yeast from activating too early or coming into direct contact with salt/sugar, which can inhibit its growth. Always check your bread maker’s manual, but generally, the order is:
- Liquids First: Pour the warm milk, pineapple juice, beaten egg, and cooled melted butter into the bread machine pan.
- Dry Ingredients: Carefully add the granulated sugar and salt. Then, gently spoon the bread flour over the wet ingredients, creating a mound.
- Yeast on Top: Create a small well or indentation in the center of the flour mound (without touching the liquid below) and add the instant yeast there. This keeps the yeast separate until the mixing cycle begins.
Beginner Tip: Always use a liquid measuring cup for liquids (at eye level) and dry measuring cups/spoons for dry ingredients (levelled off with a straight edge). Never scoop flour directly with your measuring cup; spoon it into the cup and then level it off for accuracy. This prevents compacting the flour and adding too much.
Step 3: Select Your Bread Machine Cycle
Place the bread pan securely back into your bread maker. Close the lid and select the “Dough” cycle (sometimes called “Dough/Pasta” or “Manual Dough”). This cycle typically includes kneading, a rise, and a punch-down, but it won’t bake the bread. The duration usually ranges from 1 hour 30 minutes to 2 hours. Press start and let your machine do its work!
Common Mistake & Fix: If your dough looks too sticky after about 5-10 minutes of kneading, add a teaspoon of flour at a time until it forms a smooth, elastic ball. If it looks too dry and crumbly, add a teaspoon of milk until it comes together. Avoid adding too much at once.
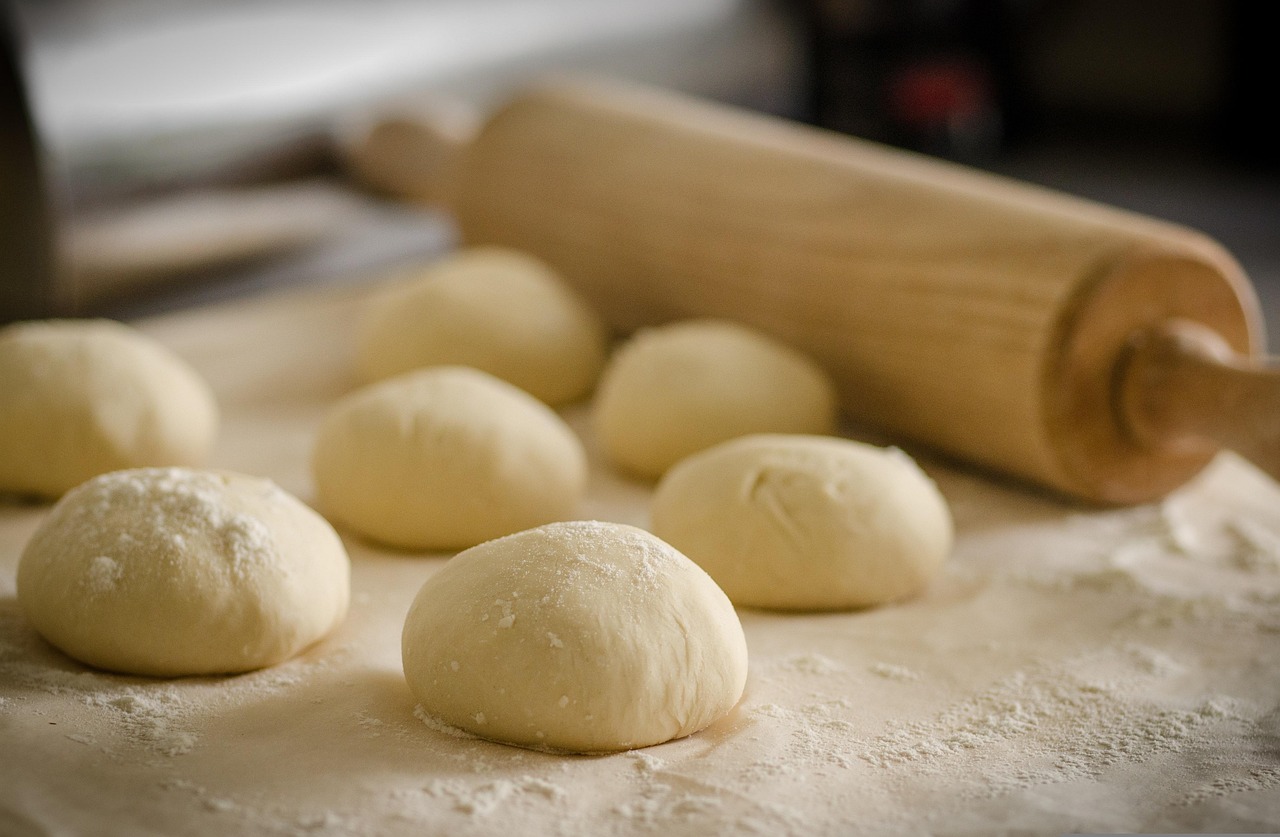
Step 4: Shape Your Hawaiian Bread
Once the “Dough” cycle is complete, the machine will usually beep. Carefully remove the dough from the bread machine pan and transfer it to a lightly floured surface. The dough should be soft, pliable, and slightly tacky.
- For a Loaf: Gently punch down the dough to release the air. Shape it into a rectangular loaf, about the length of your loaf pan. Pinch the seams together at the bottom.
- For Rolls: Gently punch down the dough. Divide it into 12-16 equal pieces. Roll each piece into a smooth ball.
Beginner Tip: Don’t overwork the dough at this stage. A gentle punch down and quick reshape is all that’s needed. Overworking can make the bread tough.
Step 5: Second Rise (Proofing)
Lightly grease your baking pan (a 9×5 inch loaf pan for a loaf, or a 9×13 inch baking dish for rolls). Place your shaped dough (loaf or rolls) into the prepared pan. Cover the pan loosely with plastic wrap or a clean kitchen towel. Let the dough rise in a warm, draft-free place for another 45-60 minutes, or until it has doubled in size. This second rise (proofing) is crucial for a light and airy texture.
Beginner Tip: A good warm spot can be a slightly warmed oven (turn it on for 1 minute, then turn off), or near a sunny window. If your kitchen is cold, this step might take a bit longer.
Step 6: Preheat and Prepare for Baking
About 15 minutes before the second rise is complete, preheat your oven to 375°F (190°C). While the oven preheats, prepare your optional egg wash. In a small bowl, whisk together the remaining large egg with 1 tablespoon of water until well combined. This egg wash will give your bread a beautiful golden, shiny crust.
Step 7: Bake Your Hawaiian Bread
Gently brush the top of your risen dough with the egg wash (if using). Be careful not to deflate the dough! Place the pan in the preheated oven and bake for 25-35 minutes for a loaf, or 18-25 minutes for rolls. The bread is done when it’s golden brown on top and sounds hollow when tapped on the bottom. An internal temperature of 190-200°F (88-93°C) is ideal.
Common Mistake & Fix: If the top starts to brown too quickly, you can loosely tent the bread with aluminum foil for the remaining baking time.
Step 8: Cool and Enjoy!
Once baked, remove the bread from the oven and immediately transfer it from the baking pan to a wire rack. Let it cool completely before slicing or tearing into it. This step is vital for the bread’s texture; slicing hot bread can make it gummy. Cooling allows the internal structure to set properly.
Beginner Tip: Patience is key here! While it’s tempting to dive in, waiting for it to cool will yield the best results. Once cool, slice your loaf or pull apart your rolls and enjoy the taste of the tropics!
Tips & Tricks for Perfect Hawaiian Bread
Even with a bread maker, a few extra pointers can elevate your baking game and ensure consistent success:
- Temperature Control: Yeast is a living organism! Ensure your milk is the correct temperature (105-115°F) – too hot kills it, too cold slows it down. All other ingredients should ideally be at room temperature for optimal dough development.
- Measure Flour Correctly: Don’t scoop flour directly from the bag with your measuring cup. Instead, spoon flour into your measuring cup until overflowing, then level it off with a straight edge (like the back of a knife). This prevents compacting and using too much flour, which can lead to dry bread.
- Check Your Yeast: Ensure your yeast is fresh. If you’re unsure, you can “proof” it separately by mixing it with a little warm water (around 110°F) and a pinch of sugar. If it foams within 5-10 minutes, it’s active.
- Dough Consistency: During the bread maker’s kneading cycle, keep an eye on the dough. It should form a smooth, elastic ball. If it’s too sticky, add flour one tablespoon at a time. If it’s too dry and crumbly, add milk one teaspoon at a time.
- Warm Proofing Environment: For the second rise, a warm, draft-free spot is crucial. If your kitchen is cool, try placing the covered dough in a slightly warm (turned off) oven or even on top of a warm appliance.
- Don’t Open the Oven Too Soon: Resist the urge to open the oven door during the first 15-20 minutes of baking. A sudden drop in temperature can cause the bread to collapse.
- Cool Completely: We know it’s hard, but letting your bread cool completely on a wire rack allows the internal structure to set and prevents a gummy texture when sliced.
Essential Baking Tools
Having the right tools makes all the difference, especially when you’re just starting out. Here are some essentials that will help you master this Hawaiian bread recipe and many others:
- Mixing Bowl (for egg wash or other small prep)
- Whisk (for egg wash)
- Baking Pan (loaf pan for a loaf, or a 9×13 inch dish for rolls)
- Measuring Cups (for both dry and liquid ingredients)
- Spatula (for scraping dough or general use)
- Bread Maker (of course!)
- Kitchen Scale (optional, but highly recommended for precise flour measurement)
- Instant-Read Thermometer (for checking milk temperature and bread doneness)
Nutrition Information (Approximate per serving)
This information is an estimate based on a standard recipe yielding about 16 servings (for rolls) or 12 slices (for a loaf). Actual values may vary based on ingredients and portion size.
| Nutrient | Amount Per Serving (approx.) |
|---|---|
| Calories | 180 kcal |
| Carbohydrates | 30 g |
| Protein | 5 g |
| Fat | 5 g |
| Saturated Fat | 3 g |
| Cholesterol | 25 mg |
| Sodium | 160 mg |
| Fiber | 1 g |
| Sugar | 9 g |
Frequently Asked Questions (FAQs)
Q1: My bread didn’t rise. What went wrong?
There are a few common culprits! The most frequent issues are inactive yeast (check the expiration date or proof it separately next time), milk that was too hot (which kills the yeast) or too cold (which slows it down), or too much salt/sugar directly contacting the yeast. Ensure you’re measuring accurately and your yeast is fresh.
Q2: Can I make this recipe without a bread maker?
Absolutely! You would follow the same ingredient ratios. Instead of the bread machine, you’d combine ingredients in a large mixing bowl, then knead the dough by hand on a floured surface for about 10-15 minutes until it’s smooth and elastic. Then, let it rise in a greased bowl, covered, in a warm place until doubled (about 1-1.5 hours), punch it down, shape, and proceed with the second rise and baking as instructed.
Q3: How should I store Hawaiian bread?
Once completely cooled, store your Hawaiian bread in an airtight container or a large zip-top bag at room temperature for up to 3-4 days. For longer storage, you can slice or roll the bread, wrap it tightly, and freeze for up to 2-3 months. Thaw at room temperature or gently reheat.
Q4: Can I substitute ingredients like milk or butter?
For best results, sticking to the recipe is recommended, especially for beginners. However, you can sometimes use non-dairy milk (like almond or soy) as a 1:1 substitute, though the flavor and texture might be slightly different. For butter, a plant-based butter substitute can work, but avoid oil as it changes the richness significantly. Substituting flour types (e.g., whole wheat) will drastically change the texture and may require liquid adjustments.
Q5: My dough is too sticky or too dry in the bread maker. What do I do?
It’s common for dough consistency to vary slightly due to humidity or minor measurement differences. During the first 5-10 minutes of the kneading cycle, observe your dough:
- Too Sticky: If the dough is sticking excessively to the sides of the pan and not forming a ball, add flour one tablespoon at a time until it cleans the sides of the pan.
- Too Dry/Crumbly: If the dough looks very dry, isn’t coming together, or the bread maker is struggling to mix it, add warm milk one teaspoon at a time until it forms a cohesive ball.
Make small adjustments; a little goes a long way!
Conclusion: Your Hawaiian Bread Masterpiece Awaits!
And there you have it! A comprehensive, beginner-friendly guide to making delightful Hawaiian bread using your trusty bread maker. We hope this detailed recipe and all our extra tips empower you to bake with confidence. There’s truly nothing more satisfying than pulling a warm, golden loaf from the oven that you made yourself.
This sweet, tender bread is perfect for any occasion – from a casual breakfast to a festive dinner side. Don’t be afraid to experiment and make it your own. We encourage you to give this Hawaiian Bread Recipe For Bread Maker a try, and share your delicious results with us! Happy baking, and enjoy your taste of the tropics right from your own kitchen!