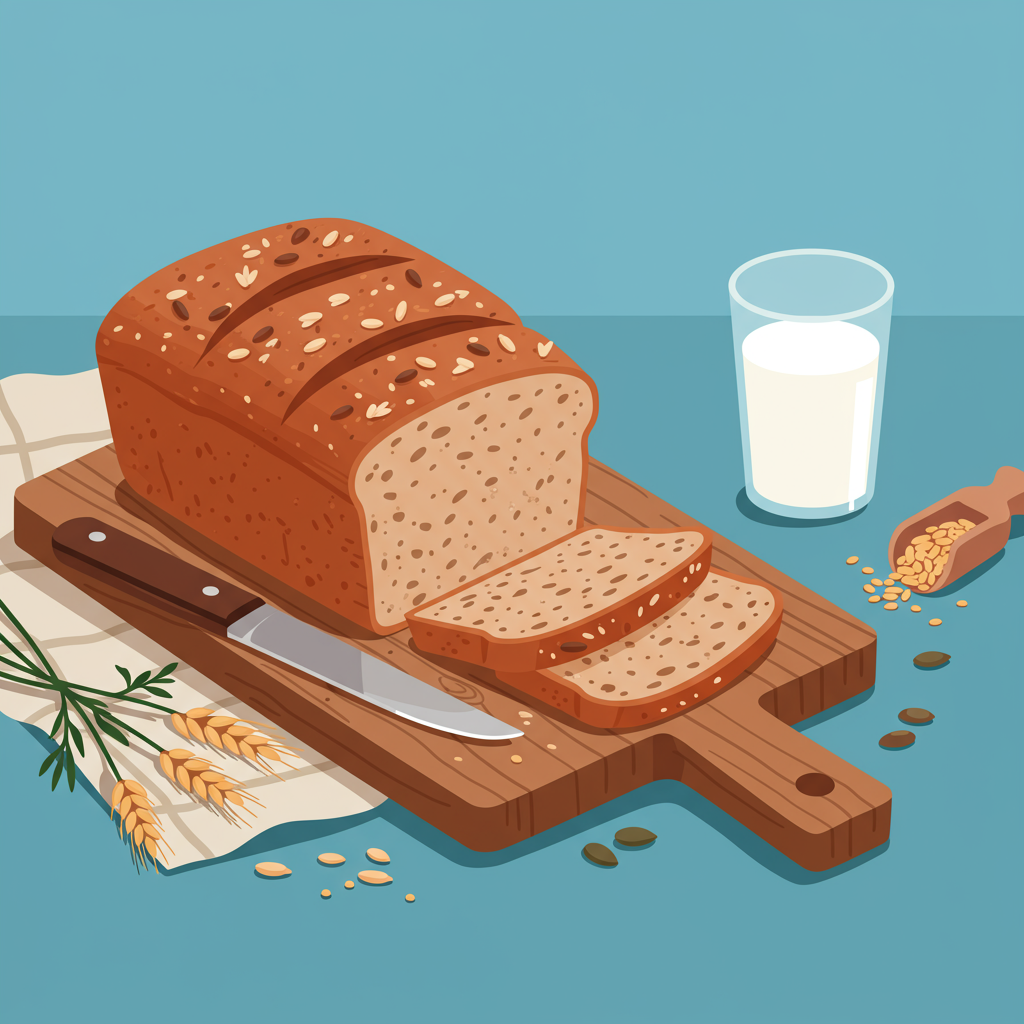
Welcome, aspiring bakers! Are you ready to embark on a delicious journey that’s both rewarding and incredibly healthy? Our High Fiber Bread Recipe is specifically designed for you, whether you’re a complete novice or just looking for more easy baking recipes to add to your repertoire. Forget about bland, store-bought bread packed with preservatives; this recipe will guide you through making a wholesome, hearty loaf right in your own kitchen. We’ll cover all the essential baking tips for beginners, ensuring your first loaf is a resounding success. Get ready to enjoy the incredible aroma of freshly baked bread and boost your daily fiber intake with every slice!
Baking bread from scratch might seem daunting, but we’ve broken down every step into simple, manageable instructions. This high-fiber loaf is not only good for your gut health but also incredibly satisfying to make and even more satisfying to eat. Let’s get started and turn your kitchen into a bakery!
Ingredients You’ll Need
Gather your ingredients! Precision is key in baking, so make sure to measure everything carefully.
| Ingredient | Quantity | Unit |
|---|---|---|
| Warm Water (105-115°F / 40-46°C) | 1 ½ | cups |
| Instant Yeast | 2 ¼ | teaspoons (or 1 packet) |
| Honey or Maple Syrup | 2 | tablespoons |
| Olive Oil (plus extra for bowl) | 2 | tablespoons |
| Salt | 1 ½ | teaspoons |
| Whole Wheat Flour | 2 ½ | cups |
| All-Purpose Flour | 1 ½ | cups (plus more for dusting) |
| Rolled Oats (old-fashioned) | ½ | cup |
| Ground Flaxseed | 2 | tablespoons |
Step-by-Step Instructions for Your First High Fiber Loaf
Follow these detailed steps carefully, and you’ll be pulling a beautiful loaf of bread from your oven in no time!
-
Activate the Yeast: Your Bread’s Engine
In a large mixing bowl (or the bowl of a stand mixer), combine the warm water (ensure it’s not too hot, or it will kill the yeast, and not too cold, or it won’t activate), instant yeast, and honey or maple syrup. Stir gently. Let it sit for 5-10 minutes. You’ll know your yeast is active and happy when it becomes foamy and bubbly on the surface. If it doesn’t foam, your yeast might be old or the water temperature was off, and you should start again with fresh yeast.
-
Add the Wet Ingredients
Once your yeast is frothy, add the olive oil and salt to the mixture. Stir well to combine. The salt is crucial for flavor and regulating yeast activity, but don’t add it directly to the yeast initially as it can hinder activation.
-
Combine Dry Ingredients
In a separate medium bowl, whisk together the whole wheat flour, all-purpose flour, rolled oats, and ground flaxseed. Whisking ensures an even distribution of ingredients, especially the flaxseed and oats, which helps with the final texture of the bread.
-
Mix the Dough: From Shaggy to Shaggy
Gradually add the dry ingredient mixture to the wet yeast mixture, about one cup at a time. Mix with a sturdy wooden spoon or a dough hook on a stand mixer on low speed. Continue mixing until all the flour is incorporated and a shaggy dough forms. At this point, the dough will look a bit rough and sticky – that’s perfectly normal!
-
Knead the Dough: Developing the Gluten (The Muscle of Your Bread)
If using a Stand Mixer:
Attach the dough hook and knead on medium-low speed for 7-10 minutes. The dough should become smoother, more elastic, and pull away from the sides of the bowl. It might still be slightly sticky, but it shouldn’t be excessively wet.
If kneading by Hand (the traditional way!):
Lightly flour a clean work surface. Turn the shaggy dough out onto the floured surface. Knead the dough by folding it towards you, pushing it away with the heel of your hand, rotating it a quarter turn, and repeating. Continue kneading for 10-15 minutes. Resist the urge to add too much extra flour, as this can make your bread dense and dry. A little stickiness is fine; a bench scraper can help manage it. Your dough is properly kneaded when it’s smooth, elastic, and springs back when gently poked with a finger.
-
First Rise (Bulk Fermentation): Let It Proof!
Lightly grease a large clean bowl with olive oil. Place the kneaded dough in the bowl, turning it once to coat the top with oil (this prevents a dry crust from forming). Cover the bowl tightly with plastic wrap or a clean damp kitchen towel. Place the bowl in a warm, draft-free spot. A slightly warm oven (turned off, or just warmed by the pilot light) or a sunny spot on your counter works well. Let the dough rise for 1 to 1 ½ hours, or until it has doubled in size. This is a crucial step – patience is key!
Beginner Tip: To check if it’s doubled, gently poke two fingers into the dough. If the indentations remain, it’s ready. If they spring back quickly, it needs more time.
-
Punch Down and Shape the Loaf
Once the dough has doubled, gently punch it down to release the air. This redistributes the yeast and evens out the temperature. Turn the dough out onto a lightly floured surface. Gently flatten the dough into a rectangle (about 9×12 inches). Starting from one of the longer sides, tightly roll the dough into a log. Pinch the seam closed firmly with your fingers. Tuck the ends under to create a neat loaf shape.
-
Second Rise (Proofing): The Final Stretch
Grease a 9×5 inch loaf pan. Carefully place the shaped dough seam-side down into the prepared loaf pan. Cover the pan loosely with plastic wrap or a damp kitchen towel. Return it to your warm, draft-free spot for another 45-60 minutes, or until the dough has risen significantly and is about 1 inch above the rim of the pan. It should look puffy and light.
Common Mistake: Don’t let it over-proof! If it rises too much, it might collapse in the oven. It should look noticeably risen but not overly airy or fragile.
-
Preheat Your Oven
About 15-20 minutes before the second rise is complete, preheat your oven to 375°F (190°C). If you have a baking stone or steel, place it in the oven to preheat as well for a crispier crust.
-
Bake Your Masterpiece!
Once the oven is preheated and the dough has completed its second rise, carefully place the loaf pan into the preheated oven. Bake for 30-35 minutes, or until the crust is golden brown and the internal temperature reaches 200-210°F (93-99°C) when checked with an instant-read thermometer. For an extra golden crust, you can brush the top with a little milk or an egg wash (one egg beaten with a tablespoon of water) before baking.
-
Cool Down: Patience is a Virtue
Once baked, immediately remove the bread from the loaf pan and place it on a wire cooling rack. This allows air to circulate around the entire loaf, preventing the bottom from becoming soggy. Let the bread cool completely for at least 1-2 hours before slicing. Slicing hot bread can result in a gummy texture. Resist the temptation, it’s worth the wait!
-
Slice and Enjoy!
Once cooled, use a serrated knife to slice your beautiful, homemade high-fiber bread. Enjoy it plain, with your favorite spread, or as a base for healthy sandwiches. You did it!
Tips & Tricks for Beginner Bread Bakers
Baking bread is a craft that gets easier with practice. Here are some extra tips to help ensure your success and build your confidence:
- Check Your Yeast: Always ensure your yeast is fresh. If it doesn’t foam up in the warm water and honey, it’s likely dead, and your bread won’t rise.
- Water Temperature is Crucial: Use a thermometer! Too hot (above 120°F/49°C) will kill the yeast; too cold (below 100°F/38°C) won’t activate it properly. 105-115°F (40-46°C) is the sweet spot.
- Don’t Over-Flour: Adding too much flour during kneading can make your bread dry and dense. A slightly sticky dough is often a good sign of proper hydration. Use just enough flour to prevent sticking.
- The Windowpane Test: For perfectly kneaded dough, take a small piece and gently stretch it. If you can stretch it thin enough to see light through it without tearing (like a windowpane), the gluten is well-developed.
- Create a Warm Proofing Environment: If your kitchen is cool, try placing your dough in a turned-off oven with just the light on, or place the covered bowl in a larger bowl of warm water.
- Listen to Your Dough: The rising times are estimates. Always go by how the dough looks and feels (doubled in size, springy to the touch) rather than strictly by the clock.
- Storage: Once completely cooled, store your bread in an airtight container or bread bag at room temperature for 3-4 days. For longer storage, slice and freeze for up to 3 months.
- Experiment with Add-ins: Once you’re comfortable, try adding other high-fiber ingredients like sunflower seeds, pumpkin seeds, or even a handful of dried cranberries (just be mindful of added sugar if using fruit).
Essential Baking Tools for Your Kitchen
Having the right tools makes all the difference, especially when you’re just starting out. Here are a few essentials:
- Large Mixing Bowl
- Whisk
- 9×5 Inch Loaf Pan
- Measuring Cups and Spoons
- Rubber Spatula or Wooden Spoon
- Instant-Read Thermometer (for water and bread internal temp)
- Bench Scraper (optional, but very helpful for sticky dough)
Estimated Nutrition Information (Per Slice, assuming 12-14 slices per loaf)
Please note: These are approximate values and can vary based on exact ingredient brands and portion sizes.
| Nutrient | Per Serving |
|---|---|
| Calories | ~130-150 kcal |
| Total Carbohydrates | ~25-28g |
| Protein | ~6-7g |
| Total Fat | ~3-4g |
| Dietary Fiber | ~4-5g |
| Sugars | ~1-2g |
Frequently Asked Questions (FAQs) for Beginners
-
Can I use only whole wheat flour?
Yes, you can, but it will result in a denser loaf. Whole wheat flour has more bran and germ, which can interfere with gluten development. If using 100% whole wheat, you might need to increase the water slightly (start with an extra 1-2 tablespoons) and be prepared for a slightly different texture.
-
How do I know if my yeast is active?
When you mix the yeast with warm water and a little sugar (honey/maple syrup in this recipe), it should become bubbly and foamy on the surface after 5-10 minutes. This “proof” shows the yeast is alive and ready to make your bread rise. If there are no bubbles, your yeast is likely dead, and you should discard it and start with fresh yeast.
-
What if my dough isn’t rising?
Several factors can cause this: your yeast might be inactive (see above), the water temperature was too hot or too cold, your kitchen might be too cold (find a warmer spot), or you might have added too much salt directly to the yeast, inhibiting its activity. Ensure your ingredients are fresh and your environment is warm.
-
How long does this high-fiber bread last, and how should I store it?
Once completely cooled, store your bread in an airtight container or a bread bag at room temperature for 3-4 days. For longer storage, you can slice the cooled bread and freeze it in a freezer-safe bag for up to 3 months. Thaw slices as needed, or pop them straight into a toaster!
-
My bread turned out dense. What went wrong?
Common reasons for dense bread include not kneading enough (under-developed gluten), adding too much flour during mixing/kneading, under-proofing (not allowing enough time for the dough to rise), or using inactive yeast. Review the kneading and proofing steps carefully for your next attempt!
Happy Baking!
Congratulations, you’ve now got all the knowledge to bake your very own delicious and nutritious High Fiber Bread Recipe! We hope these detailed instructions and tips have made the process feel approachable and fun. There’s truly nothing quite like the smell and taste of homemade bread.
Don’t worry if your first loaf isn’t perfect; every baker has a learning curve. Keep practicing, trust the process, and you’ll be baking like a pro in no time.