We know that diving into the world of baking can sometimes feel intimidating, especially if you’re searching for easy baking recipes. That’s why we’ve crafted this guide with baking tips for beginners in mind, breaking down every step to ensure your success. From perfectly mashed bananas to the golden-brown crust, you’ll be amazed at how simple it is to create a delicious and healthy loaf that tastes like a dream. Get ready to impress yourself and everyone you share it with!
Ingredients List: What You’ll Need
Gathering your ingredients beforehand, also known as “mise en place,” is a top baking tip for beginners. It makes the entire process smoother and more enjoyable!
| Ingredient | Quantity | Unit |
|---|---|---|
| Very Ripe Bananas, mashed | 3-4 (about 1.5 cups) | Large |
| All-Purpose Flour | 1.5 | Cups |
| Vanilla or Unflavored Protein Powder | 0.5 | Cup |
| Granulated Sugar (or Coconut Sugar) | 0.5 | Cup |
| Brown Sugar, packed | 0.25 | Cup |
| Large Eggs | 2 | |
| Greek Yogurt (plain, full-fat or low-fat) | 0.5 | Cup |
| Melted Unsalted Butter (or Coconut Oil) | 0.25 | Cup |
| Baking Soda | 1 | Teaspoon |
| Baking Powder | 0.5 | Teaspoon |
| Ground Cinnamon | 1 | Teaspoon |
| Salt | 0.5 | Teaspoon |
| Vanilla Extract | 1 | Teaspoon |
| Optional: Chopped Nuts (walnuts, pecans), Chocolate Chips | 0.5-1 | Cup |
Step-by-Step Instructions: Let’s Get Baking!
Follow these detailed steps carefully, and you’ll be a banana bread baking pro in no time!
-
Prepare Your Pan and Preheat Your Oven:
First things first! Preheat your oven to 350°F (175°C). This ensures the oven is at the correct temperature when your batter is ready, which is crucial for even baking. Next, take a standard 9×5-inch loaf pan. Lightly grease it with butter or cooking spray, then dust it with a little flour. This prevents your banana bread from sticking and makes for easy removal. You can also line it with parchment paper, leaving an overhang on the sides – this creates “handles” for lifting the bread out once baked. Beginner Tip: A well-greased and floured pan is your best friend against sticking!
-
Mash Your Bananas:
In a large mixing bowl, take your very ripe bananas (they should have plenty of brown spots – this means they’re sweet and full of flavor!) and mash them thoroughly with a fork or a potato masher. You can leave a few small lumps if you like a chunkier texture, but generally, a smooth consistency works best. Common Mistake: Using unripe bananas will result in less flavor and a denser, less moist bread. Always wait for those brown spots!
-
Combine Wet Ingredients:
To the mashed bananas, add the melted butter (make sure it’s cooled slightly so it doesn’t cook the eggs!), granulated sugar, brown sugar, Greek yogurt, large eggs, and vanilla extract. Whisk everything together until it’s well combined and smooth. The Greek yogurt adds incredible moisture and extra protein, making your bread super tender. Ensure your eggs are at room temperature for better emulsification with other ingredients.
-
Mix Dry Ingredients:
In a separate medium-sized bowl, whisk together the all-purpose flour, protein powder, baking soda, baking powder, ground cinnamon, and salt. Whisking dry ingredients together ensures they are evenly distributed, so you don’t get clumps of baking soda in your final product. Beginner Tip: When measuring flour, spoon it into your measuring cup and then level it off with a straight edge (like the back of a knife) rather than scooping directly from the bag. This prevents compacting the flour and adding too much, which can lead to dry bread.
-
Combine Wet and Dry Mixtures:
Pour the dry ingredient mixture into the wet ingredient mixture. Using a spatula or wooden spoon, gently fold them together until *just* combined. It’s okay if there are a few small streaks of flour – do not overmix! Overmixing develops the gluten in the flour too much, leading to a tough, dense banana bread instead of a light, tender one. This is one of the most crucial **baking tips for beginners** for almost any quick bread or muffin recipe.
-
Add Optional Mix-Ins (If Using):
If you’re adding chopped nuts or chocolate chips, gently fold them into the batter now. Don’t overdo it, just enough to distribute them evenly. A light coating of flour on nuts or chocolate chips before adding them can help prevent them from sinking to the bottom of the loaf.
-
Pour into Pan and Bake:
Pour the batter into your prepared loaf pan and spread it evenly with your spatula. Place the pan in the preheated oven. Bake for 55-70 minutes. The baking time can vary depending on your oven and the moisture content of your bananas. Beginner Tip: Avoid opening the oven door too early or too frequently, especially during the first 30-40 minutes, as this can cause the bread to sink.
-
Check for Doneness:
To check if your banana bread is done, insert a wooden skewer or a toothpick into the center of the loaf. If it comes out clean or with just a few moist crumbs attached (no wet batter!), your bread is ready. If it comes out wet, continue baking for another 5-10 minutes and check again. The top should be golden brown.
-
Cooling Process:
Once baked, remove the loaf pan from the oven and let the banana bread cool in the pan for about 10-15 minutes. This allows the bread to set and makes it easier to remove without breaking. After 10-15 minutes, carefully invert the pan to release the bread onto a wire rack. Let it cool completely on the wire rack before slicing. Slicing warm banana bread can make it crumbly and difficult to cut neatly. Patience is key for the best texture!
-
Enjoy!
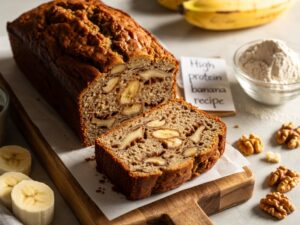
Once cooled, slice your delicious **High Protein Banana Bread Recipe** and enjoy! It’s fantastic on its own, with a smear of nut butter, or even a dollop of extra Greek yogurt.
Tips & Tricks for the Perfect High Protein Banana Bread
- Use Ripe Bananas: This cannot be stressed enough! Brown-spotted, almost black bananas are the sweetest and most flavorful, contributing to the bread’s natural moisture and sweetness.
- Don’t Overmix: As mentioned in the steps, overmixing develops gluten, leading to a tough, chewy bread. Mix until just combined. Lumps are okay!
- Room Temperature Ingredients: Eggs and Greek yogurt at room temperature mix more evenly into the batter, creating a smoother emulsion and a better texture.
- Measure Flour Correctly: Spoon your flour into the measuring cup and level it off. Scooping directly can compact the flour, adding too much and resulting in a dry loaf.
- Customize Your Loaf: Feel free to add 1/2 to 1 cup of mix-ins like chocolate chips (dark chocolate works great!), chopped walnuts or pecans, shredded coconut, or even dried cranberries for extra flavor and texture.
- Test for Doneness: Always use the toothpick test. If the top browns too quickly, you can loosely tent the loaf with aluminum foil for the last 15-20 minutes of baking.
- Storage: Store your banana bread at room temperature, tightly wrapped in plastic wrap or in an airtight container, for up to 3-4 days. For longer storage, slice and freeze individual pieces for up to 3 months. Thaw at room temperature or gently warm in the microwave.
- Protein Powder Choice: Whey protein powder (vanilla or unflavored) generally works best for baking as it blends well and doesn’t drastically change the texture. Plant-based protein powders can sometimes result in a slightly drier crumb, so you might need to add an extra tablespoon or two of milk or yogurt if using them.
Essential Baking Tools
Having the right tools makes baking a breeze! Here are some essentials you might find helpful:
- Mixing Bowl
- Whisk
- Baking Pan (9×5 inch loaf pan)
- Measuring Cups and Spoons
- Spatula
- Wire Rack (for cooling)
- Potato Masher (optional, for bananas)
Nutrition Info (Estimated per slice, assuming 12 slices per loaf)
Please note: These are estimated values and can vary based on specific ingredients and brands used (e.g., type of protein powder, amount of sugar, optional mix-ins).
| Nutrient | Amount |
|---|---|
| Calories | ~310 kcal |
| Carbohydrates | ~38 g |
| Protein | ~16 g |
| Fat | ~12 g |
| Fiber | ~3 g |
| Sugar | ~20 g |
FAQs: Your Beginner Baking Questions Answered!
We know you might have a few questions, especially if this is one of your first baking projects. Here are some common ones:
Q1: Can I use any type of protein powder?
A: While most protein powders will work, vanilla or unflavored whey protein tends to yield the best results in terms of texture and flavor integration. Plant-based proteins can sometimes make the bread a bit denser or drier, so you might need to adjust by adding an extra tablespoon of milk or yogurt to the wet ingredients.
Q2: My bananas aren’t very ripe. Can I still use them?
A: It’s highly recommended to use very ripe bananas (with brown spots!) for the best flavor and moisture. If your bananas aren’t ripe, you can try to speed up the ripening process by baking them in their peels on a baking sheet at 300°F (150°C) for 15-30 minutes until they turn black and soft. Let them cool before mashing.
Q3: How do I prevent my banana bread from being dry?
A: Several factors contribute to moist banana bread: using very ripe bananas, not overmixing the batter (which develops gluten and makes it tough), and not overbaking. Always use the toothpick test and remove the bread as soon as it’s done.
Q4: Can I make this recipe gluten-free or dairy-free?
A: Yes! For gluten-free, substitute the all-purpose flour with a 1:1 gluten-free baking flour blend (ensure it contains xanthan gum). For dairy-free, use coconut oil or a dairy-free butter alternative instead of butter, and a dairy-free plain yogurt (like almond or soy yogurt) instead of Greek yogurt.
Q5: My banana bread sank in the middle. What went wrong?
A: This is a common issue for beginners! It usually happens due to one of a few reasons: opening the oven door too early (causing a sudden temperature drop), overmixing the batter (weakening the structure), or using old baking soda/powder (which lose their leavening power). Ensure your leavening agents are fresh, don’t peek too soon, and mix gently!
Conclusion: Your Delicious High Protein Banana Bread Awaits!
Congratulations, baker! You’ve just mastered the art of making a delicious and nutritious High Protein Banana Bread Recipe. It’s truly one of those easy baking recipes that delivers big on flavor and health benefits. We hope our baking tips for beginners have empowered you to step into the kitchen with confidence and joy.
There’s nothing quite like the aroma of freshly baked banana bread filling your home, and knowing you’ve created something so wholesome makes it even better. Don’t hesitate to experiment with your favorite mix-ins or share your beautiful creation with loved ones. We’d love to hear about your baking success – feel free to leave a comment below with your experience or any delicious variations you tried!