Are you ready to dive into the wonderful world of baking with a recipe that’s sure to impress everyone, even yourself? Today, we’re uncovering the secrets to the beloved Hobee’S Coffee Cake Recipe! If you’ve ever walked into a Hobee’s restaurant and been tempted by that incredible aroma, you know exactly what we’re talking about.

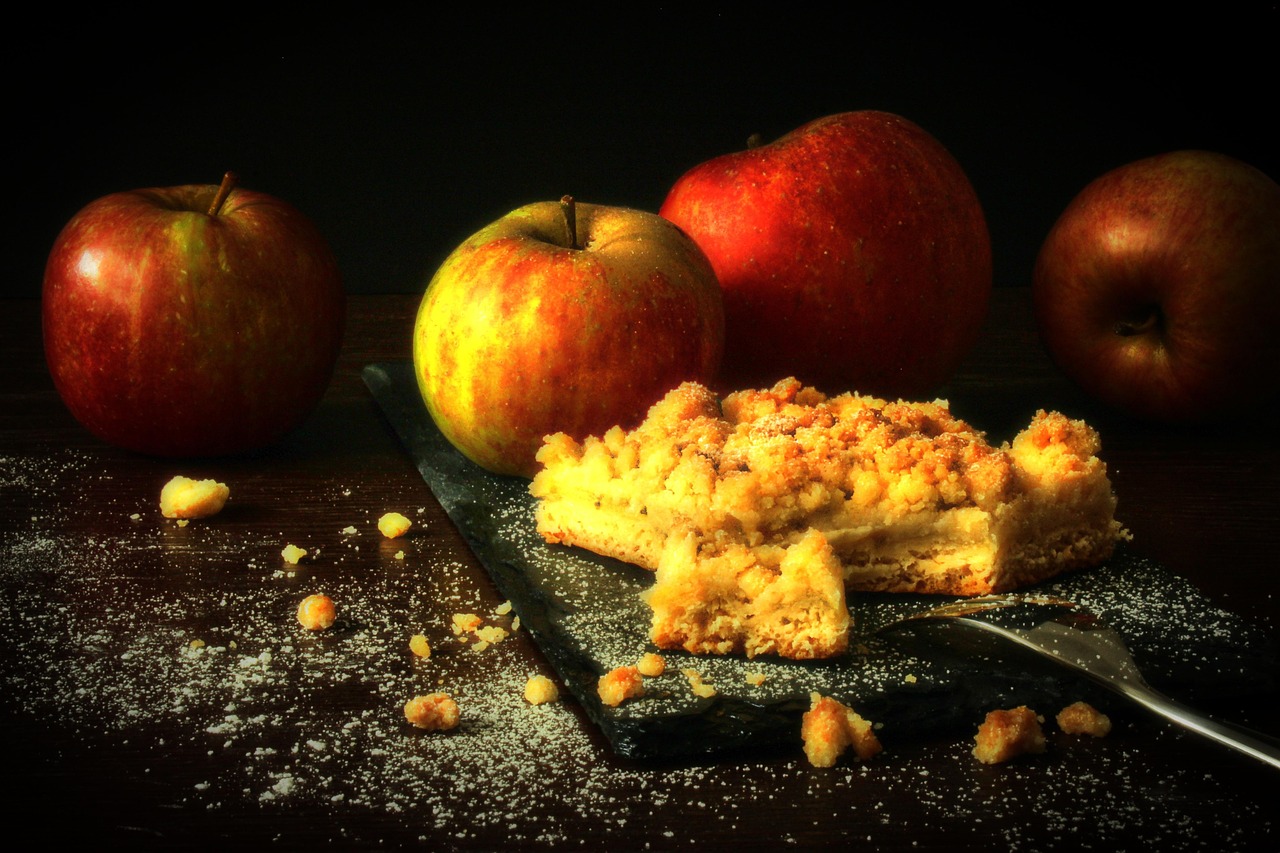
This isn’t just any coffee cake; it’s a moist, tender crumb cake topped with a generous, buttery streusel, designed to be one of your go-to easy baking recipes. Don’t worry if you’re a complete novice; this comprehensive guide is packed with essential baking tips for beginners to ensure your success. Get ready to create a masterpiece that tastes like a warm hug, perfect for breakfast, brunch, or a delightful afternoon treat!
What You’ll Need: The Ingredient Lineup
Gathering your ingredients before you start is a crucial first step for any baker, especially beginners. It ensures you won’t be scrambling mid-recipe. Make sure your butter for the cake is softened to room temperature, and your eggs are also at room temperature for the best results!
For the Irresistible Streusel Topping:
| Quantity | Unit | Ingredient |
|---|---|---|
| 1/2 | cup (113g) | Unsalted Butter, cold and cubed |
| 1/2 | cup (100g) | Granulated Sugar |
| 1/2 | cup (60g) | Packed Light Brown Sugar |
| 1 1/2 | cups (180g) | All-Purpose Flour |
| 1 1/2 | teaspoons | Ground Cinnamon |
| 1/4 | teaspoon | Salt |
For the Moist Coffee Cake Base:
| Quantity | Unit | Ingredient |
|---|---|---|
| 1 3/4 | cups (210g) | All-Purpose Flour |
| 1 | teaspoon | Baking Powder |
| 1/2 | teaspoon | Baking Soda |
| 1/4 | teaspoon | Salt |
| 1/2 | cup (113g) | Unsalted Butter, softened to room temperature |
| 1 | cup (200g) | Granulated Sugar |
| 2 | large | Eggs, at room temperature |
| 1 | teaspoon | Vanilla Extract |
| 1 | cup (240ml) | Sour Cream (full-fat recommended, or plain full-fat yogurt) |
Optional Vanilla Glaze:
| Quantity | Unit | Ingredient |
|---|---|---|
| 1 | cup (120g) | Powdered Sugar (confectioners’ sugar) |
| 2-3 | tablespoons | Milk (whole milk or heavy cream for richer glaze) |
| 1/2 | teaspoon | Vanilla Extract |
Baking Your Hobee’S Coffee Cake: A Step-by-Step Journey
Follow these detailed instructions carefully, and you’ll be enjoying a slice of homemade coffee cake in no time. Take your time, read each step, and don’t be afraid to make a little mess – that’s part of the fun!
Step 1: Prep Your Oven and Pan (The Foundation of Success!)
- Preheat Your Oven: Adjust your oven rack to the middle position and preheat to 350°F (175°C). This ensures an even bake from the start. A consistent oven temperature is vital for cakes to rise properly and bake through.
- Prepare Your Baking Pan: Lightly grease a 9×13 inch baking pan with butter or non-stick baking spray. For extra easy removal, you can also line the bottom with parchment paper, leaving an overhang on the sides to use as “handles” later. If you’re using a square 9×9 inch pan, the cake will be thicker and require a slightly longer baking time (see FAQs).
Step 2: Craft the Perfect Streusel Topping
- Combine Dry Ingredients: In a medium mixing bowl, whisk together the 1 1/2 cups all-purpose flour, 1/2 cup granulated sugar, 1/2 cup light brown sugar, 1 1/2 teaspoons ground cinnamon, and 1/4 teaspoon salt. Use your whisk to break up any lumps in the brown sugar.
- Cut in the Butter: Add the cold, cubed 1/2 cup unsalted butter to the dry ingredients. Now, using your fingertips, a pastry blender, or two knives, “cut” the butter into the flour mixture. This means working the butter into the flour until the mixture resembles coarse crumbs with some pea-sized pieces of butter remaining. Beginner Tip: Don’t overmix! The goal is a crumbly texture, not a smooth paste. These butter pieces will melt during baking, creating pockets of rich flavor and a crisp texture. Set this aside.
Step 3: Mix the Moist Coffee Cake Batter
- Whisk Dry Ingredients: In a separate medium bowl, whisk together the 1 3/4 cups all-purpose flour, 1 teaspoon baking powder, 1/2 teaspoon baking soda, and 1/4 teaspoon salt. Set aside. Beginner Tip: Whisking ensures that the leavening agents (baking powder and soda) and salt are evenly distributed throughout the flour, leading to an even rise and consistent flavor in your cake.
- Cream Butter and Sugar: In a large mixing bowl (or the bowl of a stand mixer fitted with the paddle attachment), beat the softened 1/2 cup unsalted butter and 1 cup granulated sugar together on medium speed until the mixture is light, fluffy, and pale yellow, about 2-3 minutes. Scrape down the sides of the bowl with a spatula as needed to ensure everything is incorporated. This crucial step incorporates air, making your cake tender and light.
- Add Eggs and Vanilla: Beat in the 2 large eggs, one at a time, mixing well after each addition until just combined. Then, stir in the 1 teaspoon vanilla extract. The mixture might look a little curdled at this stage; that’s perfectly normal and will smooth out with the next additions.
- Alternate Dry and Wet Ingredients: With the mixer on low speed, gradually add the whisked dry ingredient mixture to the wet ingredients, alternating with the 1 cup sour cream. Begin and end with the dry ingredients. For example: Add 1/3 of the flour mixture, mix until just combined, then add 1/2 of the sour cream, mix until just combined, then another 1/3 of flour, the remaining sour cream, and finally the last 1/3 of flour. Critical Beginner Tip: Mix ONLY until just combined after each addition. Overmixing at this stage is the number one cause of tough, dense cakes, as it overdevelops the gluten in the flour. A few streaks of flour are better than overmixing!
Step 4: Assemble and Bake Your Masterpiece
- Spread Batter: Pour the thick coffee cake batter into your prepared 9×13 inch baking pan. Use a rubber spatula to gently spread it evenly across the bottom of the pan.
- Add Streusel Topping: Generously sprinkle the prepared streusel topping evenly over the cake batter. Try to cover the entire surface for maximum deliciousness!
- Bake to Golden Perfection: Place the pan in the preheated oven and bake for 35-45 minutes. How to Tell It’s Done: The cake is ready when a wooden skewer or toothpick inserted into the center comes out clean or with a few moist crumbs attached (no wet batter!). The streusel should be golden brown and the cake should spring back when lightly touched. If the streusel starts to brown too quickly, you can loosely tent the pan with aluminum foil for the last 10-15 minutes of baking to prevent over-browning.
- Cool Down: Once baked, remove the coffee cake from the oven and let it cool in the pan on a wire rack for at least 20-30 minutes before slicing. This allows the cake’s structure to set, preventing it from crumbling when cut. If you’re adding the optional glaze, wait until the cake is almost completely cool (about 1 hour) so the glaze doesn’t melt and become too runny.
Step 5: Drizzle with Optional Glaze (The Finishing Touch!)
- Prepare the Glaze: In a small bowl, whisk together the 1 cup powdered sugar, 2 tablespoons of milk, and 1/2 teaspoon vanilla extract until smooth. If the glaze is too thick to drizzle, add more milk a teaspoon at a time until you reach your desired drizzling consistency. If it’s too thin, add a little more powdered sugar.
- Drizzle and Serve: Once the cake has cooled sufficiently, drizzle the glaze decoratively over the top using a spoon or a whisk. Let the glaze set for a few minutes before slicing and serving. Enjoy your incredible homemade Hobee’S Coffee Cake – you earned it!
Mastering Your Bake: Essential Tips & Tricks for Beginners
Baking is a science, but it’s also an art. These actionable tips will help you navigate common challenges and elevate your baking skills, ensuring your Hobee’s Coffee Cake turns out perfect every time:
- Room Temperature Ingredients are Key: For the cake batter, always ensure your butter and eggs are at room temperature. This allows them to cream together properly, creating an emulsified batter that traps air, resulting in a lighter, fluffier cake. Cold ingredients can cause the batter to separate and result in a denser cake.
- Measure Flour Correctly: Don’t scoop flour directly from the bag with your measuring cup! This compacts it, leading you to add too much flour. Instead, “fluff” the flour in its container with a spoon, then spoon it into your dry measuring cup, and finally, level it off with the back of a knife. This precision prevents adding excess flour, which is a common cause of dry cakes.
- Don’t Overmix: This is arguably the most crucial tip for most cakes. Once you add flour to the wet ingredients, mix only until just combined – no more. Overmixing develops gluten, making your cake tough, chewy, and dense. A few small streaks of flour are perfectly acceptable.
- Know Your Oven: Ovens can vary significantly in temperature, even if they’re set to the same degree. If your cake seems to be baking too fast or too slow, consider investing in an inexpensive oven thermometer to verify its true temperature. Adjust baking times as needed based on your oven’s performance.
- Cool Completely (or Almost!): Resist the urge to cut into your cake straight out of the oven. Cooling allows the cake structure to set and prevents it from falling apart. If glazing, a warm cake will melt the glaze, making it runny and absorbed rather than sitting on top.
- Storage: Store leftover coffee cake covered tightly with plastic wrap or in an airtight container at room temperature for up to 2-3 days, or in the refrigerator for up to 5 days. It can also be frozen for up to 2 months; wrap individual slices tightly in plastic wrap and then foil before freezing.
Your Baking Arsenal: Essential Tools for Success
Having the right tools makes a huge difference, especially when you’re starting out. These are some fundamental items that will make baking your Hobee’S Coffee Cake a breeze and serve you well in many future baking adventures:
- Mixing Bowls (various sizes): Essential for combining ingredients without making a mess.
- Whisk: For aerating dry ingredients, smoothing out glazes, and light mixing.
- 9×13 Inch Baking Pan: The perfect size for this recipe, ensuring even baking and the right cake thickness.
- Measuring Cups & Spoons: Accuracy is absolutely vital in baking; invest in a good set for both dry and liquid measurements.
- Rubber Spatula: Indispensable for scraping bowls clean, folding ingredients gently, and spreading batter evenly.
- Wire Rack: For cooling your cake evenly and preventing a soggy bottom from condensation.
- Pastry Blender (optional, for streusel): While fingertips work, a pastry blender makes cutting in butter much quicker and keeps it colder.
- Stand Mixer or Hand Mixer (optional): Speeds up creaming butter and sugar significantly, but a sturdy whisk and some elbow grease work perfectly fine too!
- Toothpicks or Wooden Skewers: For testing the cake’s doneness.
Nutrition Snapshot (per serving, estimated)
Please note that these are approximate values and can vary based on specific ingredients, brand choices, and precise serving size (estimated for 1/12th of the cake, without glaze):
| Nutrient | Amount |
|---|---|
| Calories | 380-420 |
| Carbohydrates | 55-65g |
| Protein | 5-7g |
| Fat | 18-22g |
| Fiber | 1-2g |
| Sugar | 35-45g |
Your Baking Questions Answered: FAQs
- Q: My streusel melted into the cake and disappeared. What went wrong?
- A: This often happens if your butter for the streusel wasn’t cold enough or if you overworked the mixture, making it too warm. Ensure butter is cubed and very cold, and work quickly when cutting it into the flour. Also, if your oven is running too hot, it can cause the butter to melt too fast before the streusel has a chance to set and crisp up.
- Q: Can I use Greek yogurt instead of sour cream in the cake?
- A: Yes, you absolutely can! Full-fat plain Greek yogurt is an excellent substitute for sour cream and will still yield a wonderfully moist cake. Avoid low-fat or flavored yogurts as they can affect the texture and taste significantly. Make sure it’s plain to avoid unwanted flavors.
- Q: How do I know if my cake is truly baked through, especially in the center?
- A: The most reliable method is the toothpick test. Insert a wooden skewer or toothpick into the very center of the cake. If it comes out clean or with a few moist crumbs attached (no wet batter!), your cake is done. If it’s gooey or has raw batter clinging to it, give it a few more minutes (typically 3-5 minutes), then test again.
- Q: Can I make this coffee cake ahead of time for a brunch gathering?
- A: Absolutely! Coffee cake is fantastic the next day, and many people find that the flavors deepen and meld even better. You can bake it, let it cool completely, and then store it covered tightly at room temperature for up to 2-3 days. If you plan to add the glaze, do so just before serving for the freshest look and best texture.
- Q: What if I don’t have a 9×13 inch pan? Can I use a different size?
- A: You can, but you’ll need to adjust baking times. A 9×9 inch square pan will work, but the cake will be thicker, requiring a longer baking time (expect 45-55 minutes). Two 8 or 9-inch round cake pans can also be used, producing two thinner cakes that will bake faster (around 25-35 minutes). Always rely on the toothpick test for doneness, regardless of pan size!
- Q: My cake turned out dry or dense. What could be the cause?
- A: The most common culprits for a dry or dense cake are overmixing the batter (developing too much gluten, which makes it tough) or adding too much flour. Ensure you measure flour by spooning it into the cup and leveling, rather than scooping. Also, mixing only until ingredients are just combined is crucial to maintain a tender crumb.
Your Baking Journey Starts Here!
Congratulations, future baking superstar! You’ve just equipped yourself with all the knowledge and detailed steps to create your very own, absolutely delicious Hobee’S Coffee Cake