Are you ready to fill your home with the irresistible aroma of freshly baked bread, without all the fuss? This Honey Wheat Bread Recipe Bread Machine guide is specifically designed for beginners, making it one of the most satisfying and easy baking recipes you’ll ever try.
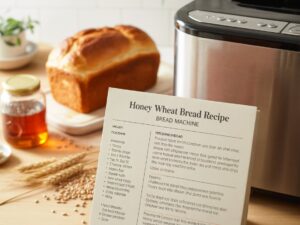
Forget about complex kneading or proofing schedules; your bread machine handles all the hard work! We’ll walk you through every step, ensuring a perfect, golden-brown loaf every time. Get ready to impress your family and friends with a wholesome, slightly sweet, and incredibly soft bread that’s perfect for sandwiches, toast, or simply slathered with butter. This post is packed with essential baking tips for beginners to guarantee your success!
Ingredients List
Gathering your ingredients accurately is the first step to a perfect loaf. For best results, use fresh ingredients and measure precisely!
| Ingredient | Quantity | Unit |
|---|---|---|
| Warm Water (105-115°F / 40-46°C) | 1 ¼ | cups |
| Honey | ¼ | cup |
| Olive Oil or Melted Butter | 2 | tablespoons |
| Whole Wheat Flour | 2 ½ | cups |
| Bread Flour (or All-Purpose Flour) | 1 | cup |
| Salt | 1 ½ | teaspoons |
| Active Dry Yeast or Bread Machine Yeast | 2 ¼ | teaspoons |
Step-by-Step Instructions: Your Path to Perfect Bread
Follow these detailed instructions to create a delicious loaf of honey wheat bread using your bread machine. Remember, the order of adding ingredients is crucial for bread machines!
-
Prepare Your Bread Machine Pan:
Before you begin, ensure your bread machine pan is clean and the kneading paddle is securely in place. Some bakers like to lightly grease the paddle or the bottom of the pan to prevent sticking, though it’s often not necessary with non-stick pans. This small check prevents issues later on!
-
Add Liquids First:
This is a critical step for bread machine success. Pour the warm water (105-115°F) into the bread machine pan. The warmth helps activate the yeast later. Follow with the honey and olive oil (or melted butter). Measuring liquids accurately is key here. For honey, you can lightly spray your measuring cup with non-stick spray before pouring to help it slide out easily.
Beginner Tip: Always add liquids first in a bread machine unless your specific machine’s manual states otherwise. This protects the yeast from premature activation by salt and helps it dissolve properly. -
Add Dry Ingredients (Flour & Salt):
Carefully spoon the whole wheat flour and then the bread flour (or all-purpose) over the liquid ingredients. Do not mix them in. Just gently layer them on top. Next, add the salt to one corner of the pan, away from where you’ll be adding the yeast. Salt can inhibit yeast growth if they come into direct contact too early.
Measuring Flour Correctly: Do NOT scoop flour directly from the bag with your measuring cup. This compacts the flour, leading to too much flour and a dense loaf. Instead, use a spoon to lightly fluff the flour in its container, then spoon it into your measuring cup until overflowing. Level off the top with a straight edge (like the back of a knife). This is called the “spoon and level” method. -
Add the Yeast Last:
Create a small indentation or “well” in the center of the dry flour mixture with your finger. Carefully pour the active dry yeast (or bread machine yeast) into this well. It’s important that the yeast remains separate from the liquid and salt until the mixing cycle begins.
Yeast Check: Ensure your yeast is fresh! Old yeast is a common reason for bread not rising. You can test active dry yeast by dissolving 1 teaspoon of sugar in ½ cup of warm water (105-115°F), then stirring in 2 ¼ teaspoons of yeast. Let it sit for 5-10 minutes. If it foams up nicely, it’s active. If not, it’s time for new yeast! Bread machine yeast doesn’t require pre-proofing. -
Select Your Bread Machine Cycle:
Place the pan securely back into your bread machine. Close the lid. For this recipe, you’ll typically select the **”Whole Wheat” cycle** on your bread machine. If your machine doesn’t have a “Whole Wheat” setting, a “Basic” or “White Bread” cycle might work, but be aware that the “Whole Wheat” cycle usually has a longer rise time specifically suited for denser whole grain flours. Choose a 1.5-pound loaf size and a light or medium crust setting, according to your preference.
Read Your Manual: Every bread machine is slightly different! Always consult your specific bread machine’s instruction manual for the recommended order of ingredients and cycle settings. Some machines instruct liquids last, though this is less common. -
Start the Machine and Monitor Dough:
Press the start button. The machine will begin its kneading cycle. After about 5-10 minutes of kneading, open the lid briefly to check the dough consistency. It should form a smooth, elastic ball. If it’s too sticky and clinging to the sides, add 1 tablespoon of bread flour at a time until it reaches the right consistency. If it looks too dry and crumbly, add 1 teaspoon of warm water at a time. Close the lid and let the machine continue its cycle.
Don’t Over-Adjust: Only make small adjustments if absolutely necessary. Too much flour or water can significantly alter the final texture of your bread. -
The Waiting Game (and the Amazing Aroma!):
Now, let your bread machine do its magic! It will knead, rise, and bake the bread automatically. The aroma of baking bread will soon fill your kitchen – one of the best parts of baking at home!
-
Remove and Cool:
Once the cycle is complete, the machine will likely beep. Carefully open the lid and, using oven mitts, remove the bread pan from the machine. Invert the pan onto a wire cooling rack and gently shake to release the loaf. If the kneading paddle is stuck in the bottom of the loaf, use a non-stick utensil to carefully remove it (be careful, it will be hot!).
-
Cool Completely Before Slicing:
This step is crucial for the best texture! Allow the bread to cool on the wire rack for at least 1-2 hours, or until it’s completely cool to the touch. Slicing hot bread can cause it to become gummy and dense inside. Once cooled, slice with a serrated knife and enjoy!
Tips & Tricks for Bread Machine Success
Achieving bakery-quality bread at home is easy with these simple tips:
- Use Fresh Ingredients: Old flour, stale yeast, or rancid oil can ruin your loaf. Always check expiration dates, especially for yeast.
- Measure Precisely: Baking is a science. Use proper measuring cups and spoons, and use the “spoon and level” method for flour. Even a slight variation can affect the final texture.
- Temperature Matters: Ensure your water is the correct temperature (105-115°F). Too hot will kill the yeast; too cold won’t activate it.
- Ingredient Order: Stick to the liquid-dry-yeast order (unless your manual states otherwise) to protect the yeast from salt and ensure proper activation.
- Check Dough Consistency: Briefly check the dough during the first kneading cycle. It should be a smooth, slightly tacky ball. Adjust with tiny amounts of flour or water if needed.
- Store Properly: Once cooled, store your bread in an airtight container or bread bag at room temperature for 3-5 days. For longer storage, slice and freeze for up to 3 months.
- Experiment with Flours: While this recipe uses whole wheat and bread flour, you can experiment with different ratios or types of wheat flour once you’re comfortable with the basic recipe.
Essential Baking Tools
While your bread machine does most of the heavy lifting, a few basic tools will make your baking experience even smoother. Here are some essentials (click to explore on Amazon):
- Mixing Bowl (for pre-measuring ingredients)
- Whisk (for combining dry ingredients if you choose)
- Baking Pan (not needed for the bread machine itself, but useful for other baking projects!)
- Measuring Cups (liquid and dry sets are best)
- Measuring Spoons
- Spatula (for scraping honey or oil)
- Kitchen Scale (highly recommended for precise flour measurement, though cups are provided here)
- Wire Cooling Rack (essential for cooling bread evenly)
- Serrated Bread Knife (for easy slicing)
Nutrition Info (Estimated Per Slice, 12 slices per loaf)
Please note: These are approximate values and can vary based on specific ingredient brands and loaf size.
| Nutrient | Per Serving |
|---|---|
| Calories | 180-200 kcal |
| Carbohydrates | 35-40 g |
| Protein | 6-8 g |
| Fat | 3-5 g |
| Fiber | 3-4 g |
| Sugar | 6-8 g |
Frequently Asked Questions (FAQs)
Q1: Why did my bread not rise, or rise very little?
A: This is a common issue for beginners! The most likely culprits are old or inactive yeast, water that was too hot (killing the yeast) or too cold (not activating it), or too much salt coming into direct contact with the yeast. Ensure your yeast is fresh, your water temperature is accurate, and you’re adding ingredients in the correct order to protect the yeast.
Q2: My bread is too dense/heavy. What went wrong?
A: A dense loaf often indicates too much flour or not enough liquid. Make sure you’re using the “spoon and level” method for measuring flour (not scooping directly from the bag). Also, whole wheat flour can sometimes absorb more liquid than white flour, so a slight adjustment (a tablespoon more water) might be needed in humid conditions or with very dry flour.
Q3: Can I substitute honey for another sweetener?
A: Yes, you can. Maple syrup or brown sugar can be substituted for honey in equal amounts. However, the flavor and slight moisture profile will change. Honey also contributes to the beautiful browning of the crust.
Q4: How should I store homemade bread?
A: Once completely cooled, store your honey wheat bread in an airtight container, a bread box, or a sealed plastic bag at room temperature for 3-5 days. For longer storage, slice the bread and freeze it in a freezer-safe bag for up to 3 months. Thaw slices as needed.
Q5: My bread machine paddle gets stuck in the loaf. How can I avoid this?
A: This is normal! You can try removing the paddle right after the final kneading cycle, before the last rise, if your machine allows (you’ll hear a beeping signal for adding ingredients). Be gentle not to deflate the dough. Otherwise, once the bread is baked and removed from the pan, carefully extract the paddle with a non-stick utensil. Some people lightly grease the paddle before starting.
Conclusion: Enjoy Your Homemade Masterpiece!
Congratulations! You’ve just created a delicious, wholesome loaf of Honey Wheat Bread with the incredible ease of your bread machine. This recipe is a fantastic entry point into the world of baking, proving that easy baking recipes can yield truly impressive results. Don’t be afraid to experiment and make this recipe your own. Remember these baking tips for beginners, and you’ll be turning out perfect loaves every time. There’s nothing quite like the taste and smell of homemade bread, and now you have the skills to enjoy it whenever you wish. Happy baking!